How to create a Google Form (step-by-step 2026 guide)
Summarize with
TL;DR: Steps to create a Google Form
1. Open Google Forms at docs.google.com/forms
2. Choose a blank form or select from pre-made templates
3. Add questions using the plus button from the floating menu on the right
4. Use conditional logic to create dynamic, branching forms
5. Click on the palette icon at the top to customize your form's appearance
6. Go to the settings tab to configure settings for emails, response limits, etc.
7. Share via email, link, embed code, or QR code
8. Track and analyze submissions from the responses tab or through Google Sheets
Making a simple Google Form allows anyone to collect data, gather feedback, register attendees, or create assessments without any technical expertise.
Whether you're a teacher creating a quiz, a business owner collecting customer feedback, an event organizer managing registrations, or a researcher conducting surveys, Google Forms provides a basic solution for your data collection needs.
In this comprehensive Google Forms tutorial, you'll learn everything you need to know about creating and managing Google Forms in 2026. We'll walk through every feature, from basic form creation to advanced conditional logic, and explore when you might need more powerful alternatives like forms.app for complex workflows.
1. Open Google Forms
There are several convenient ways to access Google Forms, depending on your workflow:
Direct Access: The quickest method is to navigate directly to docs.google.com/forms and sign in with your Google account. You'll immediately see your recent forms and the option to create a new one.
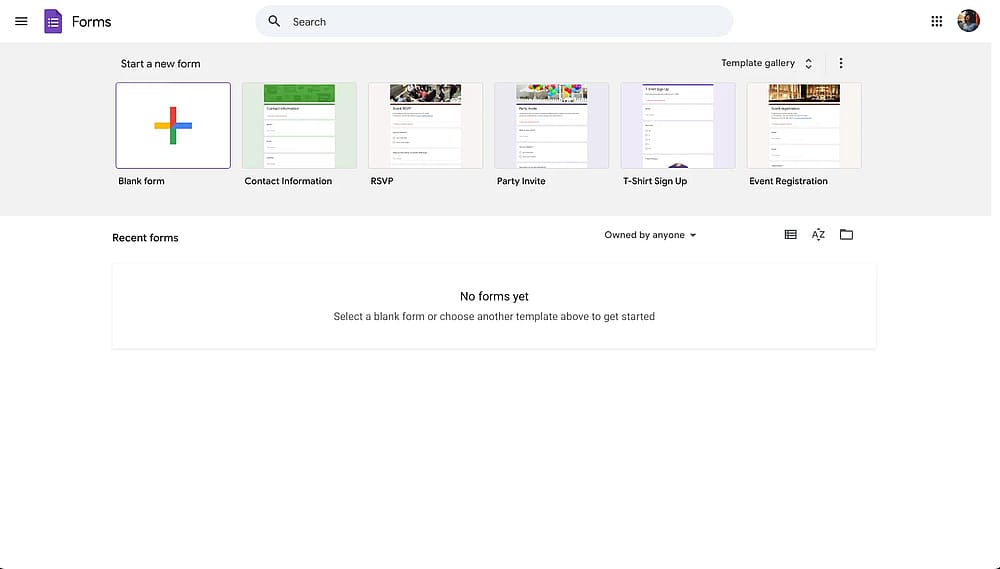
Google Forms dashboard
If you're already working in Google Drive, you can create a form without leaving the platform:
- Right-click while on a folder
- Select "Google Forms"
- Choose either "Blank form" or "From a template"
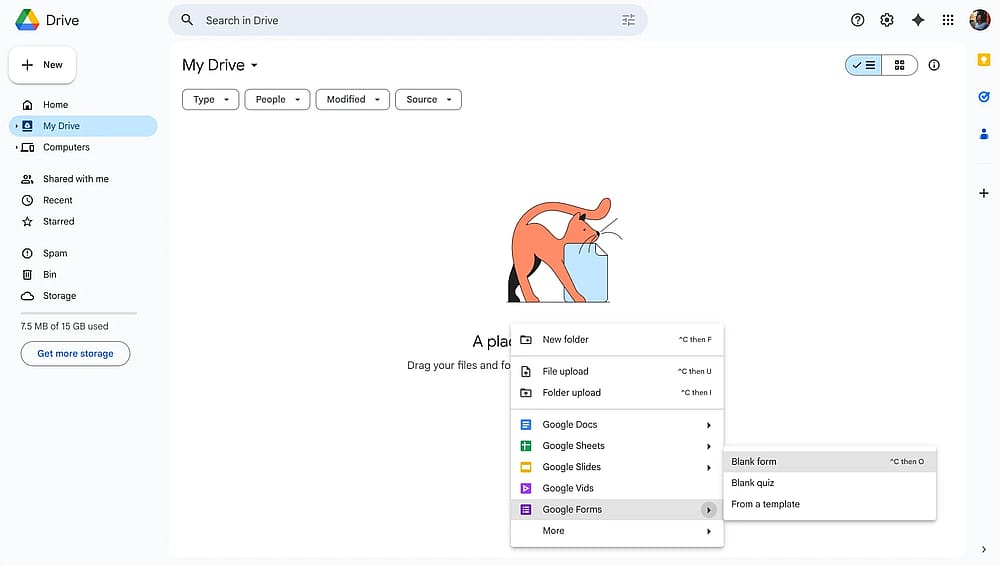
Forms option from the right-click menu on Google Drive
Mobile access to Google Forms Google Forms doesn’t have a mobile app for both iOS and Android devices. However, there are third-party apps that are basically Google Forms wrappers. You can download these apps from your device's app store or access your Google Forms via mobile web to create a Google Form on mobile.
2. Creating your first Google Form
Once you are on Google Forms, creating your first form only takes a couple of clicks. You have two options to create your Google Form:
Option 1: Start from scratch
- Go to forms.google.com
- Click the "+" button labeled "Blank form"
- Your new untitled form will open in the editor
Starting with a blank form gives you complete creative control. This approach is ideal when you want to build something completely custom.
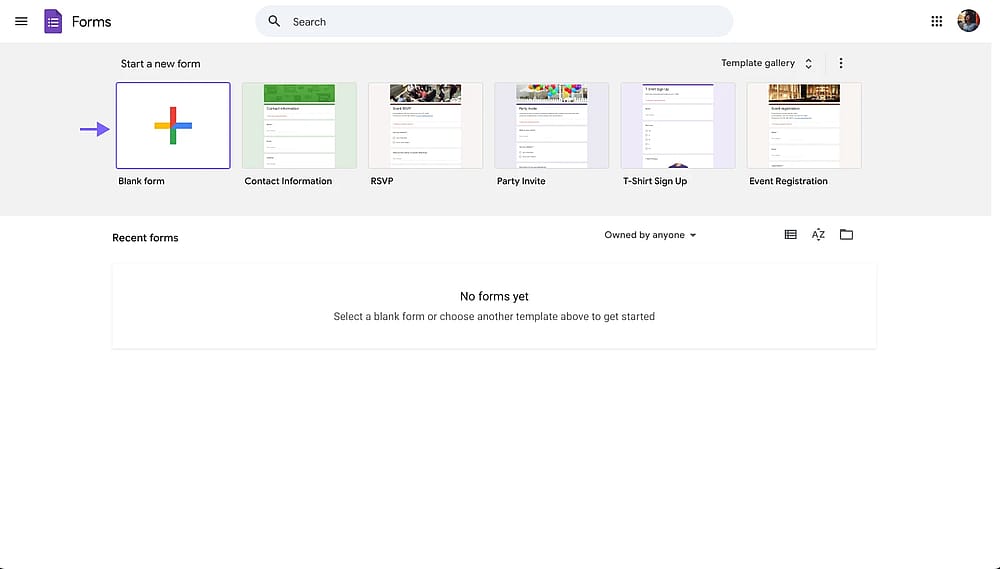
The blank form option on the Google Forms dashboard
Option 2: Using templates
On the Google Forms dashboard, you will see a few templates and a “Templates gallery” button. The template gallery includes 17 basic Google Forms tempates to get started, such as: Event Registration, Customer Feedback, Job Application, or RSVP.
To use a template:
- Click "Template Gallery" in the top right
- Browse available templates
- Click on your chosen template
- Customize the pre-filled questions to match your needs
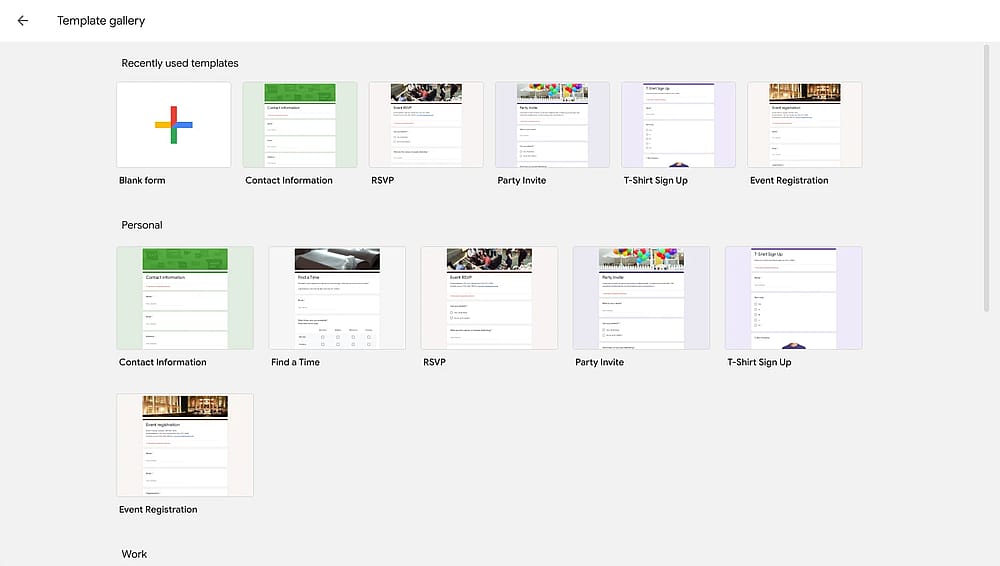
The template gallery in Google Forms
Templates provide an excellent starting point, especially if you're new to form creation or working under time constraints.
Before moving on to adding questions to your Google Form, there is an important step: Adding your Google Form title and description.
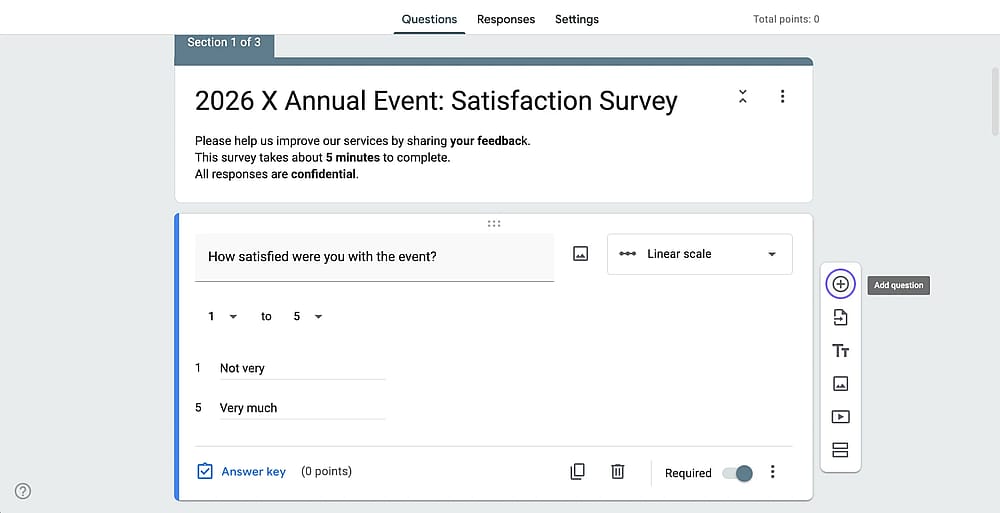
Your form's title and description create the first impression for respondents. Keep the title clear and descriptive (e.g., "2026 Customer Satisfaction Survey" not "Survey"). The description appears below the title and should explain the purpose of the form, set expectations (e.g., "Takes approximately 5 minutes to complete"), Provide any necessary instructions.
Example Google Form title and description Title: “2026 X Annual Event: Satisfaction Survey” Description: "Please help us improve our services by sharing your feedback. This survey takes about 5 minutes to complete. All responses are confidential."
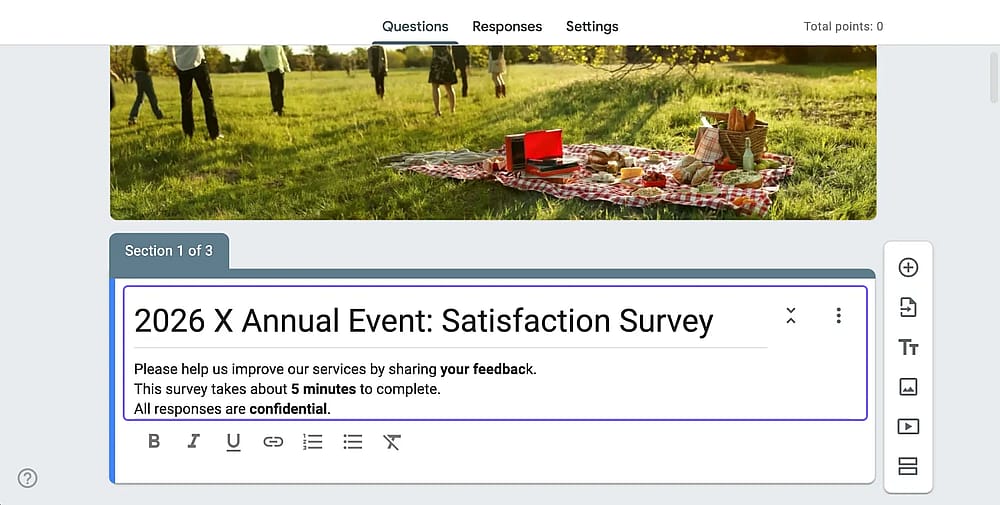
Example Google Forms title and description
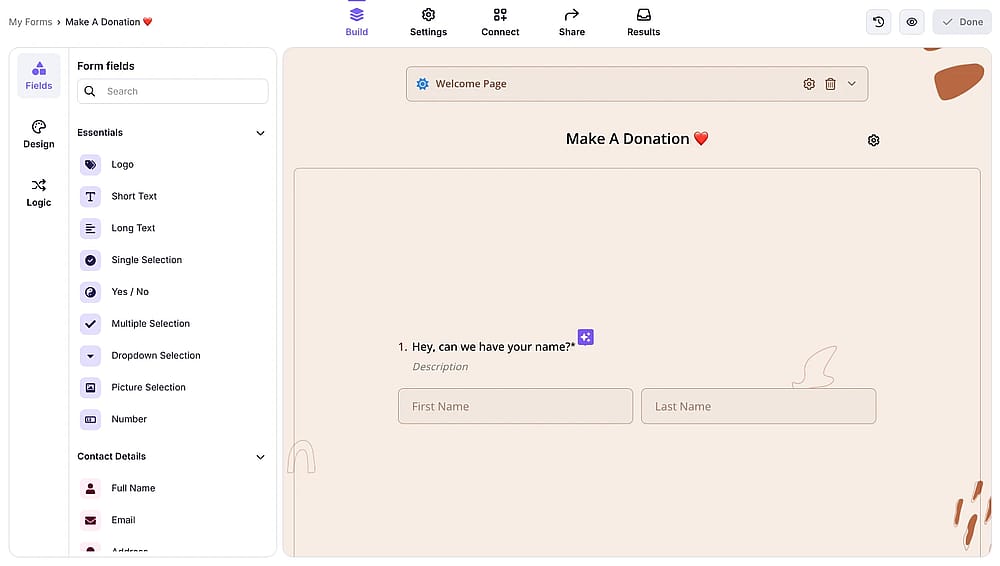
3. Adding questions to your Google Form
After adding the title and description, it is now time to add a question to your Google Form:
- Click the "+" button on the right toolbar
- A new question field appears; Click "Untitled Question" and type your question
- Select the question type from the dropdown menu
- Add answer options (if applicable)
- Configure question settings as needed
The plus button from the floating menu on the right
You can duplicate a question by clicking the copy icon at the bottom of a question box. Delete by clicking the trash icon. Reorder by dragging questions up or down using the six-dot handle. And make questions required by toggling the "Required" switch.
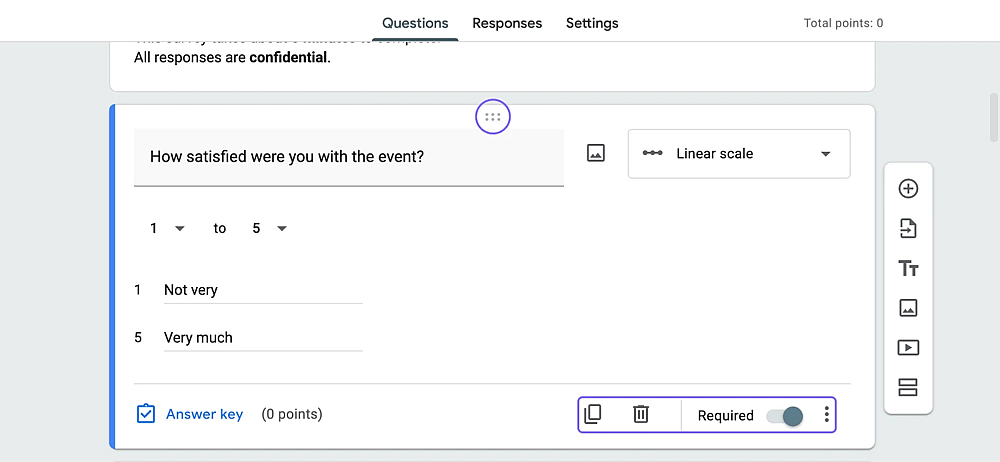
Delete, duplicate, re-order, and required options
Question types in Google Forms
Google Forms offers 12 different question types, each suited for specific data collection needs:
- Short Answer (for brief, single-line responses such as names, email addresses, phone numbers, or other short text answers)
- Paragraph (for longer, open-ended responses)
- Multiple Choice (for allowing respondents to select one option from a list)
- Checkboxes (for enabling multiple selections from a list)
- Dropdown (for providing a compact menu of options)
- Linear Scale (for numbered rating scales)
- Rating (for visual rating scales with stars, hearts, or thumbs up)
- Multiple Choice Grid (for presenting questions in rows with the same answer options in columns)
- Checkbox Grid (similar to a multiple-choice grid, but for allowing multiple selections per row)
- Date (for collecting dates and offering a calendar to choose a date)
- Time (for capturing time information)
- File Upload (for allowing respondents to upload files from their devices)
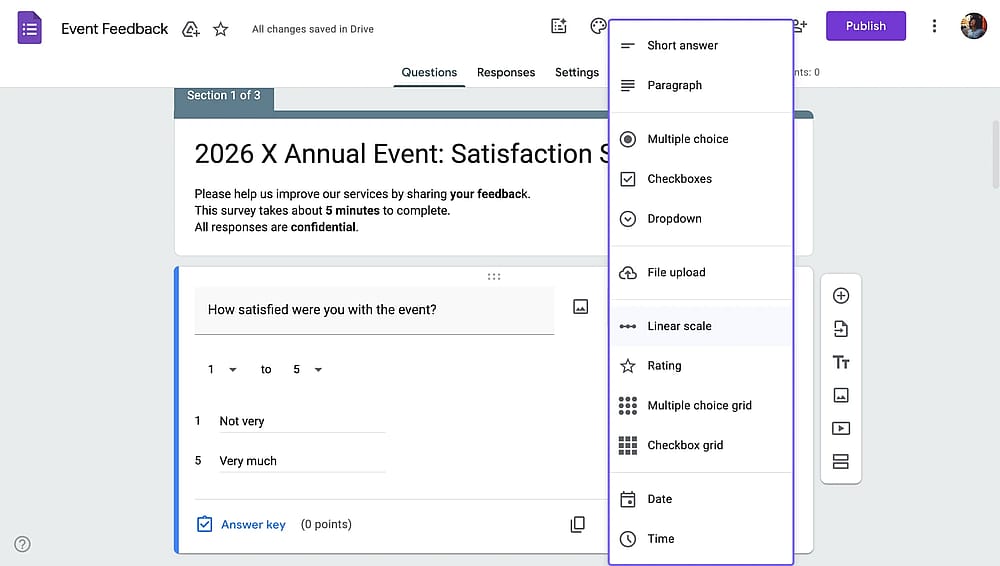
Options within the question type dropdown in Google Forms
4. Use conditional logic for a better Google Form experience (Optional)
Conditional logic in Google Forms (also called branching or skip logic) shows or hides form sections based on answers. This creates personalized form experiences. For example, you can show different questions to customers vs. prospects, skip irrelevant questions, or ask customized follow-up questions.
Note Conditional logic in Google Forms cannot hide or show individual questions. So, you need to create sections first and add branching for your form sections. Take a look at our guide on using conditional logic in Google Forms for a more detailed explanation.
How to add Google Forms sections
Sections divide long forms into manageable pages, making them less overwhelming for respondents. You can easily break up lengthy forms, group related questions, and set conditional navigation. Here are the steps to create sections in Google Forms:
- Click the section icon (two rectangles) in the right toolbar
- A new section appears with its own title and description
- Add questions to each section as needed
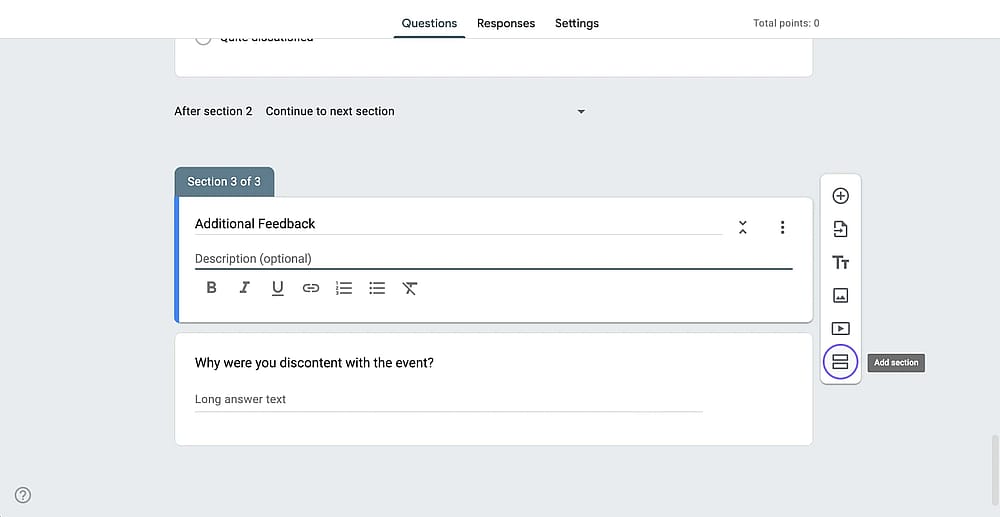
The “Add section” option from the floating menu on the right
After adding a section, you will notice there are navigation/routing options under each section. There, you can choose to skip unnecessary sections or directly submit the form after a section.
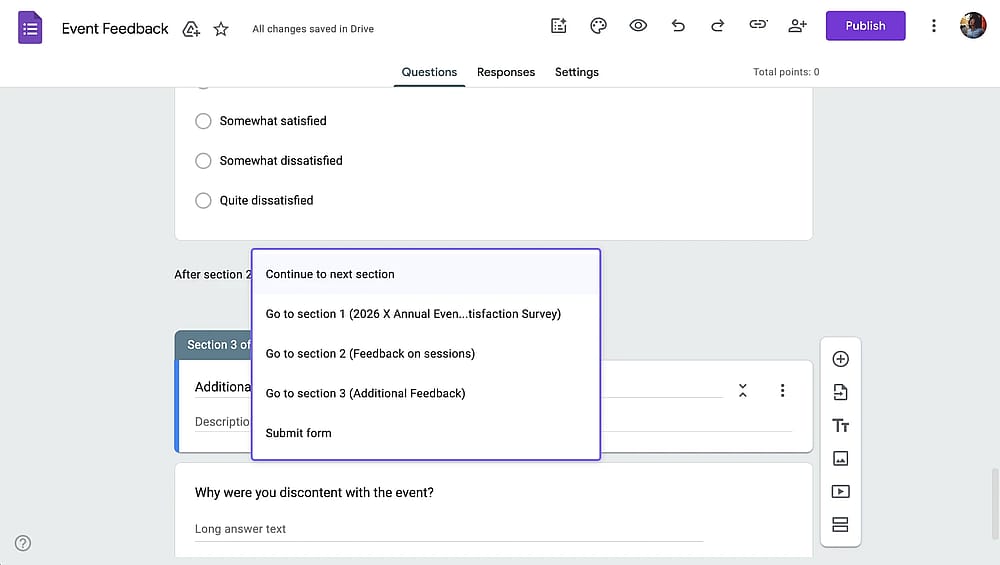
Section routing options in Google Forms
How to set up conditional logic in Google Forms
Once you have multiple sections in your form, you can add conditional logic through a multiple-choice question. Here are the steps to add conditional questions in Google Forms:
- Add a multiple-choice question
- Click the three-dot menu
- Select "Go to section based on answer"
- For each answer option, choose which section to display next
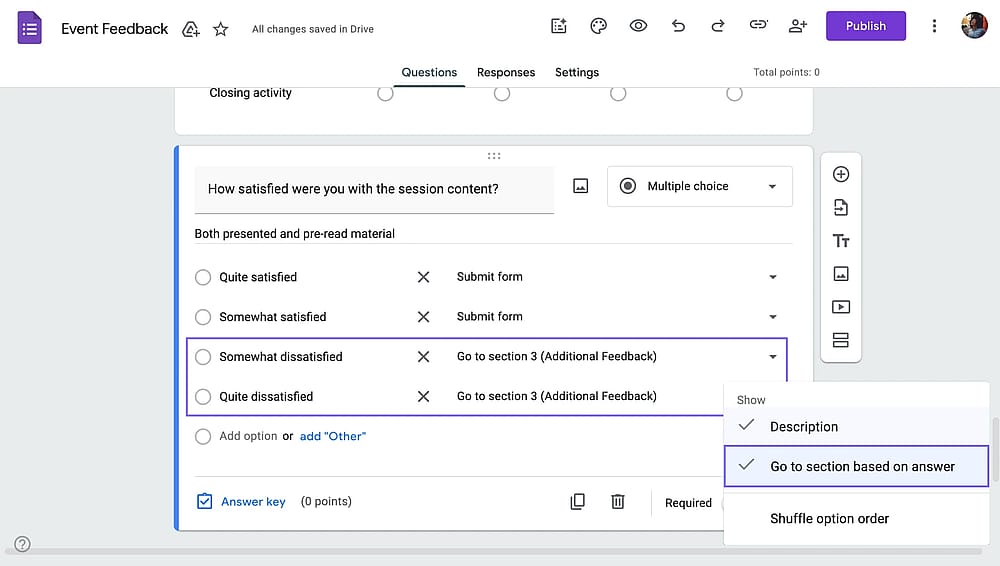
Adding conditional logic to a Google Form
Important note Always preview and test your form by clicking the preview (eye) icon and verifying all sections display correctly.
5. Customize your form's appearance
Professional-looking forms increase credibility and response rates. While you have limited options for customizing your Google Form, changing a few details can make a big difference.
To start customizing your Google Form, start by clicking the palette icon in the top-right corner. The theme options panel will open:
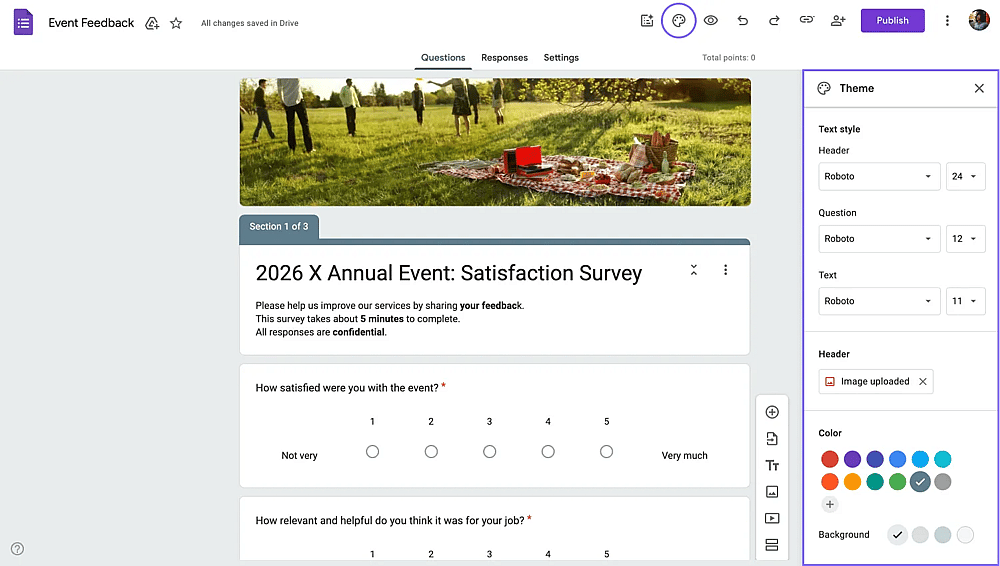
The theme menu on Google Forms
From the Theme menu, you can:
- Choose from pre-made color themes
- Select custom colors for the background and accent.
- Add a Google Forms header image (Recommended dimensions: 1600 x 400 pixels)
- Change the font family and size for the header, question, and text.
Note While Google Forms doesn't have a dedicated logo field, you can add your logo to a Google Form as the header image or insert it as an image in the first section. Take a look at our article to learn more about adding a logo to Google Forms.
6. Configure Google Form settings
You have three tabs in a Google Form editor: Questions, Responses, and Settings. Simply switch to the settings tab to adjust settings.
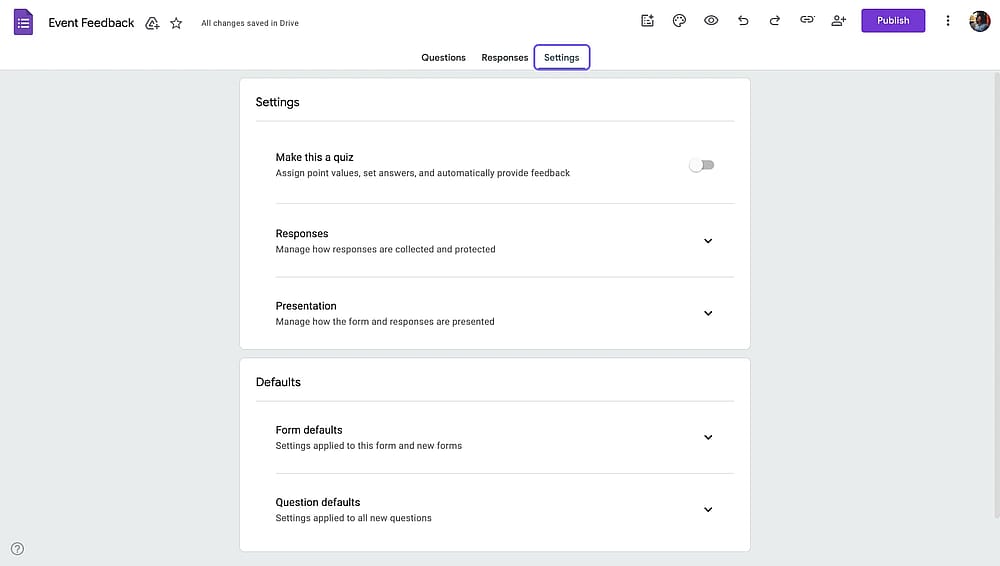
The settings tab on Google Forms
Under the “Responses” dropdown on the settings tab, you can make changes to:
- Collect email addresses (You have the options to require them to sign in, just ask for email input, or do not collect)
- Limit to 1 response (Requires sign-in)
- Allow response editing
- Send responders a copy of their response
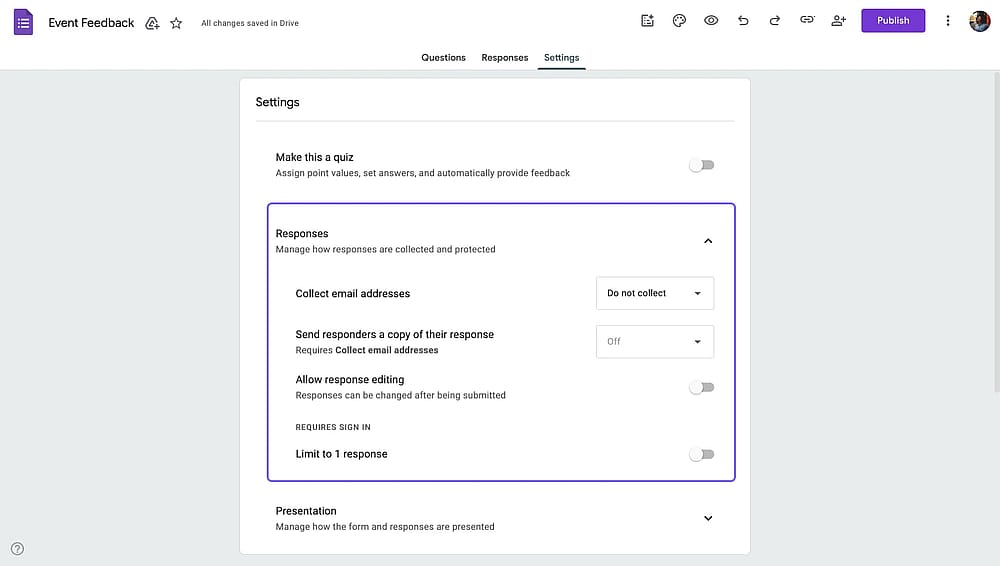
The “Responses” settings on Google Forms
Under the “Presentation” dropdown on the settings tab, you can make changes to:
- Show progress bar
- Shuffle questions
- Show/edit confirmation message (the message respondents will see after submission)
- Add a "Submit another response" link (It goes by “Show link to submit another response“)
- Show an option to “view results summary.”
- Disable autosave for all respondents
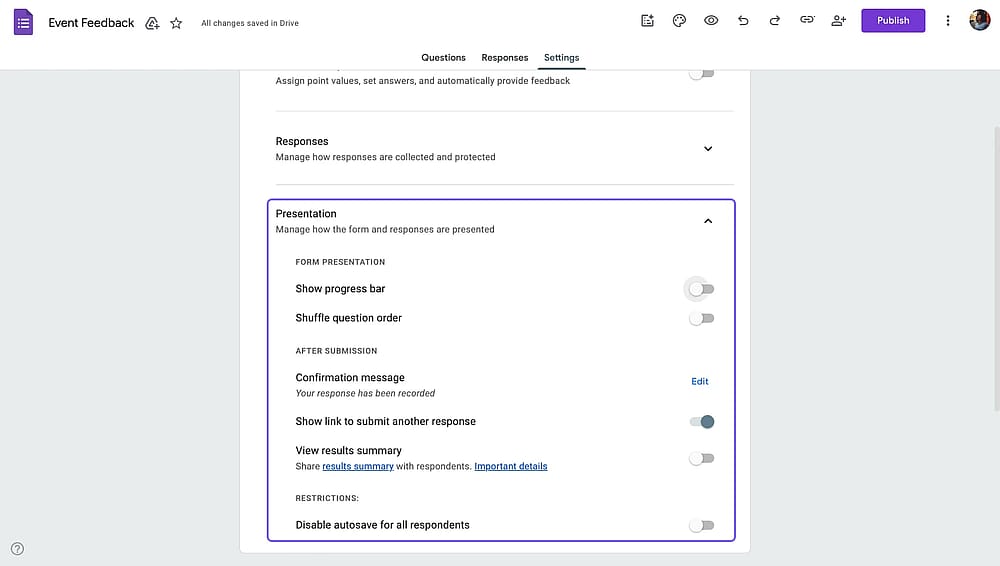
The “Presentation” settings on Google Forms
Did you know? You can also transform your Google Form into a graded quiz. Simply toggle on "Make this a quiz" option. Visit our article here to learn more about creating quizzes on Google Forms.
7. Sharing your form
Click the "Publish" button in the top-right to access all sharing options.

The “Publish” button on Google Forms
On the Publish menu, you can get a Google Forms link for responders, set close dates, or toggle accepting responses.
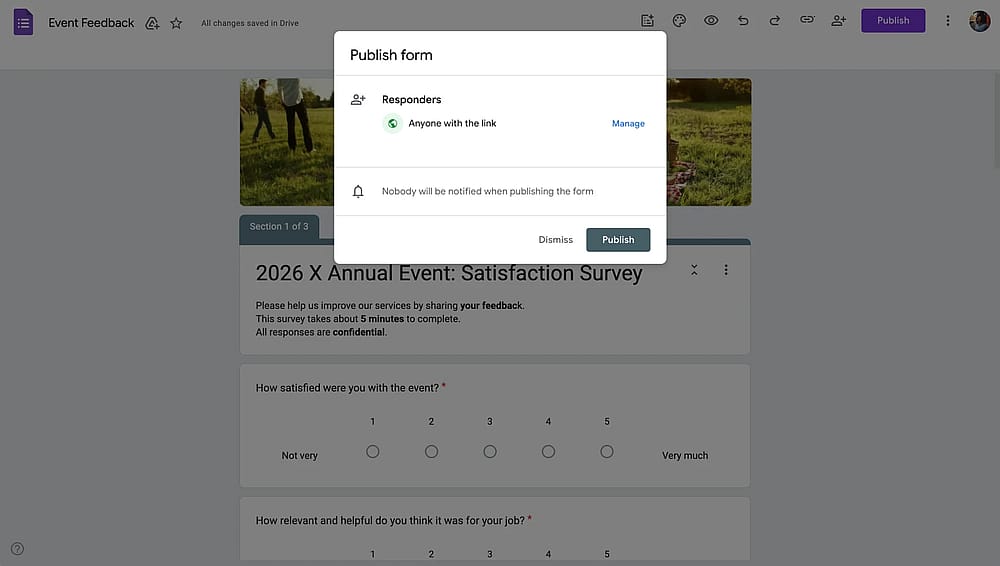
The “Publish” menu on Google Forms
Note
While Google Forms doesn't natively generate QR codes for your Google Form, you can copy your form link and use a free QR code generator (Qr-code-generator.com, QRCode Monkey, etc.). Visit our article here to learn more about creating a Google Forms QR code.
How to embed a Google Form
Apart from link sharing, you can also embed your Google Form on your website. Simply follow the steps below to get your embed code on Google Forms:
- Click the three dots at the right upper corner of your Google Form
- Select the embed HTML option
- Copy the HTML iframe code
- Paste into your website's HTML
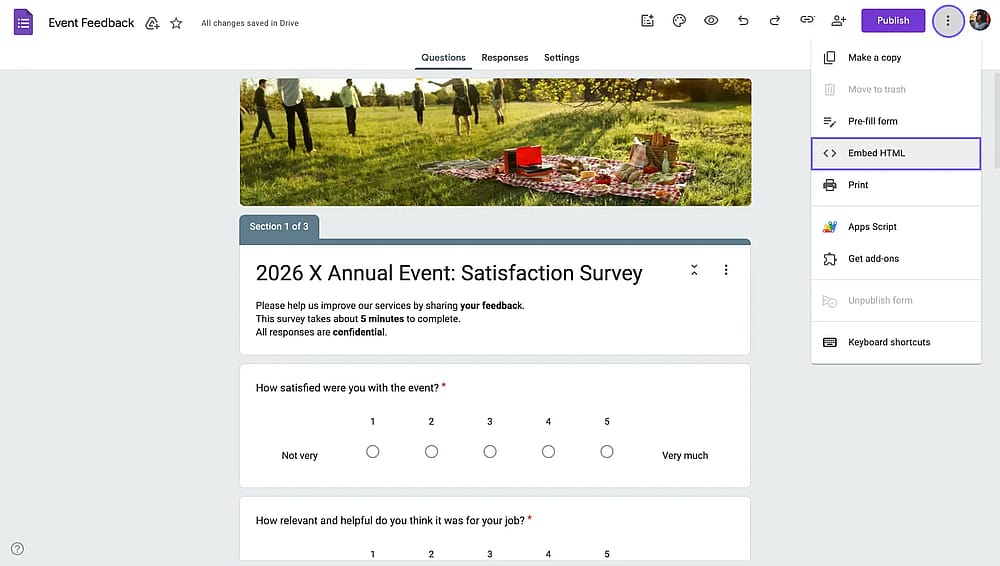
The “Embed HTML” option on Google Forms
8. Collecting and managing responses
You have created your Google Form and got your first submission. Great! Access the "Responses" tab to see submissions. There, you will have three tabs to analyze your Google Form responses:
The Summary tab displays aggregate data, shows charts for multiple-choice questions, and lists all text responses.
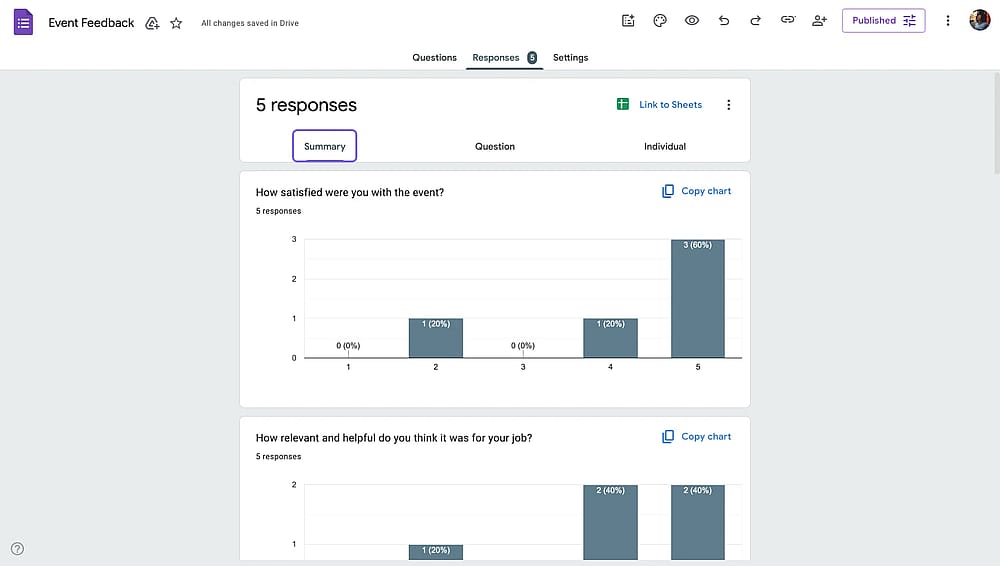
The “Summary” tab on Google Forms
The Individual tab shows submissions one by one.
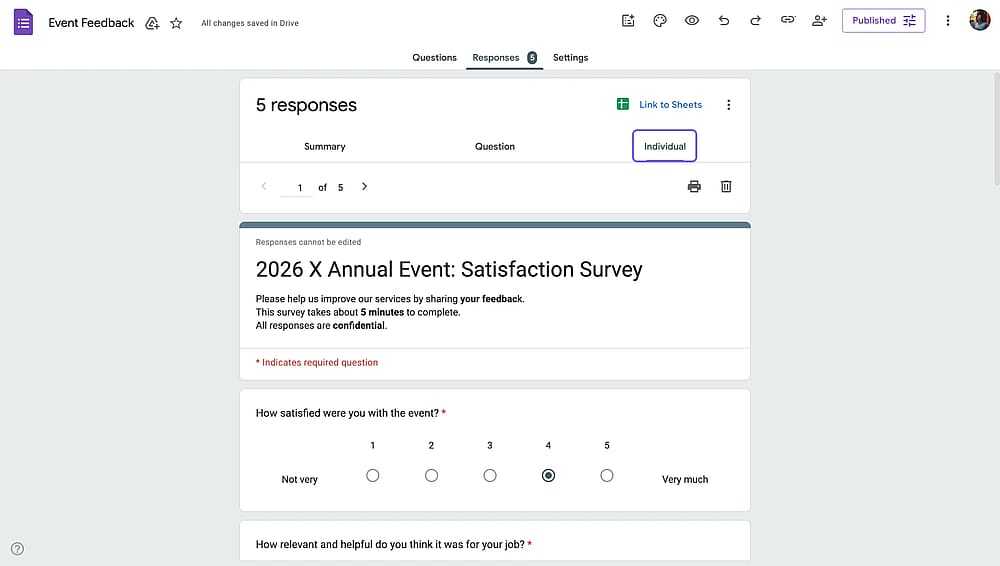
The “Individual” tab on Google Forms
The Question tab shows answers for a specific question.
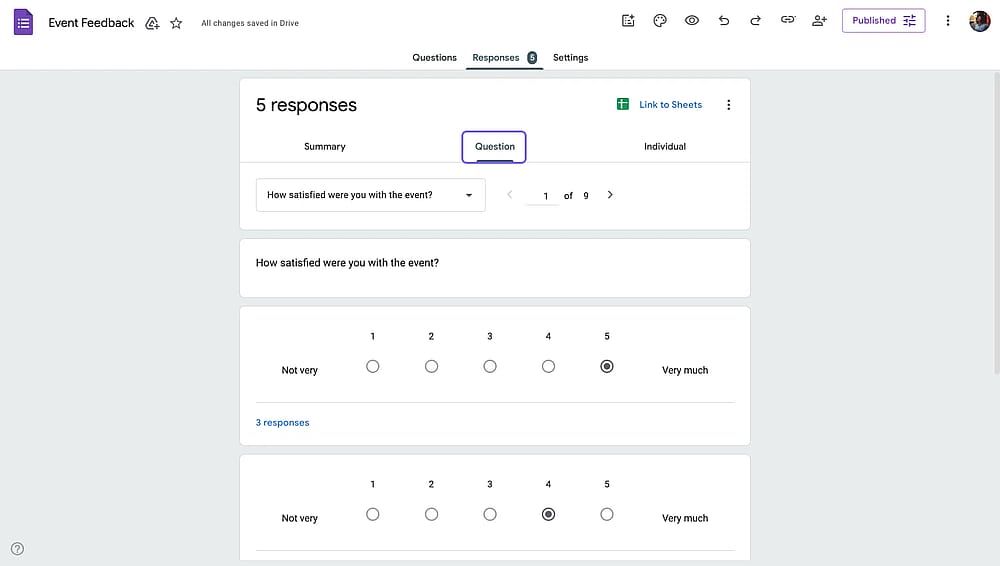
The “Question” tab on Google Forms
Google Forms tips & tricks
- Install popular Google Forms add-ons to add more functionality to your Google Form
- Share Google Form responses with your team
- Ensure GDPR Compliance by including privacy notices, explaining data usage, and providing opt-in checkboxes.
- Choose themes with sufficient contrast for accessibility.
- Write in plain language. Avoid jargon and complex terminology
- Enable email notifications to get notified when you receive a new submission.
How to solve common issues with Google Forms
Some issues with Google Forms are common; luckily, there are many solutions and workarounds you can try. If the workarounds are not enough, you also have many Google Forms alternatives to try for free.
Here is the format. We share the issue, and we share what you can try to solve it.
Form not submitting
- Check if all required fields are completed
- Verify internet connection
- Try a different browser
- Clear browser cache and cookies
- Disable browser extensions temporarily
Responses not appearing
- Refresh the Responses tab
- Check if you're in the correct form
- Verify the form is set to "Accepting responses"
- Check Google Sheets link (if connected)
- Look for responses in the spam folder (for email notifications)
Conditional logic not working
- Verify section navigation settings
- Test all possible answer paths
- Check for circular logic (loops)
- Ensure sections are properly labeled
- Preview form to test logic flow
When Google Forms falls short (The limitations of Google Forms)
While Google Forms is an excellent tool for basic data collection, it has several notable limitations:
- Limited customization
- Basic conditional logic (Cannot show/hide individual questions within sections)
- No payment processing
- Limited integrations
- Basic reporting
- No E-signature collection
Here’s a comparison table to help you visualize the limitations of Google Forms:
Feature | Google Forms | forms.app |
|---|---|---|
Templates | 17 basic templates | 5,000+ professional templates |
Field types | 12 types | 30+ types |
AI form generation | (beta) | Full AI form generator |
E-signatures | ||
Custom PDF generation | ||
Payment field | ||
Product listing | ||
Form customization | Limited | Advanced |
Form layout options | List view only | List view and step view |
Conditional logic | Section-based only | Question-level + advanced |
And/or logic | ||
Custom domains | ||
Embed options | 1 option | 6 options (Standard, pop-up…) |
Grading | ||
Drop-off analysis | ||
Google Sheets integration | ||
Team collaboration | ||
Official mobile app | ||
Offline mode | ||
Email notifications |
forms.app: A powerful Google Forms alternative
forms.app is an all-around form builder designed to overcome the limitations of basic form tools while maintaining ease of use. It's particularly well-suited for businesses, marketers, educators, and organizations that need professional forms with advanced capabilities.
Who Should Use forms.app?
- Small businesses that need payment collection
- Marketing teams running lead generation campaigns
- Educational institutions requiring quizzes with advanced features
- Organizations needing custom-branded forms
- Teams requiring workflow automation
- Anyone frustrated by Google Forms' limitations
How to create a form on forms.app
1. Open forms.app and choose from:
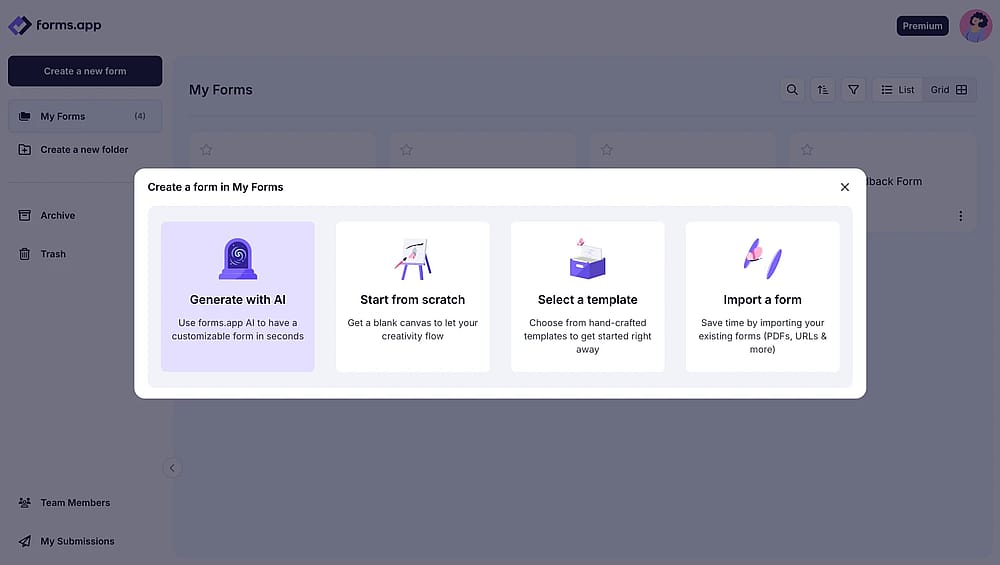
Form creation options on forms.app
2. Customize your form
Drag-and-drop form editor of forms.app
3. Share or embed

Form sharing options on forms.app
Frequently asked questions about creating a Google Form
Yes, Google Forms is completely free to use. You just need a Google account to get started. There are no hidden costs, response limits (within reasonable usage), or premium tiers.
Yes, you need a Google account to create forms. However, respondents don't need a Google account to fill out forms unless you specifically require sign-in in your settings.
No, Google Forms requires an internet connection to create forms and collect responses. Both form builders and respondents need to be online.
Google Forms itself has no response limit. However, if linked to Google Sheets, you're limited by Sheets' 10 million cell limit (rows × columns). For most forms, this allows hundreds of thousands of responses.
Simply, click the image icon next to a question or a multiple-choice option and choose from the Upload, Webcam, By URL, Photos, Google Drive, or Google Images options.
Click Settings → Quizzes → Toggle on "Make this a quiz". Then assign correct answers and point values to each question by returning to the questions and using the "Answer key" option.
Click the three dots on the upper right of your form → Choose Embed HTML → Copy the embed code → Paste it into your website's HTML. Adjust the width and height parameters as needed.
Create sections in your form, then add a multiple-choice question. Click the three-dot menu → "Go to section based on answer" → Assign different sections for each answer option.
Native Google Forms allows toggling of "Accepting responses" on a certain date. Simply click on publish, then choose “Set close date or response limit” to close your Google Form automatically.
Yes. In the Responses tab, click the three-dot menu → "Download responses (.csv)". Open this file in Microsoft Excel.
For individual responses: Open the responses tab → Go to Individual → Click on the Delete icon.
For all responses: Go to Responses tab → Open Three-dot menu → Choose "Delete all responses."
Yes, Google Forms supports real-time collaboration. Multiple editors can work on the same form simultaneously, similar to Google Docs.
Yes. In the Responses tab, click the three-dot menu → "Get email notifications for new responses." You'll receive an email for each submission. For custom notifications, use add-ons or Zapier.
Conclusion
Google Forms remains an excellent tool for basic data collection, offering a free, user-friendly platform integrated seamlessly with Google Workspace. For simple surveys, basic feedback forms, and straightforward quizzes, it provides everything you need to get started quickly.
Throughout this guide, we've covered every aspect of Google Forms, from accessing and creating your first form to expert tips and solving common issues. You now have the knowledge to build professional forms, customize their appearance, share them effectively, and analyze your responses.
However, as your needs grow more sophisticated, you may find Google Forms' limitations restrictive. When you need payment processing, advanced branding, e-signatures, PDF generation, or a superior user experience, it's worth exploring more powerful alternatives.
forms.app bridges the gap between free basic tools and expensive enterprise solutions. It offers the ease of use you'd expect from Google Forms while providing professional features that actually enhance your workflows, all at transparent, affordable pricing.
Whether you stick with Google Forms for simple needs or upgrade to forms.app for advanced capabilities, the key is choosing the right tool for your specific requirements.
Thank you for reading this far. You now have all the tools and knowledge to make it happen. Create your first Google Form or create a form on forms.app now!
Additional resources
Contributors
Researched & written by
forms.app, your free form builder
- Unlimited responses
- Unlimited questions
- Unlimited team members