How to create a registration form on Google Forms (step-by-step)
Summarize with
Manual registrations? in 2026? Good luck! But if you know how to make a registration form on Google Forms, you don’t even need luck. Whether you plan a corporate conference, workshop, social meeting, or any event, creating an online registration form helps you increase attendance, streamline guest management, better handle tasks ahead, and elevate the overall event experience.
Reading this article, you will find an easy guide to creating an online registration form with the Google Forms platform, example use cases, pro tips, a better alternative, and more. This step-by-step guide will help your business with online event registration and creating a workflow for event planning, attendance tracking, and resource management.
How to create a registration form on Google Forms
Google Forms provides a user-friendly platform for different needs. In this guide, we'll walk you through 6 easy steps to help you create a Google registration form that suits your purposes, making the process simple and organized.
- Open the Google Forms dashboard
- Select a template
- Set-up form basics
- Customize form details and add questions
- Set up response validation
- Customize the form’s theme
- Preview and share your form
1. Open the Google Forms dashboard
Go to docs.google.com/forms and Log in to your Google Account to access Google Forms dashboard. If you don't have an account, you can easily create one.
Did you know?
You can create a Google Form while in a Google Drive folder.
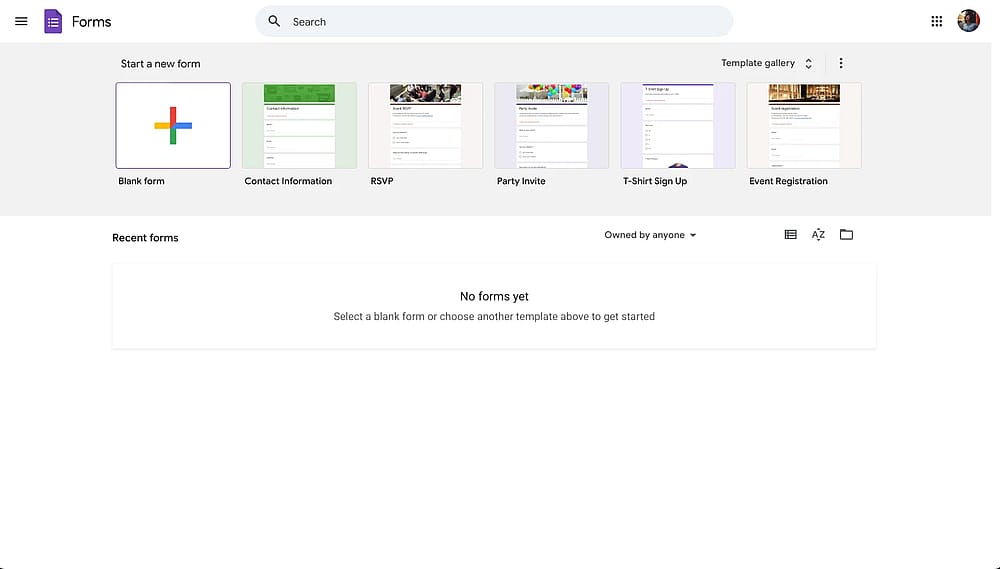
Opening Google Forms
2. Select a template
17 Google Forms templates are available under the Template Gallery for your business. If you are looking for a particular Google form template for registration, the platform offers a specific "Event Registration Template." Alternatively, you can always start with a blank form that you can modify later.
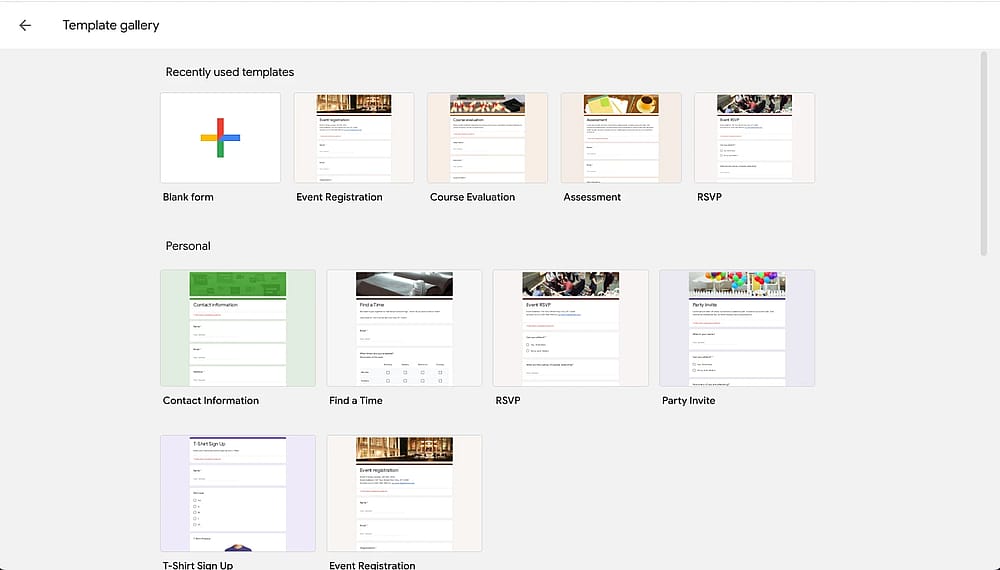
Choosing the Google Forms event registration form template
3. Set-up form basics
Perfecting the basics set the stage for a great online registration campaign. Make sure your title is specific and your description really explains the details or compel people to action.
Title best practices:
- ✅ Good: "Photography Workshop Registration 2026"
- ✅ Good: "Run for Hope 5K - Participant Sign-up"
- ❌ Avoid: "Event Regisration" or "Sign-up now!"
Description - What to Include:
Your form description should answer these questions upfront:
- What is the event?
- When will it take place?
- Where is the location (or virtual platform)?
- Who should register?
- Why attend?
Example:
Title: Digital Marketing Summit 2026 - Join Us!
Description: The annual Digital Marketing Summit will be held for the 6th time on March 15-16 in London.
During this two-day conference, we are happy to host 20+ pioneering speakers, hands-on workshops, and networking opportunities. Perfect for marketers, business owners, and digital enthusiasts to learn, catch up, and connect.
Registrations close on March 1, 2026!
Contact us at events[@]company.com for questions.
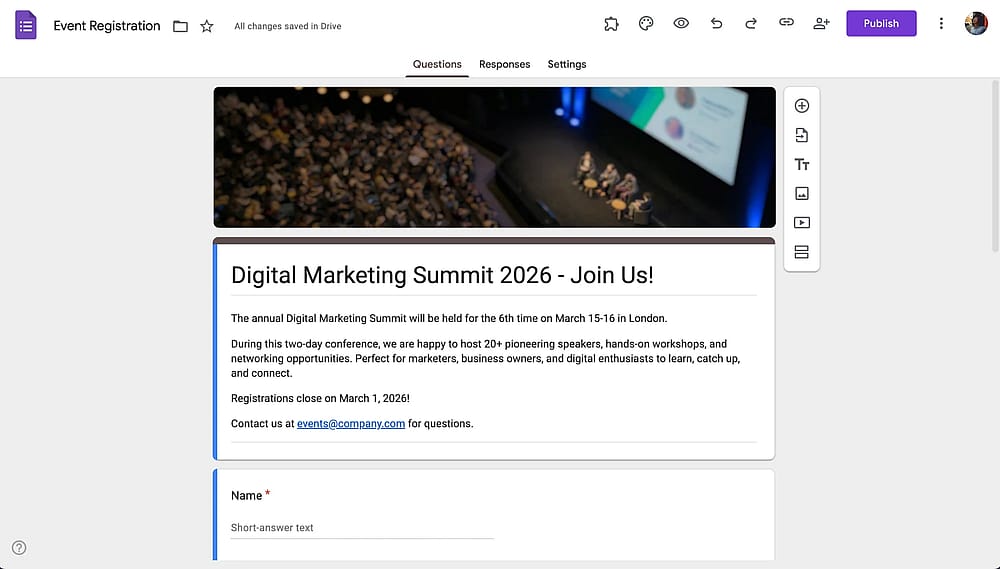
Seting-up the basics for the Google Forms registration form
4. Customize form details and add questions
The questions you ask will depend on your event type, but here's a comprehensive list. We organized it by category.
As a rule of thumb, you can use "Short answer" for contact details and "Multiple choice" questions for event preferences.
Personal Information
- Full Name: Use the short answer field and make it required. No validation is needed to allow flexibility for international names.
- Email Address: Use the short answer field and make it required. Add validation: Response validation → Text → Email. The alternative is to enable "Collect email addresses" or “Verified” in Settings. This will require respondents to log in to their Google Accounts for submissions.
- Phone Number: Use short answer field (required or optional depending on event urgency). Add validation with regular expression pattern: ^\d{3}-\d{3}-\d{4}$ for consistent 123-456-7890 formatting, or leave unvalidated for international flexibility.
Attendance Details
- Number of Attendees: Use multiple choice or short answer with number validation. Example options: "Just me," "2 people," "3-5 people," "Group of 6+". Essential for accurate headcount and capacity planning.
- Dietary Restrictions: Use checkboxes and make it optional (unless serving food). Include options: "None," "Vegetarian," "Vegan," "Gluten-free," "Dairy-free," "Nut allergy," and "Other" with a text field for specific needs.
- Accessibility Requirements: Use checkboxes or a paragraph field and make it optional. Shows inclusivity and helps you prepare. Include options: "Wheelchair access," "ASL interpreter," "Large print materials," "Other needs."
- Emergency Contact Information: Use two short answer fields (one for name, one for phone). Make both required for events with minors or physical activities like sports or outdoor adventures.
Engagement & Marketing Questions
- How did you hear about this event?: Use multiple choice or dropdown and make it optional. Options: "Social media," "Email newsletter," "Friend/colleague," "Website," "Previous attendee," "Other." Invaluable for tracking marketing effectiveness.
- Organization/Company Name: Use short answer field (optional or required for professional events). Useful for networking, name tags, and follow-up communications.
- Special Requests or Comments: Use the paragraph field and make it optional. Allows attendees to communicate unique needs or ask questions.
Pro tip
Participants will not miss essential fields if the"Required" toggle at the bottom right of each question is on.

Add questions to your registration form on Google Forms
5. Set up response validation
Activate response validation by clicking on the three vertical dots in the bottom-right corner of each question. You will see it right next to the “Required” toggle. By doing this, you make sure that the data you receive is accurate and meaningful.
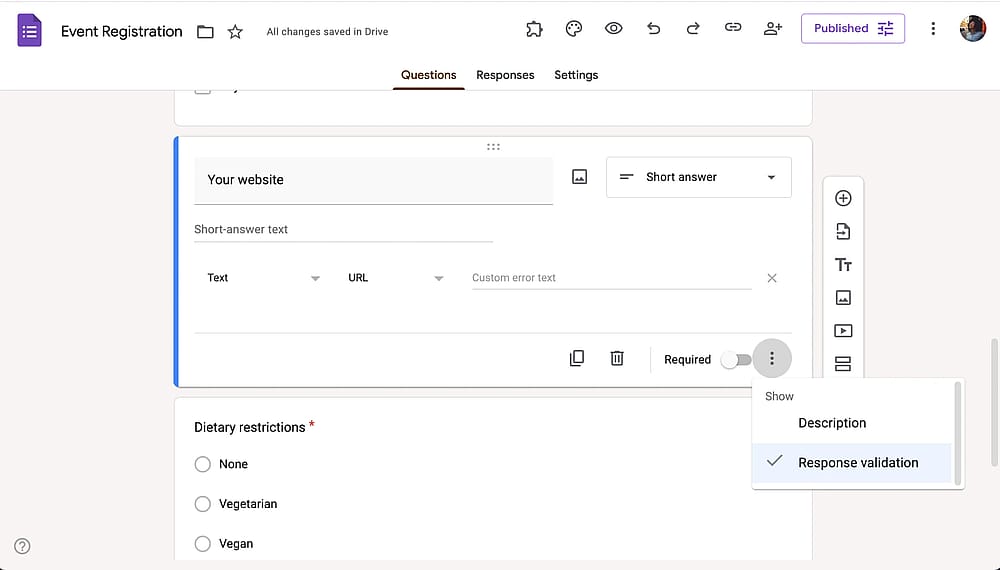
Set up response validation
6. Customize the form’s theme
In this step, you have the option to customize the appearance of your form for a more personalized touch. Click on the "Customize Theme" icon to adjust various elements, such as the head image, theme color, and font style.
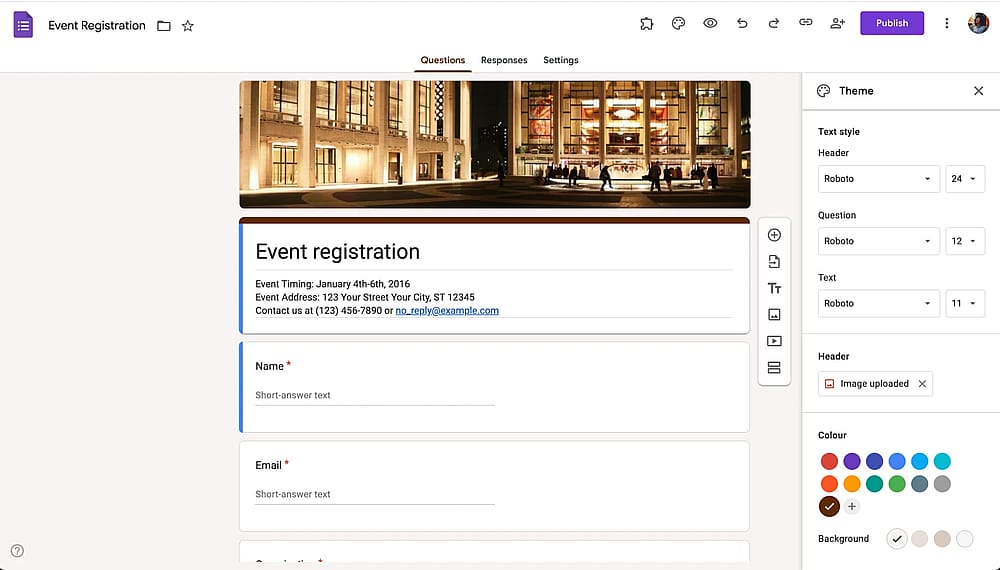
Choose a theme for your form
7. Preview and share your form
Once you finish customizing, preview your form by clicking the eye icon at the top to ensure it looks as planned. After that, click on the "Send" button to share your form. Choose from various sharing methods such as email sharing, direct links, embedding on your website, or social media platforms.
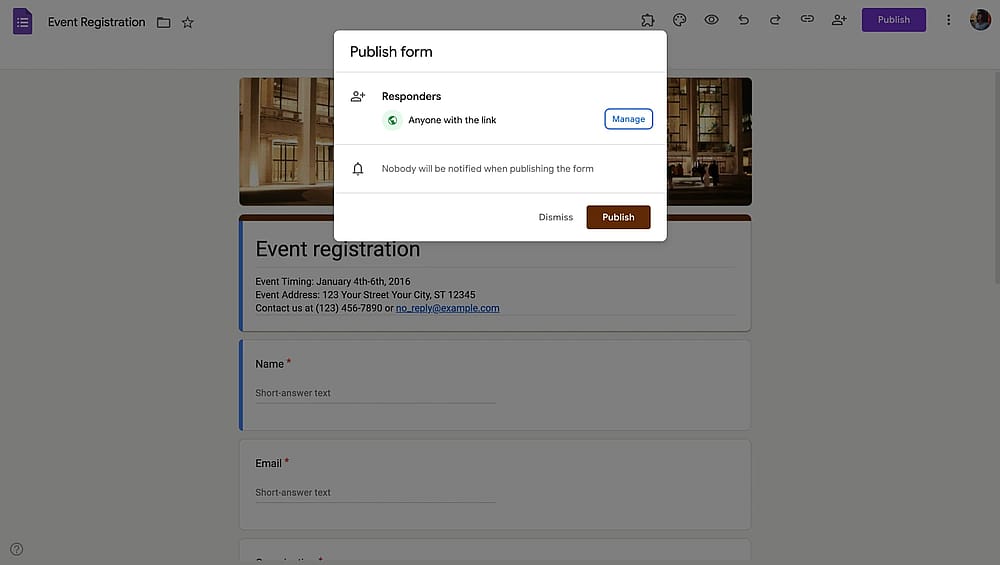
Send your form
When to use Google Forms for registration?
Google Forms is a well-known and free tool, so it stands out as one of the best options if you like to create registration forms completely free of charge. It has basic form fields, is easy to create and share forms, and last but not least, integrates with Google Sheets. Use Google Forms if you need a basic registration form with a simple design and essential fields.
When is Google Forms not enough for registrations?
While Google Forms is powerful and free, it's not the right solution for every registration scenario. Understanding these limitations upfront will save you time and frustration.
Skip Google Forms if you need:
- Payment processing: If attendees need to pay registration fees, you'll need a workaround (like separate PayPal links) to offer payment options or a form builder like forms.app.
- Open/close dates: If you only want to collect registrations between certain dates, you’ll require add-ons. Learn how to close a Google Form on a specific date.
- Advanced customization: If your brand needs a good design or removal of all Google branding, you'll find Google Forms too restrictive.
- Ticketing systems with QR codes: While you can create QR codes for Google Forms, for events requiring ticket validation at entry, you need to use dedicated event platforms.
- To collect signatures: While you can add checkbox acknowledgments, collecting signatures on Google Forms is not possible.
- Complex multi-step workflows: Google Forms integrates with some workspace tools; you’ll need another form builder that allows you to set up advanced integrations.
A better app to create registration forms: forms.app
Learning how to create a Google Form for registration also shows that Google Forms has its limitations. If you want to create your own registration forms and want to offer the best experience, you have much better alternatives, free or otherwise. forms.app offers a massive set of features, a wide variety of templates, AI-assisted form creation, and the smoothest form-filling experience.
Here’s a comparison table showing the features on both platforms you might need when creating a registration form.
Features/Tools | Google Forms | forms.app |
Form fields | 12 | 30+ |
Payment collection | ||
Email notifications | ||
Setting open/close dates | (not possible natively) | |
Customization | Basic | Advanced |
Signature collection | ||
Ticketing | ||
And/or logic |
How to create registration forms on forms.app
You craft your online registration form in a few minutes on forms.app. No matter the layout or customization, the forms on forms.app will look professional out-of-the-box. Here are the steps to make a registration form on forms.app.
1. Log in or create an account on forms.app
To start, log in to forms.app. If you do not have an account, you can easily create your account for free.
Signing in to forms.app
2. Generate a form with AI, choose a template, import, or start from scratch
forms.app offers 4 options to start creating your form. You can browse templates (forms.app has more than 200+ registration form templates), use AI to create your registration form, import your form to some other platform, or start from scratch with a blank page.
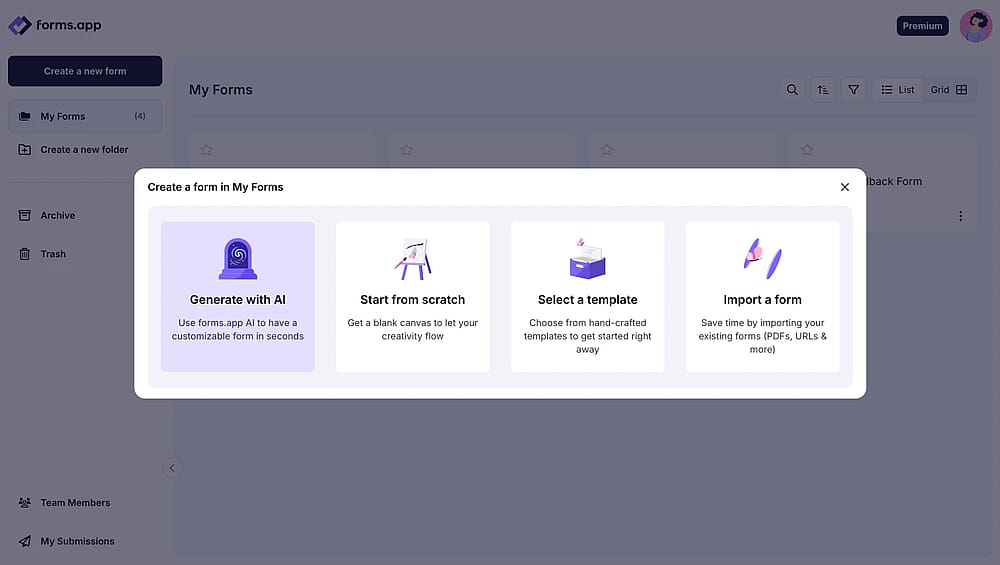
Choosing a starting option to create your registration form
3. Customize your form
Add new form fields or modify existing ones to improve the form to your specific requirements. You can also switch to the “Design” tab to customize the appearance of your registration form. On forms.app, your form design can match your brand guidelines.
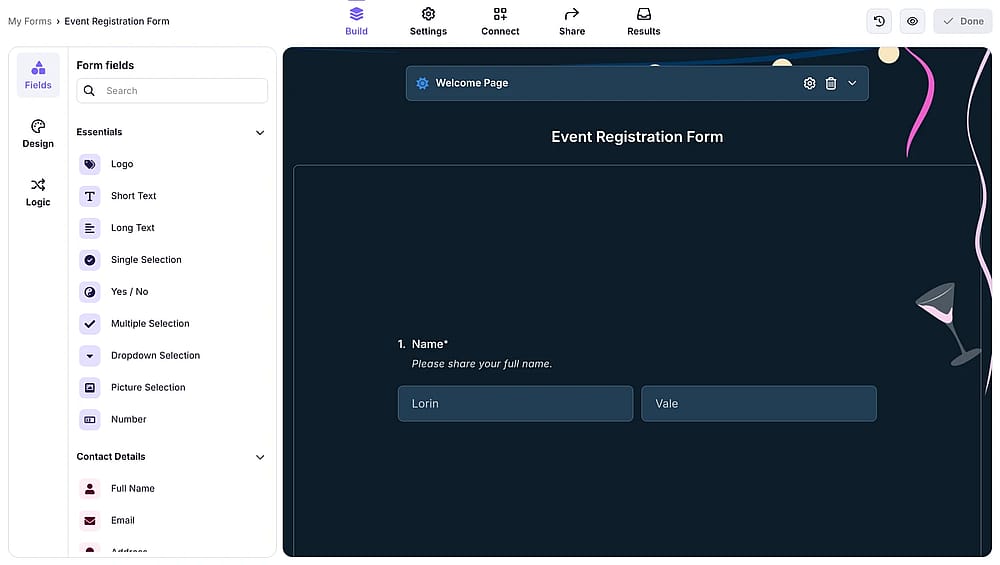
Adding questions and fields to your registration form
Pro tip
On forms.app, you can show your form questions one at a time by choosing the “Step view” layout option under the layout tab within Design, or show them in a list or pages by choosing the “List view” option.
4. Adjust your form settings
Once you have customized your form, go to settings. There you can:
- Allow or disallow multiple submissions
- Enable or disable CAPTCHA spam protection
- Set opening and closing dates for submissions
- Set a total submission limit for your form
- Set up email notifications for yourself or your respondents
- Allow saving the progress as a draft and submitting later on
- Set geo-restriction, that is, allow submissions from a specific location
- Toggle showing a summary page before respondents complete the form
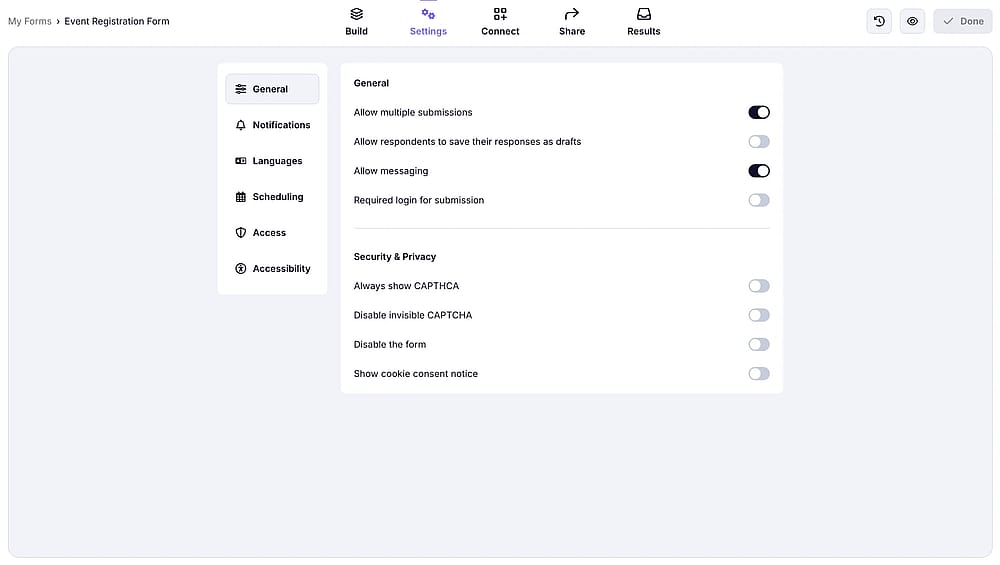
Customizing the settings of your registration form
5. Preview and share your registration form
Before publishing, preview your form to ensure everything looks as expected. Then you can customize your registration form URL, generate a unique QR code for it, or embed the form on your website.
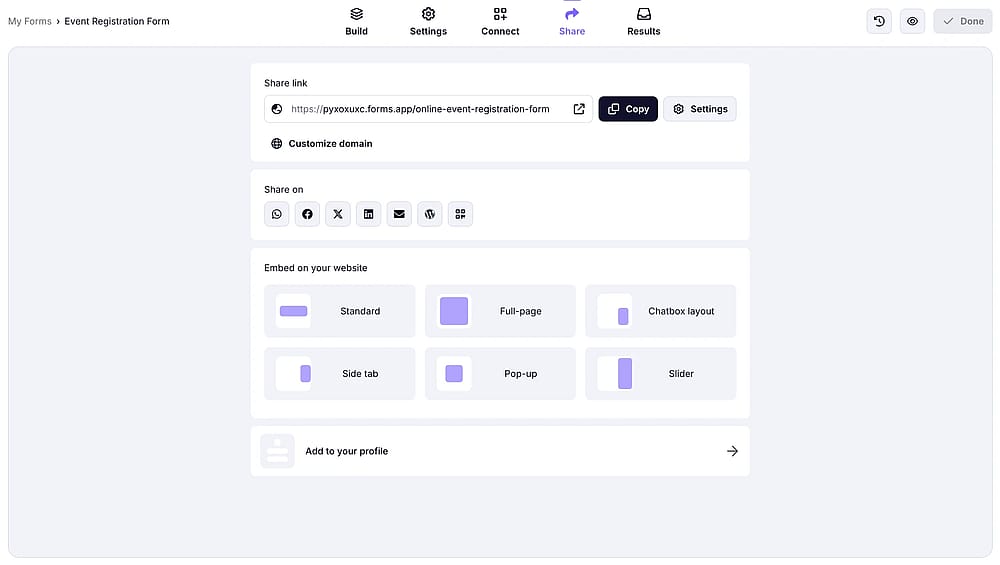
Choosing a sharing option for your registration form
Frequently asked questions about creating a registration form on Google Forms
A registration form is an online form used to gather important details from individuals signing up for an event, program, service, or membership.
These forms often include fields for attendance information, contact details, preferences, and other relevant data. They serve as a valuable resource for businesses to manage attendance, communicate effectively, and strengthen customer experience. Creating proper registration forms helps you collect all necessary information in an organized way.
No, Google Forms doesn't have native payment processing. Workarounds include:
- Adding PayPal/Venmo links in the confirmation message
- Using file upload for payment confirmation screenshots
- Collecting payment separately via email after registration
- Using forms.app if payment integration is essential
Yes, if you enable it. Go to Settings → General → Check "Respondents can edit after submit." After submitting, respondents receive a link to modify their answers. This is useful for long registration periods where details might change (dietary needs, session preferences, etc.). You can disable editing closer to the event date.
Yes, using add-ons or manual methods:
Using FormLimiter (free add-on):
- Install from the Add-ons menu
- Set the maximum number of responses
- Form automatically closes when the capacity is reached
- Optionally display a custom "Registration Full" message
Manual method:
- Monitor responses regularly
- Turn off "Accepting responses" when capacity is reached
- Requires vigilance
It depends:
No Google account needed if:
- "Collect email addresses" is OFF
- "Limit to 1 response" is OFF
- Form is set to "Anyone with the link"
Google account required if:
- "Collect email addresses" is ON
- "Limit to 1 response" is ON
- Form is restricted to your organization
For maximum accessibility, keep requirements off unless necessary.
Registration forms are helpful for businesses as they make the sign-up process easier, provide organized data collection, and help tailor offerings to participants' needs. Now, you can check some valuable benefits below:
- Fast data collection: Registration forms make gathering information from customers, participants, or job applicants much more manageable.
- Effective attendance tracking: Registration forms are a great tool in event planning, enabling the accurate collection of attendee numbers. It provides organizers with valuable insights and increases satisfaction among participants.
- Time-saving: By reducing waiting times, both sides experience a more efficient registration process.
- Easy access: Online registration forms offer convenience as individuals can complete the registration process without physically visiting. Your business can reach anyone with an internet connection.
- Reducing the risks: Through automated processes, online registration forms prevent errors associated with manual data entry. This accuracy boosts participant confidence, contributing to a smoother and more reliable registration experience.
Key points to take away
In summary, creating successful registration forms is crucial for effective event planning and business solutions. Registration forms offer a range of benefits, such as fast data collection, attendance tracking, and easy participant access. Using such forms in your company's system will simplify many projects and complications you are dealing with.
After reading this article, you learned about how to build a unique registration form using the Google Forms platform, when it is wise to use Google Forms for registrations, when it is best to seek alternative tools, how to create a registration form on forms.app, and frequently asked questions about creating a registration form on Google Forms. As forms.app team, we regularly visit and update this guide so that you can have the most up-to-date information.
Contributors
Researched & written by
forms.app, your free form builder
- Unlimited responses
- Unlimited questions
- Unlimited team members