How to customize Google Forms in 2026 (Complete step-by-step guide)
Summarize with
TL;DR: Steps to customize a Google Form
1. Go to docs.google.com/forms and open a Google Form
2. Click the palette icon (🎨) in the top-right corner
3. Under color options, select from preset colors or click + to add custom color
4. Change fonts and font sizes
5. Add header image (ideal size: 1600x400px)
6. Customize questions (Use right toolbar to add images, videos, titles, and descriptions)
7. Click "Add section" button to group related questions
8. Go to the settings tab to enable progress bar, shuffle questions, customize confirmation message etc.
Customizing Google Forms helps you create professional forms and make a strong impression with your forms. Here we will talk all about Google Form customization. Whether you're a business owner, marketer, educator, or HR professional, this guide will help you create forms that look professional and get results.
Creating online forms has become an essential skill in the business world. Online forms are helpful tools, whether you are getting customer feedback, building employee surveys, or managing event registrations. Google Forms, a part of the Google Workspace platform, provides entrepreneurs and business owners with a user-friendly tool to create forms and collect information for their businesses.
Powerful customization is the key to creating forms that not only gather information but also look impressive and professional. In this article, you will learn how to create a custom Google Form faster and easier. Also, we will explore various styling options, from adjusting font styles and sizes to adding images and background colors. Plus, we'll answer frequently asked questions about customizing Google Forms.
What can you customize in Google Forms?
Before diving into the how-to steps, let's understand what's possible with Google Forms customization.
- Customizing questions (changing questions text, its answers, type, order etc.)
- Changing accent and background colors
- Choosing fonts & font sizes for form elements
- Adding a header image to Google Forms
- Grouping questions with sections
- Adding images and videos to Google Forms
- Showing a custom confirmation message (at the end of the form)
So, Google Forms does provide some basic customization options. These features improve personalization, making your forms look better. It is an excellent possibility for businesses to manage collected data and enhance the customer experience. But, remember that a Google Form will always look like a Google Form.
How to customize Google Forms (Step-by-step)
Customizing Google Forms allows you to tailor both the overall theme of your form page and individual questions, helping you to craft many cool Google Forms. Below, we explore each type of customization with details and step by step:
1. Open a Google Form
To begin customizing your Google Form, open a Google Form in edit mode. Or you can create a Google Form at docs.google.com/forms.
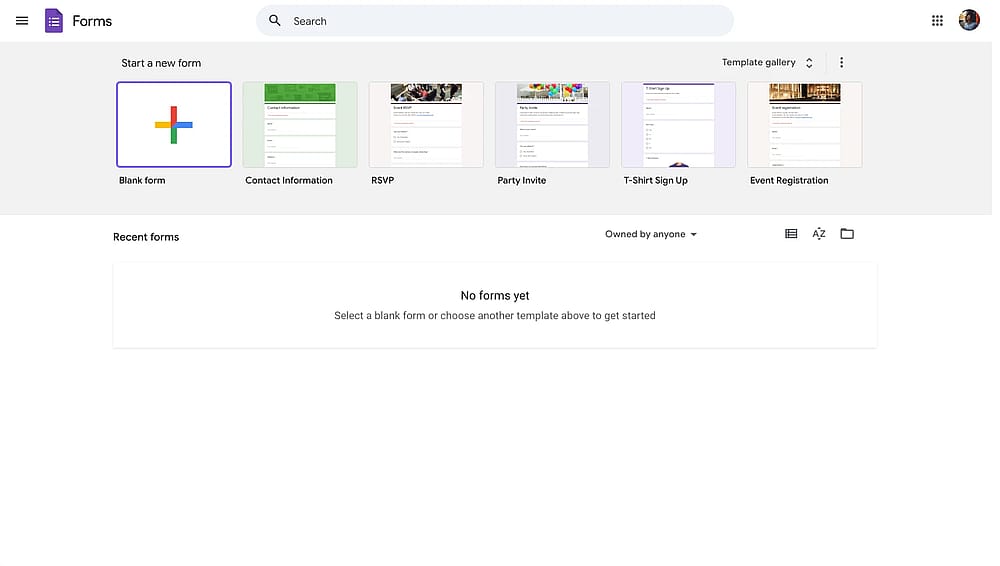
Google Forms Dashboard
2. Click on palette icon to open the Theme menu
Then, look for the palette icon (🎨) in the top-right corner of your screen and click on it. It will open Google Forms’ Theme menu. This is where you will find settings for making pretty Google Forms.
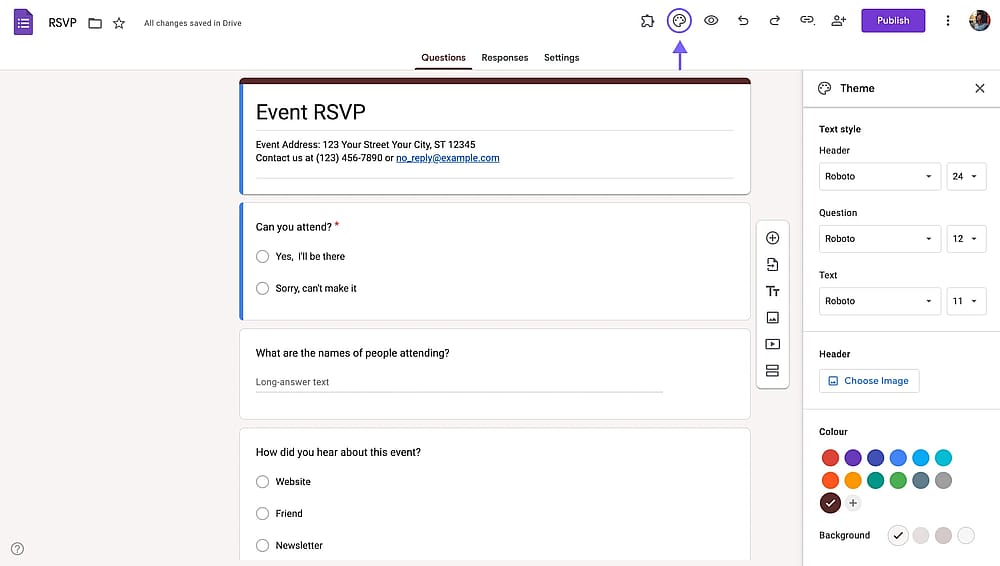
Palette icon in the top-right corner of a Google Form
Pro tip Keep this panel open as you work through the customization process. You'll be returning to it frequently to make adjustments.
3. Select your theme colors
Theme colors affect multiple elements throughout your form, and it creates a cohesive look. To change your theme color:
- In the customization panel, scroll down to the Color section
- You'll see a horizontal row of preset color swatches (purple, blue, red, green, yellow, etc.)
- Click any color swatch to apply it instantly
- Click the + (plus) button at the end of the color row to create a custom color
Once you select an accent color; you can choose from background color options. Google Forms generates four background colors automatically for you to choose from; based on your accent color.
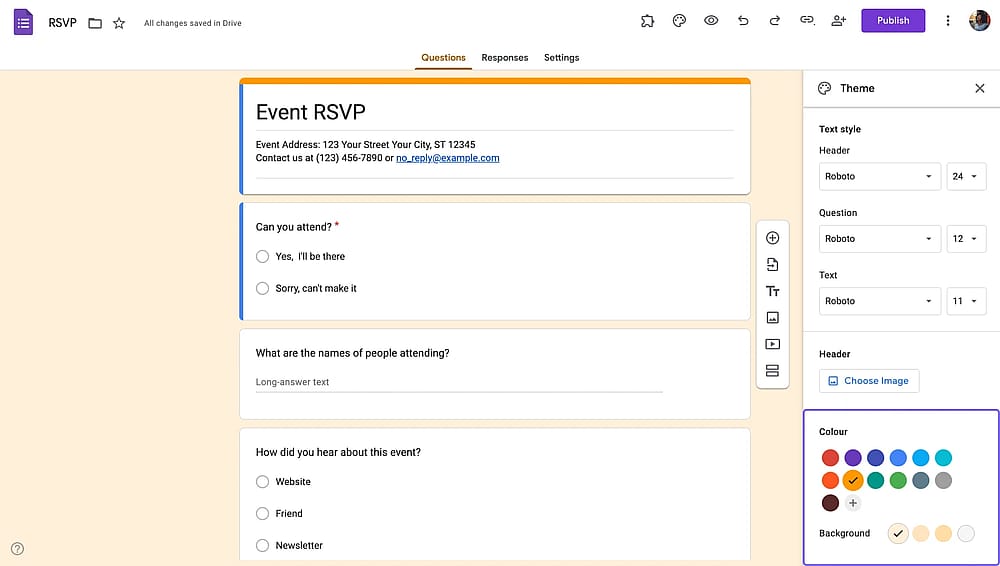
Color settings in a Google Form
4. Change fonts and font sizes
When you type something, anything, your typeface faces the reader first. Choosing the right fonts helps you create an appropriate setting.
Thankfully, Google Forms lets you choose from many font families within Google Fonts. You can also change fonts and font sizes for different form elements, namely, header, question, and text.
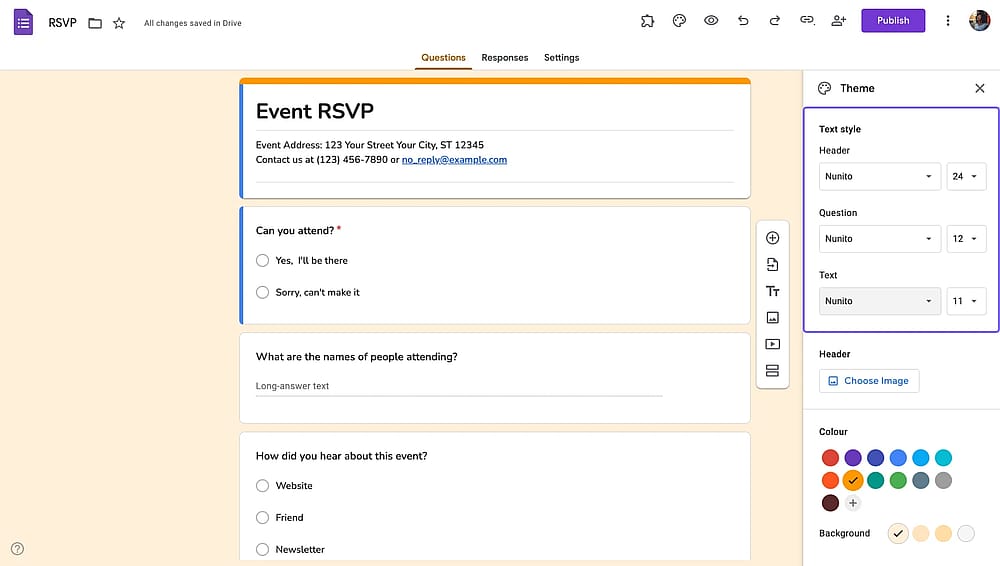
Font settings in a Google Form
5. Add a header image
Header images make the biggest visual impact on your form. They appear at the top and set the tone for the entire experience. To add a header image:
- In the customization panel, locate the Header section
- Click Choose image
- A popup appears with six source options:
- Select your image source and choose your image
- Click Select to apply it to your form
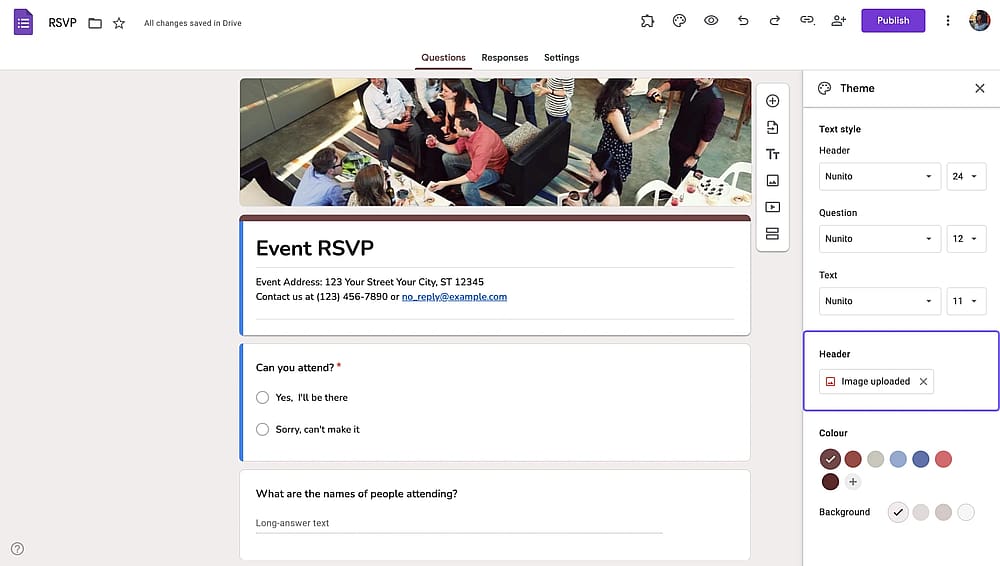
Header image setting in a Google Form
6. Customize questions
Apart from Google Form design customization, you can change the form content itself.
You can change question text, its type, answers, or order. You can also add images to questions or add them as a separate form element using the toolbar on the right.
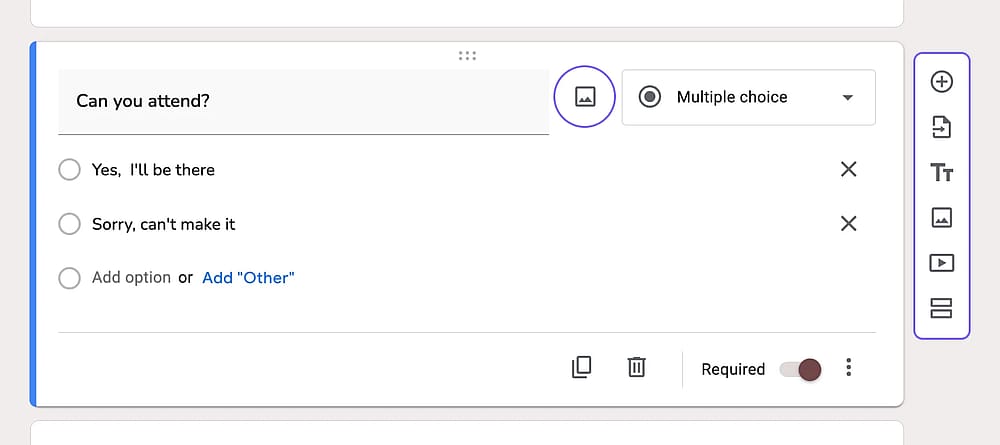
Customizing questions in a Google Form
7. Add sections to group related questions
Sections break long forms into manageable chunks and create logical groupings. To create a new section, simply click the Add section button (icon with two horizontal lines) on the right toolbar.
Then, add section title and description. Once you’re done adding a section; drag and drop questions to your section to group them together.
Pro tip You can show or skip sections based on answers on Google Forms. Check out our article on conditional questions in Google Forms to learn more.
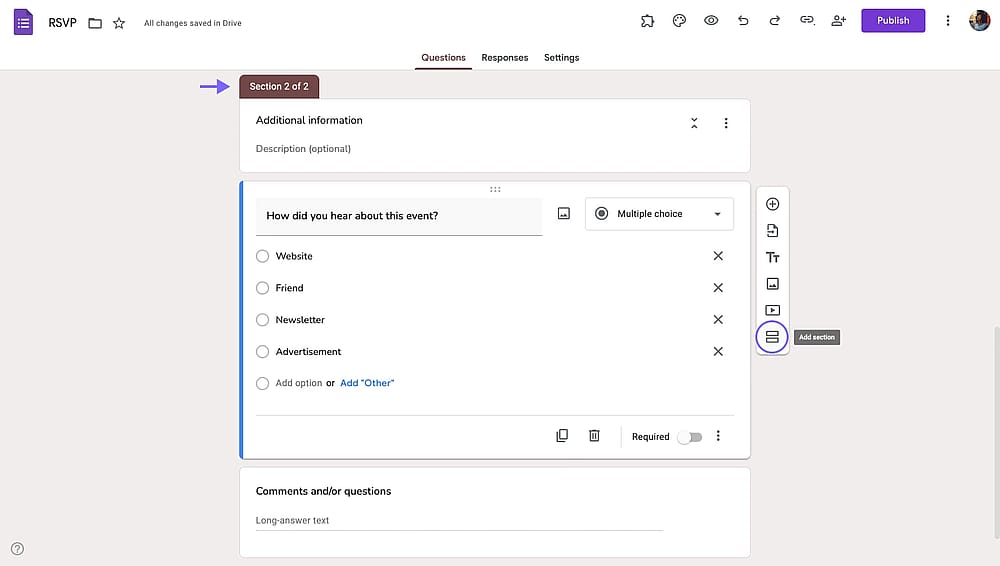
The Add section button in a Google Form
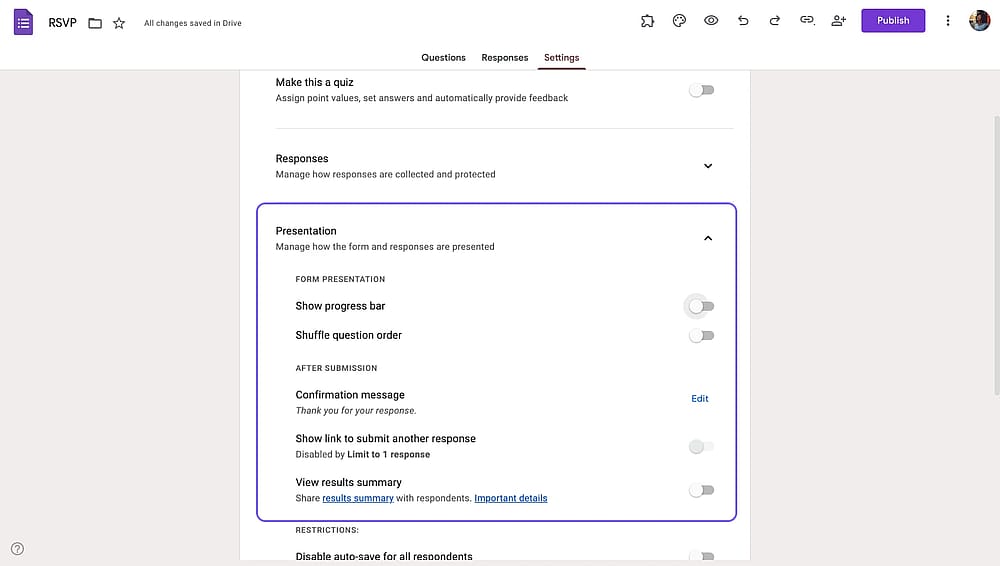
8. Go to the settings tab
On Google Forms you have several options to change how you present your forms. Simply switch to the “Settings” tab and open the “Presentation” dropdown. There you will find the settings to:
- Shuffle questions
- Show progress bar
- Change the confirmation message (the message that shows at the end of the form)
- Show a link to submit another form response
- Show results summary
The Add section button in a Google Form
forms.app is a better alternative for customized forms
Google Forms allows users to customize various elements to improve their forms' visual appeal and functionality. Despite these valuable customization features, Google Forms does have its limitations, especially when you or your employees seek more advanced options for your forms. If you want to create and customize your form on an advanced level, consider using some alternative tools.
forms.app is an online form builder that lets you easily create, customize, and manage web forms. Unlike Google Forms, forms.app is designed to offer more advanced and extensive customization options for users looking to tailor their forms to specific needs. The platform provides a range of great options, giving you more control over the design of your online forms. Here are some key steps on how to customize your form with forms.app:
1. Select a form’s theme
forms.app allows you to choose from over 50 expertly designed themes, instantly changing the look of your form. You can add these pre-set visual styles to your form with a single click. Open your form and go to the "Design" tab. You will automatically see the "Themes" section.
Pro tip For an extra touch, explore the animated themes and make your forms truly stand out.
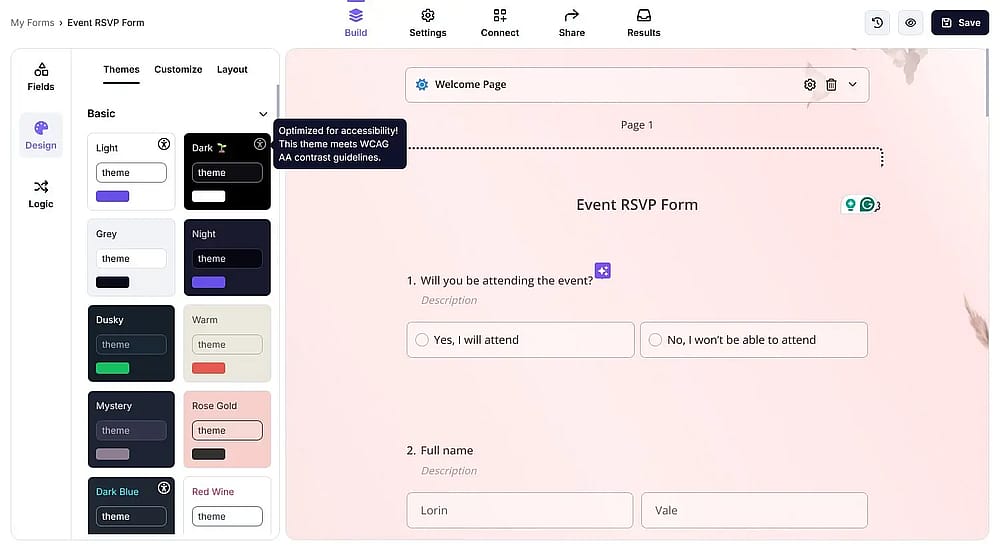
Choosing a theme for your form on forms.app
2. Change colors
forms.app lets you customize colors easily. This level of color customization goes beyond what Google Forms offers. In the "Customize" section, edit or choose colors from a rich color palette. Also, you can adjust transparency and see instant changes.
Changing form colors on forms.app
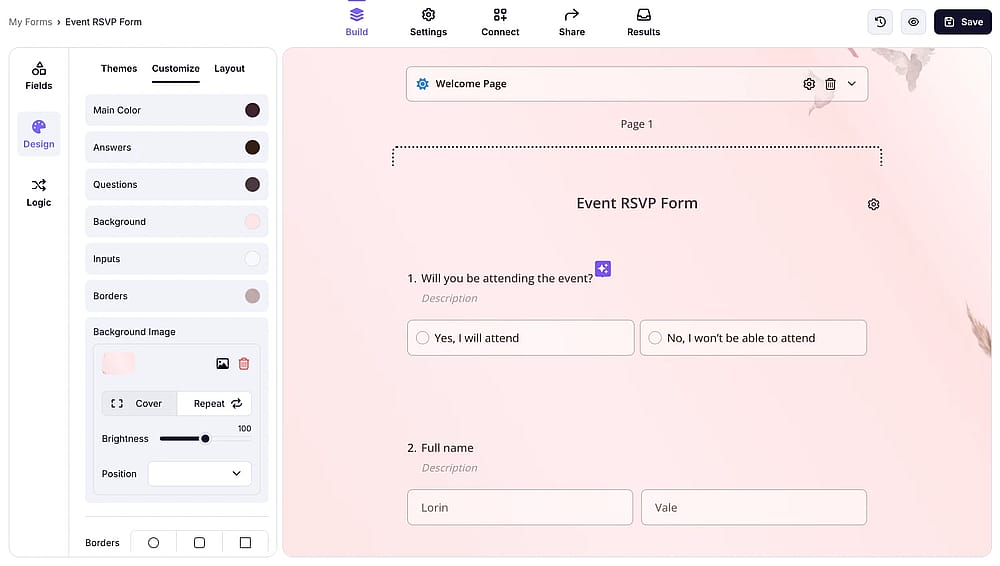
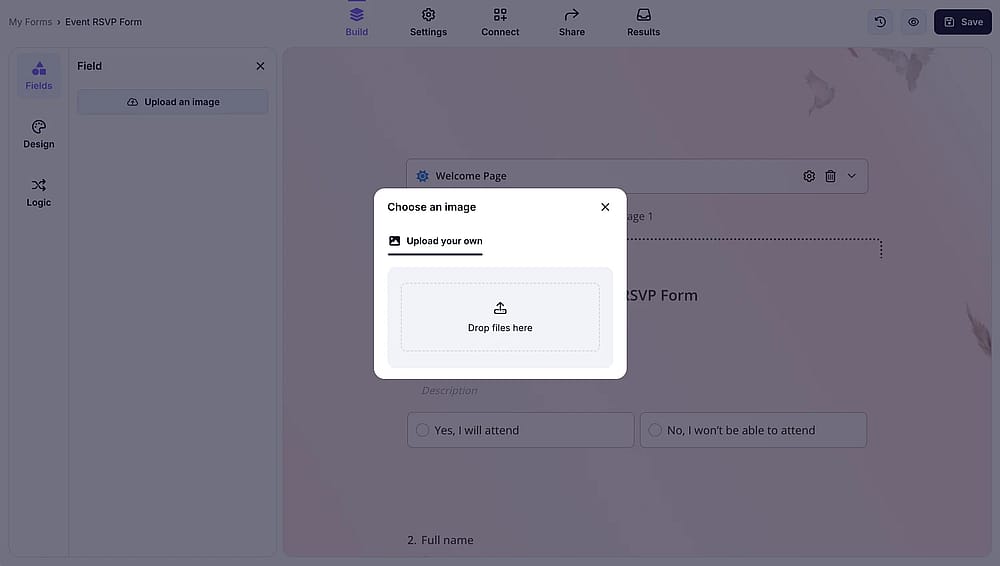
3. Add a background image
On the "Design" page’s "Customize" section, click on the plus button next to the “ Background image” option. You can choose your image, adjust brightness, and instantly see how your form looks with a custom background.
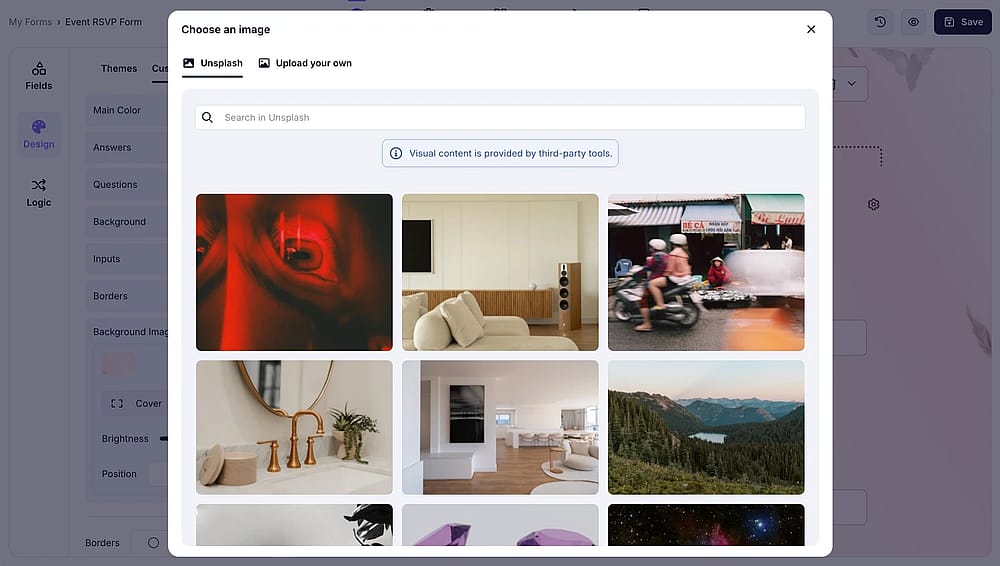
Uploading a custom form background image on forms.app
4. Select a view type
On the design page, switch to the “Layout” tab to change your form layout. Here you can choose between step view (to show your questions one by one, creating a conversational form) or list view (to list your questions in one or multiple pages).
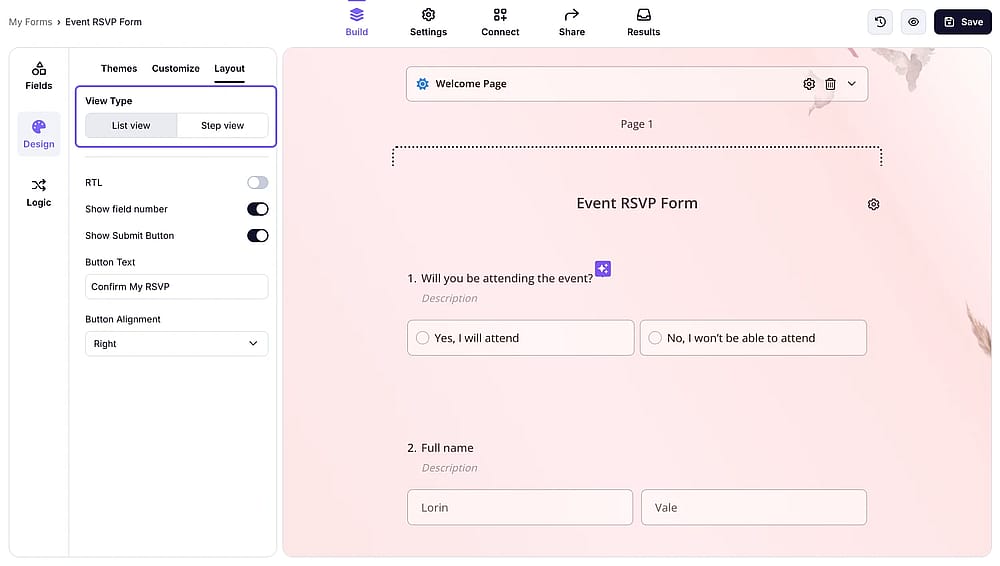
Choosing a view type for your form on forms.app
5. Add your logo to your form
Adding image content to forms is simple with forms.app. You can include image content fields, upload/select photos, and even display your company logo with adjustable size.
Adding a logo to a form on forms.app
6. Customize your questions
forms.app offers over 30+ question types to meet the unique needs of youır forms and surveys. You can find specific question types like rating, checklist, grid, and even image selection questions.
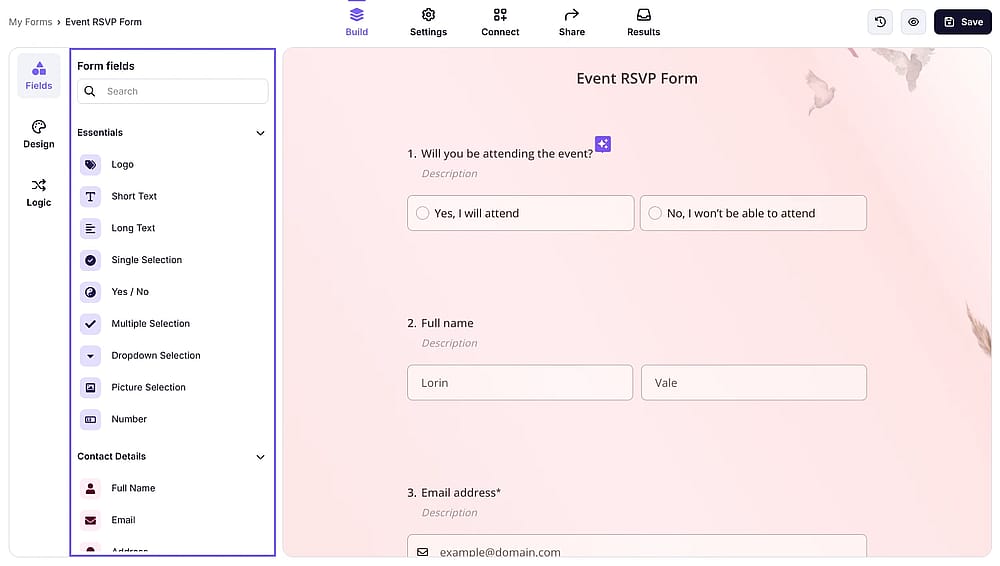
Adding custom questions to a form on forms.app
Frequently asked questions about customizing Google Forms
To show you the full potential of this tool, we answered frequently asked questions about customizing Google Forms. You may be curious about changing layouts, adjusting colors, or other valuable options. We will give insights into the available custom features and answer common questions:
Yes, Google Forms does offer some options to customize your forms. You can add a header image and change the theme, background, and font style. These functions allow you to give your forms a more specific look and feel. To enhance the content, you can modify questions by adding title descriptions and images or videos. However, it's important to note that Google Forms has its limitations when it comes to advanced customization.
Changing the layout of Google Forms can be a bit limited using the tools’s native settings. However, there's a solution: you can install add-ons for Google Forms. These add-ons provide additional customization options, allowing you to improve the look and quality of your forms, including layout adjustments. So, while the built-in options might have some limitations, exploring add-ons opens up new possibilities for you to customize Google Forms' layout.
To customize the header image in your Google Forms, click on the “Customize Theme” icon, resembling a paint palette.
In the Theme window, under the Header section, click "Choose image." You can select a pre-made header, add an image from Google Photos, or upload your own. This simple customization lets you add a personal or branded touch to your forms.
No, you cannot remove the "Google Forms" logo from the bottom-left corner of forms, even with a paid Google Workspace account. The branding remains visible to all form respondents.
Yes, but with limitations. You can add your logo as part of the header image at the top of the form or as a separate image within the form. However, you cannot:
1. Position the logo separately from the header image
2. Resize the logo independently
3. Include the logo in confirmation messages
4. Place the logo in email notifications
Certainly, you can customize the color theme of your Google Forms, but it's important to say that the extent of customization is limited.
You can change the background color of your Google Forms theme, but you need to remember that it only affects the page surrounding the form, not the form itself. You can adjust the theme by clicking the painter's palette icon in the top right corner.
In short
Google Forms offers a solid foundation for basic customization. It is enough for simple surveys, internal questionnaires, and casual data collection. However:
Your Google Form will always look like a Google Form
If your forms represent your business to clients, drive revenue, or require professional polish, Google Forms' constraints will hold you back. This is where forms.app excels. It's designed for businesses and organizations that need Google Forms' simplicity but with professional-grade features.
Whether you stick with Google Forms for basic needs or make the switch to forms.app for professional results, this guide will help you create better forms that people actually complete.
Contributors
Researched & written by
forms.app, your free form builder
- Unlimited responses
- Unlimited questions
- Unlimited team members