How to send webhooks from Google Forms
Summarize with
If you've used Google Forms for lead generation, you know submissions can be saved to Google Sheets automatically. For automation pros, this works—until you need to integrate with CRMs or mailing lists. The problem? You can't receive submissions in real time. Instead, you must poll the sheet for updates, which increases operational costs and wastes your automation platform’s “data plan.”
The solution is quite simple: use webhooks from Google Forms. In this article, we will discuss how to configure webhook requests from a Google Form, share a better alternative, and more!
What are Webhooks?
A webhook is an event-driven, lightweight communication protocol that automatically sends data between applications via HTTP. It’s triggered by specific events, automates communication between APIs, and can be used to activate workflows.
Why use webhooks with Google Forms?
With webhooks for Google Forms, you can send form responses to an external web service as soon as someone submits a new Google Form. For example, you can use webhooks to post Google Forms responses to your CRM tool automatically. Additionally, you can create new entries in your mailing list software when a new lead is captured through Google Forms.
The new version of the Email Notifications add-on supports webhooks and, in addition to making HTTP requests to the webhook callback URL. Furthermore, the add-on can also include the user’s response and the form data in the payload body of the HTTP request.
Here are some other reasons why you should use webhooks with Google Forms:
- Connects with third-party apps like Slack and Trello without complex scripts. ✅
- Triggers specific actions, such as sending email confirmations or updating CRM systems. ✅
- Pushes data only when an event occurs, reducing unnecessary API requests and improving efficiency. ✅
- Automatically stores responses in a database or cloud service. ✅
- Sends form responses as soon as they are submitted. ✅
- Notifies teams via Slack and Discord when receiving a new email response, helping them make real-time decisions. ✅
How to set up webhooks in Google Forms
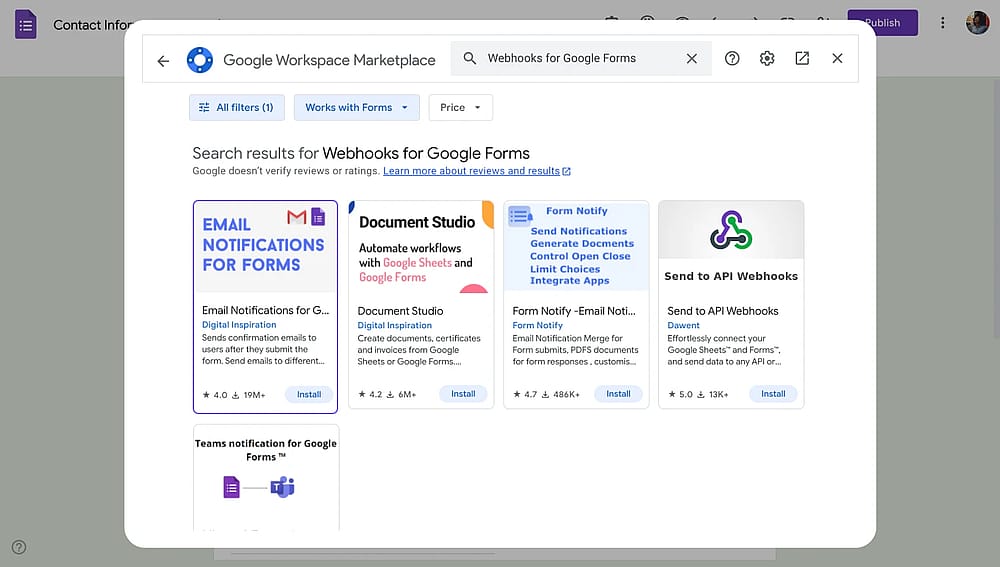
First of all, you need to install a Google Forms add-on from the Google Marketplace. This add-on is titled Email Notification for Google Forms. Moreover, it also includes support for sending instant push notifications to any webhook URL.
Additionally, you can have multiple webhooks associated with the same Google Form, and it will send the form's data to all the webhooks' URLs when a new form submission is received.
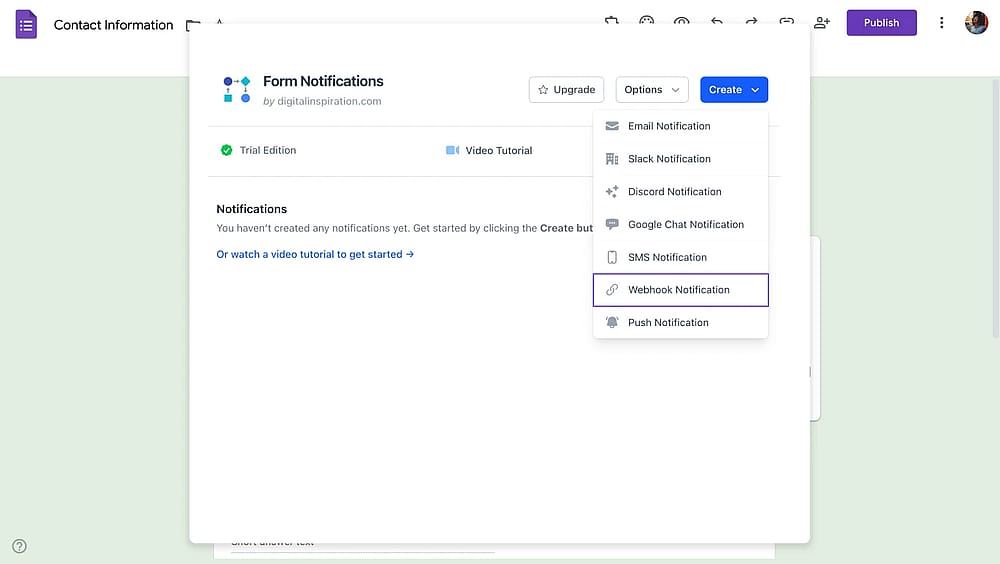
1. Open the webhooks add-on
Open the webhooks add-on
First, you'll need to create a Google Form or open an existing one. Then, you'll need an add-on. Once you install the add-on, launch it by choosing it from the add-ons menu that shows under the puzzle icon, and choose Webhooks for Google Forms from the menu.
2. Configuring webhook requests
Configuring webhook requests
Next, click the Create Webhook button to integrate a new webhook with your Google Forms. The next step is configuring webhook requests and integrating them into Google Forms with external services.
3. Choosing the request method
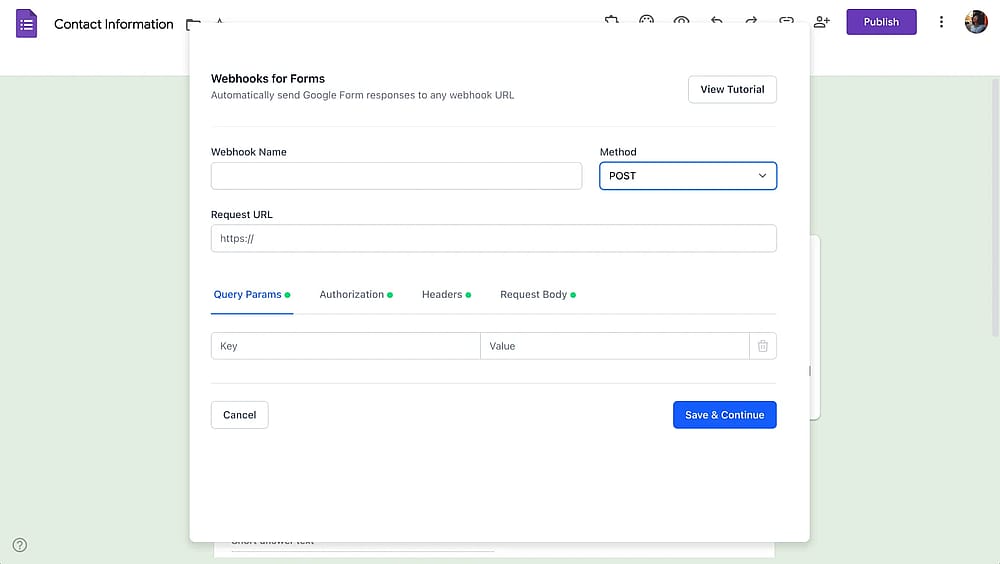
Choosing the request method
In webhook integration, the HTTP request method determines how data is sent to the external service. While there are nine request methods: GET, HEAD, OPTIONS, TRACE, PUT, DELETE, POST, PATCH, and CONNECT, two of them are the main ones used in integrations:
a. POST method
The POST method is the most commonly used HTTP method for webhook integrations. This allows the form data to be sent as part of the request body.
b. GET method
The GET method sends data via the URL. It’s typically used when you want to retrieve data from a server or track requests without sending complex data.
However, GET is less common for a webhook integration because Google Forms typically requires sending data, not retrieving it. However, you can use GET if you only have to send small amounts of data for tracking or analytics.
We will go with the POST option for this example.
4. Adding the webhook URL
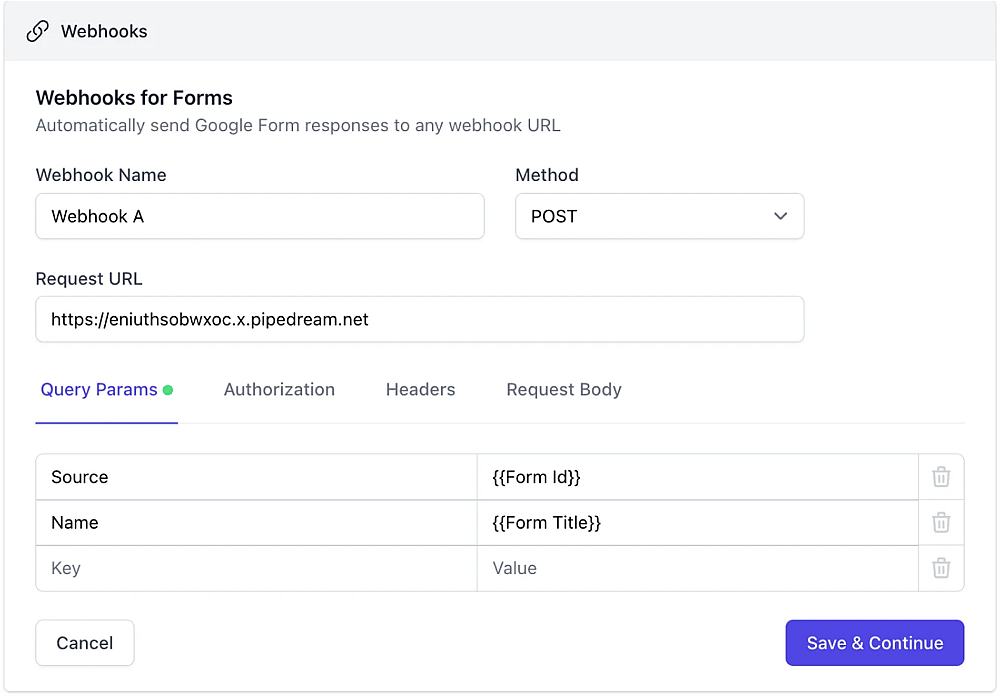
Adding the webhook URL
If you want to integrate Google Forms with an external service, configure the correct webhook URL where the data should be sent.
Obtain the webhook URL from the third-party services or custom APIs. We provide a webhook URL that you can use to send data. Moreover, look for an endpoint specifically for handling incoming webhooks. If you need a webhook URL for testing purposes, you can use webhook.site without any charges.
Once you’ve obtained the correct URL from the external service, add it to the addon. The add-on will use this URL to send form data when a user submits a response.
Furthermore, test the webhook URL before going live. Moreover, you can use tools like Postman or webhook.site to test whether the data is properly being sent and received.
Bonus: Using query parameters for customization
Query parameters help you add additional data to the webhook URL for tracking and filtering. This can be especially helpful when working with multiple form submissions or integrating with services that require specific identifiers.
Authenticating webhooks for secure data transfer
When doing Google Forms integration with an external service via webhooks, it’s important to ensure it's secure. Webhook authentication ensures that only requests are accepted by the receiving system.
Using API keys for authorization
API keys are the best method for authenticating webhook requests. An API is typically a long and unique string that includes the request to verify that the request is coming from an authorized source.
API keys are usually provided by the application you’re trying to integrate. Additionally, you can generate API keys through the developer portal.
Furthermore, in the Google Apps Script, you can include the API key in the request headers for API authentication.
Moreover, do not expose your API key to public networks, as anyone with access can make requests on your behalf. Therefore, if you suspect your key has been compromised, you should generate a new key to maintain the API security and update your script accordingly.
Configuring OAuth and Bearer tokens
More secure authentication techniques include OAuth and Bearer tokens, particularly when working with user data or services that need more precise authorization. With OAuth, you can safely approve apps without disclosing private information like passwords.
OAuth involves a two-step process:
- The user authorizes the application to access their data.
- The application trades the authorization code for an access token to authenticate API calls, also known as a bearer token.
Like an API key, the Bearer token is generated and appended to the Authorization header.
Adding custom headers
The external service you’re integrating can ask you for further authentication details or specific information to process the request correctly. In these cases, custom headers are used. Custom headers are arbitrary value pairs that can be added to the request.
Additionally, you can specify unique headers based on the receiving server's specifications. For instance, you may include an X-Custom-Auth header for custom authentication or an X-Request-ID header to log queries.
💡 If you like to learn more about APIs, you may also like this article about REST API and RESTful API stack up against each other.
Testing and troubleshooting webhooks
After selecting the right tools for testing your webhooks, the next step is to identify and resolve any issues. You can do this using testing tools like Postman and RequestBin. Also, if any issues arise, debugging them under different scenarios is important.
Moreover, you can check the response code to determine what error you are dealing with. Also, you can check the webhook server logs and inspect payload headers to ensure nothing is wrong with them.
Using webhook testing tools
Testing is an important part of the webhook setup process. Tools are available to help you test your webhook endpoints, analyze the request and response, and verify if the webhook functions correctly. Some of these tools are:
1. RequestBin
RequestBin allows you to create a temporary endpoint that captures and displays HTTP requests, which is incredibly useful for handling webhooks. Moreover, it’s a simple, no-code solution to see what data is being sent.
2. Postman
Postman is an outstanding tool for testing API endpoints and learning about APIs. It's not specifically made for webhooks, but it's a great tool for testing the receiving side of your webhook because it lets you mimic delivering data to an endpoint.
3. Webhook. site
Webhook.site is another service that provides a unique URL to capture incoming HTTP requests. It’s one of the most used tools for testing webhooks as it allows you to inspect headers, query parameters, and payloads.
Handling errors & Debugging issues
Any issues that arise after testing your webhook need to be troubleshooted. Various circumstances, including incorrect configurations, network difficulties, or server-side problems, can cause webhook malfunctions.
1. Check the response code
Analyzing the external service's answer is the first step in troubleshooting. An HTTP status code that indicates whether the request was successful or unsuccessful is frequently returned when you access the webhook URL. Some common status codes include:
- 200 OK: This indicates that the webhook data was properly processed, and the request was successful.
- 400 Bad Request: Malformed data is one of the problems with the request delivered to the server.
- 401 Unauthorized: This status code means that authentication has failed.
- 404 Not Found: The webhook URL is incorrect, or the endpoint does not exist.
- 500 Internal Server Error: The server hosting the webhook has an error.
2. Check the webhook server logs
Look for any error messages or logs about inbound requests in the external service's logs if you can access them. These logs might reveal data processing problems such as malformed payloads, unsuccessful authentication attempts, or missing parameters.
3. Inspect payload and Headers
Ensure that the data you send from Google Forms matches the expectations of the receiving server. Some common issues are incorrect content type and malformed data.
4. Test under different scenarios
Certain circumstances, such as sending a lot of data, employing unusual characters, or having a sluggish network, might occasionally cause problems. Test several scenarios to determine whether the problem occurs in all submission types or only in specific circumstances.
How to send form data through webhooks in forms.app
forms.app is a great platform for building online forms with built-in webhook integration. The method of configuring webhooks in forms.app is simple. It also offers choices for transferring data to databases, CRMs, and other external services. This is how to set up a webhook on forms.app:
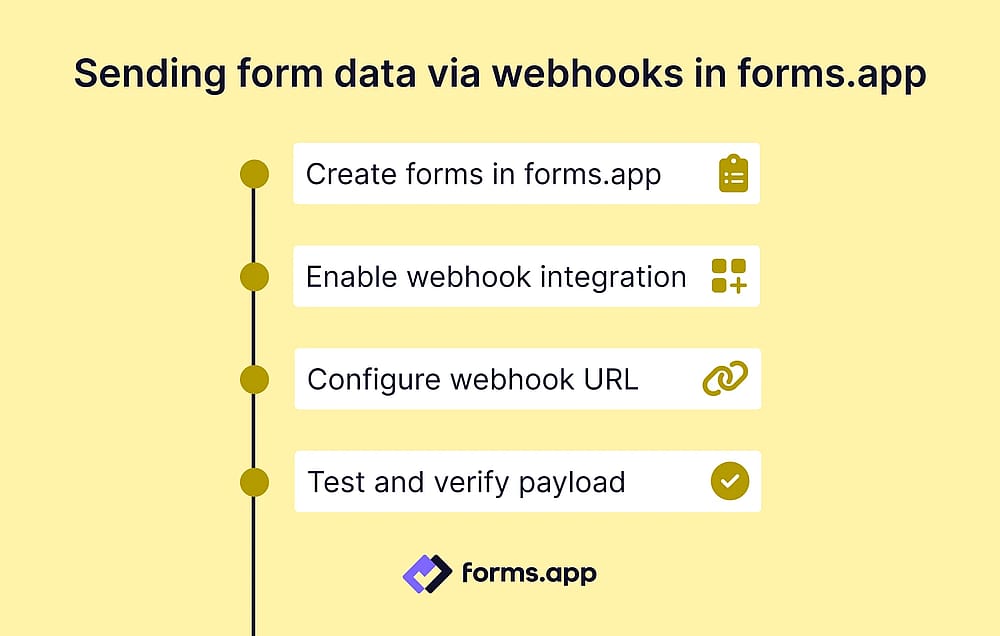
Sending form data via webhooks in forms.app
1. Create forms in forms.app
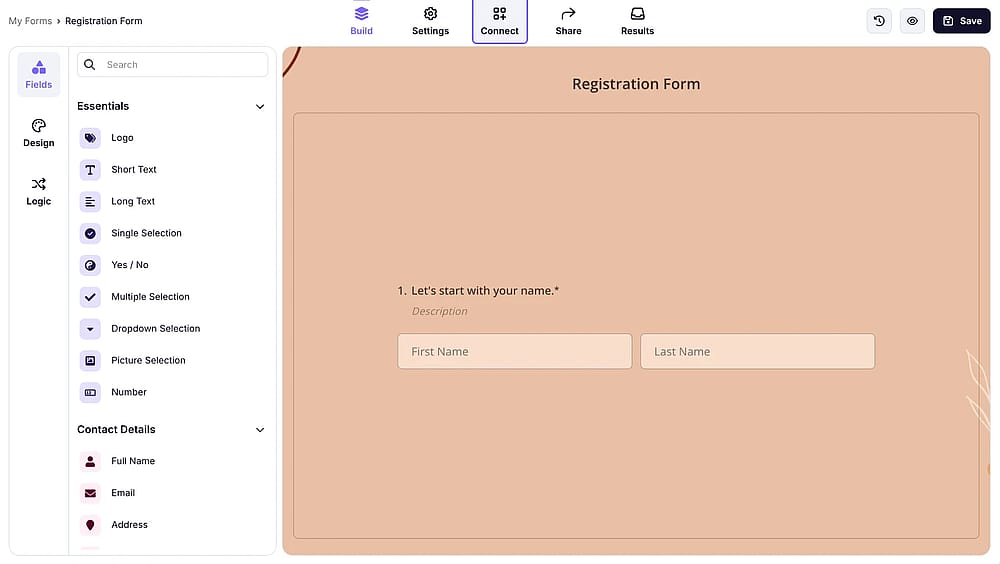
Create forms in forms.app
You start by creating a new form, either from scratch or by selecting a template. After that, you may modify your form and add the required fields.
2. Enable webhook integration
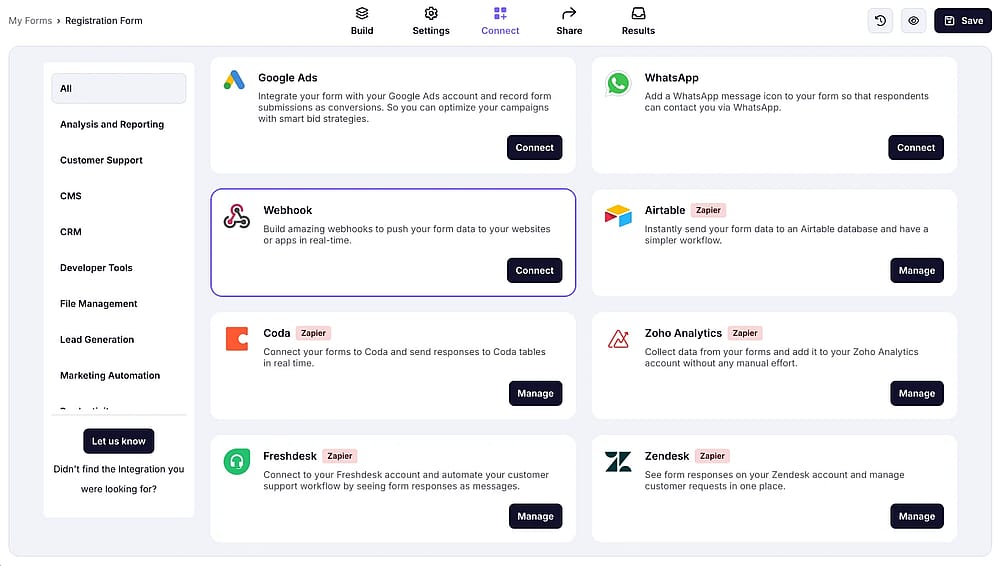
Enable webhook integration
Next, in the Integrations section, you’ll see the Webhook option. Click on Enable Webhook to enable the integration.
After that, you have to enter the Webhook URL. This is the endpoint where you want the form data to be sent upon submission.
3. Configure webhook URL
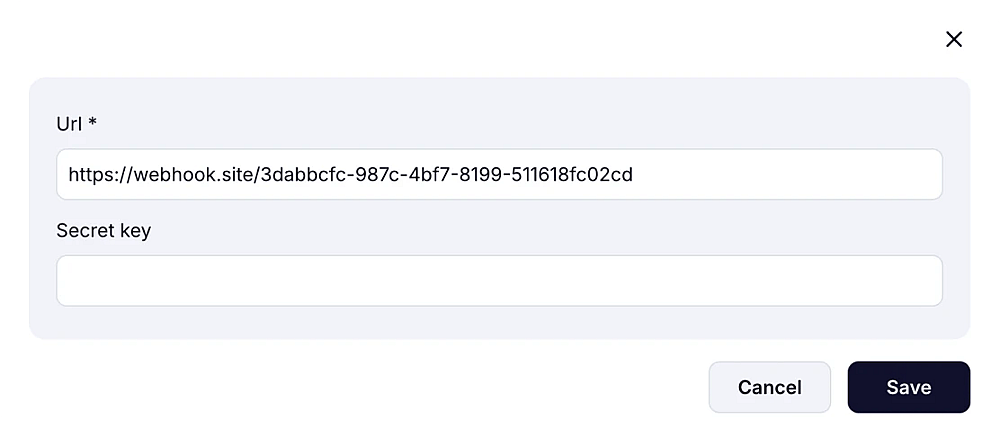
Configure webhook URL
Enter the URL of the external service that receives the form submission data. This could be a service like Zapier or a custom API endpoint.
4. Test integration and check the data payload structure
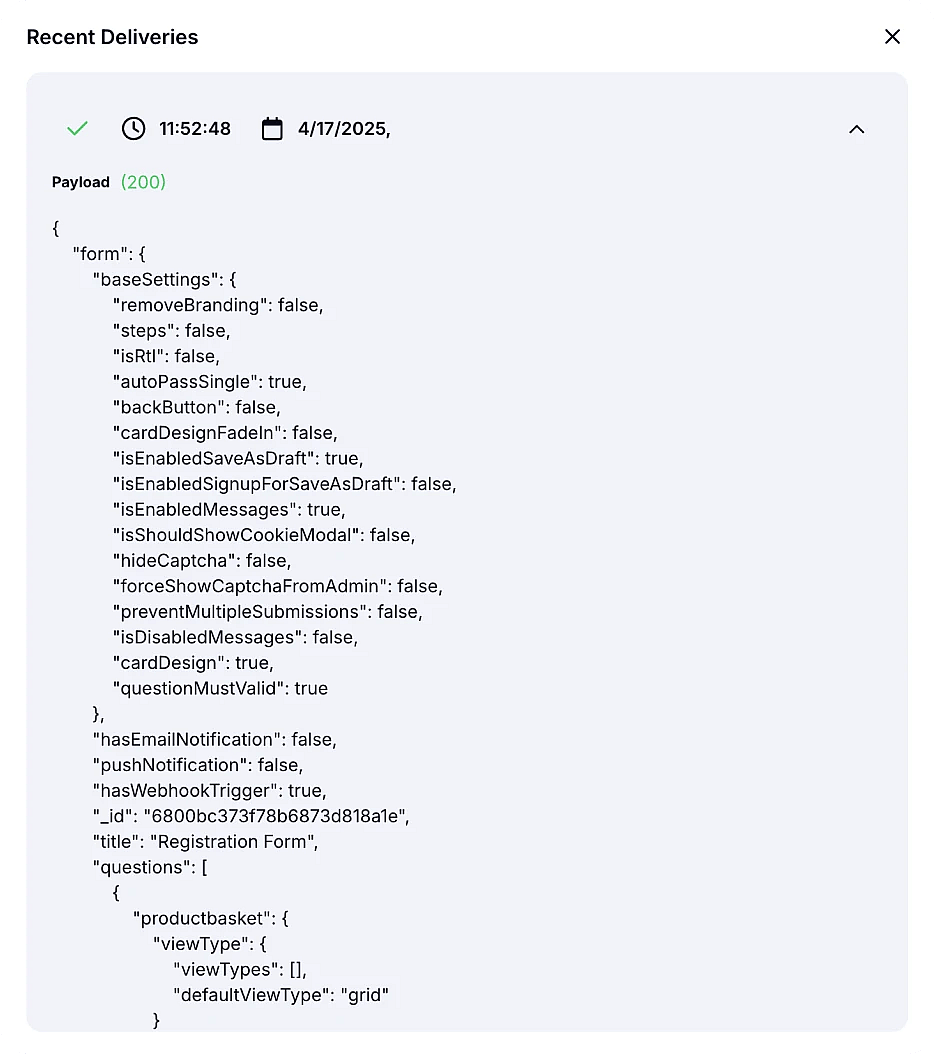
Test integration and check the data payload structure
forms.app will automatically send all form fields as part of the webhook payload. You can check your recent deliveries within forms.app’s webhook panel and view the payload structure. Then you can use this to configure the integration to achieve your desired result.
Conclusion
You can seamlessly integrate your forms with third-party tools such as CRM and databases by setting up webhooks correctly. Whether capturing leads or automating email responses, webhooks provide a flexible solution.
Webhooks in Google Forms and forms.app enables data transfer to external services in real-time, automating workflows. While Google Forms webhooks require add-ons or customization via Apps Script, forms.app offers a simpler built-in webhook integration. So, if you want to create elegant and impactful online forms effortlessly, use forms.app to turn your data into impactful results!
Contributors
forms.app, your free form builder
- Unlimited responses
- Unlimited questions
- Unlimited team members