How to build a Microsoft Forms NPS survey (and its limits)
Summarize with
The Net Promoter Score (NPS) is one of the clearest indicators of customer satisfaction.
Microsoft surveys or forms make it relatively easy to collect NPS data, but getting accurate results requires understanding both the tool and its limitations.
For businesses of any size, NPS is more than just a number; it directly influences product decisions, customer retention strategies, and long-term growth. The forms you select and the tool you use to build them can make the difference between surface-level data and genuinely actionable customer insight.
Considering the significance of the matter, this Microsoft Forms tutorial walks you through how to set up and interpret your NPS score, and when it makes sense to consider a more capable alternative.
TL;DR steps to create NPS surveys on MS Forms
Step 1: Sign in and click New Form
Step 2: Add your questions, including the built-in NPS question type
Step 3: Customise, preview, and share via link, QR code, or email
What is an NPS survey and why should you use it?
Used across industries and integrated into tools like Microsoft 365 apps, the Net Promoter Score (NPS) is a customer loyalty metric built around a single, standardized question: "How likely are you to recommend our product/service to a friend or colleague?"
Respondents answer on a scale of 0–10, and their scores are grouped into three categories:
- Detractors (0–6): Unhappy customers who may discourage others
- Passives (7–8): Satisfied but indifferent customers
- Promoters (9–10): Loyal advocates who actively recommend your business

An NPS question sample
💡The NPS formula is simple: % Promoters − % Detractors = NPS
The two best moments to send an NPS survey are right after a customer interaction, when the experience is fresh, and on a fixed schedule every quarter or six months to track loyalty trends over time. When used consistently, NPS becomes less of a single data point and more of a reliable signal for where your business stands with the people who matter most.
How to add NPS questions to Microsoft Forms
Creating an NPS survey in Microsoft Forms is straightforward; you can get started right away and create your first form in just a few steps.
1. Start from scratch or use a template
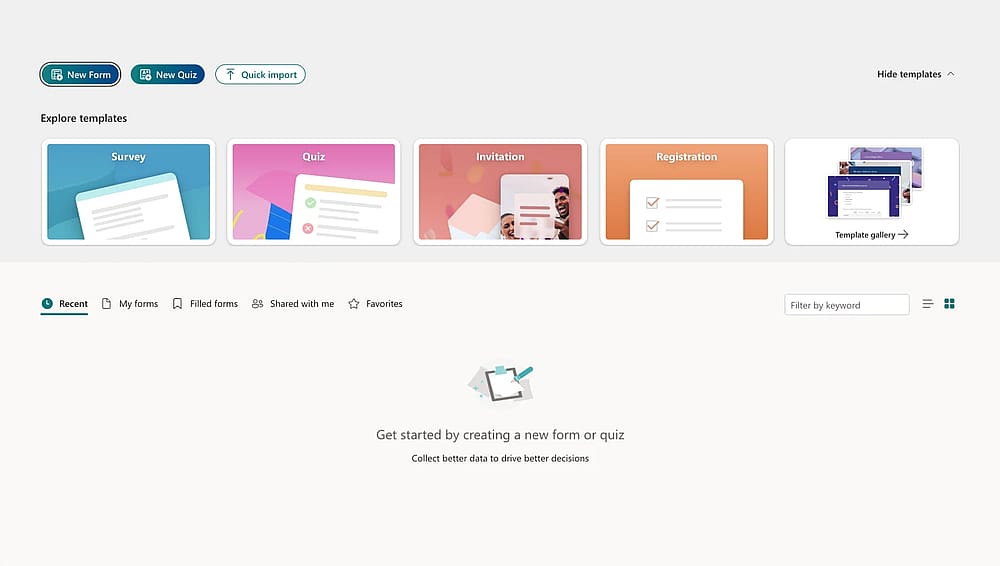
Choose a way to start
Choose from a blank form or a ready Microsoft Forms template that already includes the appropriate question types and data analysis potential. Once selected, you are ready to create your NPS survey.
2. Add and edit your NPS questions
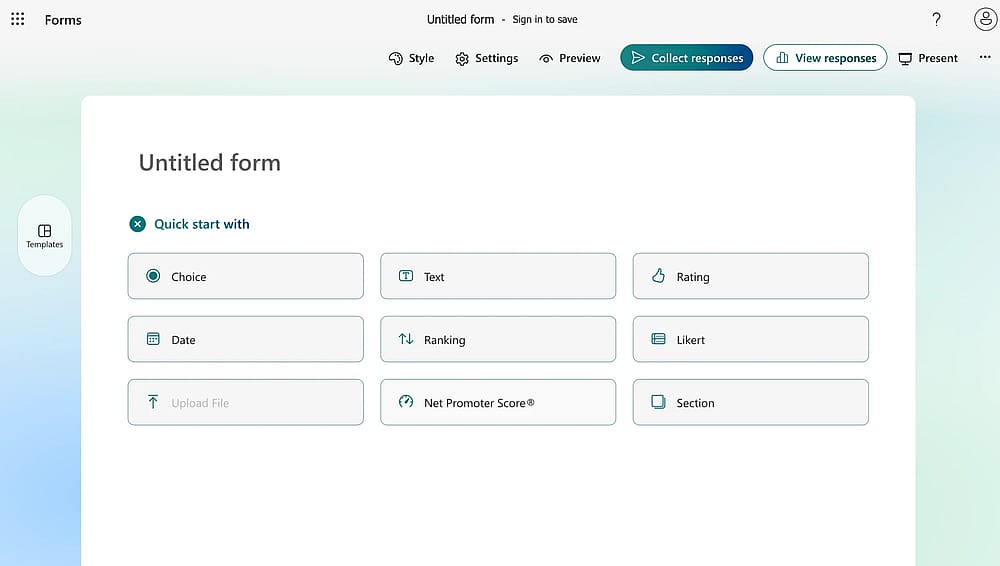
Click the NPS question field
If you started with a blank form, you can ‘Quick start with’ the Net Promoter Score question type, then select Add new question to continue building your form. To edit an existing question, simply click on it and make your changes.
💡 Tip: Note that while you cannot change a question type after saving it, you can still customise the interior settings by clicking the three vertical dots within the question.
3. Edit the NPS question
Once your NPS question is added, click on it to access the editing options. From here you can:
- Add an image to the question for additional visual context.
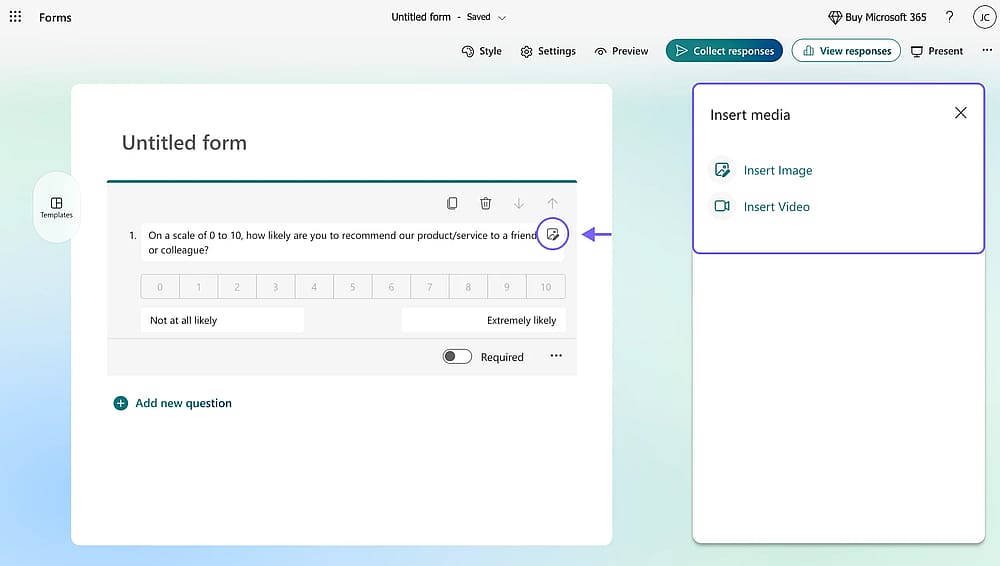
Click edit icon to insert media
- Edit the rating labels, for example, changing the default scale labels to "Not Likely" on the low end and "Likely" on the high end.

Change the text on rating labels as needed
- Add a subtitle beneath the question.

Insert the question subtitle by clicking the three-dot button
- Mark the question as Required to ensure no respondent can submit the form without answering the question.
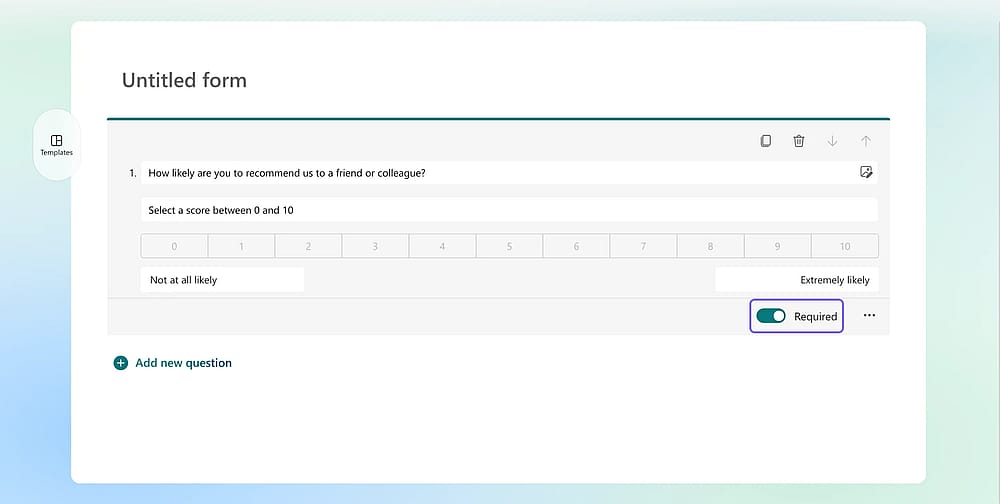
Turn on the Required toggle to make your field mandatory
💡Tip: Always mark your NPS question as Required. A partially answered NPS survey cannot be included in your final score calculation, which can skew your NPS score results.
4. Customise the visuals
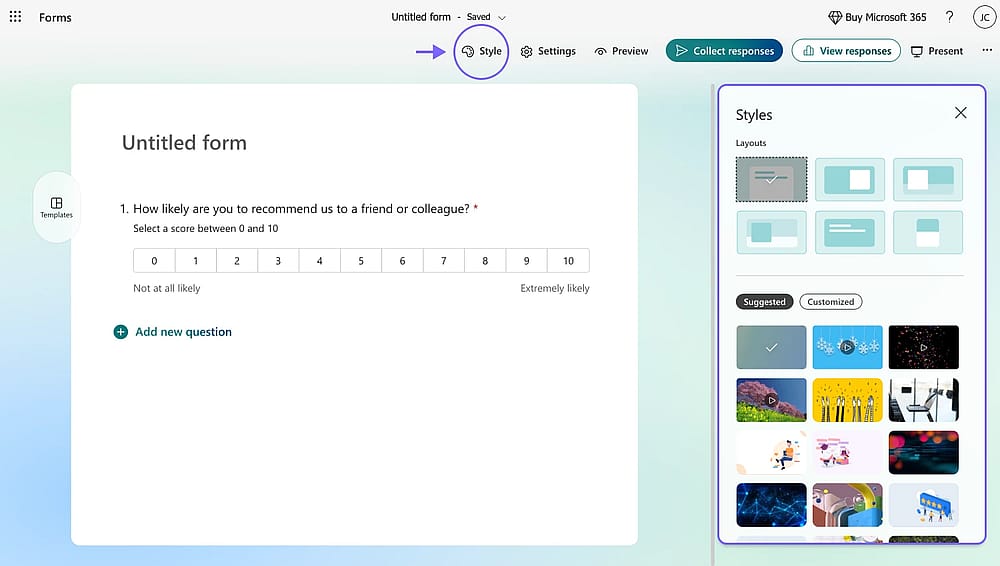
Click the palette icon to access the Style menu
Click the palette icon in the top right corner to open the Style menu. From here, you can adjust the theme, layout, and background image to match your brand.
💡 Learn from experience: Surveys with relevant visuals consistently collect higher response rates than plain ones. A well-chosen image or colour theme can make a bigger difference than you might expect.
5. Adjust settings and preview
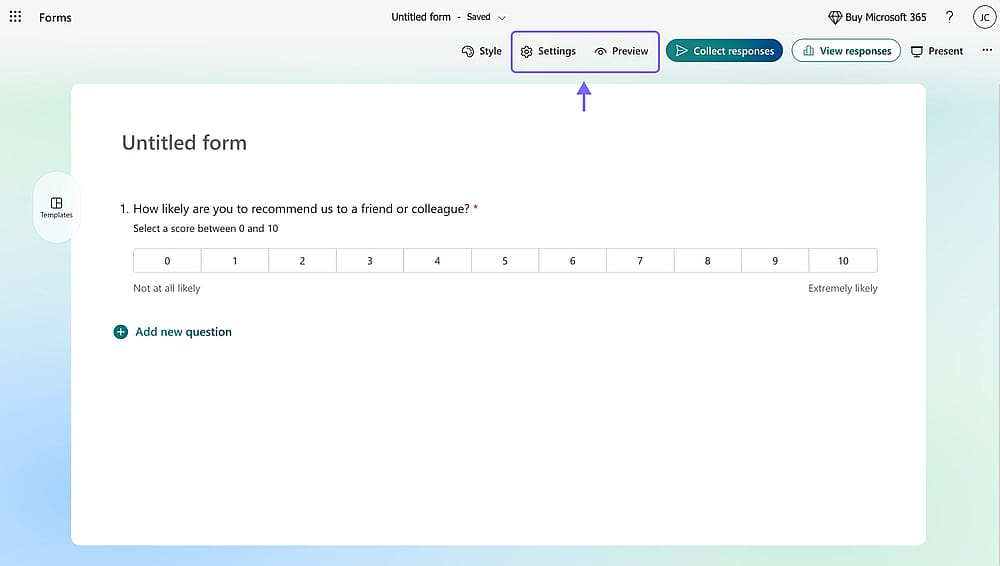
Access the form settings and preview mode by pressing the related buttons
Click the gear icon to open the settings menu, where you can set start and end dates, limit responses, and add personalised messages. Once done, use the Preview option to experience the form exactly as your respondents will, on both desktop and mobile devices.
6. Share your form & View responses
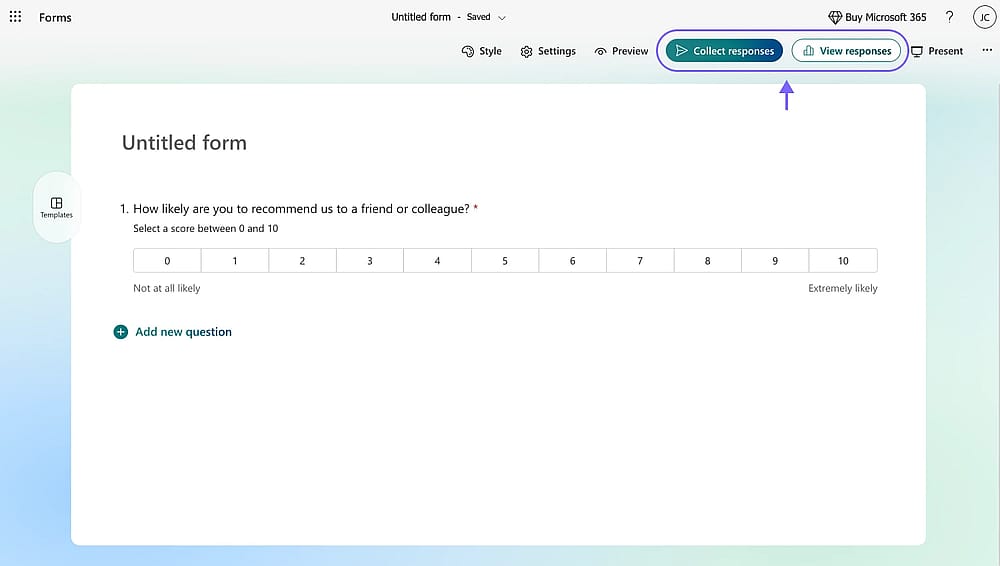
Click the ‘Collect responses’ button to access the sharing settings and the ‘View responses’ button to check your form submissions
Head to the Collect Responses section to share your form via link. Once responses start coming in, the View Responses section displays your collected data in clear, readable charts, giving you an early picture of your Microsoft Forms NPS score distribution.
Limitations of Microsoft Forms for NPS surveys
Microsoft Forms is a reliable tool for creating surveys, quizzes, or polls within the Microsoft ecosystem, but there are a few things to know before committing to it for NPS tracking.
- Question types are fixed once created
Once you select a question type and save it, it cannot be changed, only deleted and recreated. It is a small but notable limitation when editing live forms.
- Visual customization has a ceiling
The Style menu covers the basics well: themes, layouts, and background images, but teams looking for deeper control and advanced branding question types may find the options limiting compared to dedicated survey tools.
- Analytics stay relatively simple
The built-in response view works well for a quick overview, but there is no trend tracking or advanced segmentation without first exporting to Excel or another Microsoft 365 app.
- Integrations favor the Microsoft ecosystem
Microsoft Forms connects with Microsoft Teams and other Microsoft 365 apps, but integration with tools outside that ecosystem, such as third-party CRMs, requires additional workarounds.
How to add an NPS survey question on forms.app
Now that we have covered how to create a survey in Microsoft Forms, it is worth exploring what a more flexible alternative looks like in practice. forms.app gives you complete creative freedom to build any form with its extensive template library and detailed customization options. Select pre-ready forms or get started from scratch; either way, the process is straightforward.
1. Use the opinion scale field
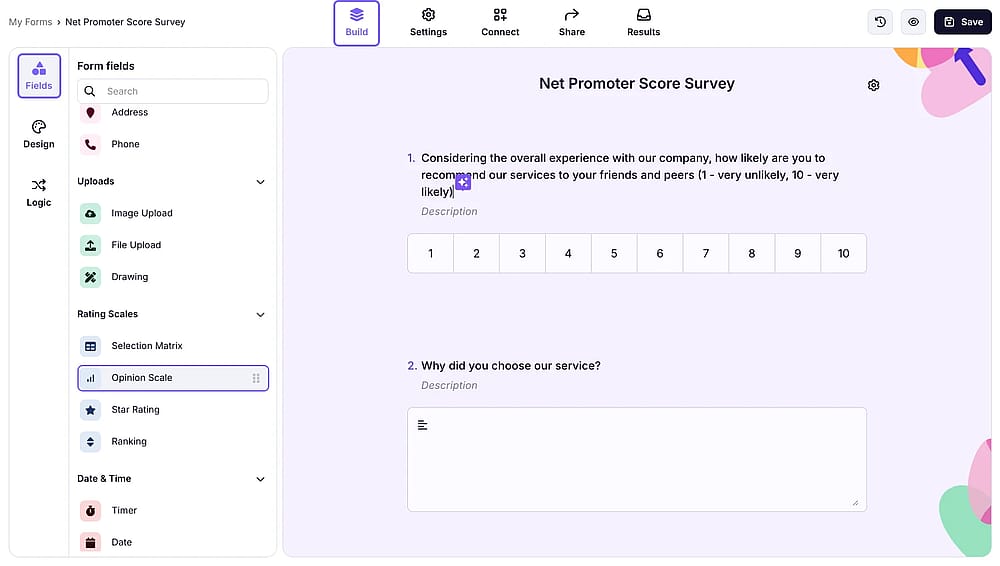
Click the ‘Opinion Scale’ field to add it to your form
Go to the Fields tab within the Build section and scroll down to the Rating Scales heading. From there, select the Opinion Scale field, a highly customisable alternative to the standard NPS question type. Once added, click on the field to adjust the scale, labels, and any other settings to match your survey's needs.
2. Connect your survey to Google Sheets or Microsoft Excel
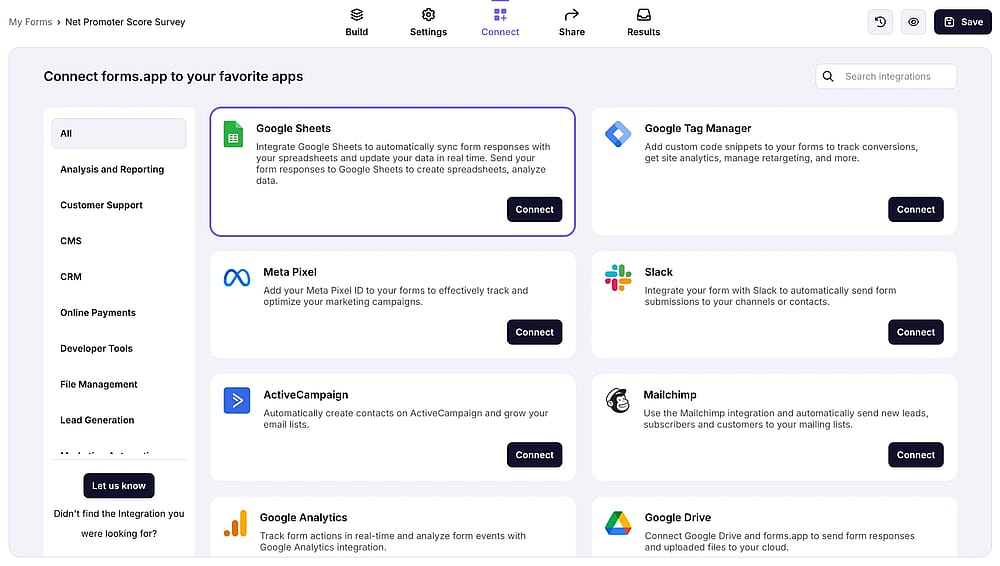
Press the “Connect” button to access the integrations tab
Once your form is ready, go to the Connect section to link your survey to Google Sheets, Microsoft Excel, or any other database your business uses. You can connect to multiple databases at once, ensuring all incoming response data is stored and organised exactly where you need it in real time, as responses arrive.
💡 Expert tip: Connecting your form to a database from day one means you can track how your NPS changes over time, turning a single score into a genuine trend line for your business.
3. Calculate Your NPS using the database
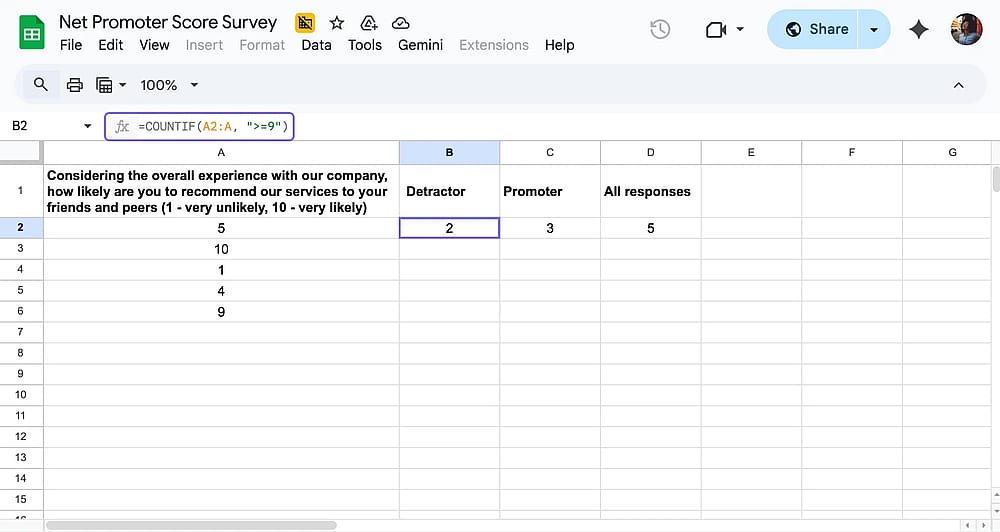
Open the connected database and calculate the NPS with formulas
Once responses start coming in, calculating your Net Promoter Score directly inside Google Sheets or Microsoft Excel is simple. All measurable data from your survey is integrated into your chosen database automatically, so you can analyse NPS data alongside any other responses you have collected.
To calculate your NPS, first classify each response as a Promoter (9–10), Passive (7–8), or Detractor (0–6). Then apply the following formulas in Google Sheets, assuming scores are listed in Column A:
COUNTIF(A2:A, "
=9") → Counts all Promoters
COUNTIF(A2:A, "<=6") → Counts all Detractors
COUNTA(A2:A) → Counts all responses
Final thoughts: One score, endless insights
The NPS gives customer loyalty a number, and Microsoft Forms makes it straightforward enough to start measuring it today. This tutorial has walked you through every step, from setting up your first NPS survey to calculating your score and knowing where the tool's limits begin. Whichever tool you choose, the most important thing is simply to start. The feedback your customers are ready to give is only useful if you are ready to collect it.
Frequently asked questions (FAQs)
Yes, Microsoft Forms supports several form types to suit different goals. You can create a survey for collecting feedback, a quiz for graded assessments, or a poll for quick single-question responses. It is widely used in both business and educational settings, and works with any Microsoft account, including a school account.
Firstly, keep it simple and use clear multiple-choice and choice text rating questions to avoid confusing respondents.
Next, collect essential context like name and product details in the first fields, and always add an open-ended follow-up to capture the reasoning behind the score.
Also, when you select forms to build from, connecting your survey to a database from the start makes tracking your NPS over time significantly easier.
Contributors
Researched & written by
forms.app, your free form builder
- Unlimited responses
- Unlimited questions
- Unlimited team members