How to customize Microsoft Forms (a full guide)
Summarize with
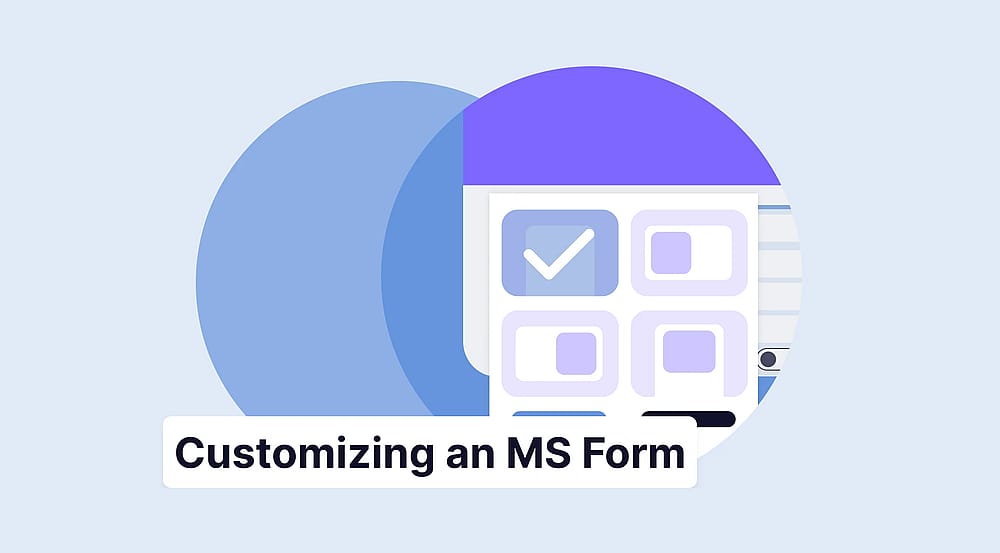
Microsoft Forms is more than just a tool for surveys and quizzes. It’s also a platform you can shape to fit your unique style. By taking the time to design Microsoft Forms, you can make them look professional, engaging, and tailored to your audience’s needs.
In this guide, we’ll cover step-by-step how to customize MS Forms for better usability and branding. From themes and backgrounds to images and layouts, you’ll discover how small design tweaks can make a big difference. The goal is to help you create forms that stand out and improve response rates.
Can you customize Microsoft Forms?
The short answer is: Yes, a Microsoft Forms form can be customized. However, the extent of the customization is limited to the features that Microsoft Forms offers. Within Microsoft Forms, you can make customizations to the following features:
- Question layouts
- Background images
- Background colors
- Stock background images
- Certain question features (e.g., rating symbols)
How to customize your Microsoft form
While the customization processes for these features in the online form builder are straightforward, it's essential to showcase your creativity to stand out from the competition.
1. Customizing the visuals of your form
Click the palette icon
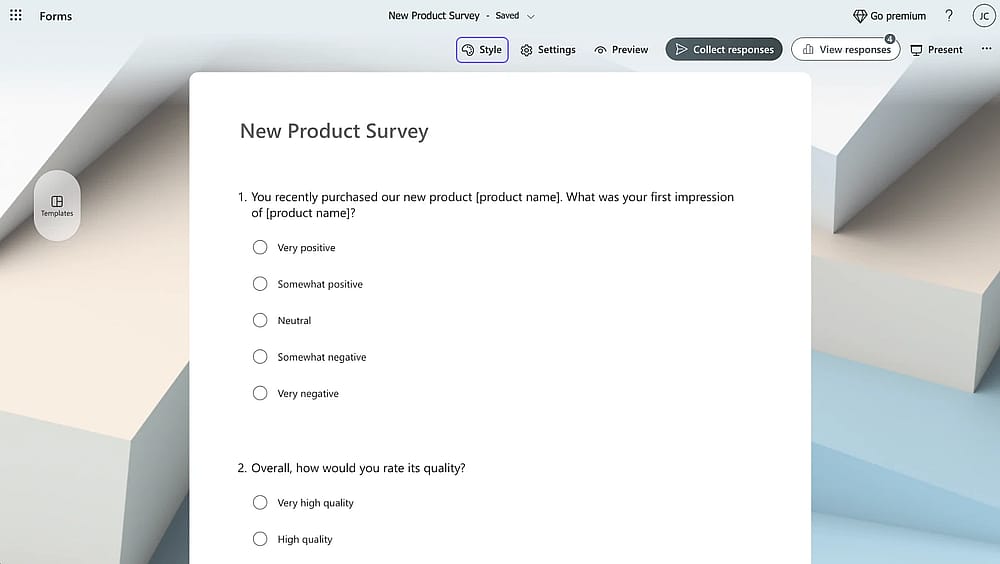
One of the most prominent features when the topic of customization comes up is the visual customization area. To customize the visual aspects of your Microsoft Forms, you must click on the palette icon at the upper right corner.
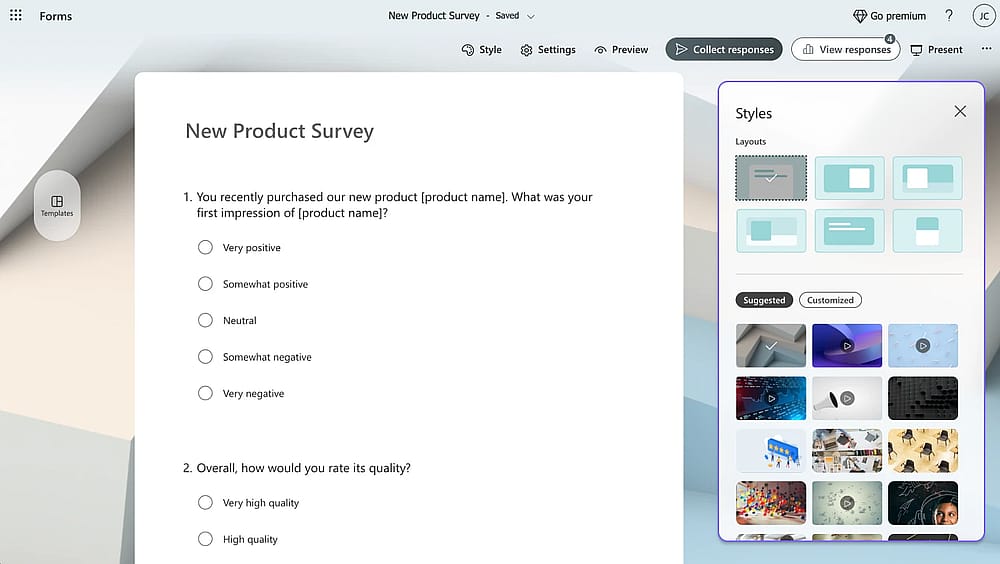
Choose a background
Within the Style menu, you can customize colors and backgrounds, upload an image or a specific color from the color picker, create a customized theme, select from pre-made Microsoft Forms themes for free, or add animated themes. You can even add background music to your form.
💡 You can change the Microsoft Forms background image size by changing the form's layout.
2. Customizing your questions
The second part of the customization process within Microsoft Forms is more detailed. Once you have created a form or have used one of the free Microsoft Form templates and customized the visuals, you can begin the second process, which is customizing the questions themselves.

Customize your question
You can explore the details by clicking on the question and viewing your customization options. Microsoft Forms offers customization options for your questions: You can allow for multiple answers, make the question required, or insert an image into the question. You can also access the question’s specialized settings by clicking on the three horizontal dots at the lower right side of the question and selecting the option that suits your business needs.
Unfortunately, while Microsoft Forms offers general customization options for questions, the amount of control over the details may not be satisfactory for professional designers who would like to showcase their creative expertise. The ability to have control over details matters, especially when the time comes to collect responses and gather quality data.
Try more advanced customization features: forms.app
If you want to take your form creation process to the next level and stand out from the competition, we recommend experimenting with the advanced features of forms.app. With the ability to choose from advanced features in every customization area, forms.app’s form builder offers a unique participation and creation experience for you and your customers.
1. Editing questions
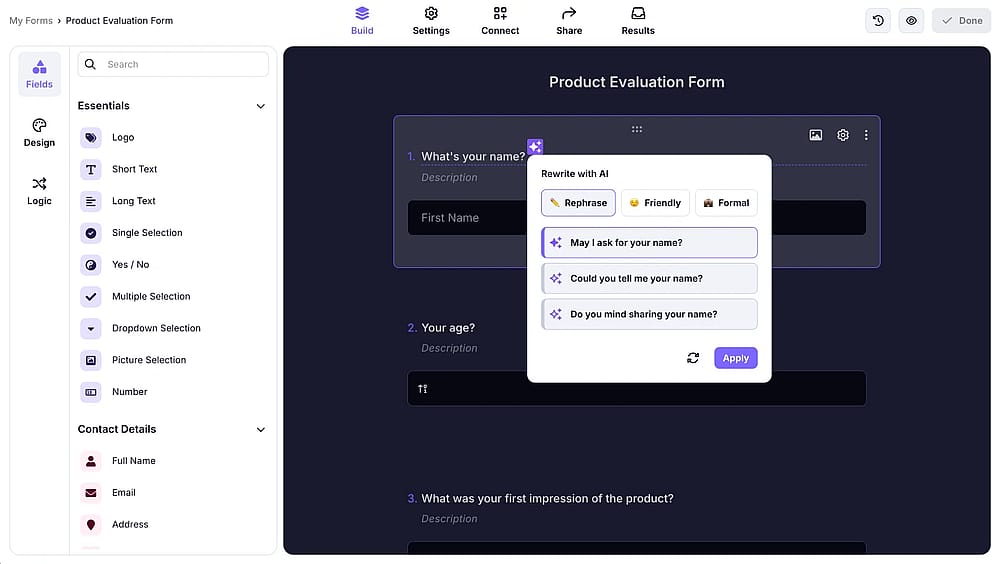
Rewrite your questions with AI
While the standard procedure of adding questions you like or editing the existing ones within the templates still applies in forms.app, by clicking on the question, you can access a dedicated settings menu for that specific question or use the rewrite with AI feature to change the tone of your question or completely rewrite it.
The Rewrite with AI feature allows you to rewrite your question entirely or change the tone to make it more friendly or formal. Once you select which option you would like to go with, our AI offers three options. However, you do not have to worry because if you do not want any of these selections, you can quickly refresh them by clicking the refresh icon next to the Apply button.
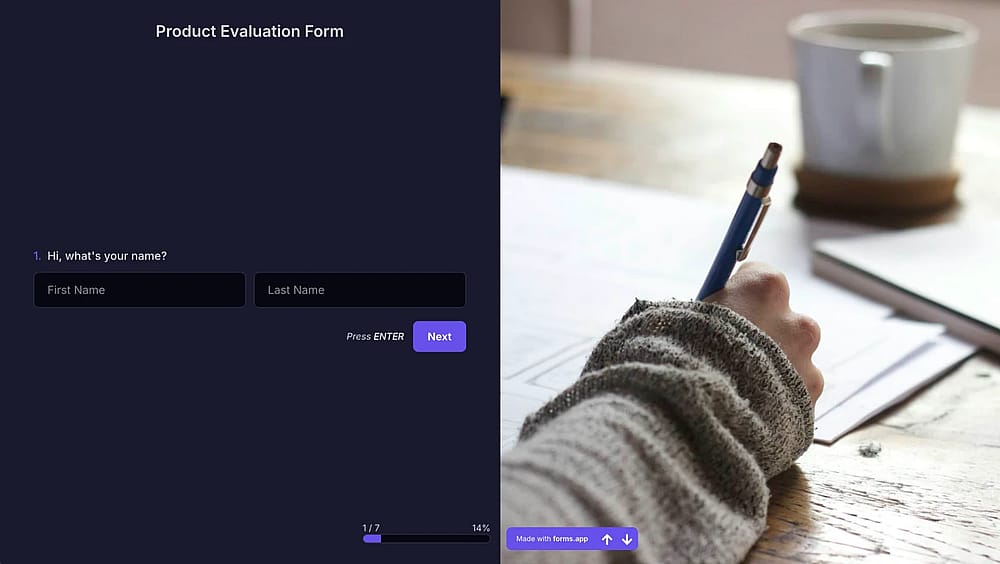
Add images or videos to your question
If you would like to make changes to the visual aspect of the question, you can do so by clicking on the question itself and clicking on the image icon at the top right corner of the question to add any images or videos. Furthermore, you can also head to the dedicated settings menu of the question and change the options, such as making the question required or even having a default answer.
2. Advanced visual customization
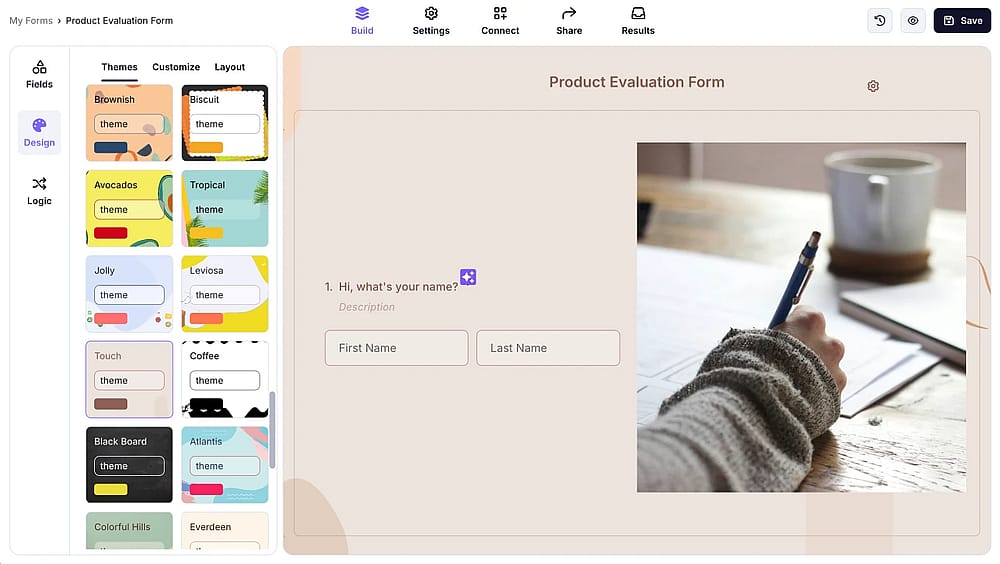
Change the theme
When it comes to visual customization, forms.app does nearly everything. By heading to the Design tab within the Build section, you can access not only standard themes with different color schemes but also animated themes. All of these themes are divided into headings for easier access and selection for different themes that a form may require.
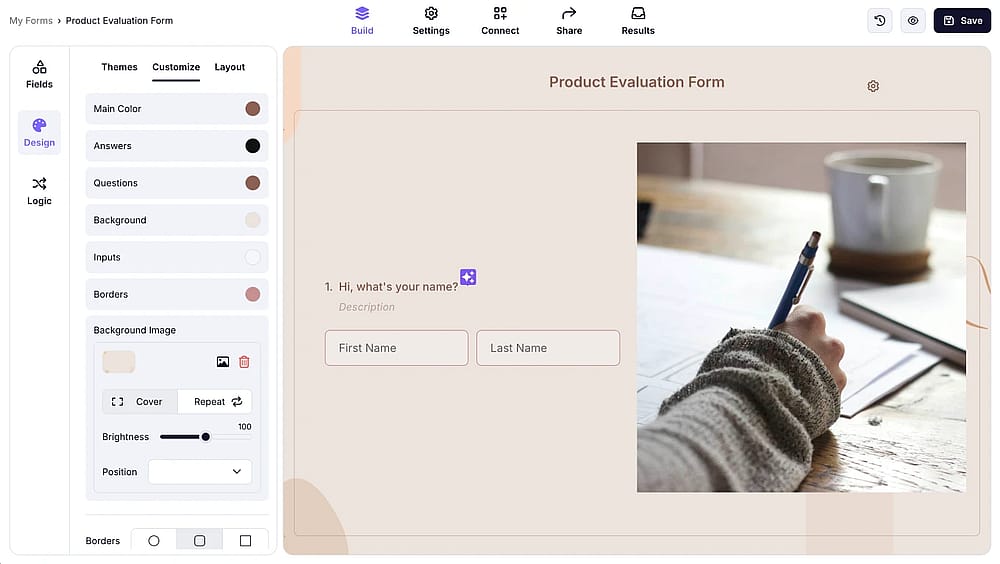
Customize the details
If standard themes are not enough for you and you want to make detailed customizations to your form, you can head to the Customize tab within the Build section. From there, you can change the font, customize the font color by choosing a color from a color palette, change the button alignment, or even add custom CSS and change the form's aspect ratio and how it is presented.
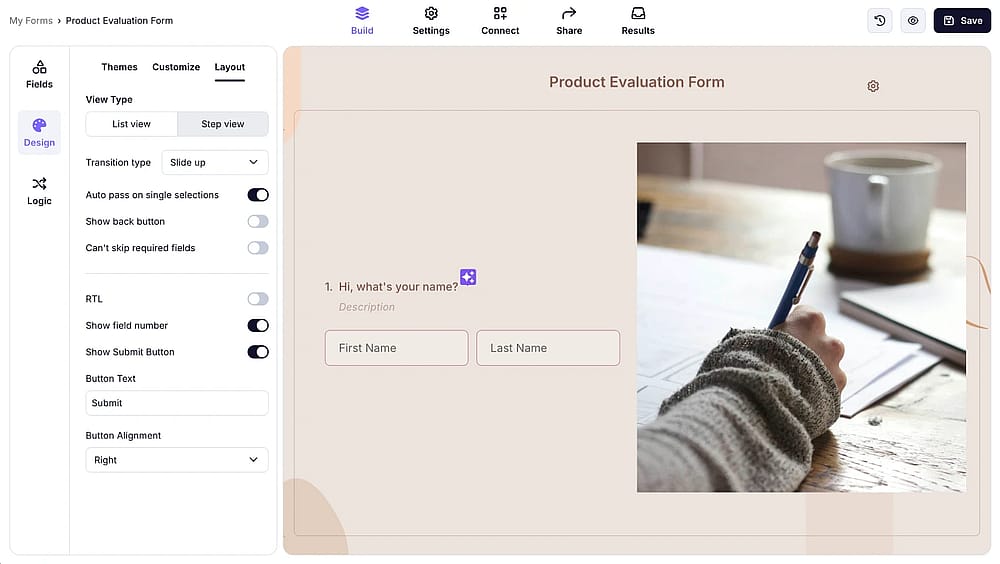
Change the layout
💡 Editor’s note: To make your form look more professional, you can add your brnad/company/organziation’s logo and cover. The feature is free!
Furthermore, within the Customize tab, you can also change the general border-radius and change the settings of the form’s background image. All of these detailed settings allow you to showcase your creativity and give you the possibility of standing out from your competition.
Frequently asked questions about Microsoft Forms customization
Whether you are customizing your Google form or your Microsoft form, paying attention to the details is key. The best way to understand what matters most is by listening to your audience and the questions they raise. To make things easier, we’ve gathered the most common questions about customizing Microsoft Forms and answered them for you.
You can customize the form style in Microsoft Forms by clicking on the palette icon at the top right corner of the form creation page and heading to the Style menu. Within this menu, you can make changes to the theme and layout and even add background music.
While the saying “Beauty is in the eye of the beholder” is used frequently and is a primarily correct argument, you must still make changes to make a form look good to you. You can make Microsoft Forms look good by customizing its theme, adding background images, and choosing colors that match your brand. Clear layouts and thoughtful visuals make the form more engaging and professional.
To make your form more professional, the safest approach is to choose primary colors that will not divert attention from the form itself and use professional language in your questions. However, if you are confident in your abilities, there is nothing wrong with experimenting with different themes and colors.
Conclusion
Making the right customization decisions regarding your form can be the deciding factor in whether you will collect the right amount of high-quality data or not. Furthermore, it should be kept in mind that a form's customization is not just in the visuals; even changing the settings to customize the form experience is a part of customization.
In this article, we have examined whether you can customize a Microsoft Forms form, how to customize it, and a better way to create and customize forms with the advanced features of forms.app. We have also examined the details of form customization by answering some frequently asked questions.
It is now time for you to create the most personalized form and stand out from competitors!
Contributors
forms.app, your free form builder
- Unlimited responses
- Unlimited questions
- Unlimited team members