Collecting necessary information can be the difference between winning and losing your customer base. A well-developed survey or form can increase engagement, help you acquire crucial details, and guide your organization to the right path. Based on this information, using a checkbox grid within your questions in Google Forms can add significant value to your information-gathering process.
In this article, we will look at what a checkbox grid is, when and how to use checkbox grids in Google Forms, and how to create a checkbox grid in several steps. Without wasting time, let’s start with the definition!
What is a checkbox grid in Google Forms?
Checkbox grids are questions where the participant must choose one or more options for each sub-section.
Checkbox grids are primarily used on surveys or forms where the organization wants to gather data about customers’ preferences. They may allow respondents to choose between multiple answer options.
Different from multiple-choice questions, checkbox grid questions can also be divided into rows and columns, where the creator can place additional questions and answers to other parts of the survey for a more detailed data-collecting experience.
When to use checkbox grids?
Checkbox grids are a way to customize Google Forms. However, they are more than just a means to appeal to an audience visually. They can also be a way to collect information. Some designers even select multiple grid questions that require a response with various stages to get as much detail as possible in essential situations.
Some possible response options for checkbox grid examples include:
⏰When learning the level of agreement of your supporters with a statement if you are a political party.
⏰When trying to gain information about several products and which products customers prefer the most if you are a food service chain.
⏰When filtering data or eliminating a feature based on the acquired feedback from customers, if you are a game design company,
⏰When getting information about the coding languages that a potential employee is proficient in if you are a hiring manager.
How to create a checkbox grid in Google Forms (in 5 steps)
Creating a multiple-choice Google Forms checkbox response, also known as checkbox grids, is relatively straightforward. As this customization feature focuses only on the responses to the questions, there are few details to remember or not many confusing steps. There are only 6 steps to follow if you want to create a Google Forms checkbox with short answers to get you the information your organization needs:
1. Start from scratch or use a template
After you open Google Forms, you can choose between two options: Start from scratch and design an entirely new form, or use a free form template. If you want to use templates, you can access them by clicking “Template Gallery” at the top right corner.
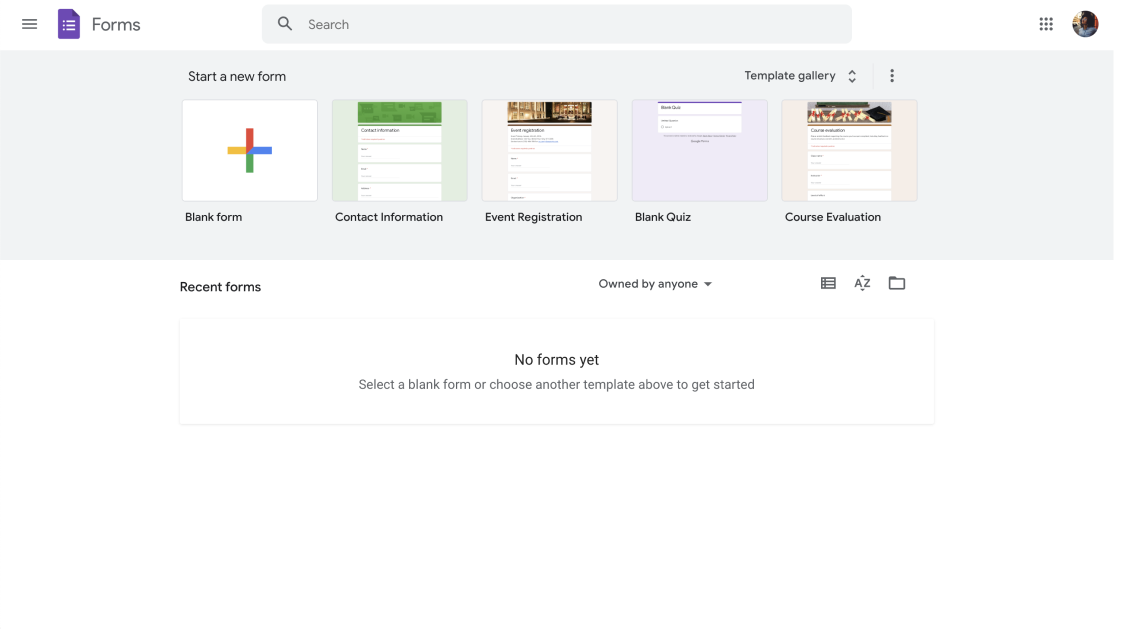
Choose a beginning option
2. Add your questions
You can add your questions and answers after starting with a template or a blank form page. Writing your own questions is better if you want to add checkbox grids because you do not have to change the answers themselves. You can even set a limit on adding a checkbox grid or changing the number of responses per column.
💡Check out our article on how to add a linear scale question in Google Forms and learn how to add different types of questions.
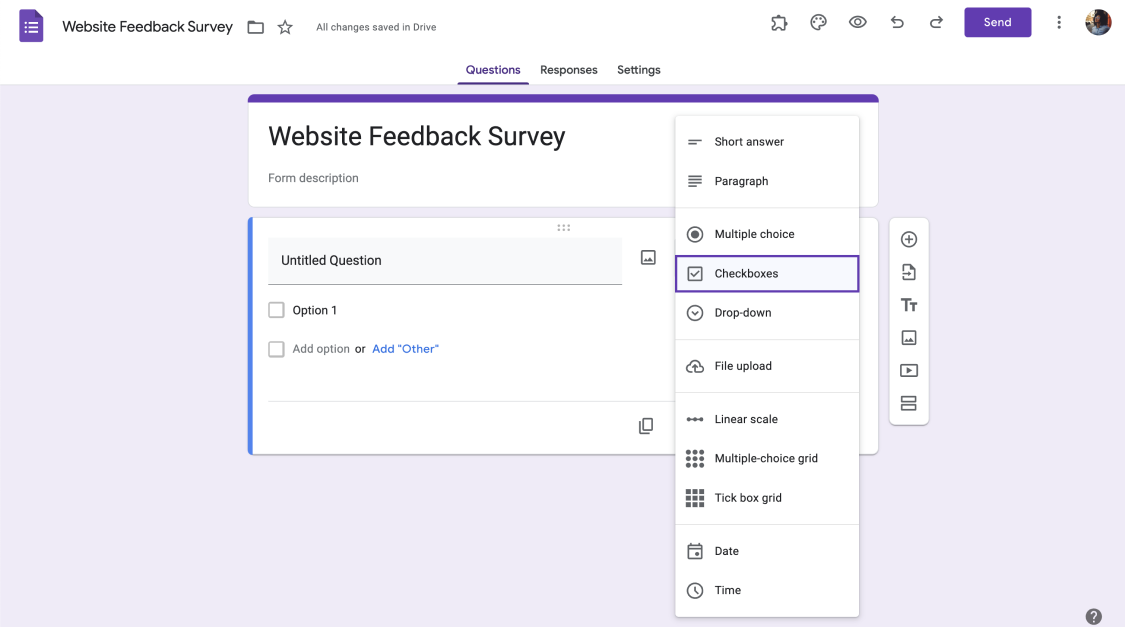
Choose checkboxes
3. Edit your questions
After you add your questions, you can reformat your answers using the customization feature for every question. If you are working on a blank form, you must first add your question to the Untitled Question space and then access the customization section. To access the individual customization section, click on any question you would like to customize.
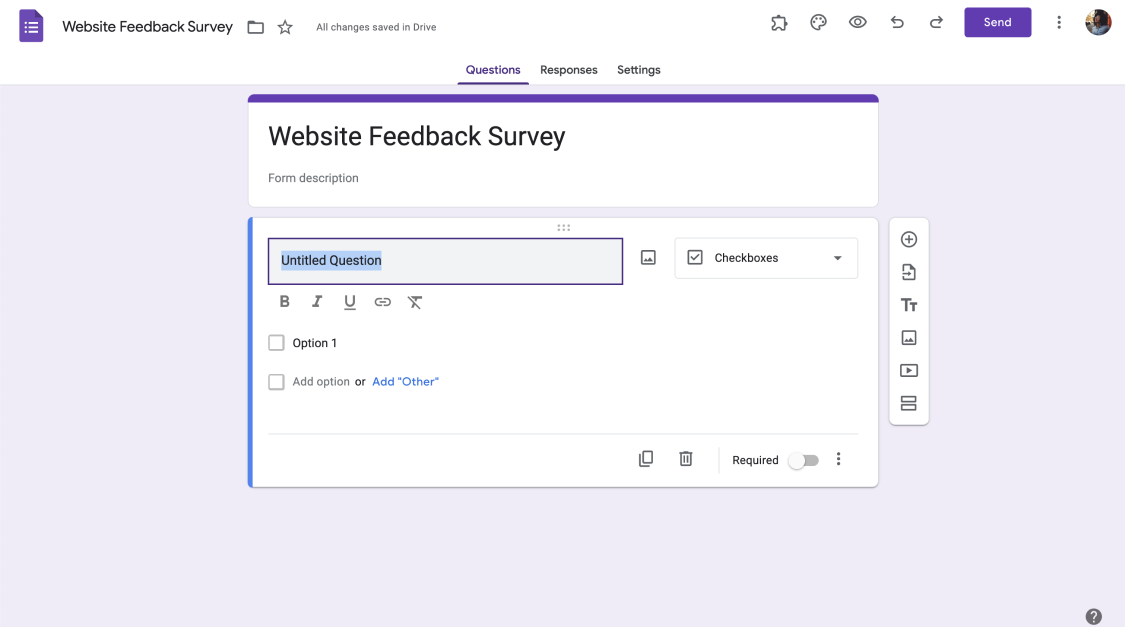
Add your own questions
4. Edit your checkbox grid
After creating your checkbox grid question, you can then start editing within the question. The edit options allow you to change individual answers, answer options, or even add a picture to each question. Furthermore, you can also toggle the Require a response for each row option so the respondents do not accidentally miss a question while filling out the form.
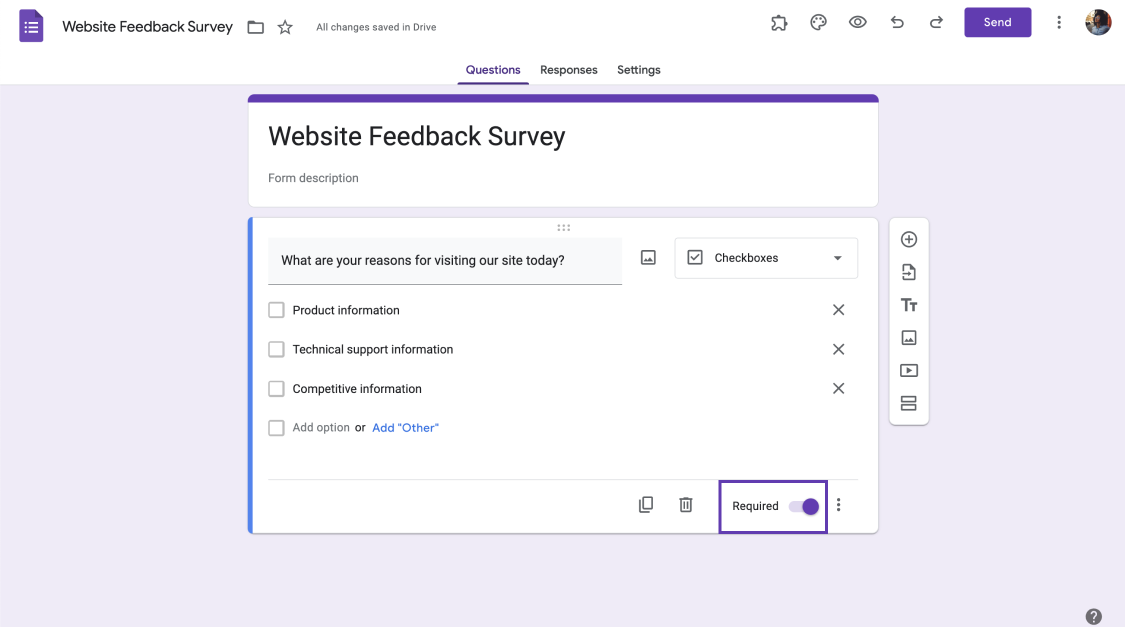
Toggle the required option
5. Preview your form and share
After everything is done, you can preview your form to see it from a respondent’s perspective. To access the preview section, click on the eye icon at the top right of the form. Afterward, check your form for any mistakes or changes that should be addressed and share it with your customers.
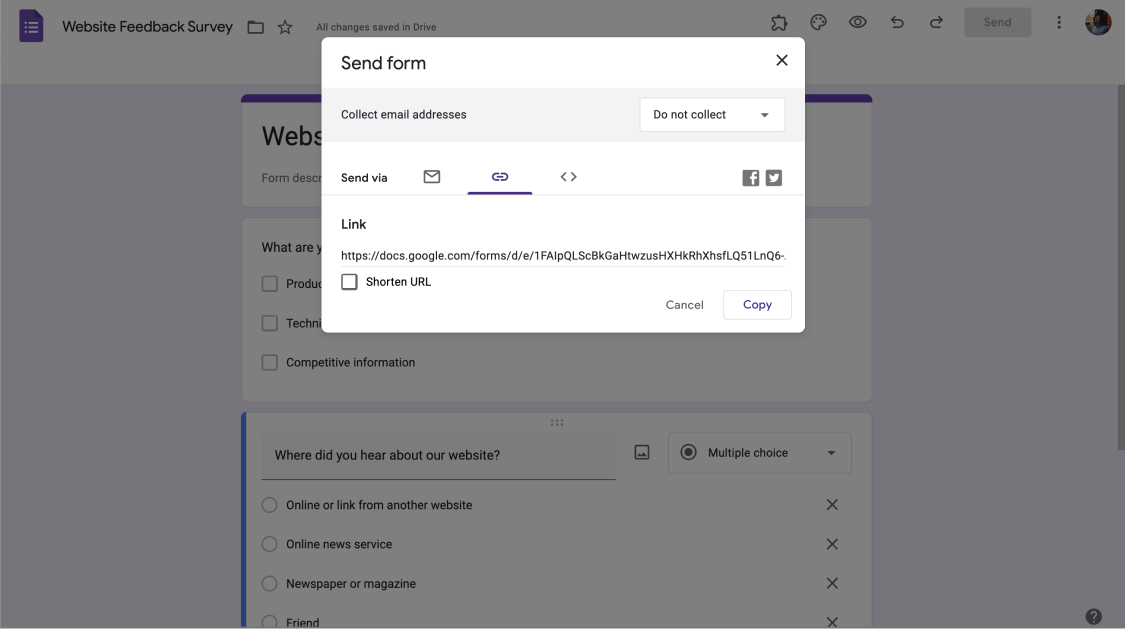
Share your form
How can forms.app help you create better forms?
While creating checkbox grid questions may seem simple, there is room for improvement and optimization. That is why forms.app has realized the places for improvement and implemented optimizations to make the process even faster and easier.
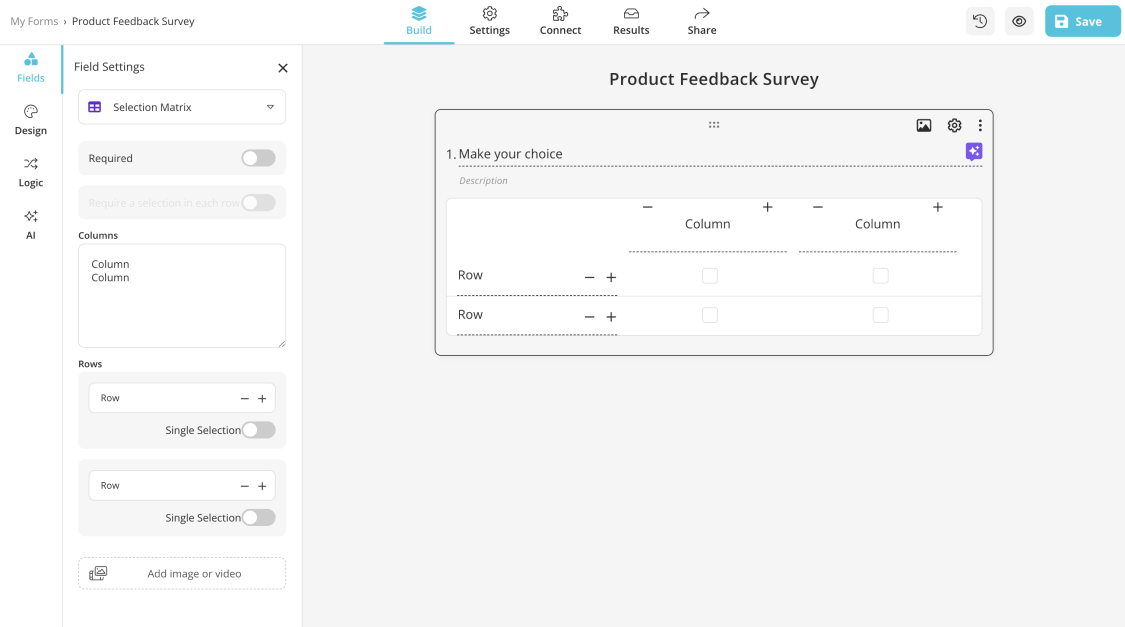
Advanced options of forms.app
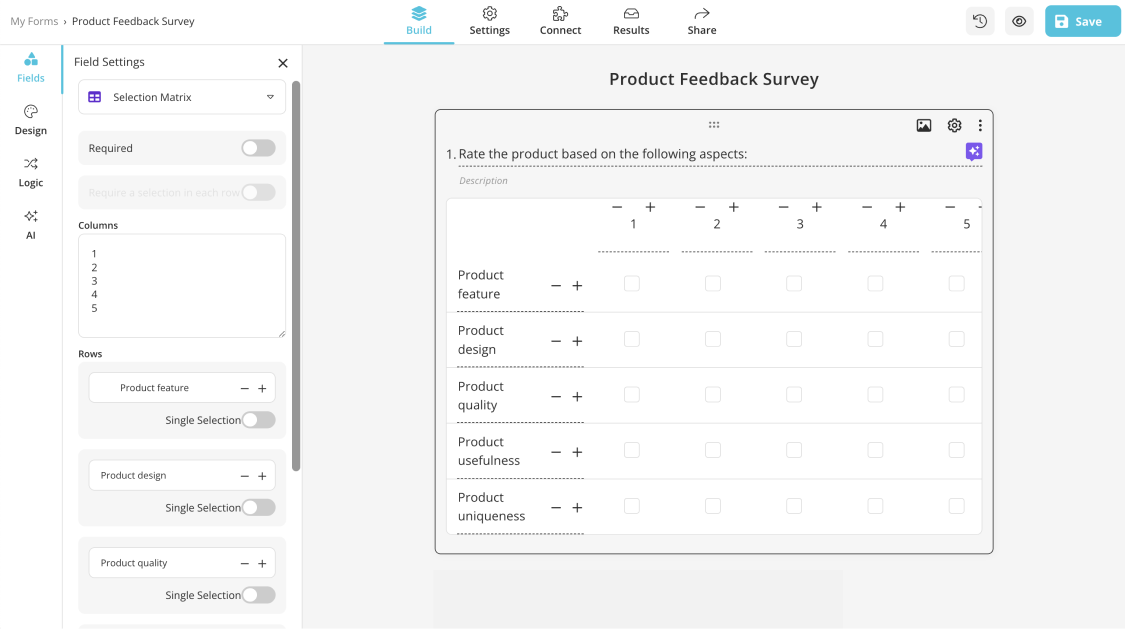
When you are creating a form on forms.app, and you would like to add a checkbox grid question, you do not have to add a blank question first, then write your question, and then turn it into a checkbox grid question. You can simply scroll down at the left side of the Build tab, go down until you see the Rating Scales menu, and then click on Selection Matrix.
Various types of questions
The Selection Matrix will automatically add a checkbox grid question where you can customize many things: You can add or subtract columns using the plus and minus signs or give each column or row a different name, so you do not have to deal with multiple questions simultaneously.
💡You can even change the individual settings of the question from the gear icon or let forms.app AI helps you every step of the way.
Conclusion
Adding a checkbox grid question will help you gather more detailed information, add value to the overall design of the form, and help customers have a more engaging experience while filling out your forms. Furthermore, it is also a great way to have multiple questions in one to save time and space.
We have looked at what a checkbox grid is in Google Forms, when to use them, how to create them in 5 simple steps, and a better alternative for creating checkbox grids and forms in general: forms.app. Creating forms with forms.app gives you a much smoother and more accessible experience every step of the way. So, try them both and see the difference!
Yakup is a content writer at forms.app. He is also a skilled translator. His hobbies include reading, learning about different languages, and different branches of sports. Yakup's expertise lies in translation, NoCode tools, and Google Forms.
