Google Sheets is a game-changer for many businesses. Thanks to it, businesses can save useful data and use it for later. The right and effective usage of Google Sheets is such a powerful tool for companies/businesses or organizations. To take advantage of effective data management, you need to pay attention to some points.
Checkboxes are only one of the ways of using Google Sheets efficiently. In our article, we have prepared the easiest ways to create checkboxes and a guide to how you can use them better. Moreover, you will see the reasons to insert a checkbox in Google spreadsheet, frequently asked questions about the issue and more!
Why use the checkbox in Google Sheets
Google Sheets formulas make business jobs much easier. Google Sheets is an excellent tool for storing your essential data from minor to major. However, you need to keep all your data organized to take advantage of them. The Google Sheets checkbox is a good way to achieve this.
Checkboxes in Google Sheets let you know whether you have completed the task. It is also a good way to identify the active and inactive data. Apart from all these pros, check boxes in Google Sheets let you see the big picture when you see the page.
💡If you want to learn how to make line graphs in Google Sheets, check out the article.
How to create checkboxes in Google Sheets (in 4 steps)
Now that we have learned the reason to have checkboxes in your sheet, we can continue with how to create them. As long as you follow the steps given below, you can easily create checkboxes in your Google Sheets in seconds. Here are the steps to learn how to add checkboxes in Google Sheets:
1. Open Google Sheets
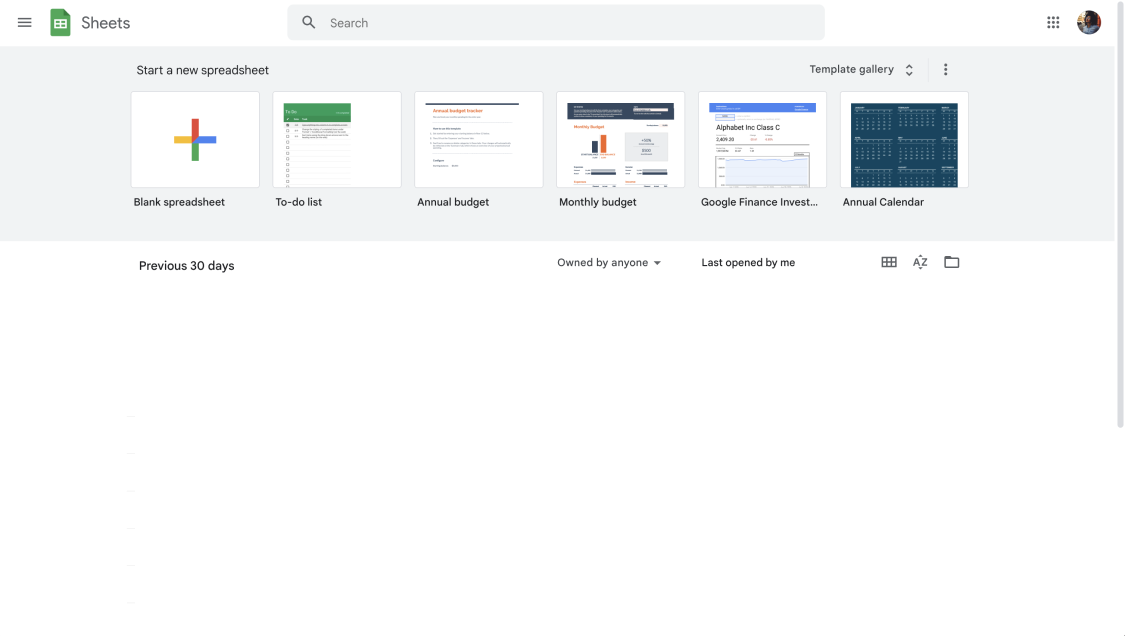
Google Sheets dashboard
Firstly, you need to sign in to your Google account. If you do not have any, you can create one and continue. After that, open Google Sheets to view the specific sheet you want to add checkboxes.
2. Select the cells to apply
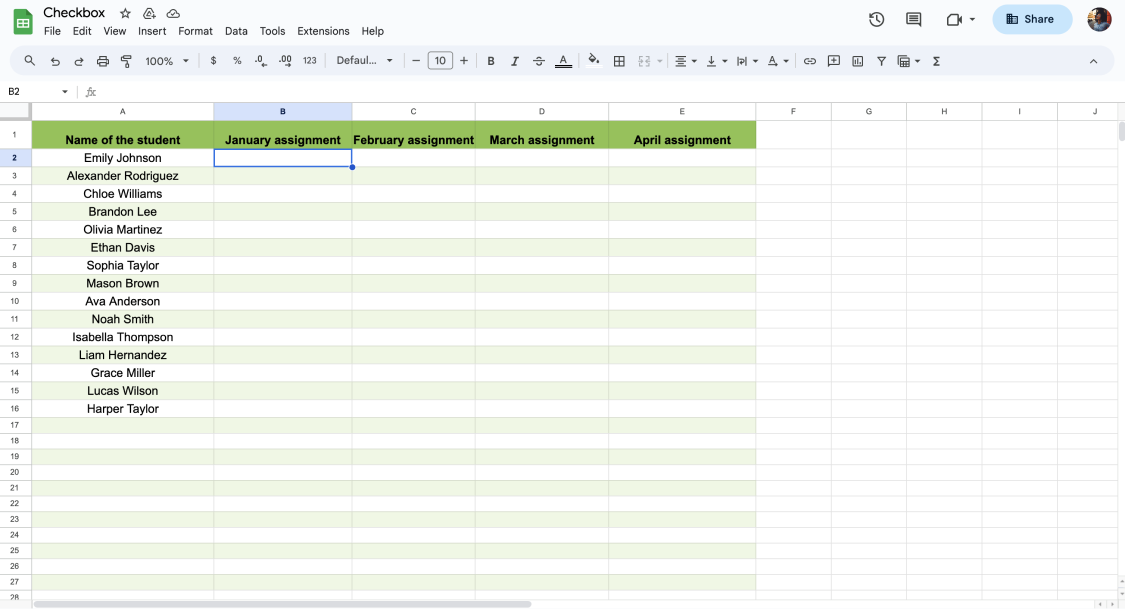
Select the cell for the checkbox
In this step, you basically need to decide on which cell or range of cells you want to add checkboxes. After deciding, you need to click the blank cell before getting started on the other steps.
3. Insert the checkbox
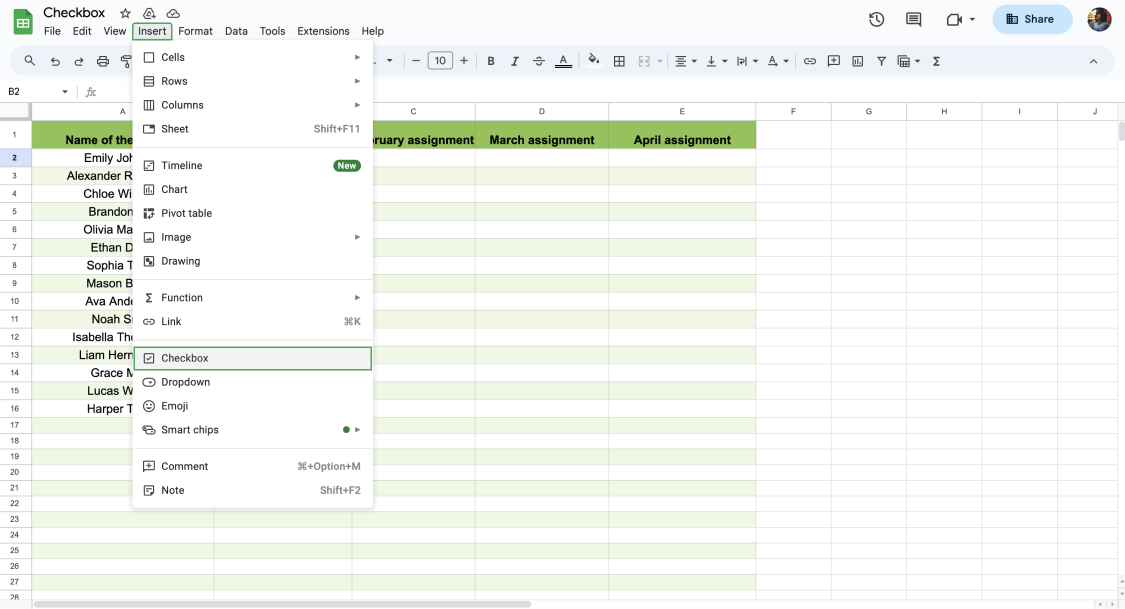
Insert the checkbox
In this step, you must find the Insert tab and choose the Checkbox. And that’s all! If you want to add more checkboxes, you need to select data that contains checkboxes, hold the small circle on the right bottom and extend it as much as you need. If you need custom cells, you can go on with the next step.
4. Add custom rules
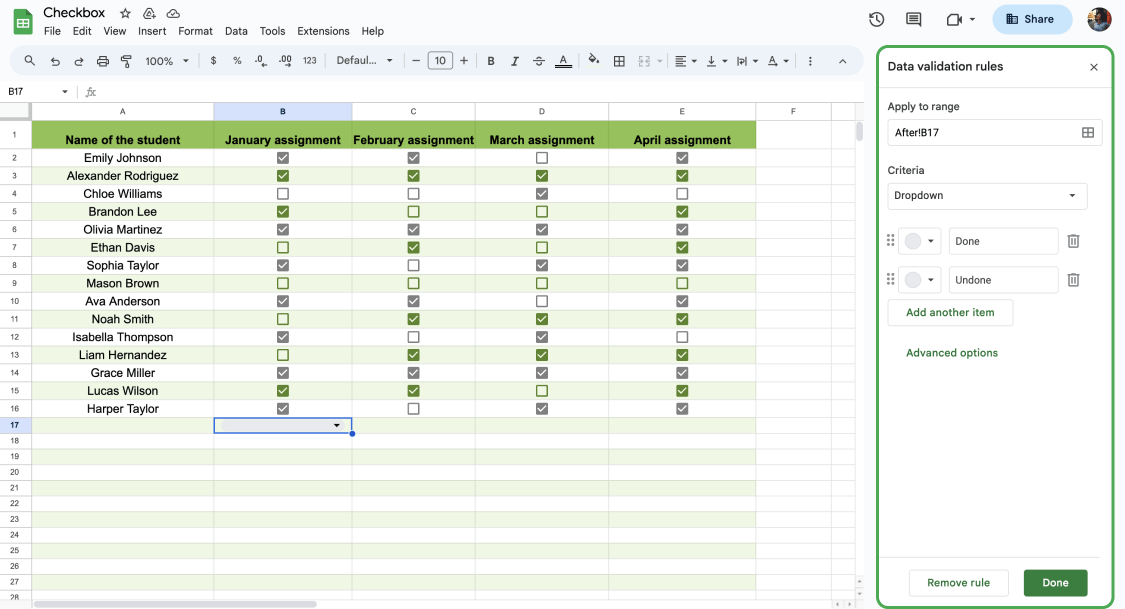
Add validation rules if you need
You can easily create checked or unchecked boxes, as we have discussed in the previous steps. However, you can personalize the details based on your preferences. On Data validation rules, you can change criteria and transform them into a drop-down if you need to. For example, you can make a dropdown list consisting of 2 variables (true and false, done or undone, etc.).
💡If you use a dropdown list instead of checkboxes, do not forget to change the colors. Check out our article on how to make a drop-down menu if you want to learn more.
Frequently asked questions about checkboxes in Google Sheets
You have learned how to create checkboxes so far. However, you still might have some questions about the issue. Under this title, we will not leave your questions unanswered. To check some frequently asked questions about checkboxes in Google Sheets, have a look at the questions given below:
Conditional formatting is possible in Google Sheets. You need to follow these steps to make a conditional checkbox in Google Sheets:
1. Select the checkboxes
2. Choose Format from the toolbar and click Conditional formatting
3. From the format cells if drop-down menu, find the Custom formula is.
4. In the Value or formula field, you can type the formula: =cell reference=FALSE. To give an example, you can adapt the formula as =C4=FALSE based on your sheet.
5. Select the Formatting options for the checkbox’s checked status and click done.
You can customize the checkboxes that you created on Google Sheets. All you have to do is to follow the steps given below:
1. From the toolbar, find Data and click on Data validation.
2. Choose Checkbox from Criteria.
3. Click Use custom cell values and enter a value.
4. Enter a value next to Checked or Unchecked.
5. Save the preferences.
Spacebar Key is all you need for this. You can hold and choose multiple cells and click the Spacebar key to make them checked or unchecked. To choose multiple cells, you can also click the cell and hold the Shift (Command ⌘ for Mac).
In short
To wrap it all up, Google Sheets has a huge role in businesses/companies or organizations using this tool for data management. As long as you know how to manage your data effectively, you can plan your route better. To succeed in this, learning Google Sheets hacks to use it better matters.
In our article, we aimed to share a complete step-by-step guide with you on how to make checkboxes in Google Sheets. Also, we included why to use checkboxes in Google Sheets and frequently asked questions (FAQs) about the issue. Now that you know everything about the checkboxes, you can take action now and create your own!
Şeyma is a content writer at forms.app. She loves art and traveling. She is passionate about reading and writing. Şeyma has expertise in surveys, survey questions, giveaways, statistics, and online forms.
