One of the first platforms that comes to mind for creating forms is undoubtedly Google Forms. You may create forms for topics such as evaluation, request, application, payment, exam preparation for your class, business, or research.
The opportunity to create free exams or quizzes on Google Forms encourages educators to use this platform. But how can educators new to Google Forms or creating forms use this platform? In this article, you will learn how educators can prepare exams, event registration forms in Google Forms, and more.
How can educators use Google Forms?
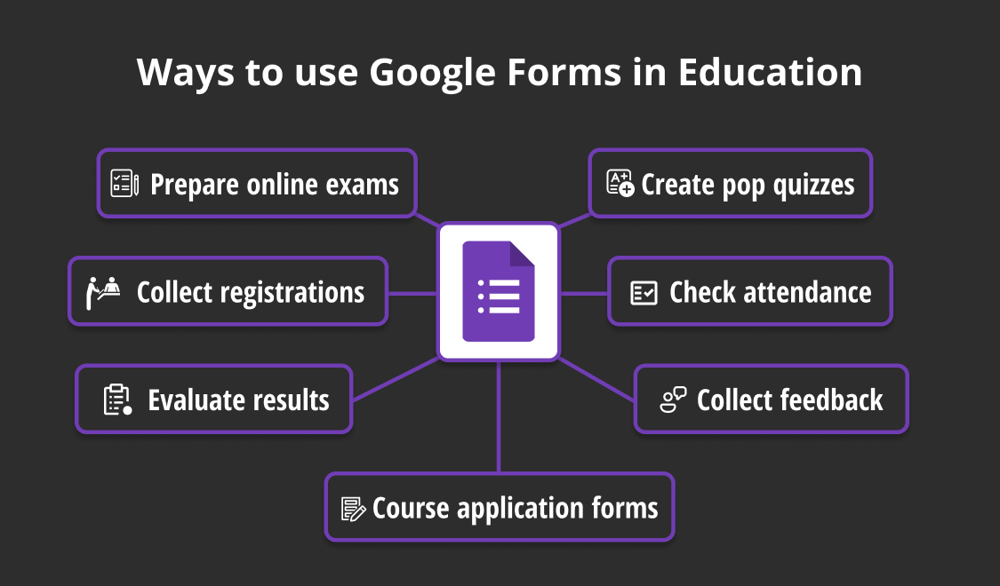
Ways to use Google Forms in Education
Google Forms is a tremendous help to educators for a variety of purposes. Educators can use it to:
- prepare online exams
- create pop quizzes
- collect registrations
- check attendance
- evaluate results
- collect feedback
- and course application forms
Online forms can also be a good choice in terms of easily delivering to students and checking the results. Here are Google Forms for school administrators; check below to learn in detail which fields and features you can use:
1. Creating online exams or quizzes in Google Forms
You may have difficulty finding a free and reliable site when preparing for online exams. Convert and professionalize the forms you create on Google Forms into online quizzes by customizing and adding your own questions. To create quizzes or exams in Google Forms, follow the steps below:
a. Log in to Google Forms
Log in to Google Forms with your Google account. If you don’t have an account, create one for free. Browse Google Forms' ready-made templates in the template gallery or choose to start with a blank form.
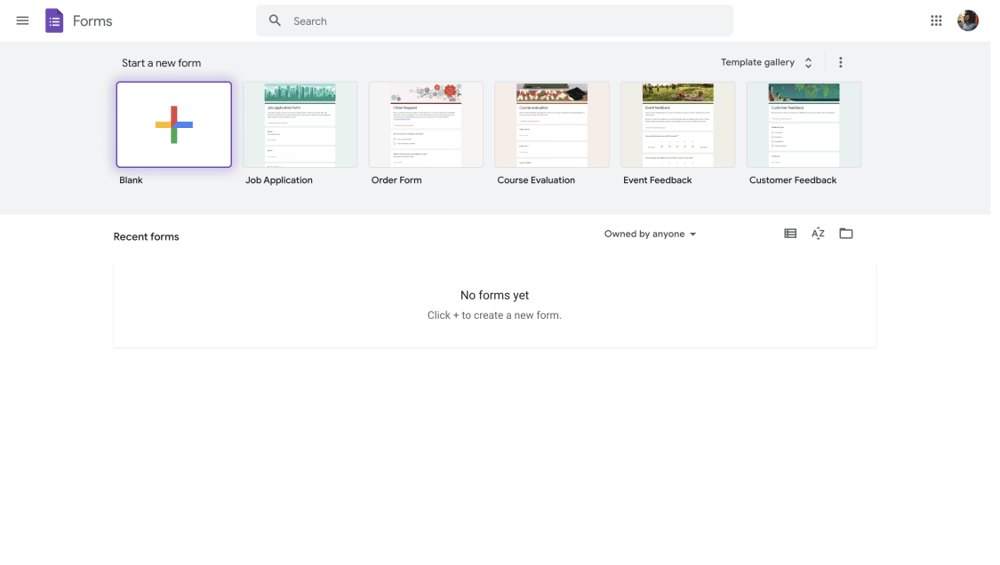
Sign in and create a form in Google Forms
b. Add your questions
Choose your question types according to the exam content you will prepare. For example, you can select from multiple-choice, dropdown, or short-answer options. For cases where images such as primary school are used often, you can upload pictures by clicking the icon on the right of the question options, and you can also prepare options consisting of images.
Make some questions required by clicking the required button under the question box. You can also prepare questions that will measure your student's listening skills by adding the videos you want by clicking on the add a video section in the menu on the right.
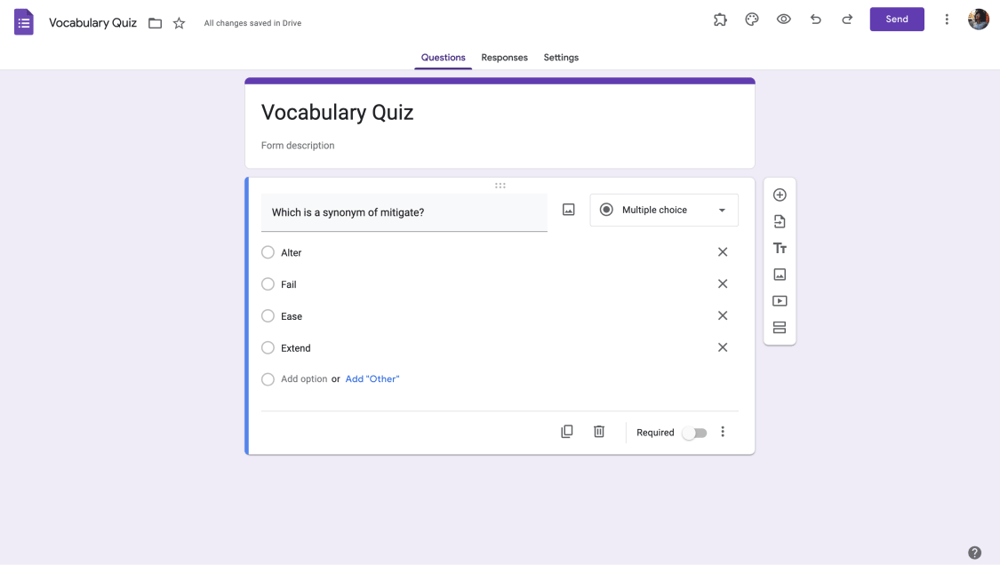
Add question to your Google Form
c. Enable the quiz mode
Google Forms comes with a quiz mode that you can manually enable. Just click on the settings menu at the top. Activate the Make this a quiz button on the page that appears. You can automatically send the results in the posting section of the notes in the menu or set them to be sent later.
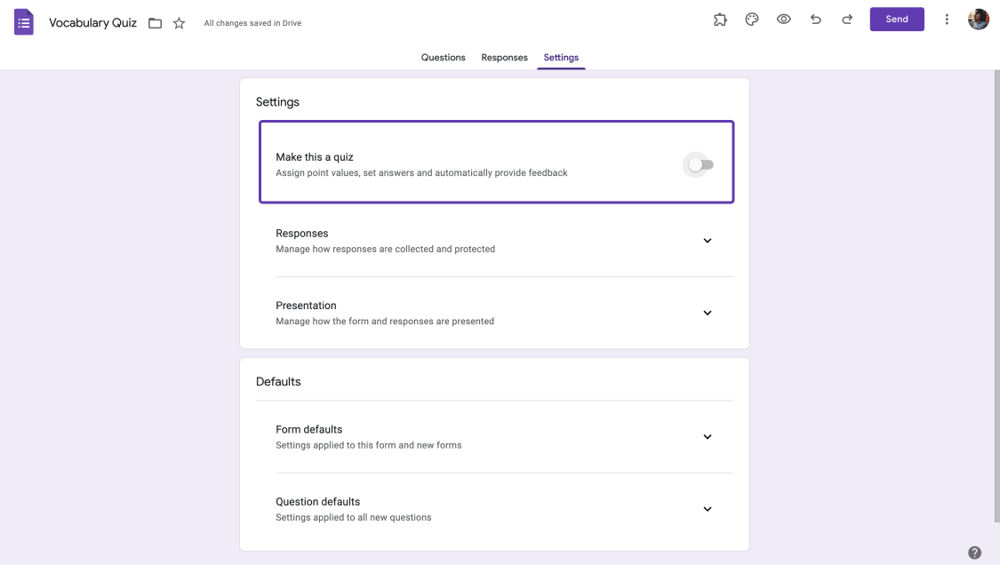
Turn your Google Form into a quiz
d. Add score values to your questions
Customize your exam questions by choosing an action when they are left blank or answered incorrectly. You can also add point values in the same menu. By doing so, you can assess the test scores manually or leave them to Google Forms.
🎓You can collect email addresses and allow edits after submitting in Google Forms
e. Share your quiz with your students
After completing all your changes, click the save button and share your form with your students with different options. You can determine the email addresses of your students according to the participant entries in the e-mail address collection section and share your quiz.
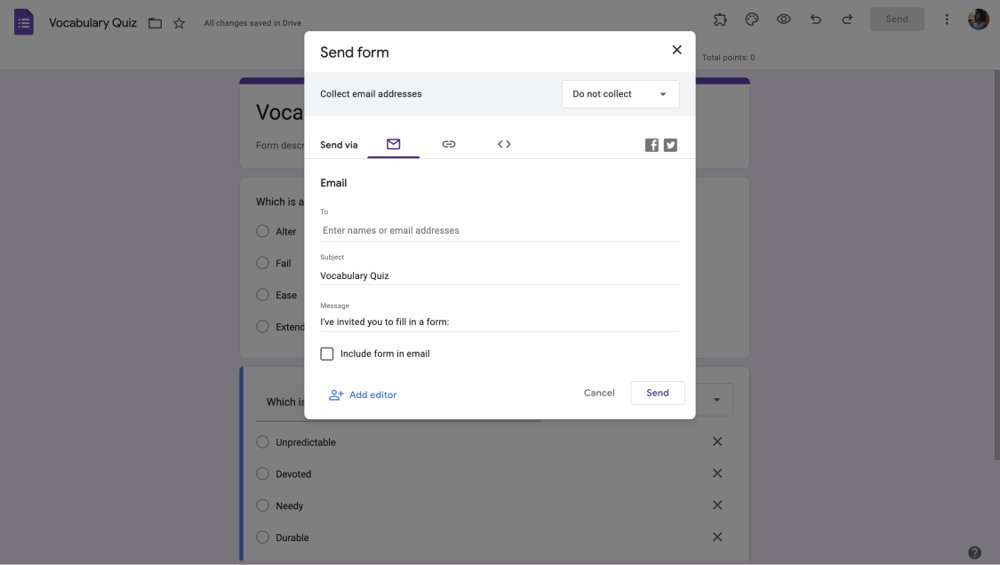
Share your quiz
2. Creating event registration forms
If you are an educator, creating an online form for school, courses, or out-of-school event registrations makes your job much easier. For example, let’s imagine you are organizing a 1-day trip with your students. Creating a registration form in Google Forms allows you to easily and quickly collect and organize records by sending them online to your students or parents.
a. Log in & create a Google Form
To create your event registration forms in Google Forms, first, you need to log in to Google Forms or create an account with your Gmail. Then, choose one of the registration form templates of Google Forms or start with a blank form. After choosing your form, you are now ready to customize it.
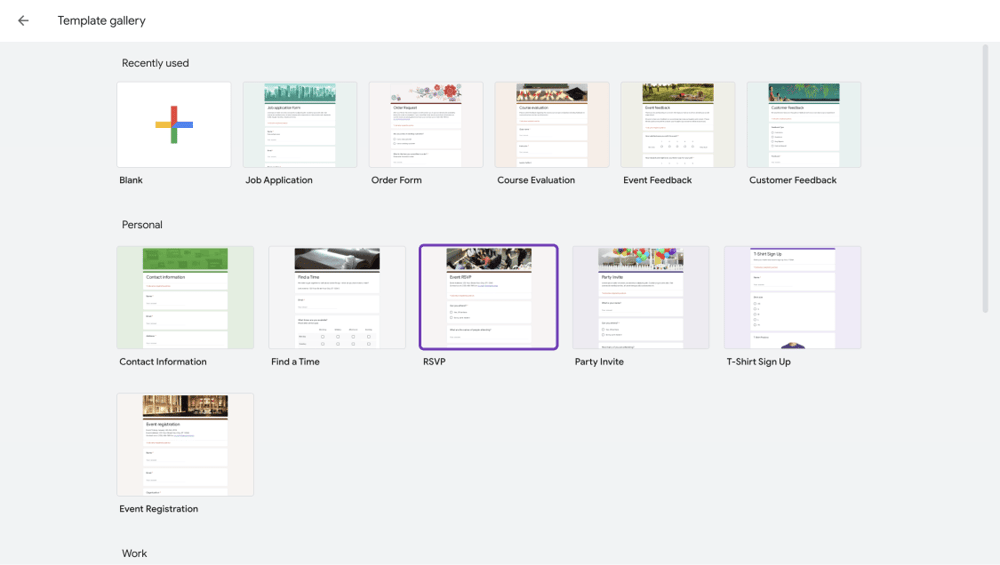
Log in and create a form for event registrations
b. Customize your form
Browse the questions in the ready-made template, add new ones, or remove the ones you want. Make your form professional by adding logos or images related to the event being prepared. Lastly, customize how your form looks.
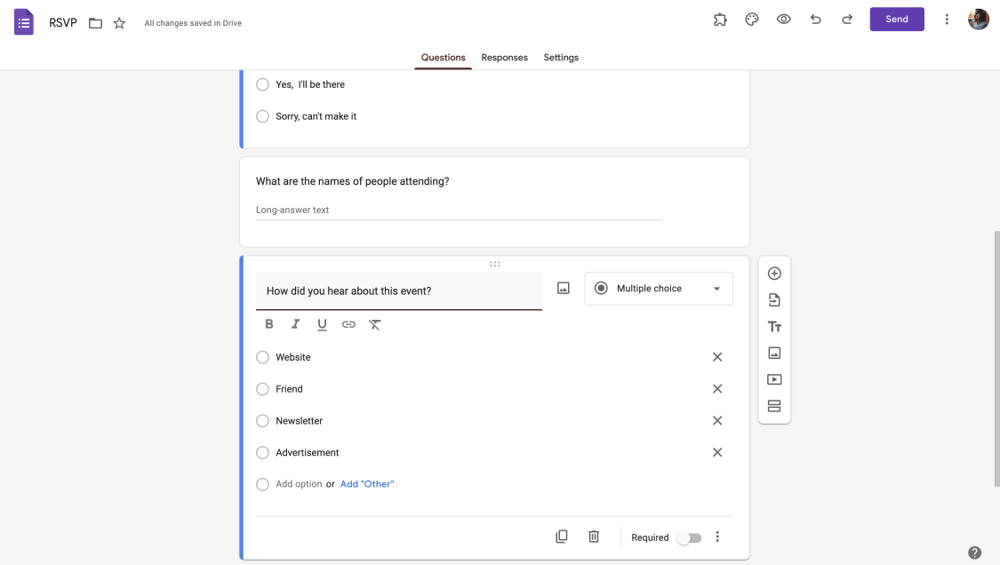
Customize your Google Form
🎓 If the event is paid and you like to collect payments on Google Forms, you will need an add-on, as Google Forms does not have a payment field.
3. Creating a student feedback form
As an educator who runs online courses, collecting feedback from the students participating in your course is essential. Google Forms can be advantageous for you as it is free. To create a student feedback form using Google Forms, follow the steps outlined below:
a. Log in to Google Forms
Firstly, log in to Google Forms with your Google account. If you don’t have one, you can create free of charge quickly. You can look at Google Forms' feedback form templates in the dashboard or start with a blank form.
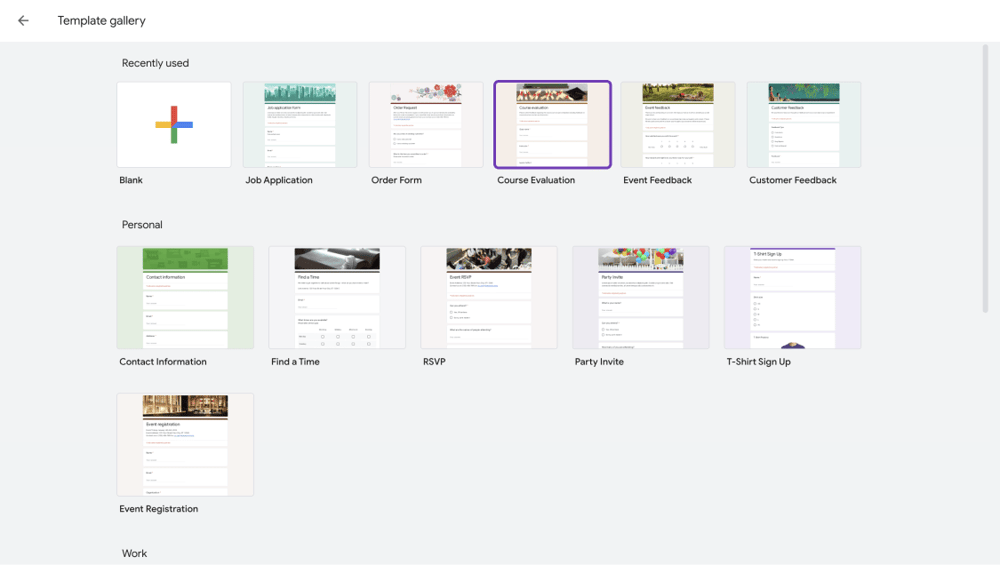
Log in and create a form to collect student feedback
b. Add questions and customize your form
Add and sort your questions about the information you want to collect. You can convert your questions into question types such as multiple choice, dropdown, or short text. Activate the required button for the questions that must be answered. Click on the palette icon at the top to customize your form theme.
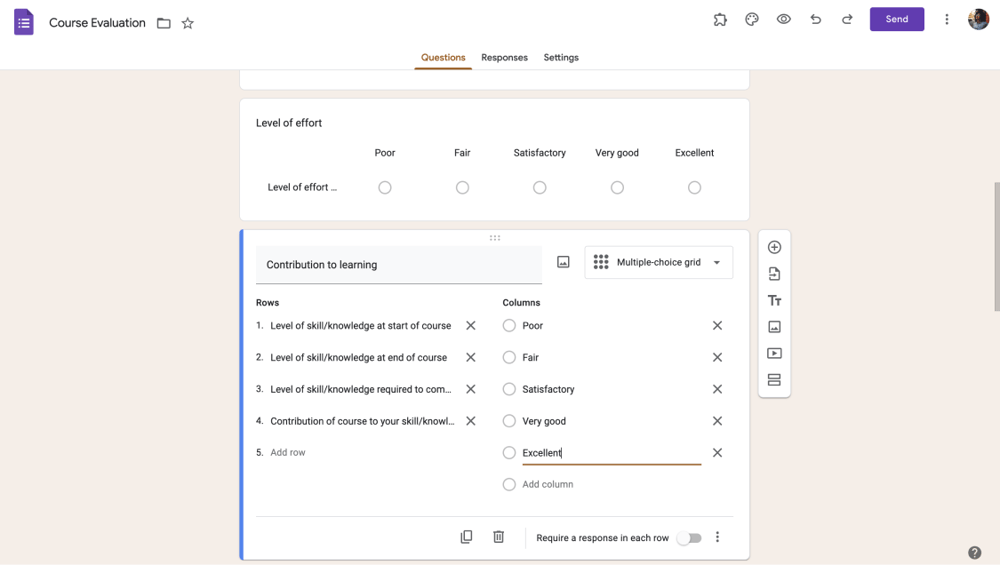
Add questions and customize your feedback form
c. Share your feedback form
After completing all the changes, click the send button above. You can start collecting feedback by sending the form to all your students with the email option. Automatically collect e-mails of people who fill out the form with the collect e-mails option above; you can use social media or link options.
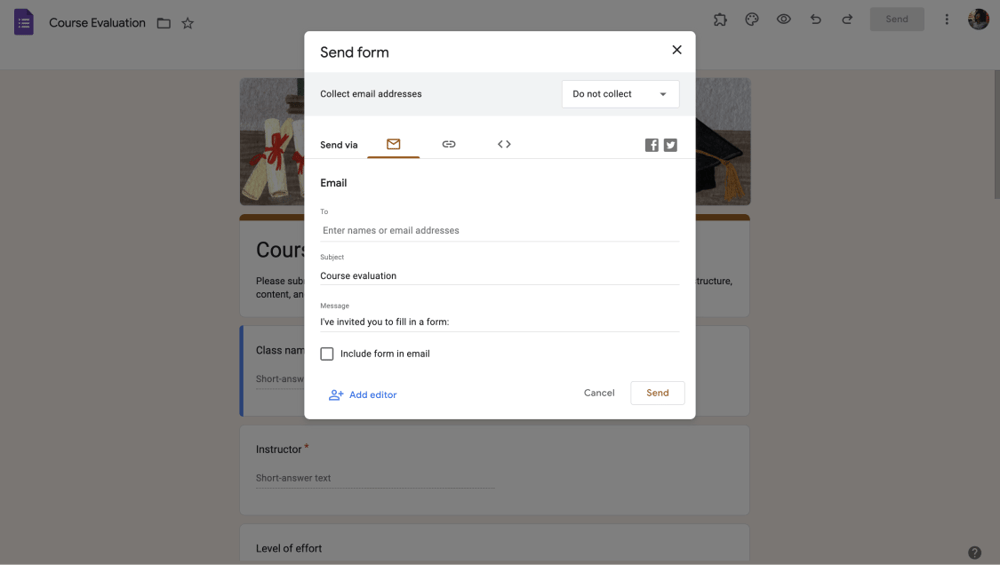
Share your feedback form
4. Creating a course application form
If you are an educator running a course, you first need the application form to identify participants. By creating an online application form, you can collect applications faster, easily share the form, and attract potential participants. Check out how to create an application form in Google Forms by following the steps below:
a. Log in and create a blank form
To start creating your application form, you must first log into Google Forms. Log in with your Google account or create an account for free. Check out Google Forms' free templates after logging in, or choose a blank form to start all over.
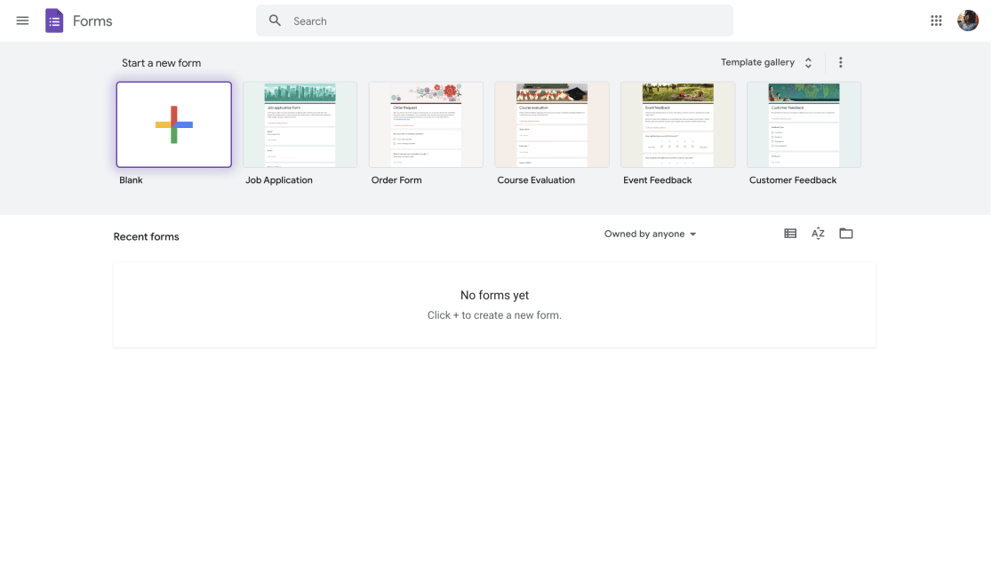
Log in and create a form to collect course applications
b. Add questions to your application form
Identify the questions required for your application form. Add the questions you want to determine their order by pressing and holding the six dots in the middle of the question box. Customize your form by browsing the buttons on the right.
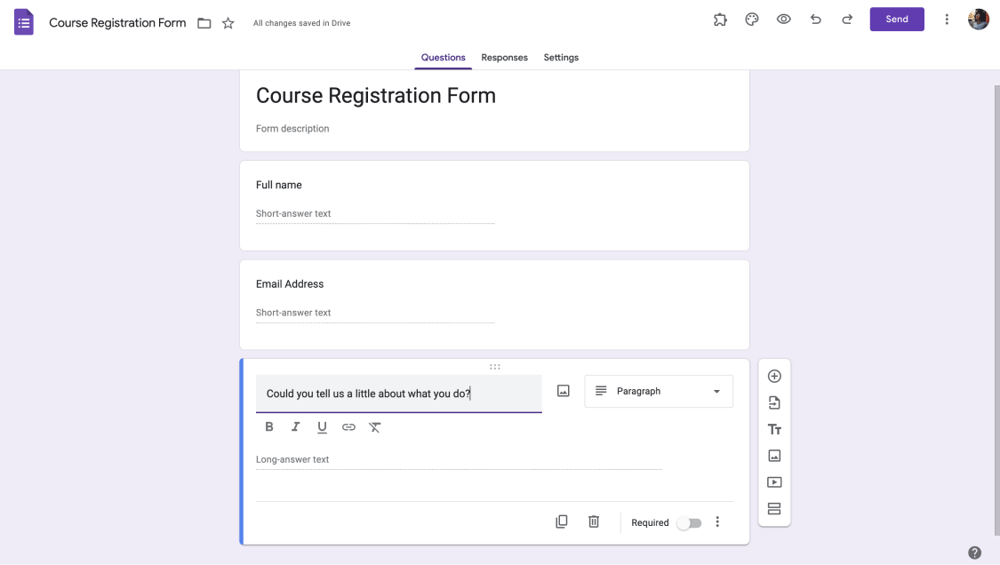
Add questions and customize your feedback form
c. Share your course application form
After you're done customizing your form, all that's left is to share it with your target audience. Click the send button and share your form via email, social media, and link options. You can collect the emails of the applicants by using the collect email addresses option on the sharing page.
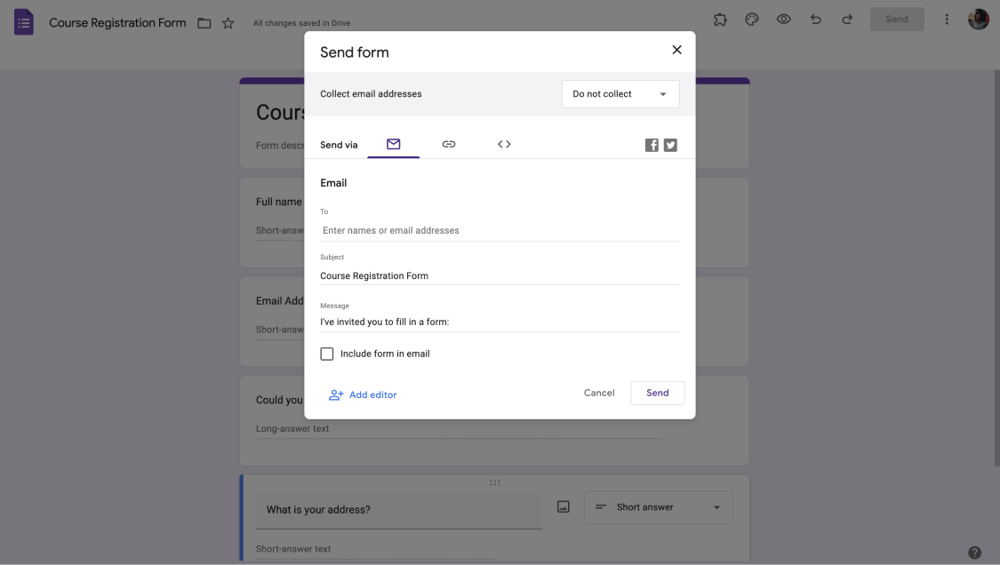
Share your course application form
You may be asking if it is possible to handle all the steps on a single platform without opening many tabs instead of dealing with limited customization and sharing features. You're in luck with this because there is a better Google Forms alternative.
You have a better alternative: forms.app
forms.app is a builder platform for creating forms or surveys online. You can meet a great Google Forms alternative with this platform, where you can benefit from free templates and many fields.
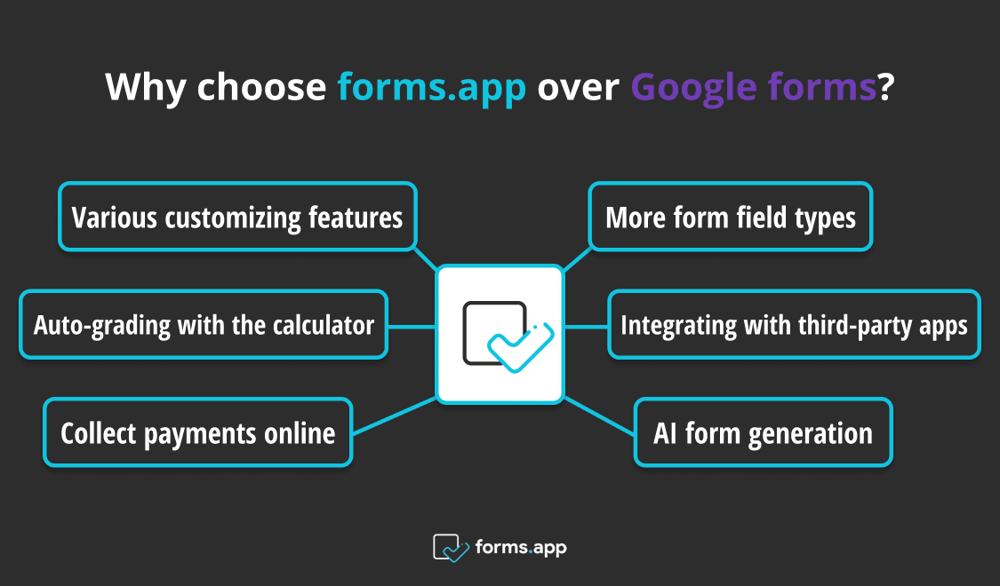
Why choose forms.app over Google forms?
forms.app offers you all the steps above with more free customization and sharing options. You can use free templates or create your own form on forms.app, which offers educators many advantages such as designing exams, collecting data, preparing certificates, and organizing events.
- Various customizing features: You can customize your form by choosing the background, font, and colors. Add a logo to make it look professional. Enrich your exam regarding question types using fields such as multiple choice, dropdown, yes/no, or picture selection in the fields menu.
- More form field types: You can make your form unique with more than thirty field options in the build menu. Try the form fields and preview by clicking the eye icon in the upper right corner.
- Auto-grading with the calculator: Click the logic button on the left in the build menu, then click the calculator button. When you create an exam or quiz, use this feature to determine the point values and let students see the results with the customization features in the calculator settings.
- Integrating with third-party apps: By clicking the connect button at the top, integrate your form with the applications and add the necessary features. For example, you can automatically transfer and analyze your students' answers by integrating your form with Google Sheets.
- Collect payments online: Collect and track your payments using fields such as payment or product basket in the fields menu.
- AI form generation: If you have not prepared a form online before, you can ask the AI feature of forms.app to design a form for you. To activate the AI feature, just click on the AI text on the left side of the build page and write what you want in the box.
🗝️ Along with the great features above, you can enjoy a 20% NPO discount on forms.app.
How to use forms.app for educational forms & surveys
forms.app is a helpful tool for professional work and can make gathering data more effortless. You can benefit from various education form templates and customization options for educational subjects. Check out the article below to find out what educational features forms.app can help you with:
a. Log in to forms.app
Log in to forms.app with your account. If you don’t have one, you can create one for free. Check out forms.app's free form templates after logging in, registering, or starting with a blank form. To get suggestions, you can browse education-related templates by clicking on the education forms text in the industries section of the form templates section.
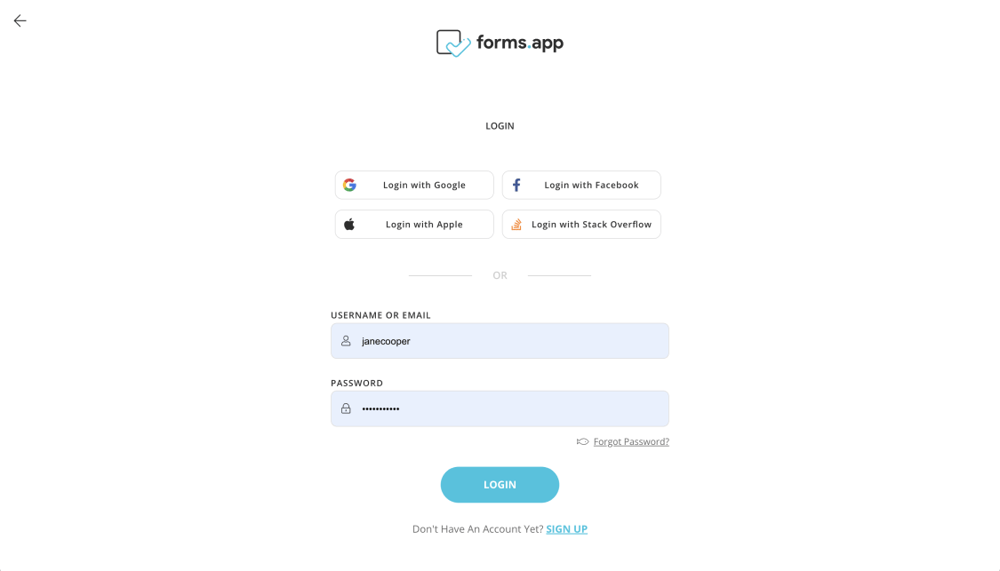
Log in to forms.app
b. Create and customize your form for any purpose
After choosing one of the templates, start customizing your form using the buttons left in the build menu. Click the fields button and create the form you want using the fields under the headings such as essentials, contact details, uploads, rating scales, date & time, legal & consent, payment & e-commerce, and media & structure. Change the look of your form by clicking the design button.
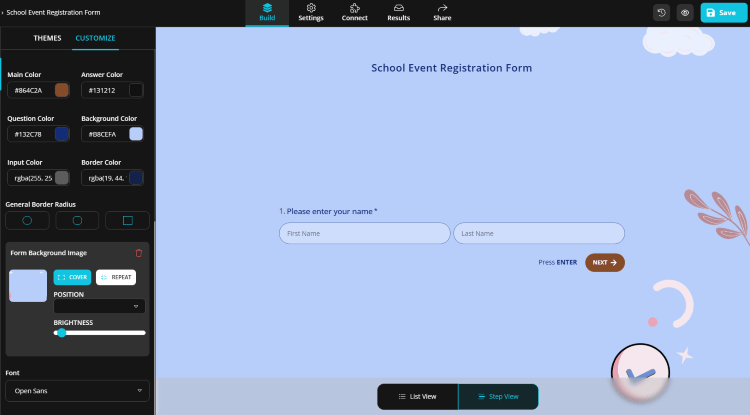
Create and customize your form for any purpose
c. Choose a sharing option
Determine access to your form by sending your form publicly or personally with forms.app's many sharing options. After you finish your form, click the share button above. Share the form you created with the link, social media, QR code, and embed HTML options, or send it to students' e-mail addresses.
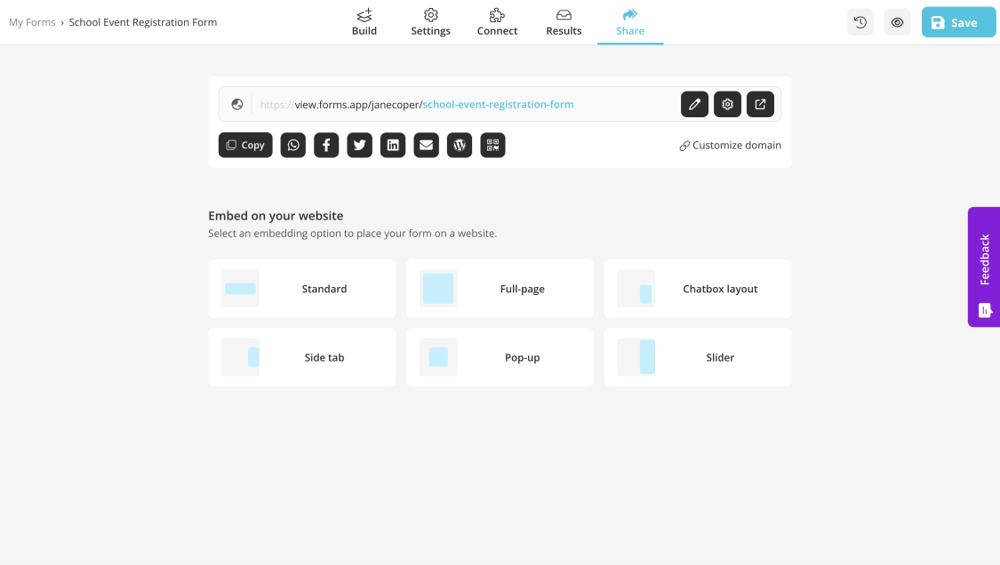
Share your form with various sharing options
Free form templates for educators
Using online tools allows an educator to make the work easier. Creating online forms is one of the best tools. When gathering feedback, registering, taking exams, or organizing courses, you must share your forms with your students without problems. With the various customization features on forms.app, you can choose one of the templates below with a good start.
Final words
Although the popular and frequently preferred Google Forms offers some features for educators, these may not meet the expectations of educators. Fortunately, with the easy and useful features of forms.app, educators can organize effective quizzes & forms and share them with their students with many sharing options to achieve their goals. If you want to take a look at these opportunities, sign up now and give it a try for free.
- How can educators use Google Forms?
- 1. Creating online exams or quizzes in Google Forms
- 2. Creating event registration forms
- 3. Creating a student feedback form
- 4. Creating a course application form
- You have a better alternative: forms.app
- How to use forms.app for educational forms & surveys
- Free form templates for educators
- Final words
forms.app, your free form builder
- Unlimited views
- Unlimited questions
- Unlimited notifications

