In the realm of Google Sheets, managing dates and times efficiently is key for users who deal with schedules, timelines, and deadlines. The Google Sheets date selector format offers a smooth way to input dates, enhancing user experience significantly.
In this guide, we'll demonstrate how to use the date picker in Google Sheets, part of Google Workspace, to enhance date management and efficiency in project planning. This feature streamlines scheduling tasks, making it indispensable for users looking to optimize their workflow in Google's integrated platform.
What is a date picker?
A date picker, or Google spreadsheet data picker, is an invaluable feature that pops up a calendar beside the cell you are editing.
Basically, it allows for an easy selection of dates. This Google sheet date selector simplifies the process of entering dates, reducing the chance for input mistakes and speeding up your workflow.
The integration of a date picker into your Google Sheets spreadsheet is close to having a personal assistant for data management. It simplifies tasks ranging from logging dates and times to planning out calendars in Google Sheets.
When do you need a date picker in Google Sheets?
In Google Sheets, the date picker format greatly simplifies task management and date entry, becoming essential for smooth workflow and data organization. Important for clear planning and keeping data correct, this feature helps in picking specific days of the week, enhancing work quality by making date entry easier.
Adding a date picker to your Google Sheets can transform your approach to:
⏰ Managing event timelines: Keeping track of important milestones and events becomes straightforward.
⏰ Tracking project deadlines: Ensures everyone on the team knows their time constraints.
⏰ Maintaining a schedule: Daily, weekly, or monthly schedules are easier to create and adjust.
⏰ Planning multi-day events: From conferences to workshops, plan events that last several days with ease.
⏰ Creating calendars: Calendar creation is simplified for personal use or sharing with a team.
⏰ Reducing errors: Direct calendar selection minimizes the risk of typing the wrong date.
⏰ Enhancing user experience: A visual calendar interface makes date selection quick and intuitive.
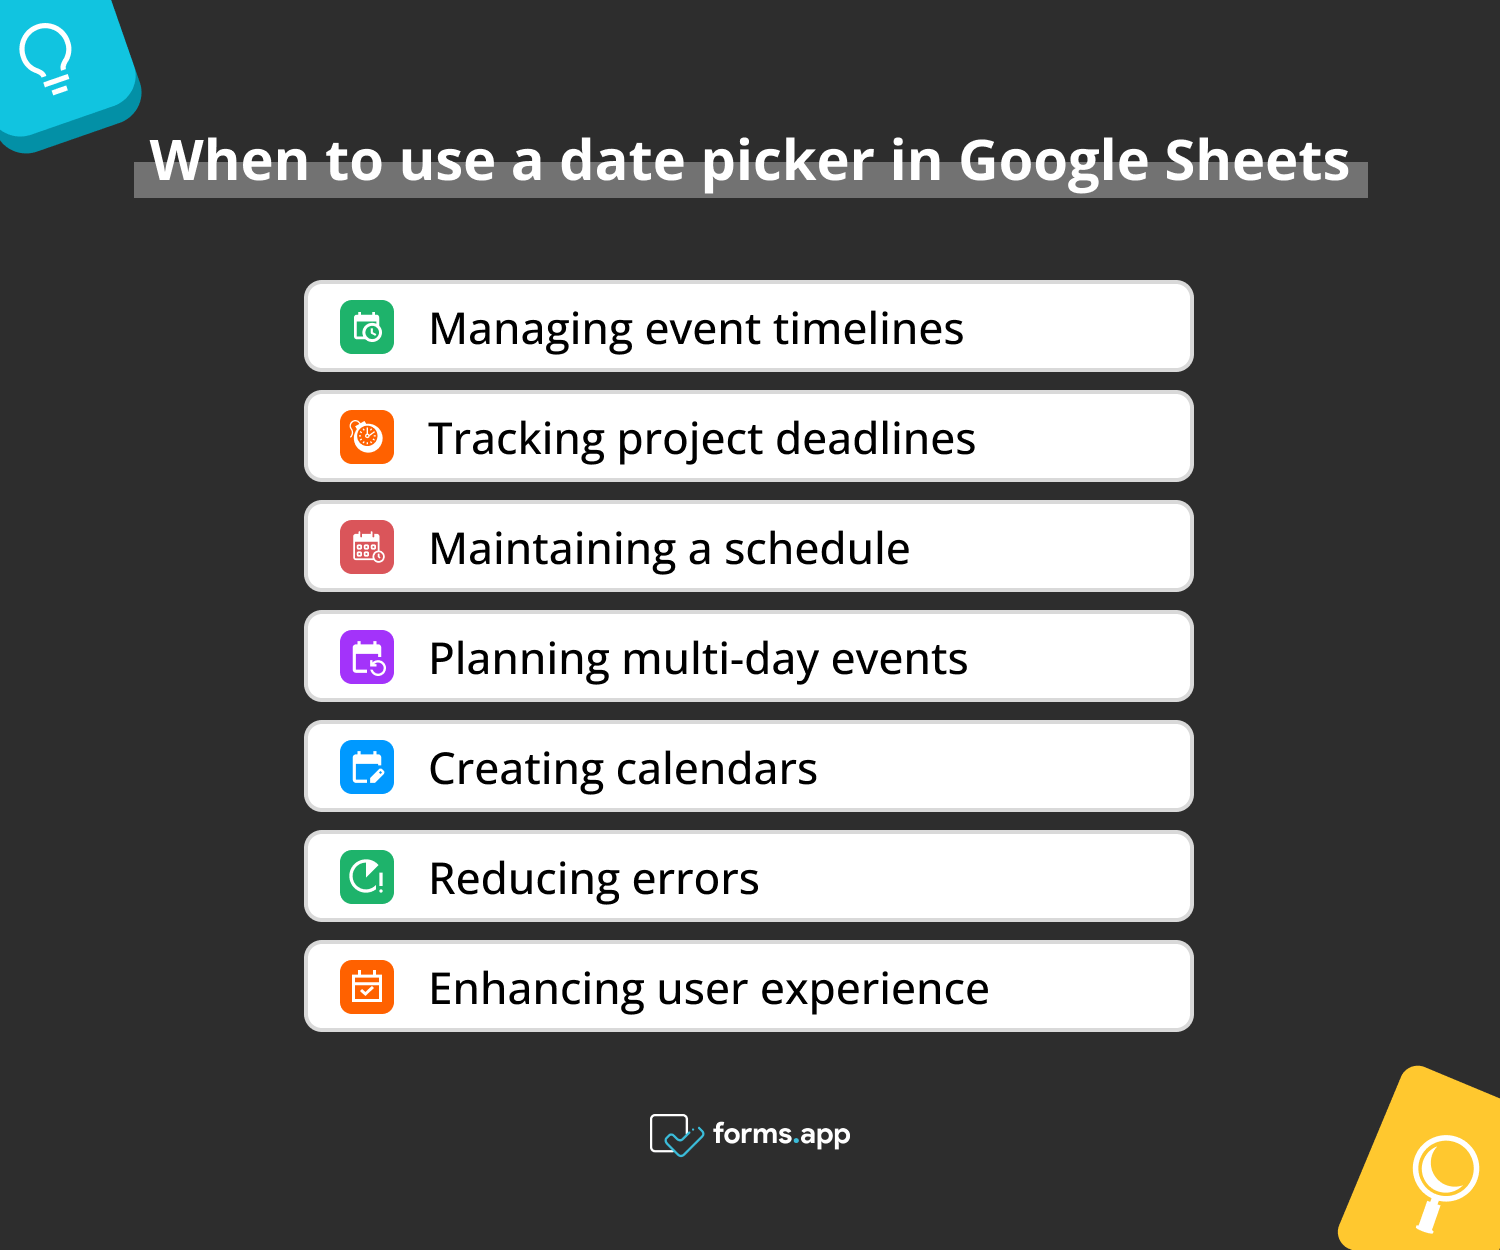
Times to use date pickers in Google Sheets
How to create a date picker in Google Sheets (step-by-step)
Understanding the use of the date picker in Google Sheets makes adding dates easier. Our guide helps you learn how to add dates in Google Sheets. Just click a cell, type the date, and press enter to use the date picker for your projects smoothly.
Now, let's learn how to access this tool:
1. Click a cell to insert a date
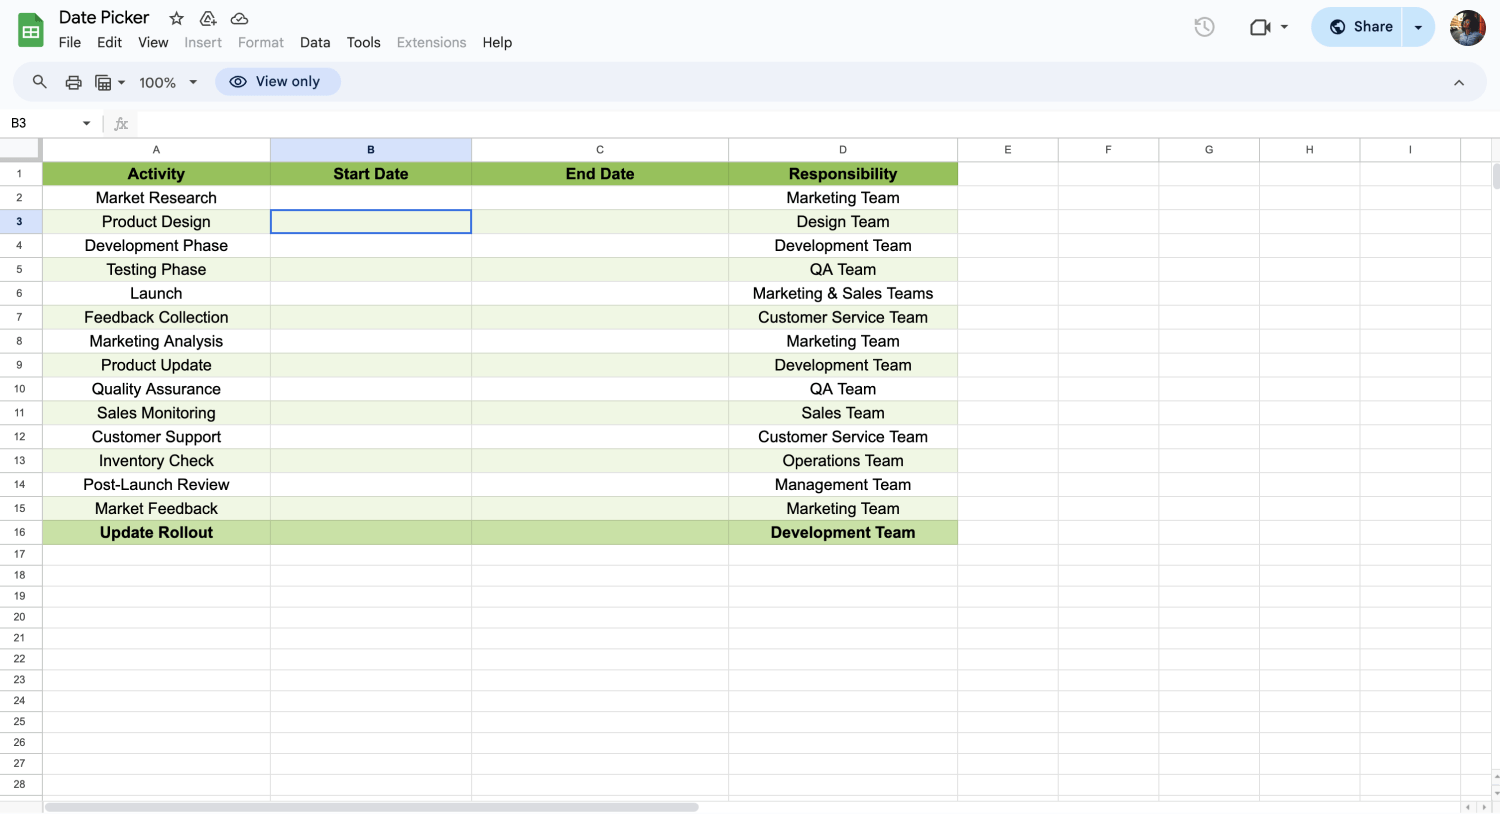
Click on a blank cell
The first step to insert a date in Google Sheets is to click on the cell where you wish to enter the date. This initial action is your entry point for efficient date and time management within your spreadsheets.
2. Data validation
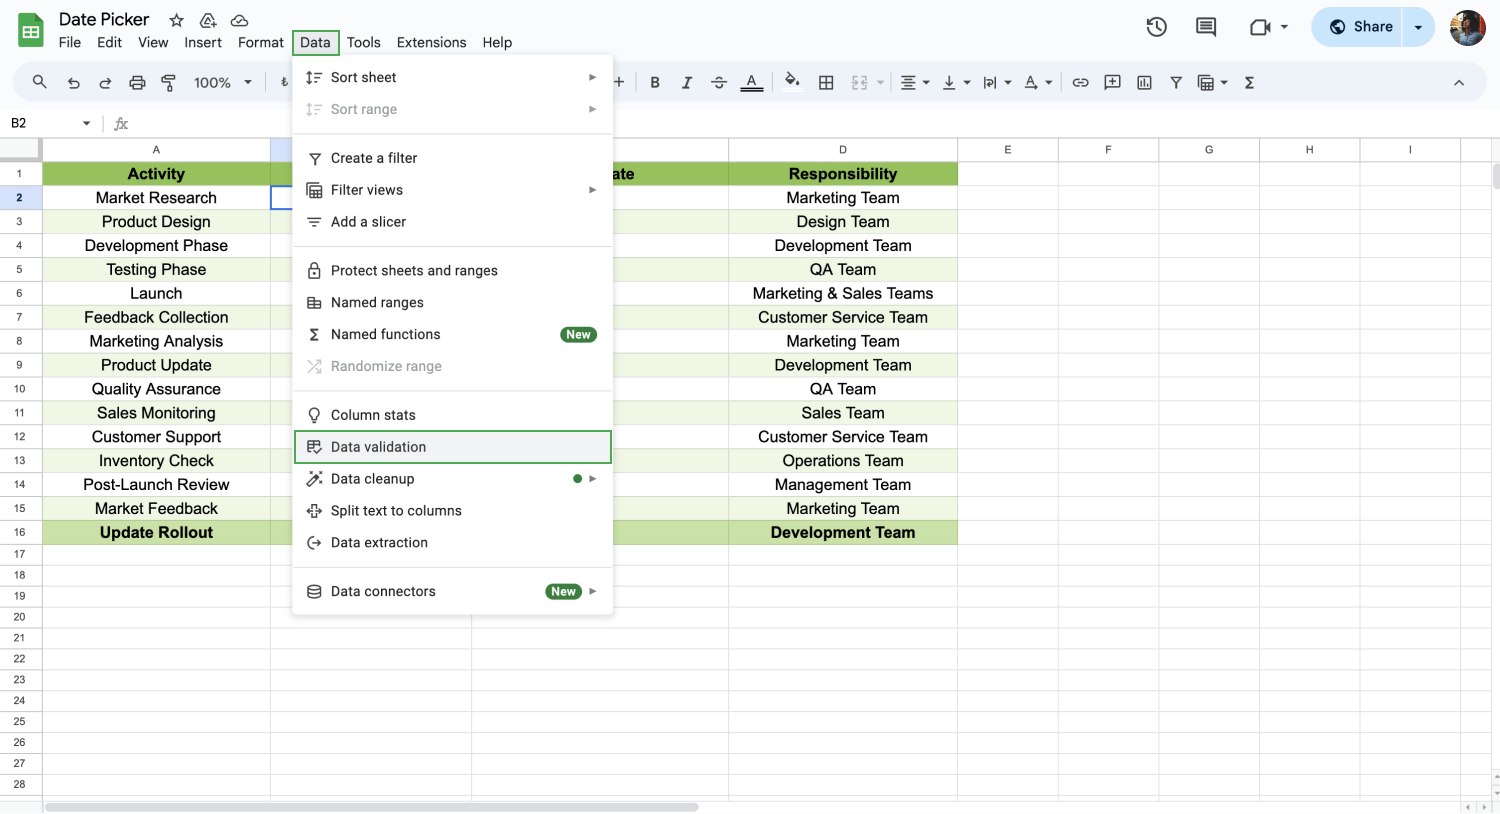
Click data validation
Progress by navigating through the Data menu to select Data validation. This powerful feature is the cornerstone for anyone aiming to insert a calendar within their spreadsheet. It facilitates the management of calendars in Google Sheets, transforming your blank spreadsheet into a dynamic Google Sheets document.
3. Calendar configuration
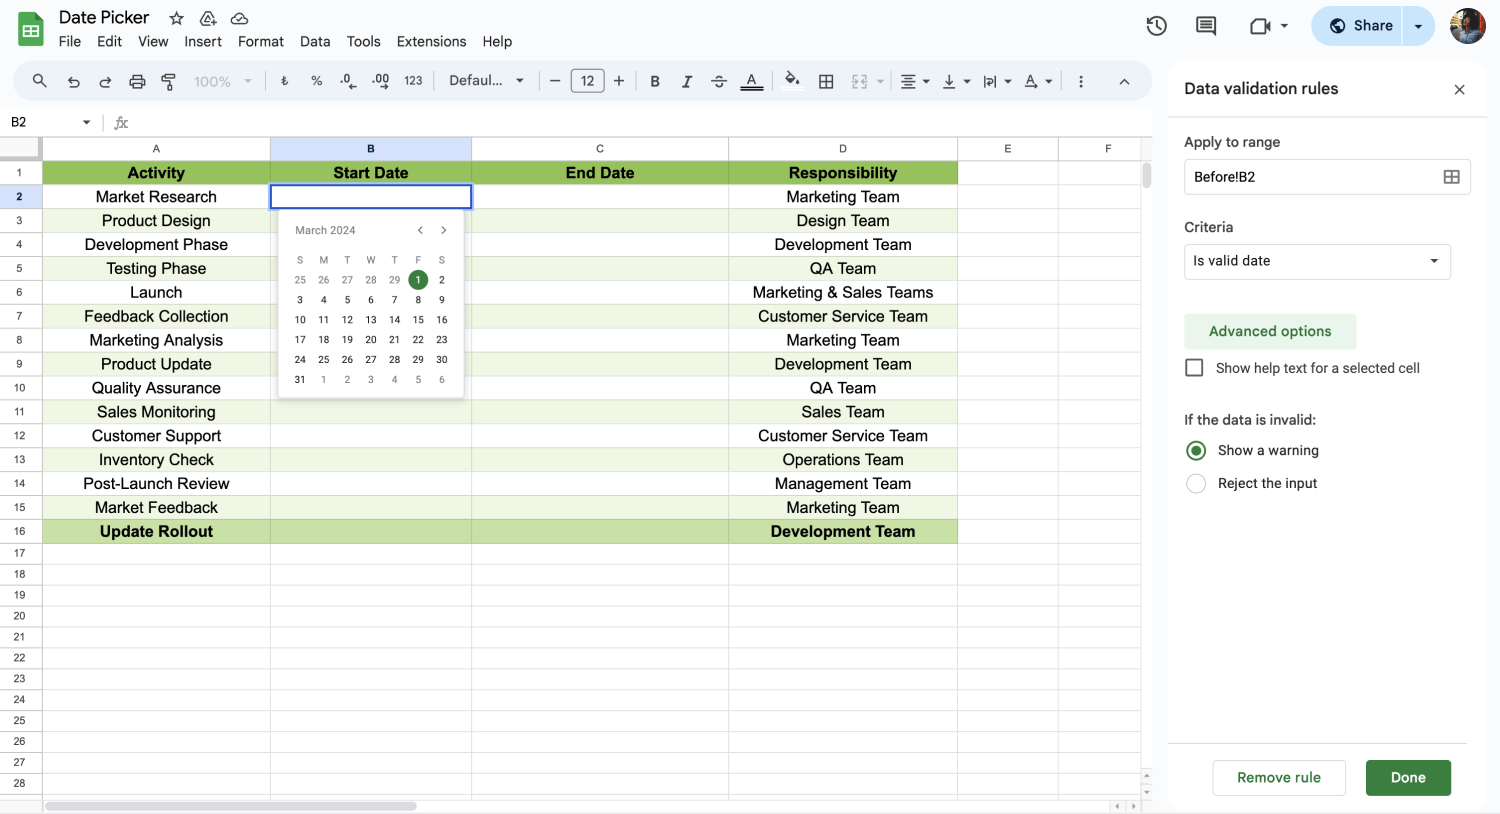
Insert the calendar
Select Date from the dropdown menu in the criteria section, then explore formatting options to customize your entries. Activating this setting is the key to unlocking the date picker, making it straightforward to input and organize dates.
💡 Once you've set up a calendar in a cell, you can easily duplicate this feature across other cells as needed, enabling flexible and widespread use throughout your spreadsheet. This functionality simplifies date entry, enhancing precision and uniformity across your documents.
4. Customize and save
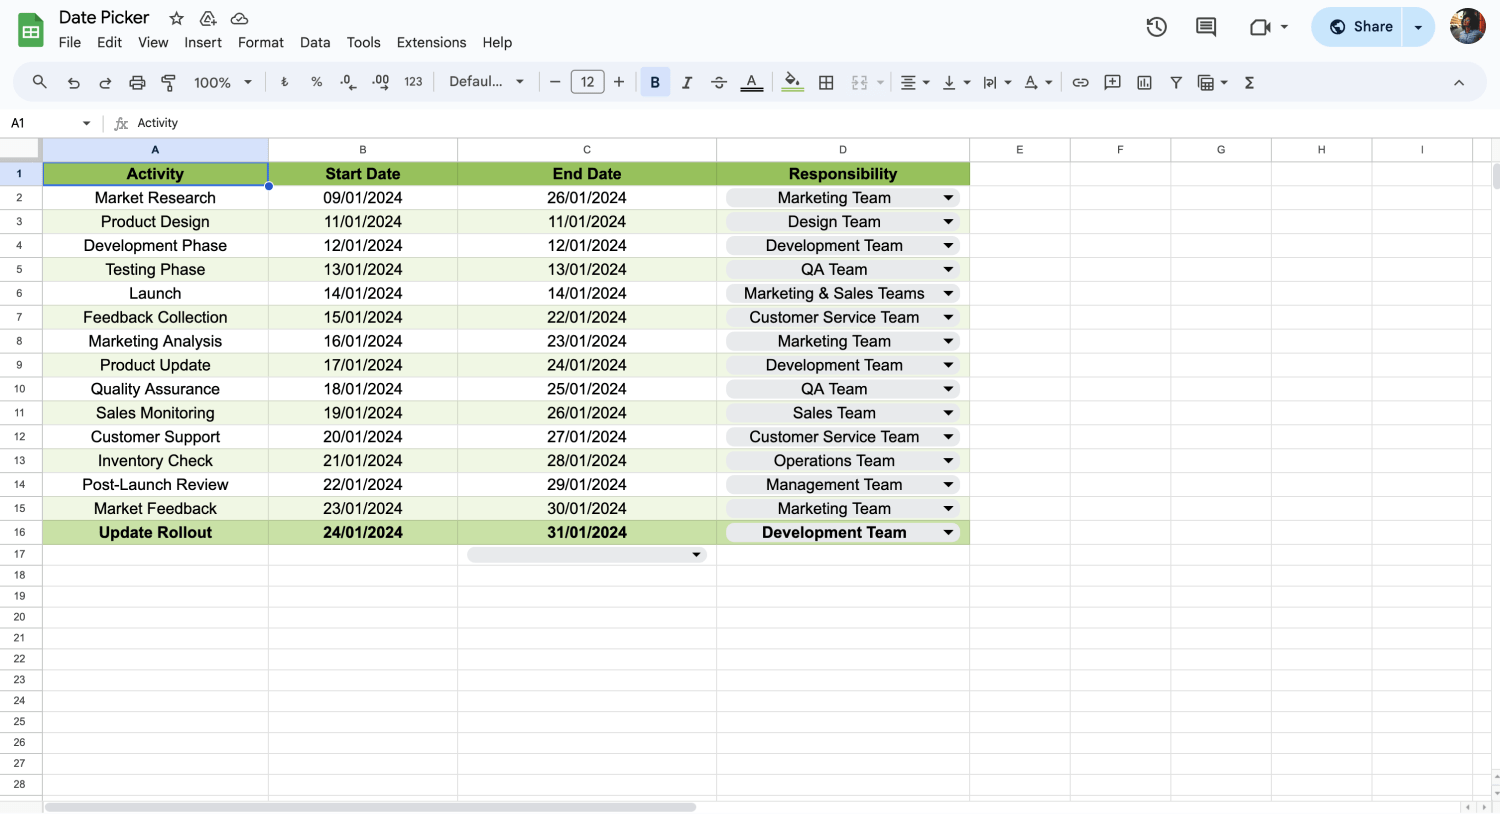
Save the customization
If you follow how to add a pop-up calendar in Google Sheets, it is time to finalize and customize your sheet’s form like you want. Also, Google Sheets will save automatically for you even if you forget.
Google Spreadsheet date picker boosts your efficiency and upgrades your proficiency in leveraging the full spectrum of Google Sheets functionalities.
Frequently asked questions about the date picker
You have learned all the steps to create a date picker in Google Sheets, but you still might have some question marks in your mind. No worries; we will not leave any questions unanswered. In this section, we answer the most common questions about utilizing the data picker in Google Sheets for efficient date selection:
Yes, you can easily add a date picker in Google Sheets using data validation to get a pop-up calendar. As long as you follow the basic steps below, you can insert a date picker in Google Sheets:
1. Click on a cell to start using Google Sheets' calendar feature for date entry.
2. Use Data Validation from the Data menu to enable calendar insertion in your sheet.
3. Select the Date in the criteria section for calendar setup and explore formatting options.
4. Finalize your sheet's layout and rely on Google Sheets' auto-save feature.
To add a date list in Google Sheets, utilize data validation by choosing the date option, which restricts a cell to only accept date entries, thus establishing a streamlined date list. Additionally, after inputting a date in a cell, you can extend that cell downwards to generate a continuous date picker list, simplifying the process of creating sequential date entries.
Even though Excel works a bit differently, it also relies on data validation to make a date drop-down menu. To insert a date drop-down in Excel, follow these 5 simple steps:
1. Select cell: Click on the cell where you want the date drop-down to appear.
2. Go to the data tab: Navigate to the Data tab on the ribbon.
3. Data Validation: Click on Data Validation and select Data Validation... from the dropdown.
4. Set Criteria: In the Settings tab, under Allow, choose Date. Configure the date range if needed.
5. Apply: Click OK to apply the data validation, creating a date drop-down in the selected cell.
Changing the date and time formats in Google Sheets is straightforward. Simply select the cells containing dates, go to Format > Number > Date, or choose a custom format that meets your specific requirements. This adjustment is crucial for ensuring that your dates and times align with your preferred date formatting standards.
💡You can read our article and find more details about how to change the date format in Google Sheets.
Google Sheets supports an array of formulas that are specifically designed for working with dates. Formulas such as TODAY(), DATE(), DATEDIF(), and EDATE() are instrumental in calculating differences, adding or subtracting durations, and much more, thereby expanding your toolkit for effective date and time management.
💡You can check to learn more about the Google Sheets formulas to level up your efficiency.
Conclusion
Mastering the date picker in Google Sheets transforms your approach to data management, particularly with date and time forms. This valuable tool facilitates the creation of intricate calendar templates and precise date ranges, streamlining how you handle custom date and time entries.
In our article, we shared a guide with users about how to insert a calendar in Google Sheets. By following our step-by-step guide, you can add calendars to your cells and plan your work better. If you want to learn more information and tips about Google Sheets, stay with us!
forms.app, your free form builder
- Unlimited views
- Unlimited questions
- Unlimited notifications
