Zapier Integrations
Zapier is a popular automation platform. People can use it to connect their applications and create workflows. It requires no code, and it’s possible to set up everything in minutes.
How can I connect my forms to other applications through Zapier?
If you need to create a workflow but don’t want to deal with technical requirements, Zapier is your go-to tool. Below are the steps to connect your form to any application on Zapier:
1. Open your form and switch to the Connect tab:
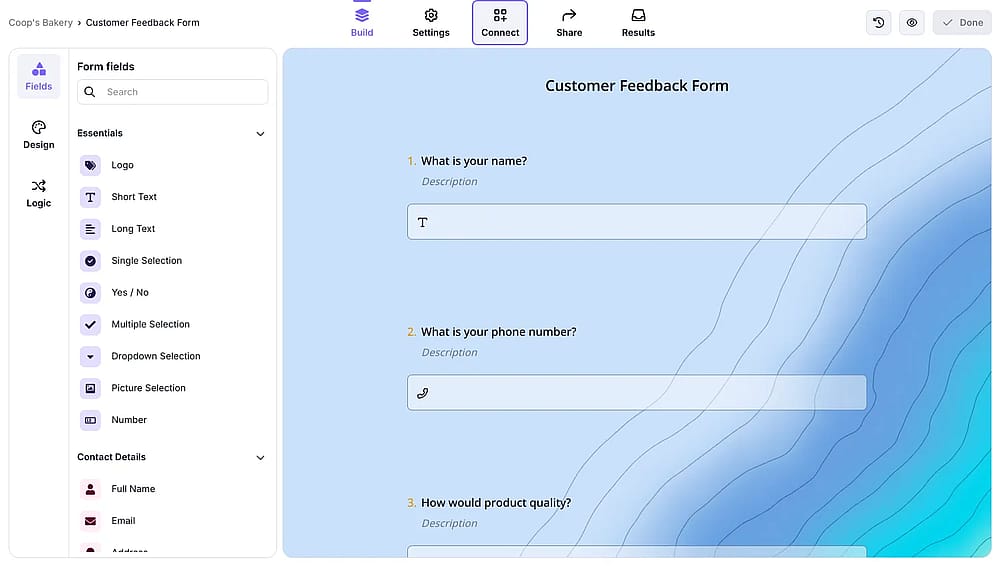
An image showing the opened form and the “Connect” button you need to press to access the integration
You can visit the forms.app integrations page on Zapier for more integration options.
2. Search for the application you want to connect your forms with:
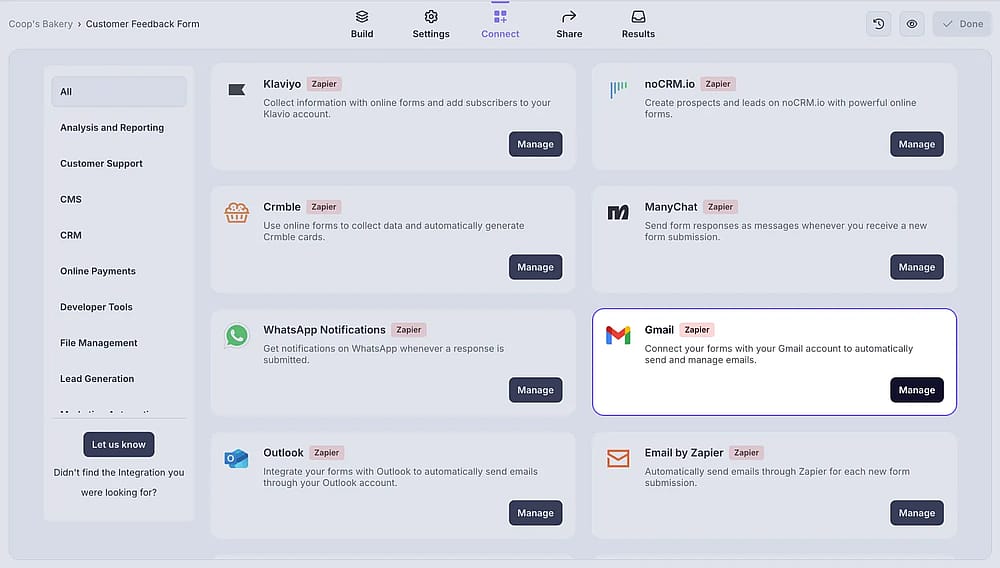
An image showing the “Connect” section, where you can find the tool for the integration by searching for it
3. Click on the Manage button:
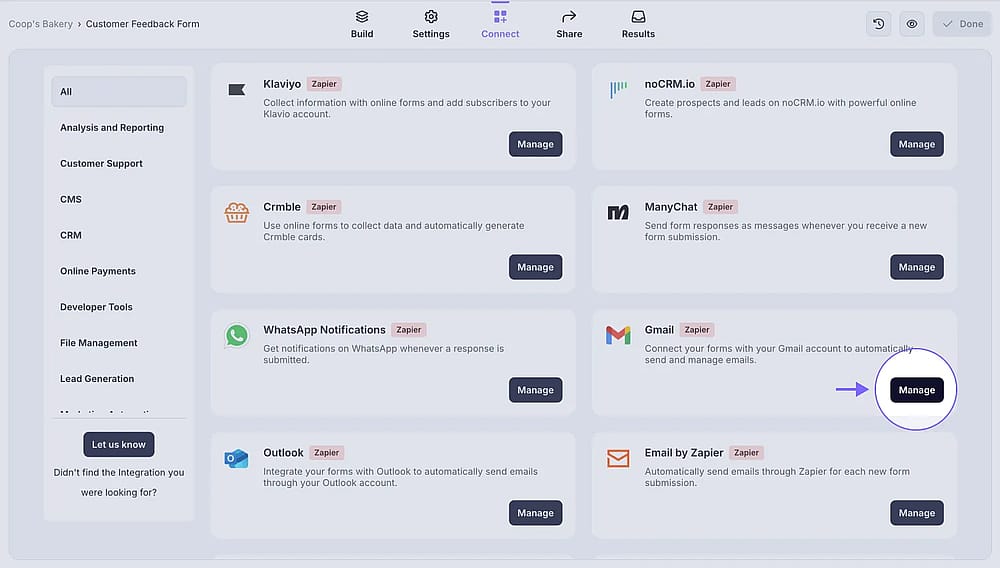
An image showing the “Manage” button you need to click to start setting up the integration
4. You need to log in or sign up to Zapier first to set up your integration:

An image showing the “Integrate for free” button that will appear on the Zapier page once logged in or signed up to the Zapier platform
5. After signing in, you will be at the Zap editor:
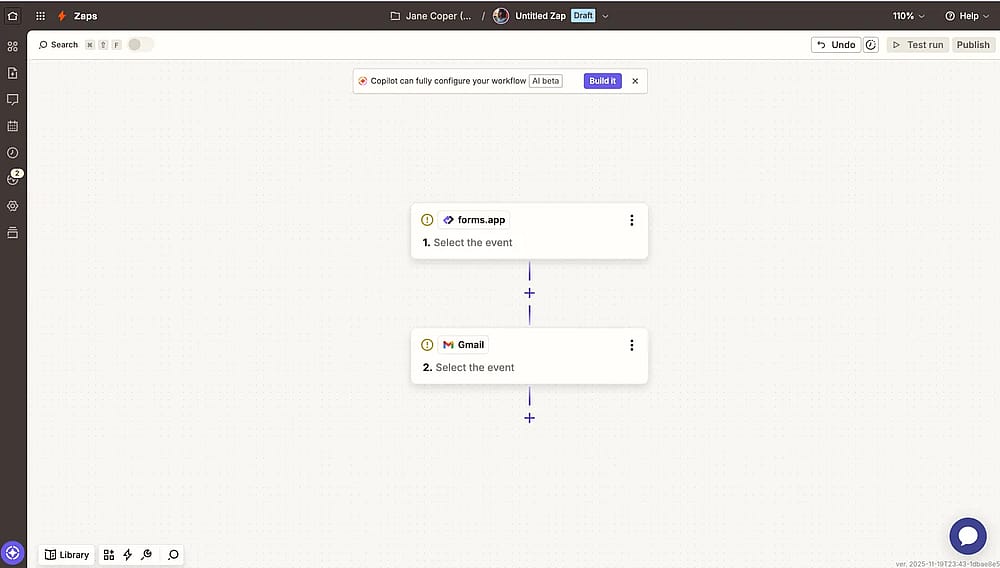
An image showing the “Zap editor” screen, which you will access after signing in to Zapier
6. First, you need to set up & configure your trigger. You can easily do so by choosing the Trigger event as New Form Submission and connecting to your forms.app account:
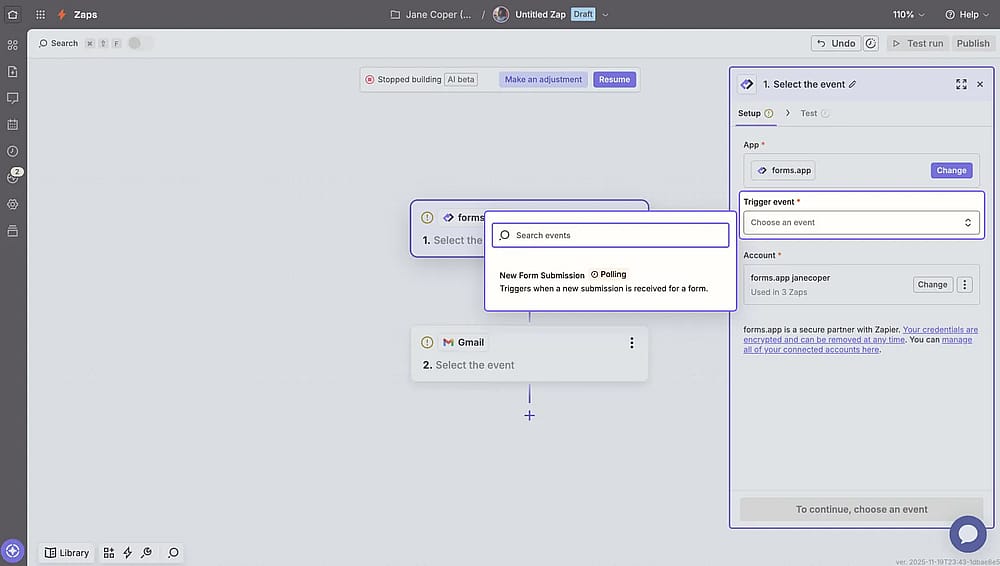
An image showing how you can set the “New Form Submission” as a trigger by firstly clicking the forms.app element in the editor screen
7. Choose the form you want in your workflow and hit Continue:
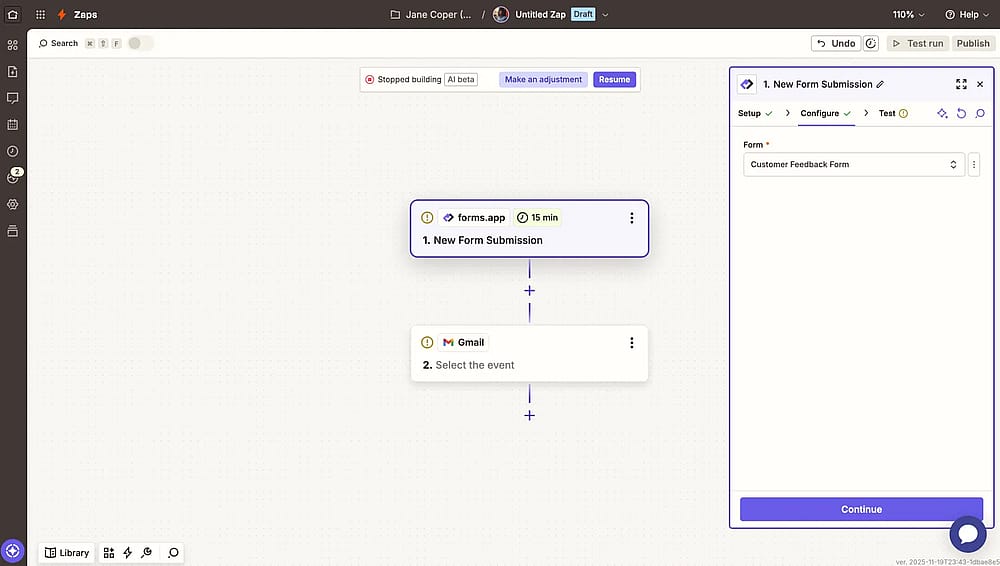
An image showing the “Configure” area, where you can select the forms.app form for your workflow
8. Test your trigger to see if everything works as intended. This is the last step of setting up your trigger:
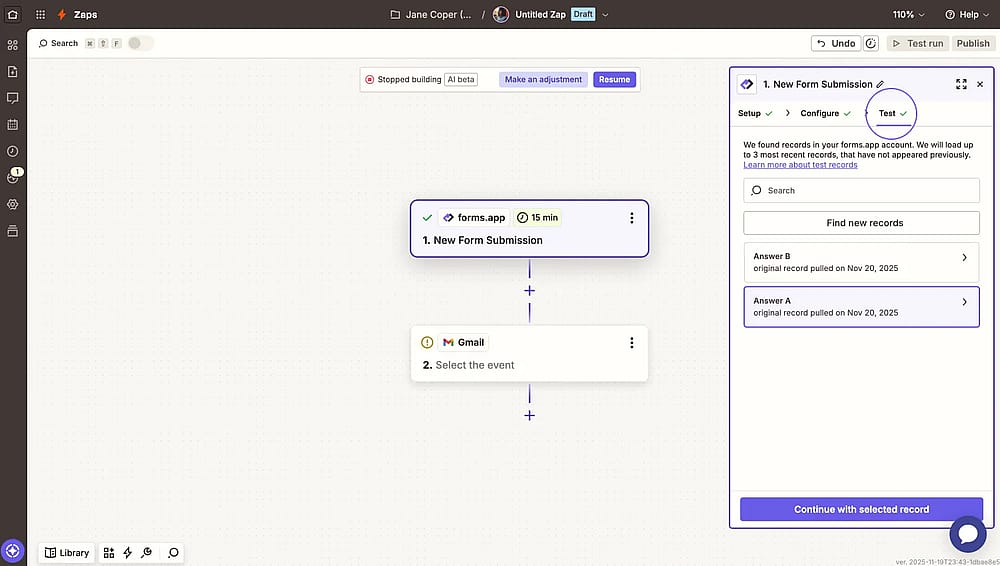
An image showing the “Test” area, where you will need to test your trigger
9. Now, it’s time to add and configure the event. Simply choose the event you want to execute when you collect a form response and connect to your other application:
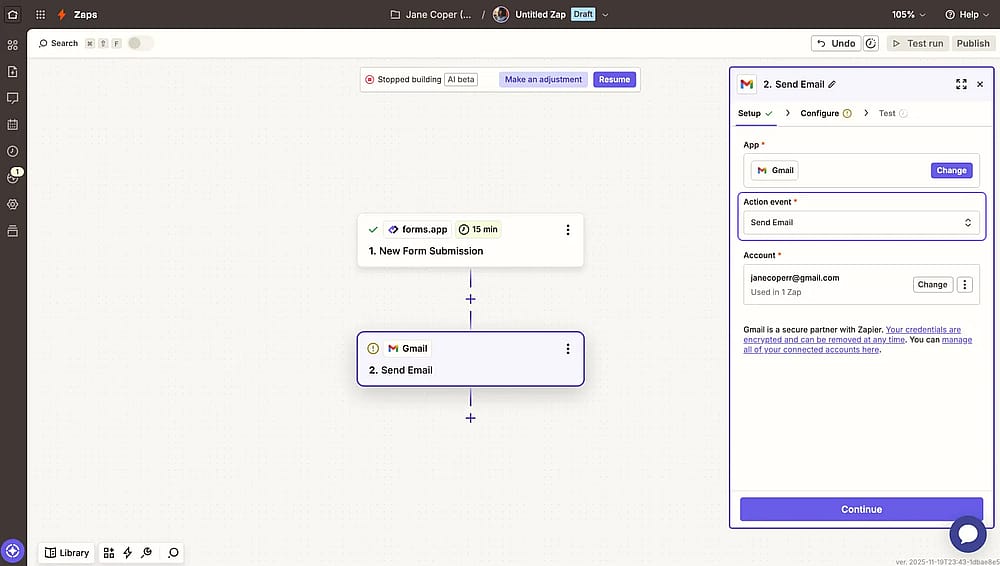
An image showing the pop-up that appears once you click the other tool element, where you will need to sign in first
10. Match the form fields with the properties on your application and finish configuring your event:

An image showing the “Configure” tab where you will need to match the form fields with the properties
11. Head over to the Test section and see if your workflow works:
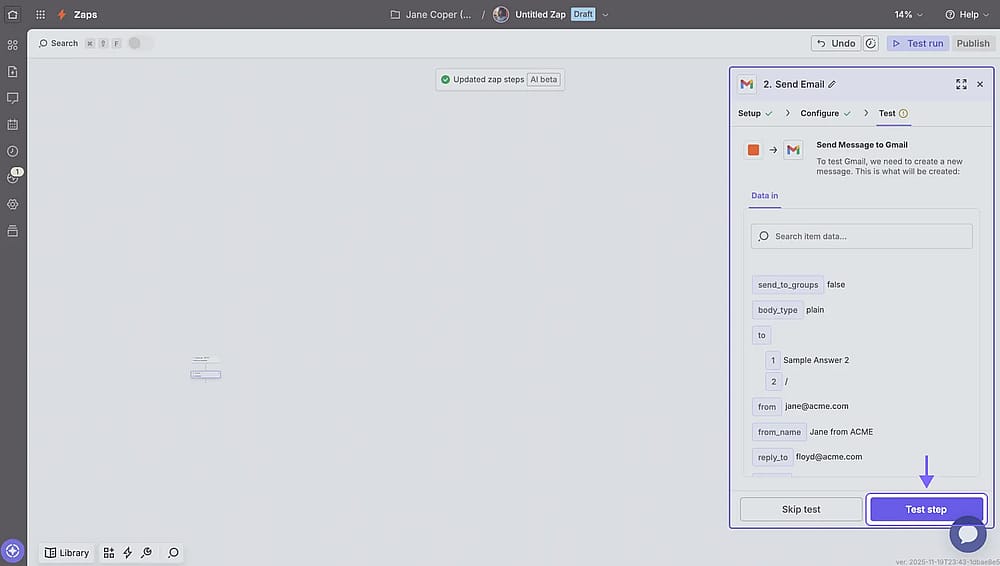
An image showing the “Test” area, where you will need to test your workflow
12. Lastly, publish your Zapier integration and automatically send your form responses to your applications:

An image showing the “Publish” button that will publish your Zapier integration and automatically send your form responses to your applications
Pro tip: Click on the plus icon between your trigger and event to add additional steps to your workflow. For example, you can add delays or conditions for your events to be triggered.
No. Zapier offers up to 100 tasks to be completed on its free plan. So you can set up workflows without any purchases at first. In case you need more than 100, Zapier's next higher plan starts at 29,99 USD monthly.
Zapier has one of the largest library of applications among automation platforms. But not all apps are available, of course. In case you cannot find your application on Zapier, you can contact to Zapier for requesting an app.
In the meantime, you can use other automation platforms, such as Make and SureTriggers. In addition, you can use webhooks to create custom integrations.
- Check the Zap’s task history for errors.
- Verify that the trigger event has occurred.
- Ensure that the trigger and action apps are connected properly.
- Visit Zapier’s help page or reach out to their support team.