Products
Do you want to sell online without a website? forms.app is a spot-on platform for this. Create your order forms with our handy product basket form field, sell online without needing a website, and offer your customers a hassle-free e-shopping experience. 🛒
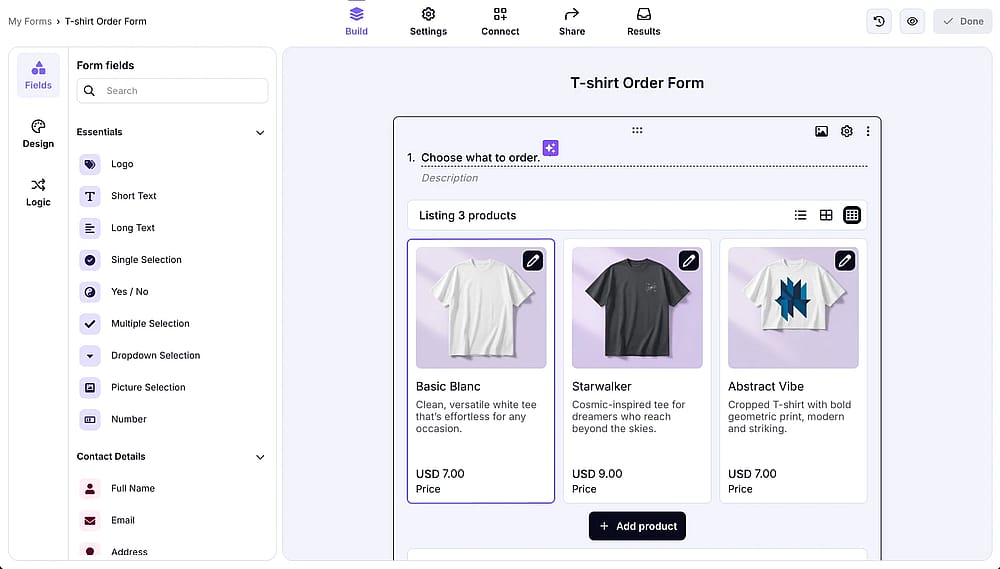
How can I add “Products” to my form?
It’s pretty simple. Simply open the Form Fields menu and click on the Product Basket field.
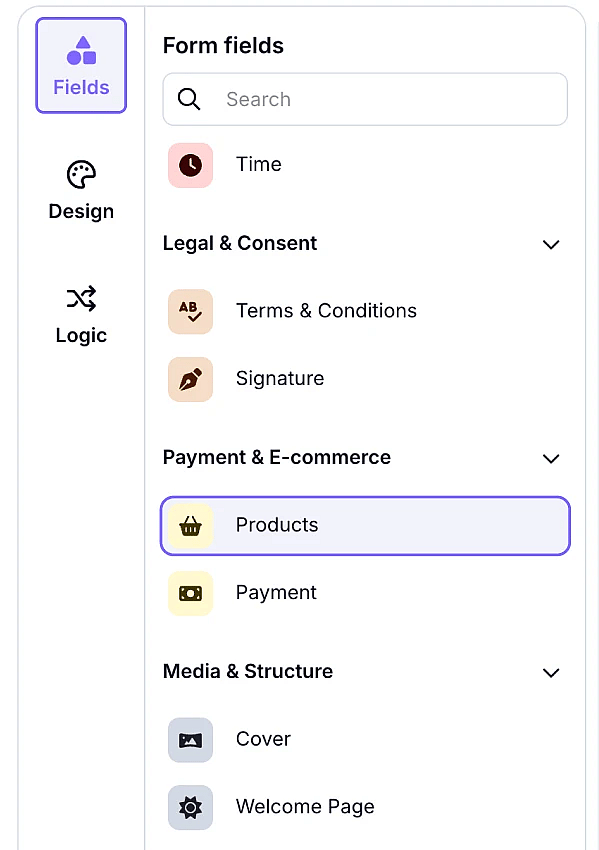
An image showing how to add the “Product Basket” field to your form from the field menu on the left
How to add products to the Product Basket
Once you have a Product Basket field on your form, you can simply add new product slots by clicking on the “+ Add product” button at the bottom of the field.
You can add up to 300 products to your product basket field.
After adding as many product slots as you need, you can type down the title, description, price, etc., for your products and upload product photos.
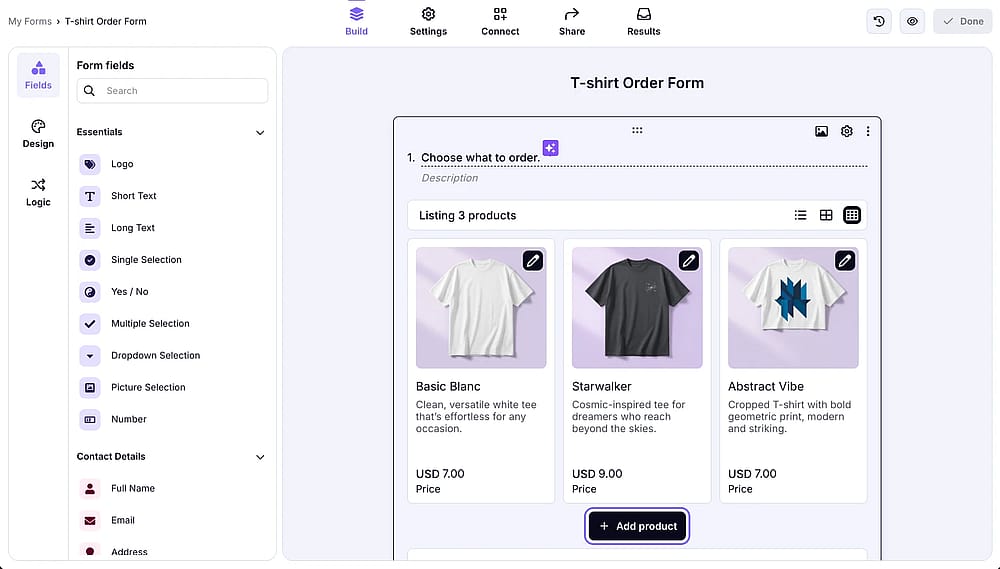
An image showing how you can add new items to your product list
General product settings 🛒
Through the field settings of your Product Basket, you can:
- Add new products or edit existing ones
- Change the currency
- Add a shipment fee
- Add included or added tax
- Generate discount codes
- Change the layout (by choosing list, two-column, or three column options)
- Create a product category
- Inserting a Payment field to your order form,
- And, upload a general image/video for an excellent e-Shopping experience

An image showing how the field settings you can adjust within your “Products” field
Include/add tax information in your sales
Under the settings of your products field, you can enable showing taxes. You can add a fixed tax rate for your products, and choose to include the tax or add on the subtotal amount.
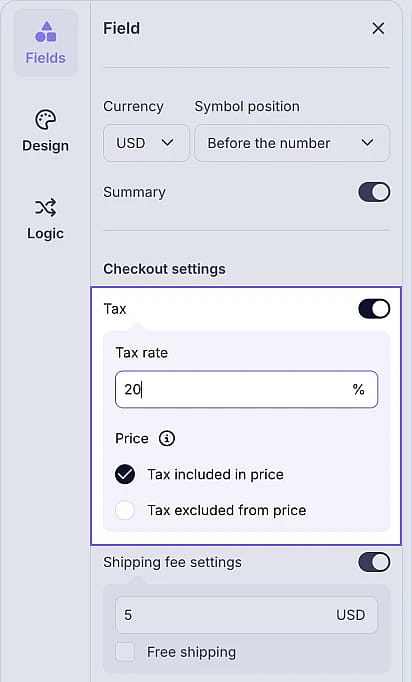
An image showing how to enable tax information in the products field settings
Entering shipping fees
Under the checkout settings section, you can enable and apply shipping fees in your orders.
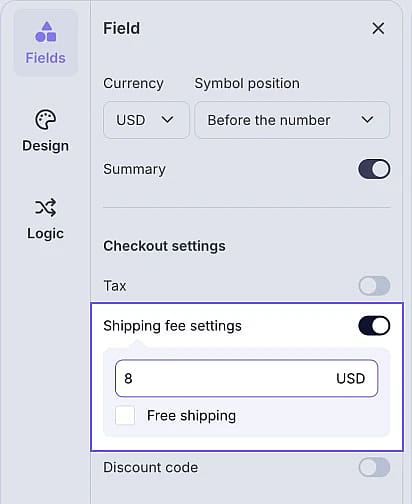
An image showing how to enable shipping fees in the products field settings
Generating discount codes
Running a campaign? Create discount codes to get more orders. You can:
- Create random discount codes or add manually
- Apply discount at percentage or a fixed amount
- Set use limits
- Set an expiry date
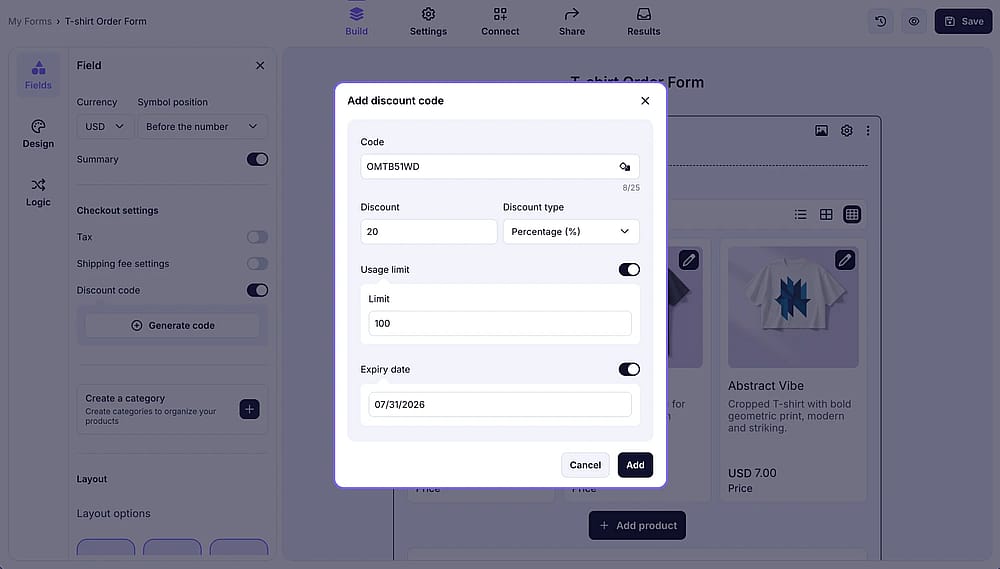
An image showing how to generate discount codes in the products field settings
Creating product categories
You can create categories and put your products under them with the category options to have a more organized product basket. Simply click on the + button next to Create a category and give it a name.
You can also add subcategories for a more detailed order forms.
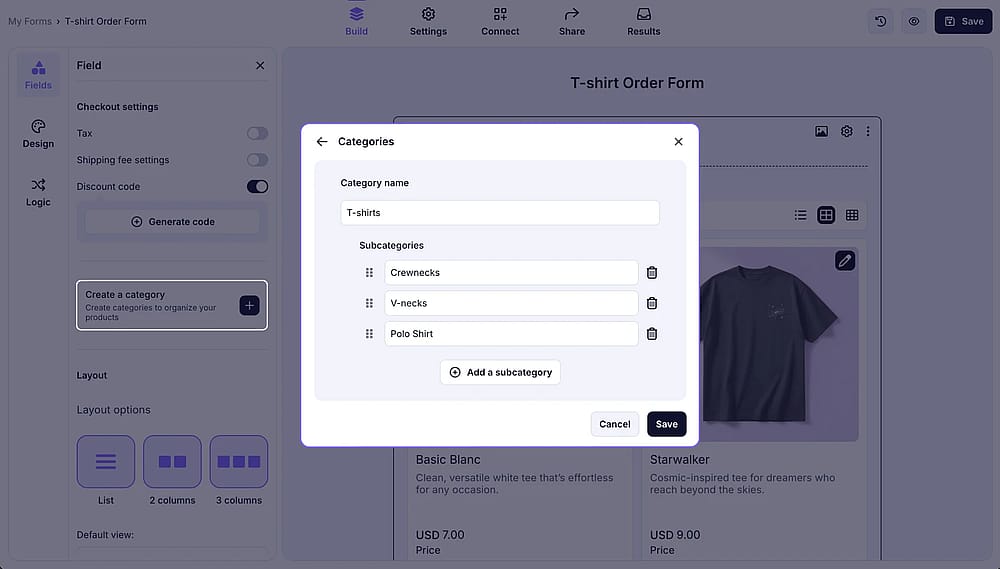
An image showing the “Category” section, where you can assign your item to the particular category you created
Changing the product display layout
List your products in one-column, two-column, or three column layouts. Set layout option the default and which are available.
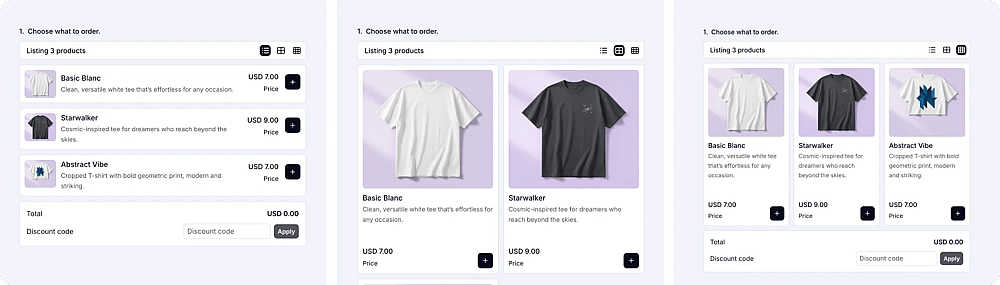
An image showing the different product display layouts
Individual product settings 🛍️
Apart from the general field settings, you have access to many other capabilities through your product settings. But how? Explained below:
1.Simply click on a product after you add one:
An image showing on where to click to open the settings for a specific product
2. Here, in the product settings, you can change the upload images, add description, add variants, change stock and price information, and more.
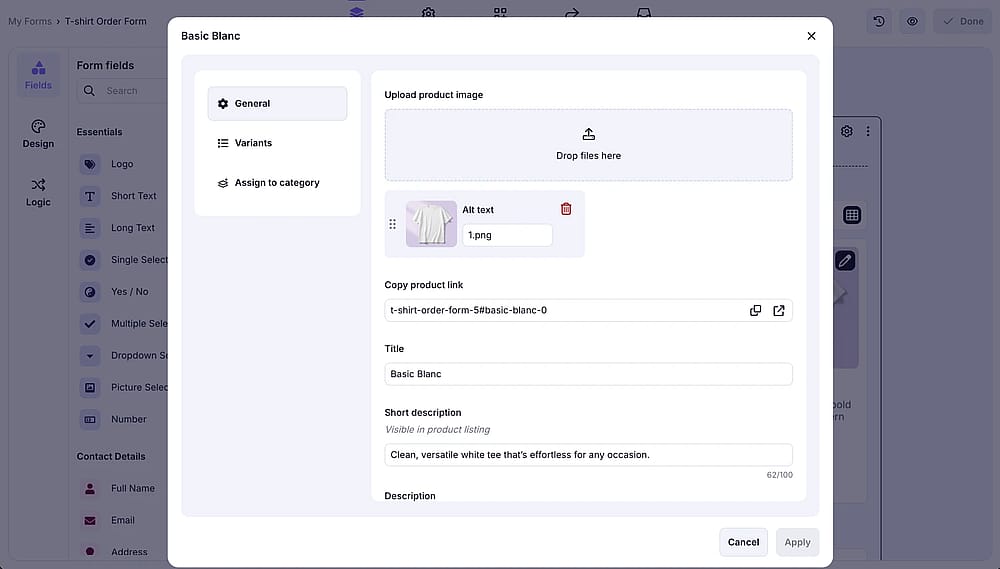
An image showing the settings pop-up for a specific product
Adding product images
You can add up to 4 images for each product. You can show your products from different angles or simply add one image for each size option. Here are the best image sizes for product images:
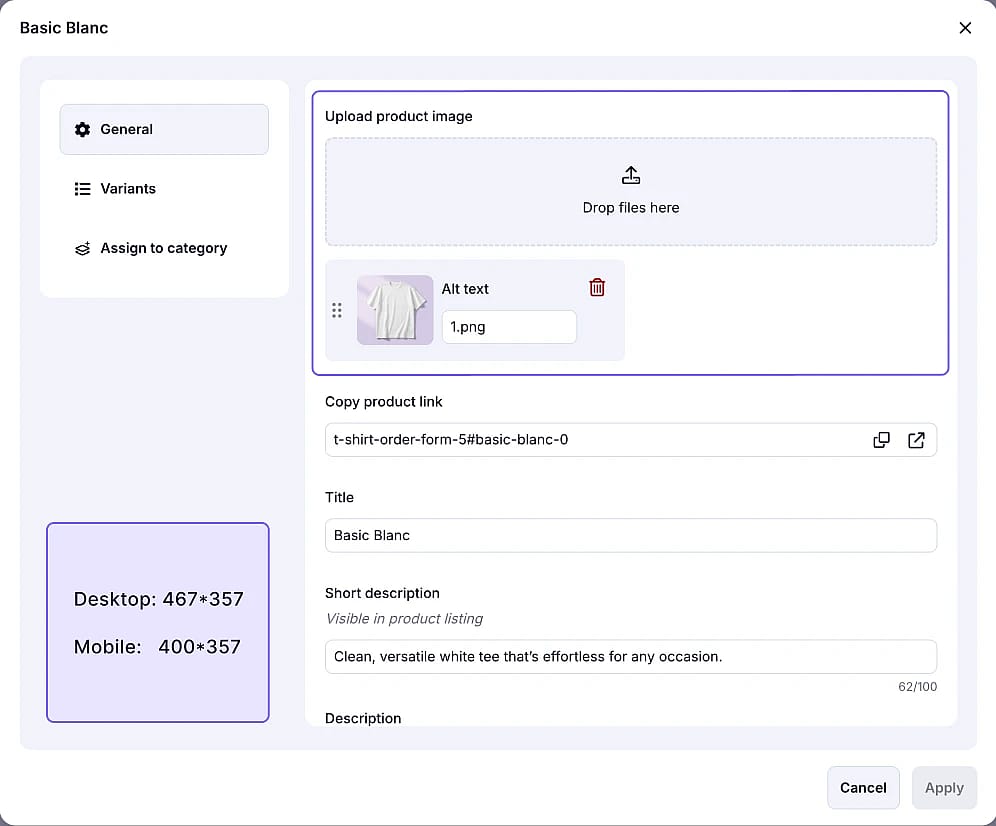
An image showing how to upload a product image and best dimensions for the product image
Adding product options/variations
After switching to the menu on the right of your product settings, called Options, you can add different options for this specific product, such as Size, Color, etc.
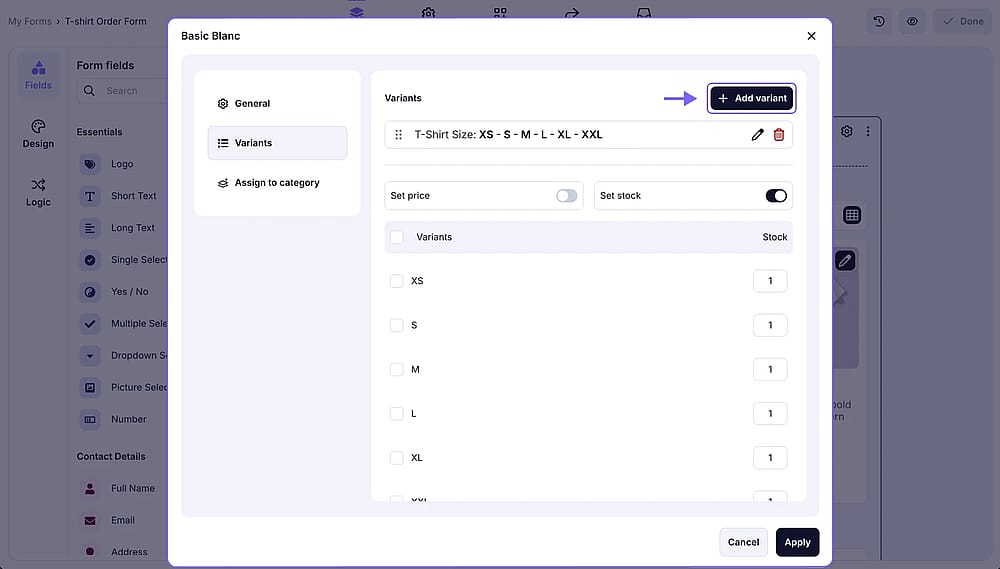
An image showing the “Variants” section, where you can add item variants needed
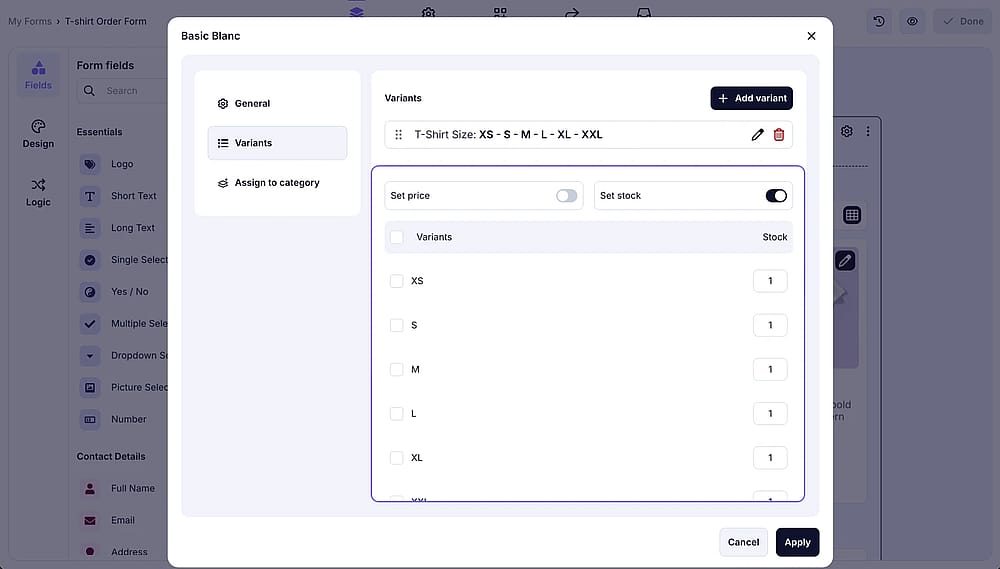
Enabling stocks for products
On the stocks menu, you can set the stock amount for your product and choose how it will behave when out of stock, such as hiding, disabling, or continuing to offer the product.
An image showing how to enable stock settings for your products
If your product doesn’t have variations, you can find the stock settings under “General” and also decide what happens when a product is our of stock (hide the product, continue showing, etc.)
Setting prices for different options
On the Variants menu, you can set different prices for each option of every single product. For example, if you want to sell a T-shirt in L size at a higher price than the M one, you can set different prices for each here.
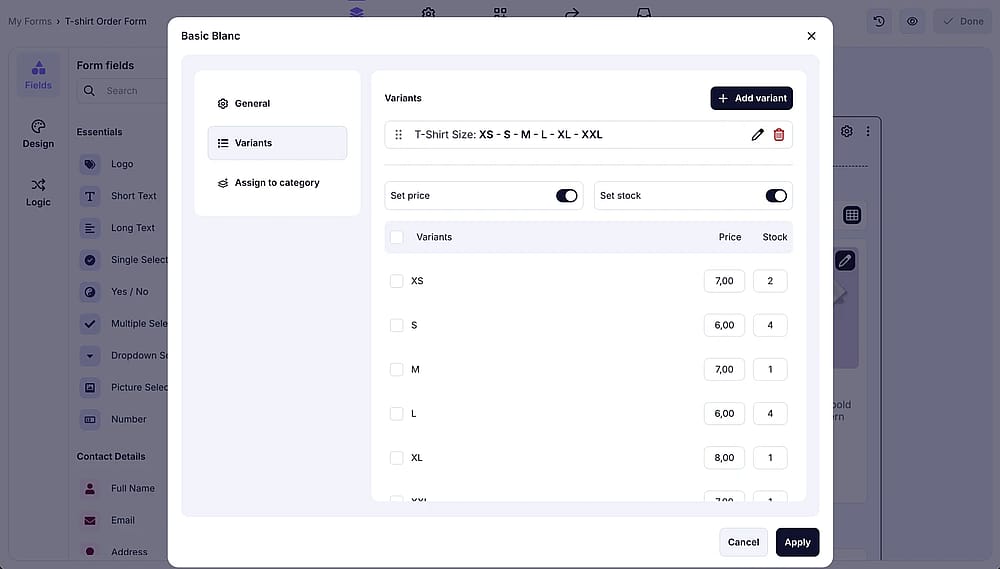
An image showing how to add different price information for variants of the same product
Splitting products into categories
Under the “Assign to category” tab, you can assign your product one or multiple categories. It’s that easy.
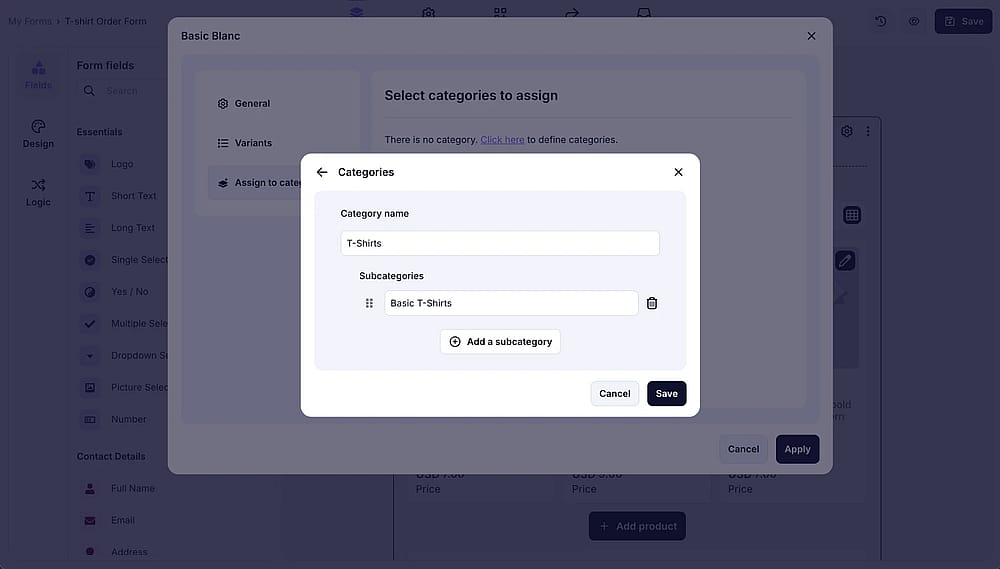
An image showing the “Category” section, where you can assign your item to the particular category you created
What’s next?
Once you have completed adding products to your product basket, you can now look for ways to accept online payments for them, and it is a pretty easy thing with forms.app’s Payment field and integrations with the World’s most popular payment gateways such as Stripe and PayPal.
Yes, you can add a shipping fee for your product basket by accessing the field settings.
Yes, after collecting a response, you can share shipping information by clicking the response in the Results page and choosing a truck icon.