
Save up to 60% on yearly plans and enjoy our biggest offer of the year. Limited time only. 🍂
See pricing

How to accept payments? 💸💸
Using online forms to collect payments without any hassle and commission fee sounds like a dream, right? That’s exactly what forms.app offers with its product basket and payment fields. Let’s take a look at the methods for collecting payments and how you can use them:
Payment methods
Whether you are selling products online or collecting donations, the payment field of forms.app will help you easily collect and transfer money to your account. For collecting international payments, you can connect Stripe and PayPal accounts to your forms. No matter which method you use, it will be a quite simple process that can be completed with a few steps.
After adding a payment field to your form, you will have several options: setting a fixed amount and currency for payments, choosing a default payment method, and enabling the methods you would like to offer. Please visit the following articles to learn how to enable collecting payments through Stripe or PayPal:
How to collect payments through Stripe
forms.app offers several ways to help you collect payments by using online forms. One of these methods involves Stripe, a globally trusted online payment processor that helps businesses collect payments easily and securely. After you connect to Stripe on your form, your visitors will be able to use their credit/debit cards to make payments or donations.
1. Add a payment field to your form and add the Stripe as a payment option in the field settings:
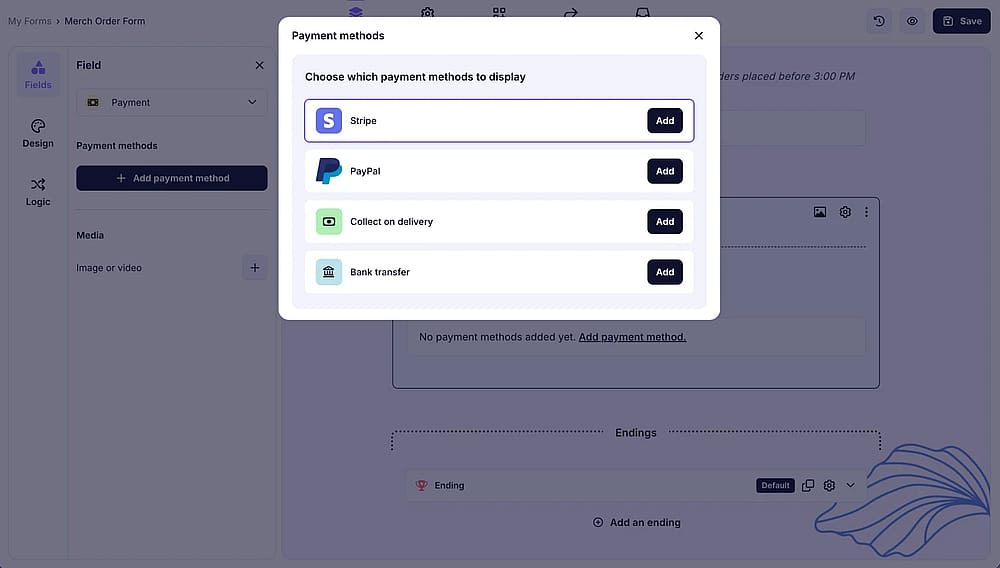
An image showing how to enable the Stripe option from the Payment field settings area
2. Click on the “Add new account” button and connect to Stripe:
Before adding your account for real transactions, you can enable test mode to see how payment collection works on forms.
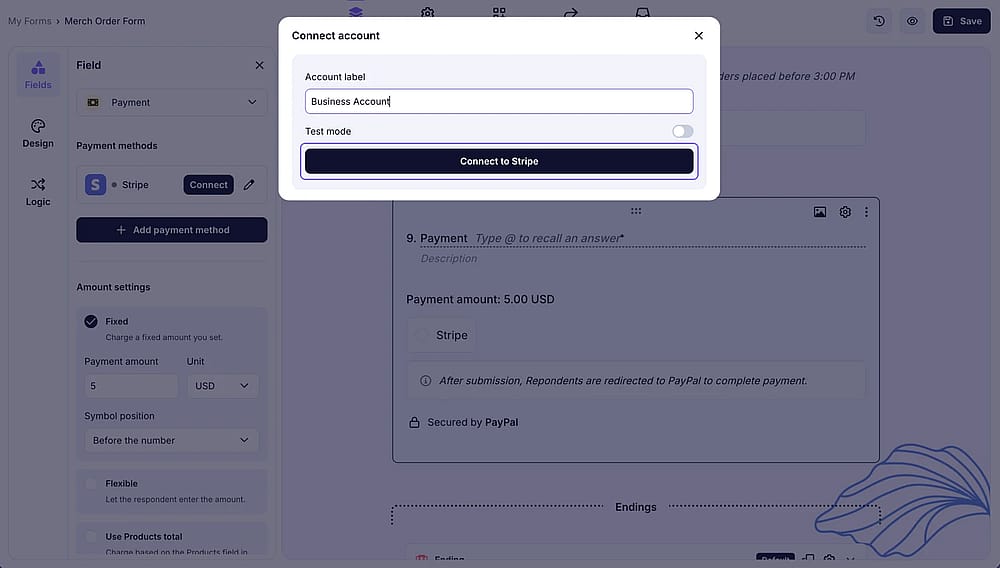
An image highlighting the “Connect to Stripe” button in the field settings
3. Sign in to your Stripe account on the pop-up page:
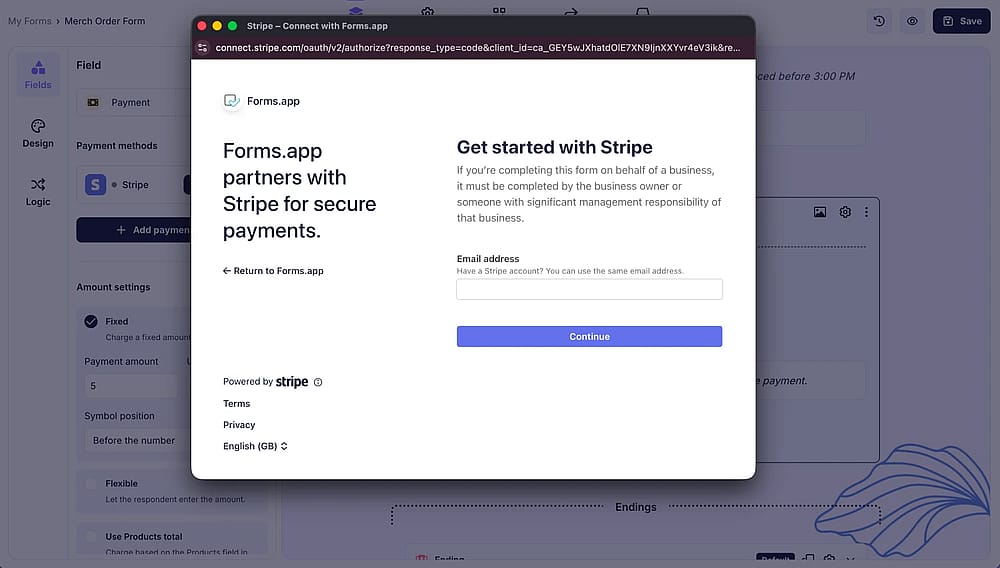
An image showing the pop-up appearing where you need to log in to your Stripe account
4. Fill in some details if you haven’t before:
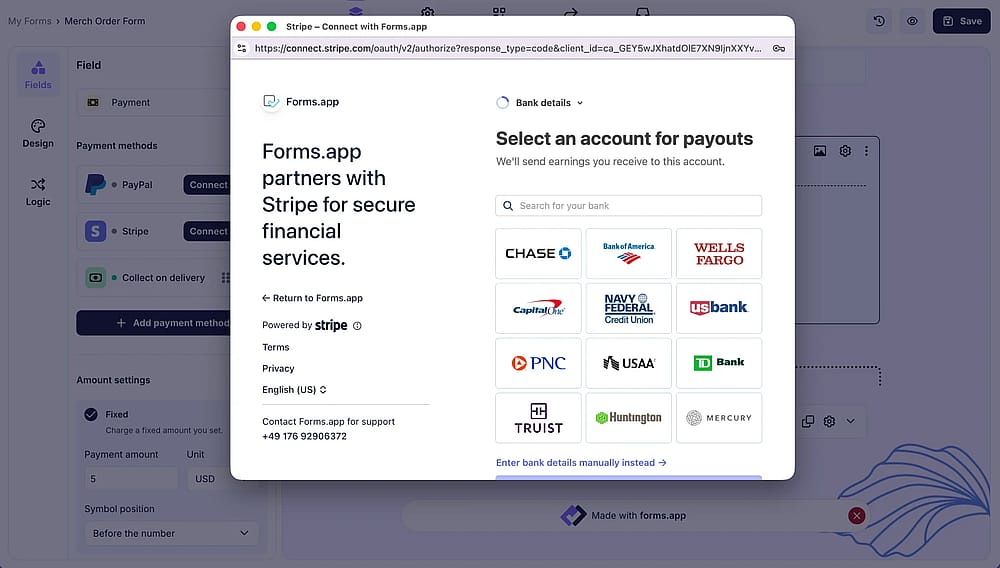
An image showing the Stripe page, where you need to enter your personal information
That’s it, you can start collecting international payments with your online form! If you are looking for a way to offer multiple payment options to your visitors, continue reading to learn how to collect payments through PayPal.
How to collect payments through PayPal
PayPal offers one of the easiest ways to collect payments from all around the world. Now, you can use it to collect payments through an online form. This will allow people to pay or donate to you easily and securely. Let’s see the steps you should follow to enable the PayPal option for payments:
1. Add a payment field to your form and enable the PayPal option in the field settings:
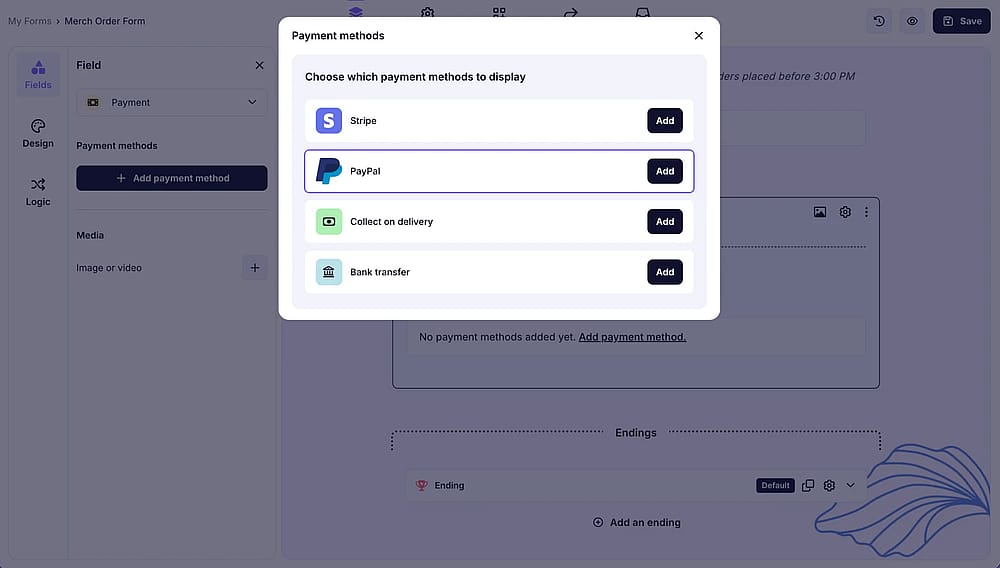
An image showing how to enable the PayPal option from the Payment field settings area
2. Click on the “Connect to PayPal” button:
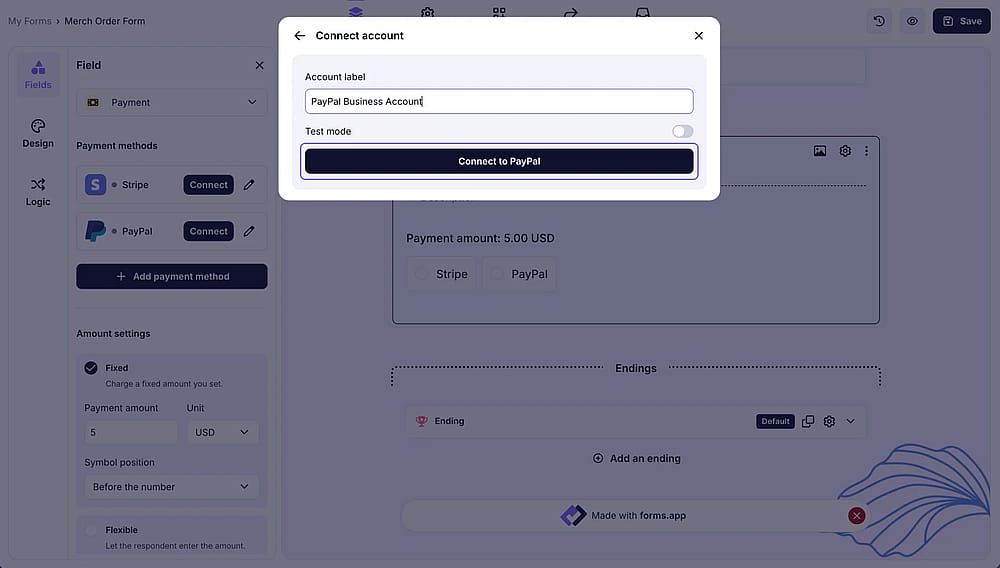
An image showing how to add a PayPal account for payments
3. Sign in to your PayPal account on the pop-up page, and the connection will be set up automatically:
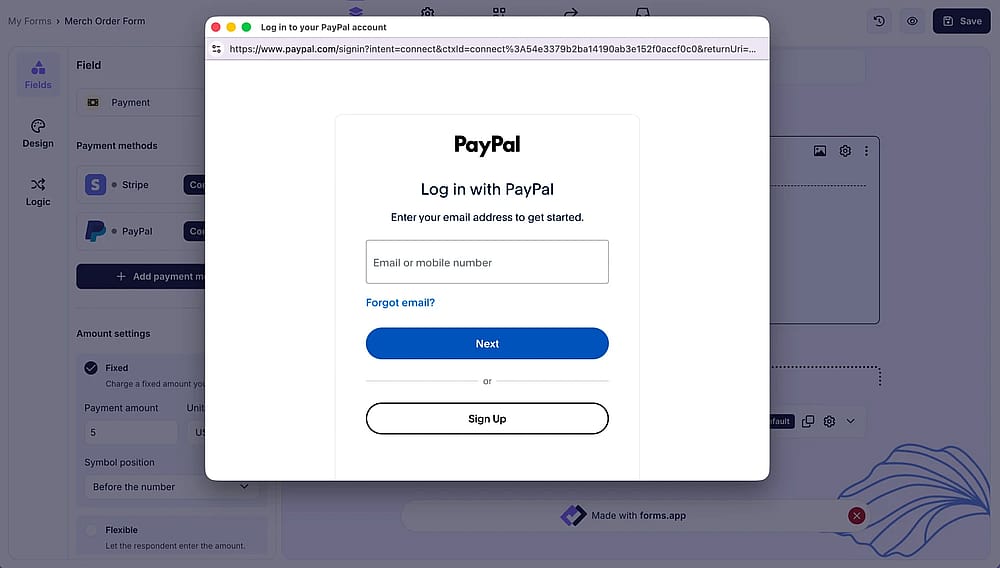
An image showing the pop-up appearing where you need to log in to your PayPal account
If you want to test how the payment method you added works, you can always check out the Testing mode option and enable it above the payment options in the Payment field settings.
How to collect payments through Authorize.net
Connecting your Authorize.net account allows you to collect payments directly from your forms. In order to set up a payment integration with Authorize.net you need three keys:
- API Login ID
- Transaction Key
- Public Client Key
Here are the steps for getting the necessary keys on Authorize.net and set-up the integration:
1. Open your Authorize.net account and find Account > Account and API settings under the left menu:
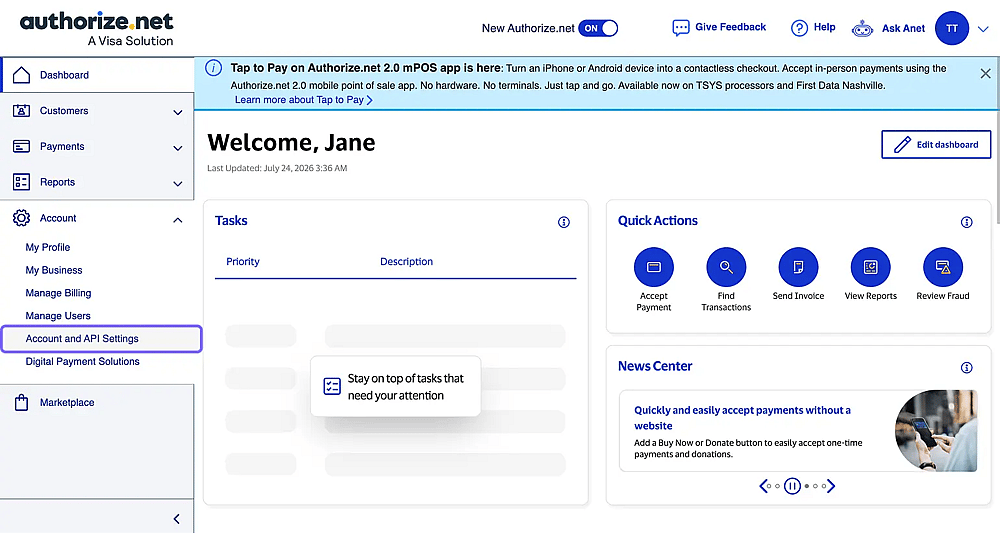
Image showing the Account and API settings option on Authorize.net
2. While on Account and API settings, choose API Credentials and Keys:
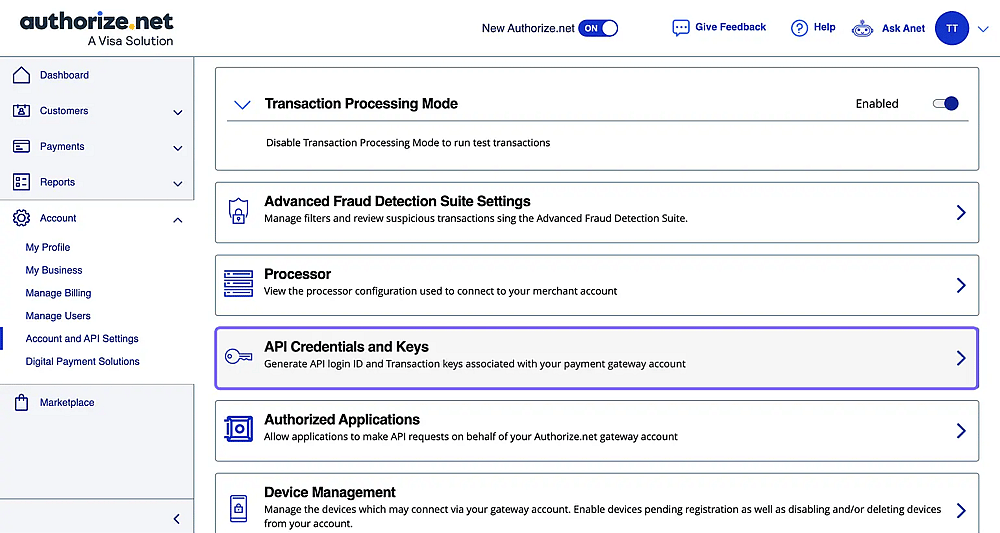
Image showing the API Credentials and Keys option under Account and API settings menu
3. Copy your API Login ID and create a new Transaction Key under API Credentials and Keys:
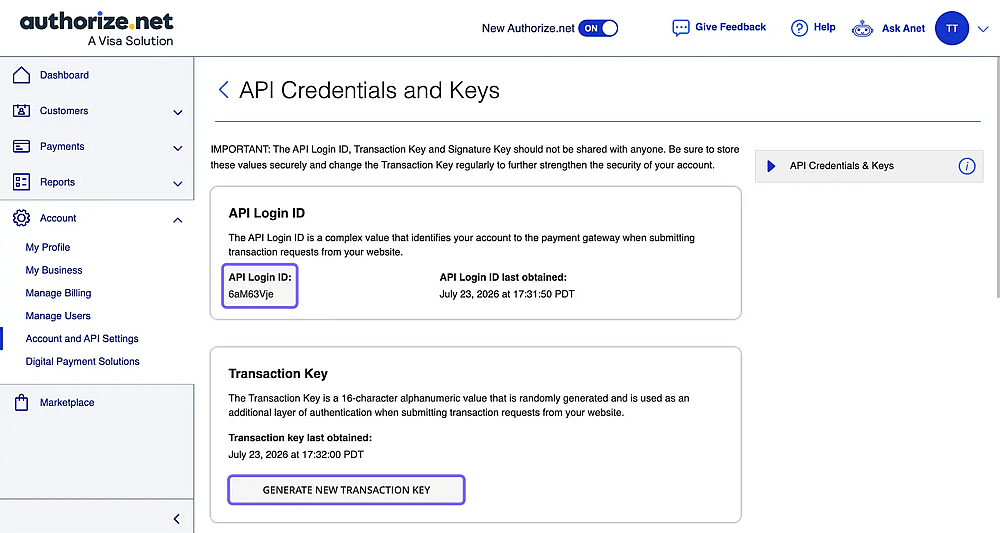
Image showing the API Login ID and new Transaction Key options
4. Scroll down to find and create a Public Client Key. If you have already created one, you can just copy it:
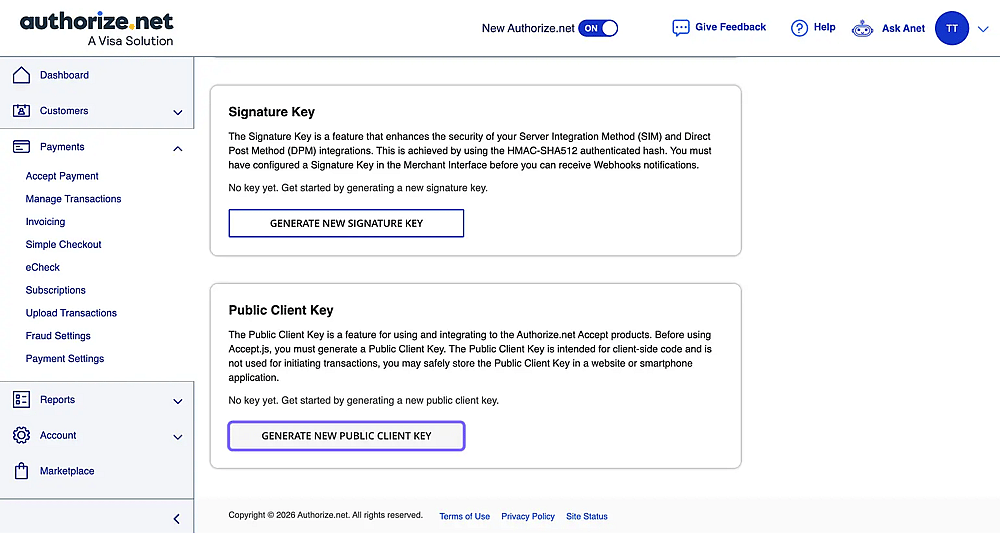
Image showing the Public Client Key
5. Now that you have the API keys, go to forms.app and choose the Authorize.net as the payment method. It will open a screen, where you can name the connected account and enter API keys:
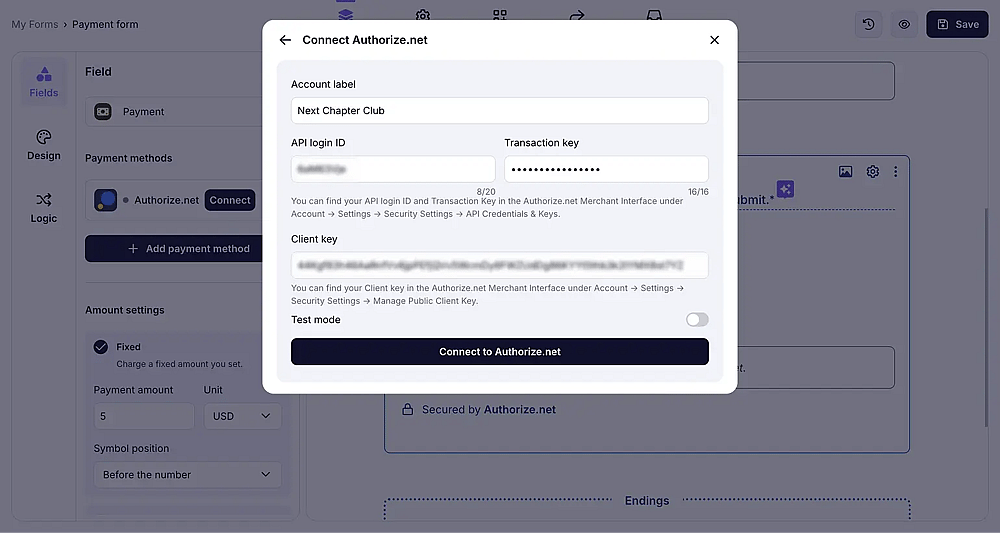
Image showing the integration set-up pop-up for Authorize.net on forms.app
6. That’s it. Once you are done, you should be able to see Authorize.net option with a green dot under the payment field settings:
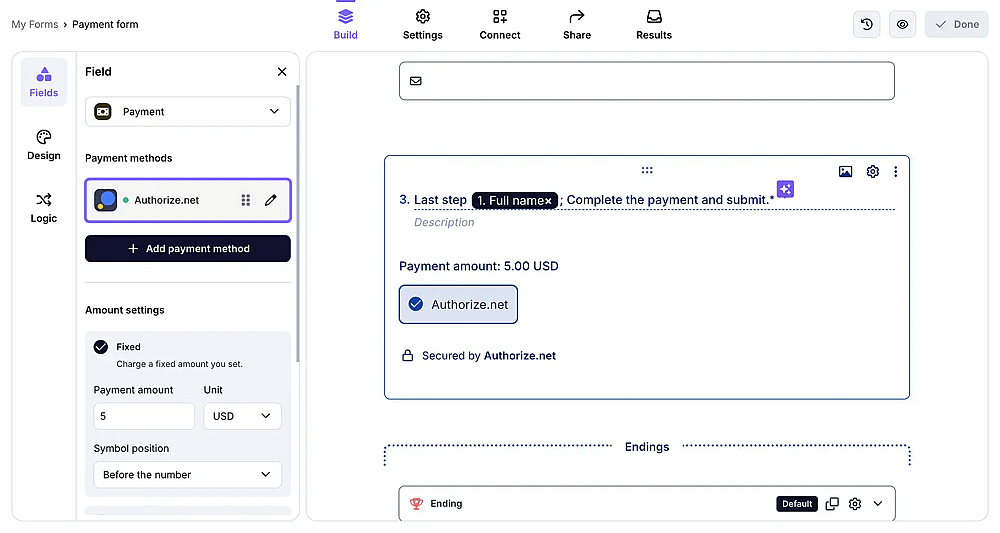
Image showing a successfully set-up Authorize.net integration on forms.app
How to collect payments through Square
Square is one of the most prominent payment methods used online. Especially liked by SMEs, Square allows not only credit card/debit payments, but also payments such as Google Pay and Apple Pay.
1. Under payment field settings, choose "Add payment method" and then Square option.
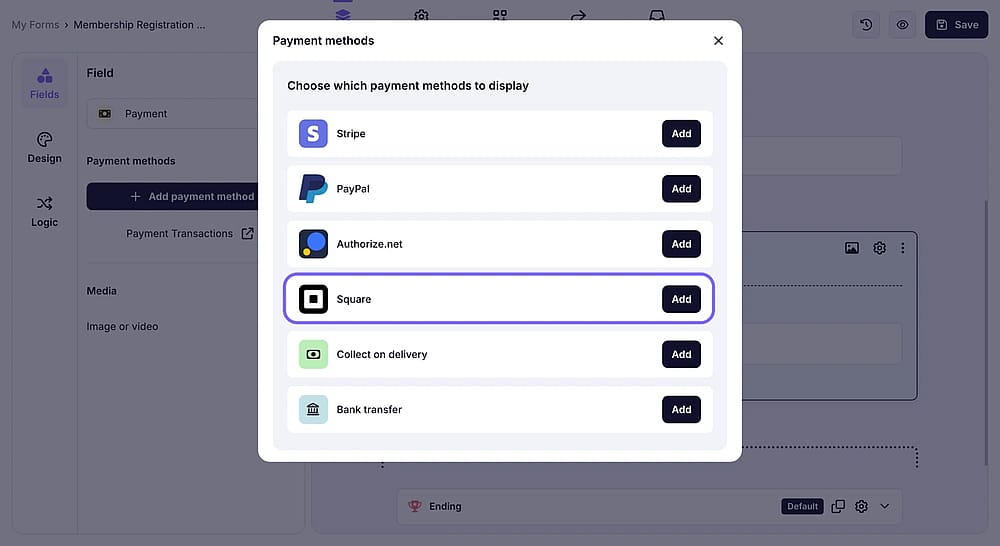
The “Square” option under the Payment methods menu
2. Give your Square account a name and connect to your account.
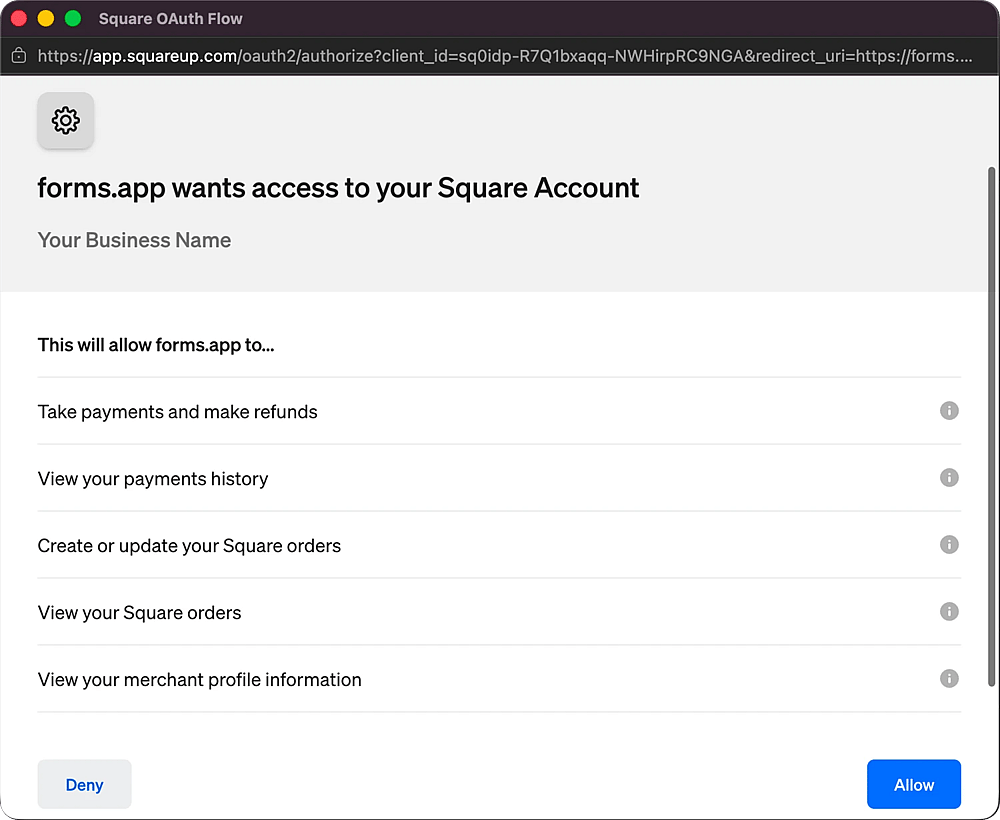
Square's authorization screen
3. Once you authorize access, you will see a tag that says "connected" under Square payment settings. You can also enable payment methods available with Square, such as Google Pay and Apple pay.
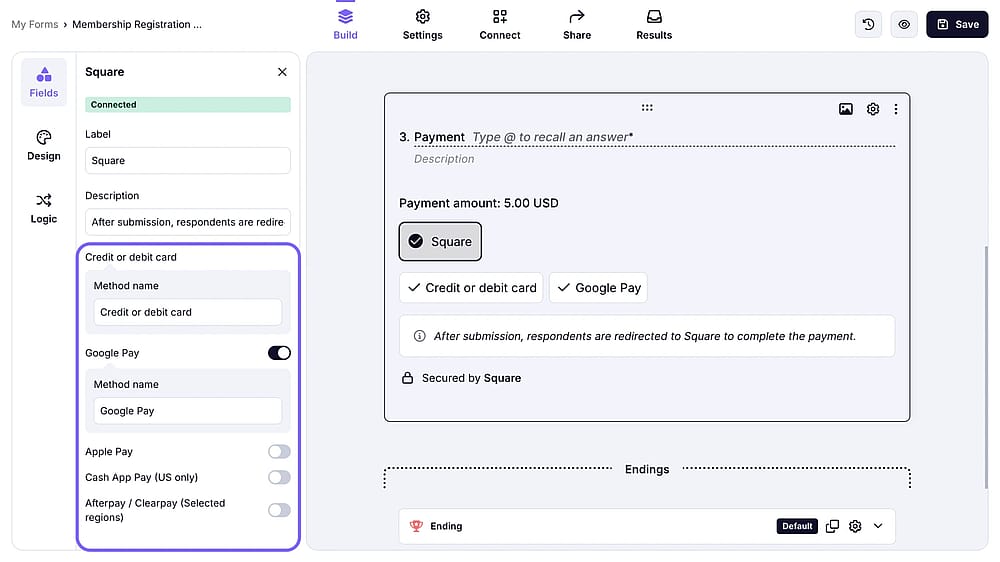
Square payment settings
⚠️ Testing Square in Sandbox mode
Before you authorize forms.app for test mode, your Square test account must be signed in. Otherwise you will see a blank page when you try to connect. here's how:
1. Go to developer.squareup.com/apps and sign in with your Square Developer account
2. Select your app → and make sure the environment is Sandbox
3. Open Sandbox test accounts in the left menu, then click the Dashboard option next to the test account you're using.
4. This opens a signed-in Sandbox Dashboard tab. You need to leave it open in your browser while you connect.
How to enable pay on delivery
Not all payments are collected at the time of the order. If you offer a cash payment option or payment on delivery, simply follow these steps:
1. Click on “Add payment method” under the payment field settings and select “Pay on delivery.”
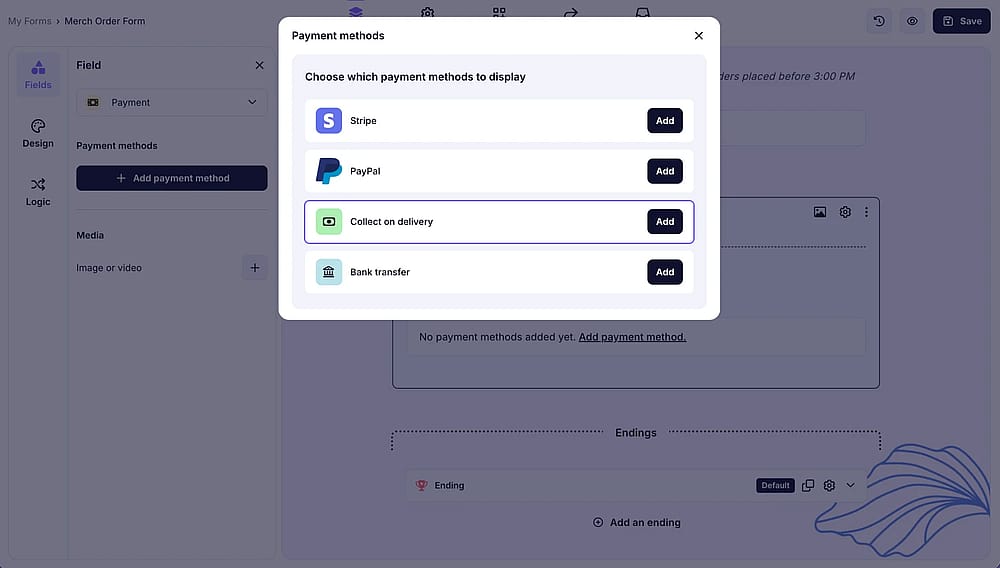
An image showing how to enable the “pay on delivery” option from the Payment field settings
2. Change the payment method name, add a description, and add sub-options, such as cash, credit card, or anything else.
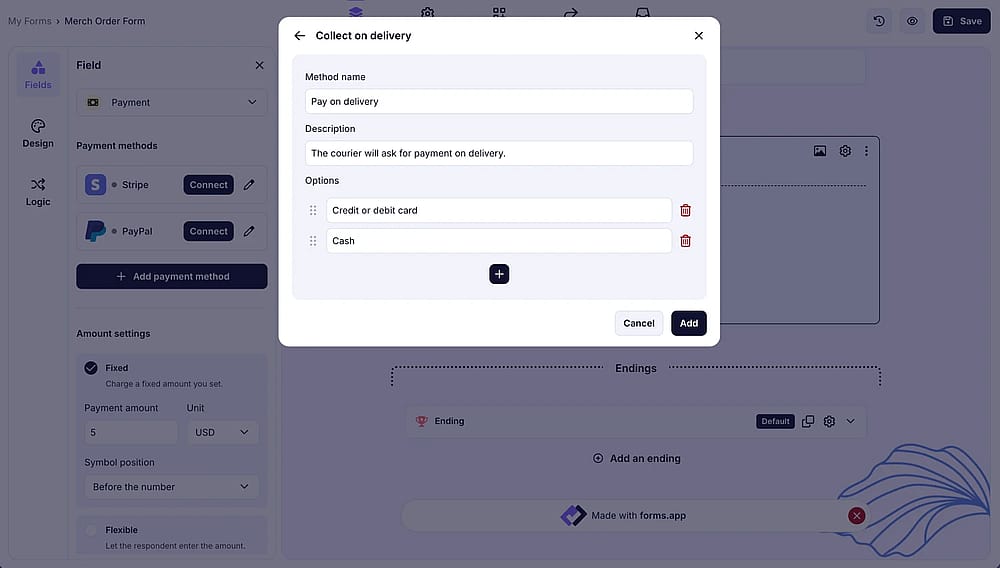
An image showing the “pay on delivery” settings
3. That’s it! Here’s how “Pay on delivery” option looks like on a real form:
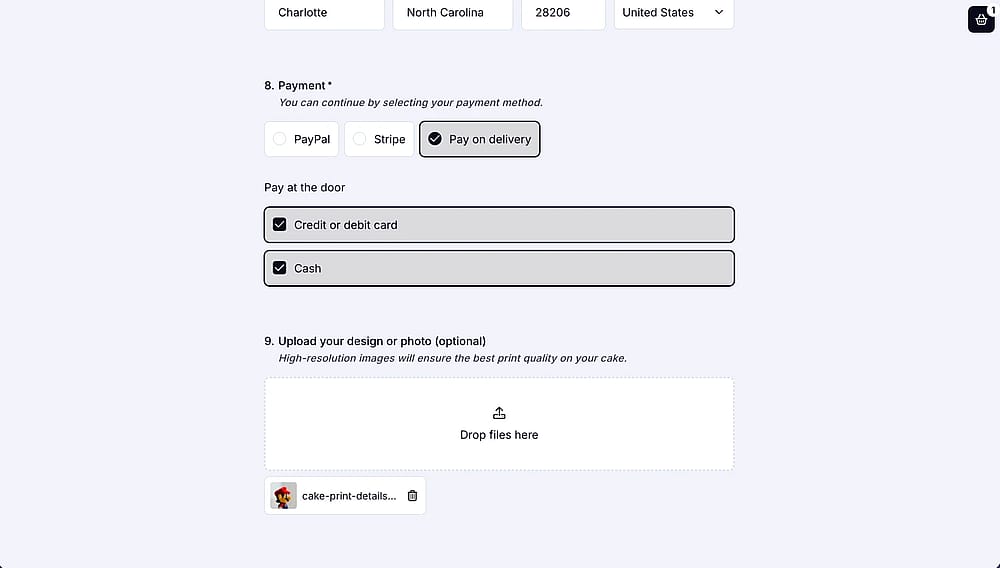
An image showing how “pay on delivery” looks like on a real form
How to collect payments through Bank Transfer
If you accept bank transfer payments, you can also add it as a payment option. forms.app generates a unique reference ID so you can easily match payments with form responses.
1. Click on “Add payment method” under the payment field settings and select “Bank transfer”
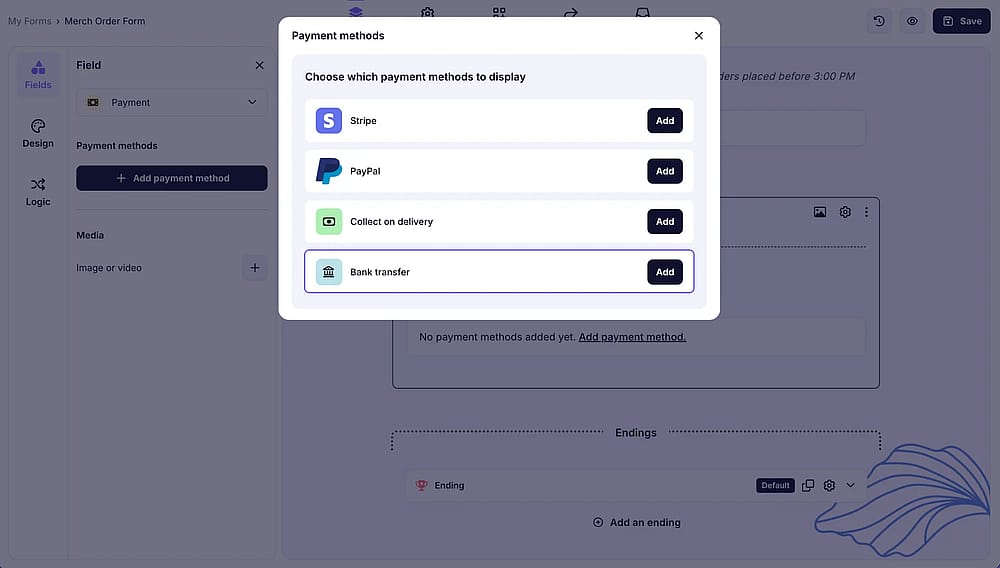
An image showing how to enable the “Bank transfer” option from the Payment field settings
2. Simply enter a custom description for bank transfers. Here, you can also click on “+ Reference ID” to generate unique IDs for each respondent.
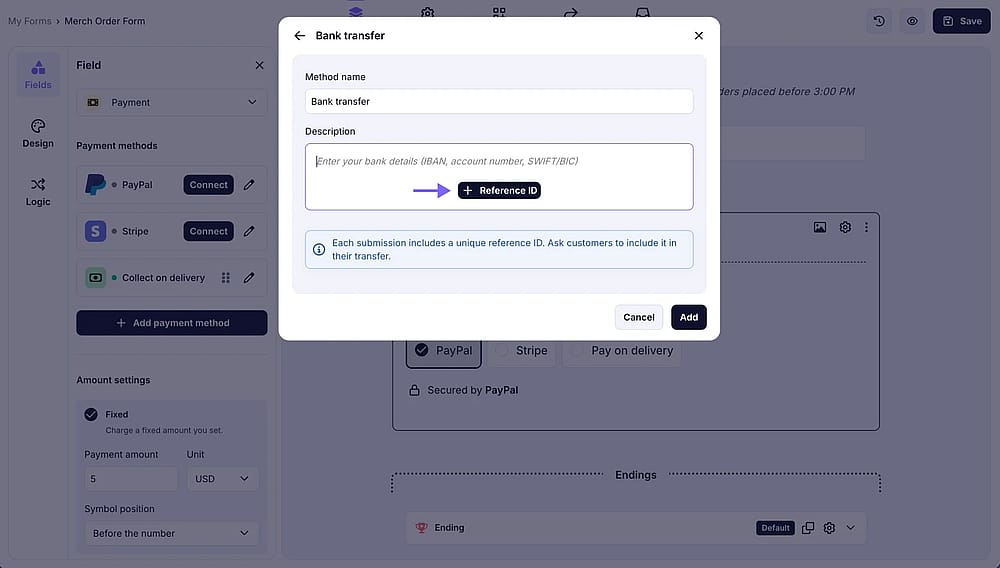
An image showing the settings available for the Bank transfer option
Frequently asked questions
To ensure your payment field works correctly, you can always enable the Testing mode option in your payment field settings and submit the form.
Firstly, please double-check the personal details you entered, such as your account information for Stripe and PayPal. Make sure everything is correct, then try testing your form again. If the problem persists, feel free to reach out to us anytime.
We utilize integrations with third-party tools, such as PayPal and Stripe, to enable you to collect payments through our system. Since the actual payments are processed by these platforms, receipts can only be obtained directly from them.
However, to be notified within forms.app when a payment is made, you can always enable and check the Email Notifications feature.
No. Unlike some other form builders, forms.app doesn’t take any fees from your collected payments. Please note that PayPal and Stripe has their own standard fees.
- For Stripe: The fee is 2.9% + 30¢ per successful transaction for domestic cards. For example, you pay a $3.20 fee to Stripe for services to collect $100.
- For PayPal: The processing fees depend on the received currency. Learn more about PayPal’s processing fees on their page.
Currently, there is no limit on the number of payments you can collect through the forms you've created. However, please note that each plan still has a monthly response quota, which applies regardless of whether the form response includes a payment or not. We recommend keeping an eye on your plan’s response limit while collecting payments.