How can I customize response PDFs?
You can receive a copy of your form responses via email, send them to respondents post-submission, and download them at any time, including as PDF files. With forms.app’s response PDF editor, you also have the option to customize or create PDF versions of your responses to perfectly fit your needs.
You can create a custom PDF for each response when downloading it from the Results section. Check the details below to learn how.
1. Access the Results tab and select the response you want. After that, click the three-dot menu in the upper-right corner and choose the Edit PDF option:
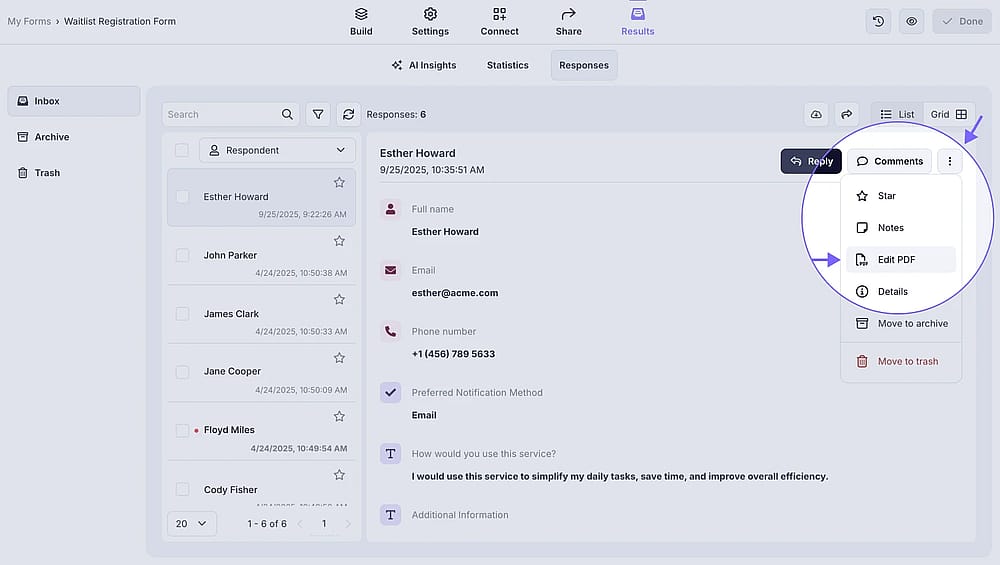
An image showing how you can find the “Edit PDF” button to start editing the PDF response from the Results tab
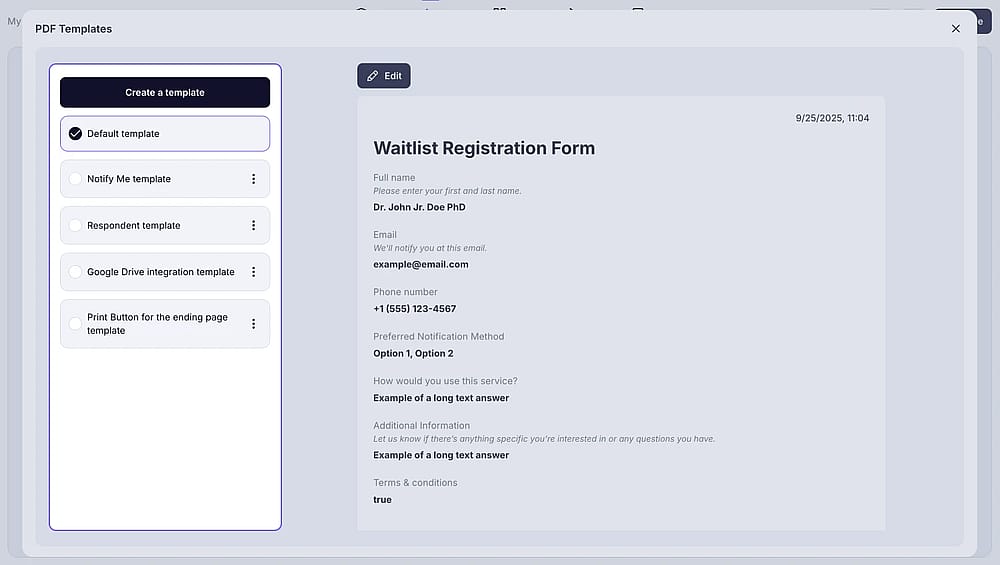
2. Once the PDF editor is opened, you have options to use the Default template, create a new template, or choose one of the templates you created earlier:
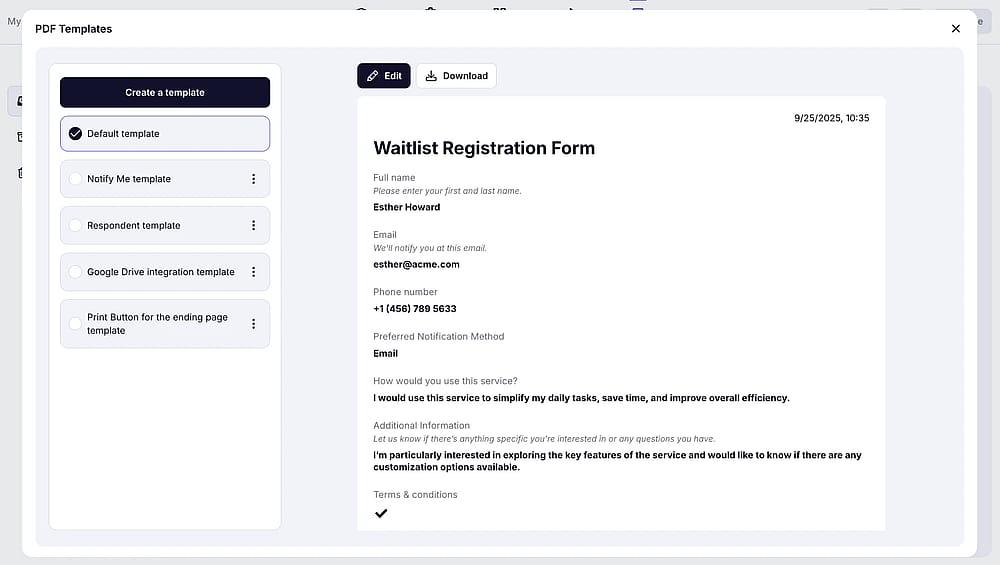
An image showing the options you have once the “PDF templates” panel is opened
3. You can start customizing your PDF by pressing the “Edit” or “Create a template” buttons. Under the Content section, you can:
- Hide or show the questions
- Rename or re-order your questions
- Add a Date & Time stamp to your PDFs
- Choose your preferred date format
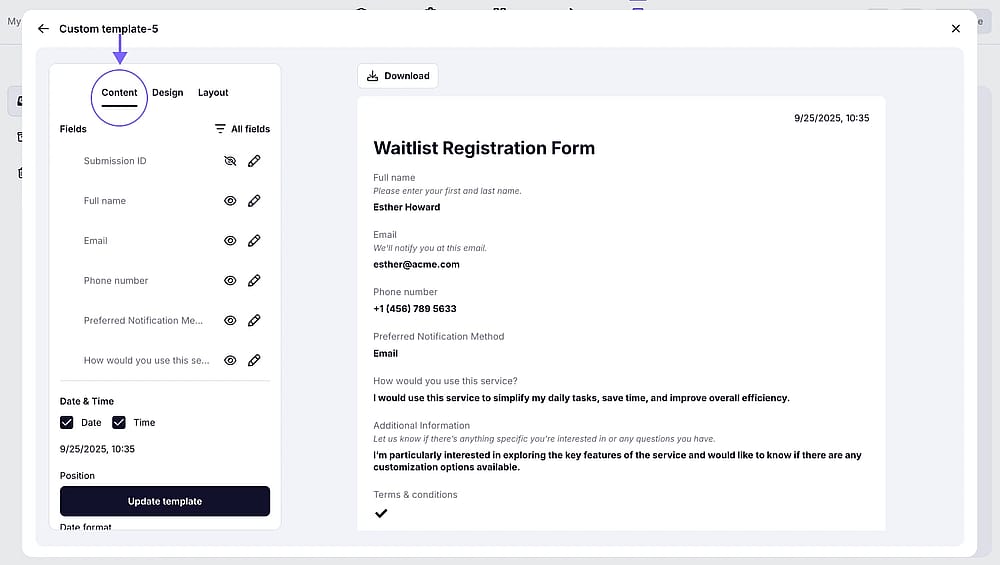
An image showing the customization options you have once you access the “Content” tab
4. Next, under the Design section, you can:
- Upload your logo
- Adjust the spacing between questions
- Change the color and font of the text of your PDF response
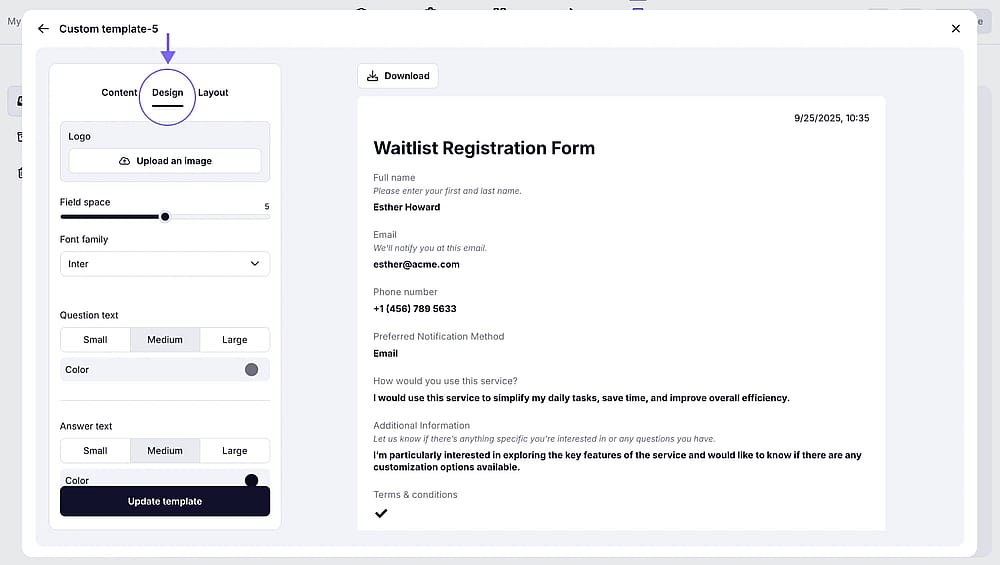
n image showing the customization options you have once you access the “Design” tab
Adding logo feature is only available on the Basic plan and higher.
5. Once you have adjusted the design of your PDF, head over to the Layout section. Here, you will be able to:
- Change the header title & description of your document
- Add a footer section
- Enable field descriptions
- Hide empty fields
- Add the calculation score to the document
- Remove forms.app branding
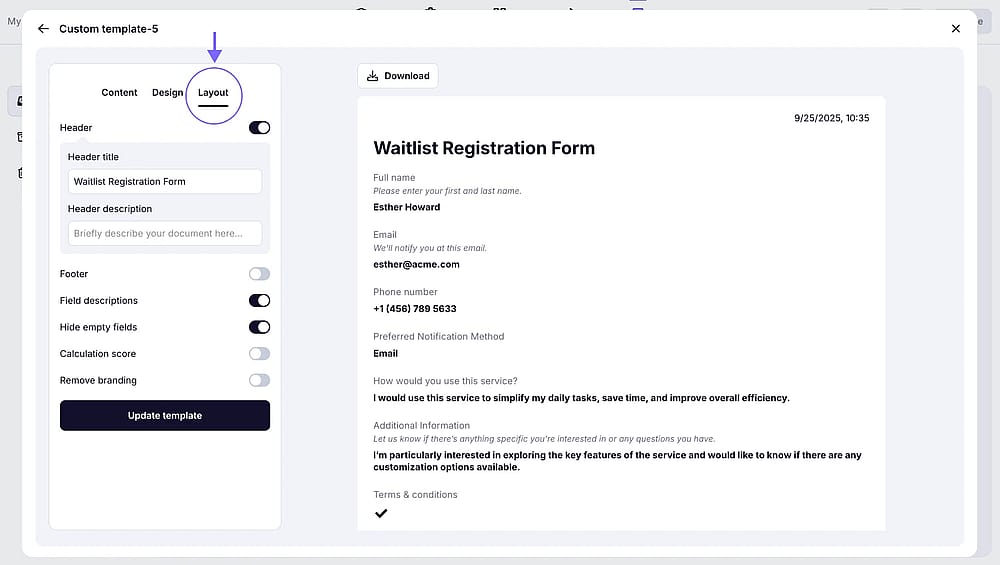
An image showing the customization options you have once you access the “Layout” tab
Removing branding option is only available on the Basic plan and higher.
6. Once you are done with the template editing, press the Update template button. If you want to download the response with the template you just adjusted, click Download to start the process:
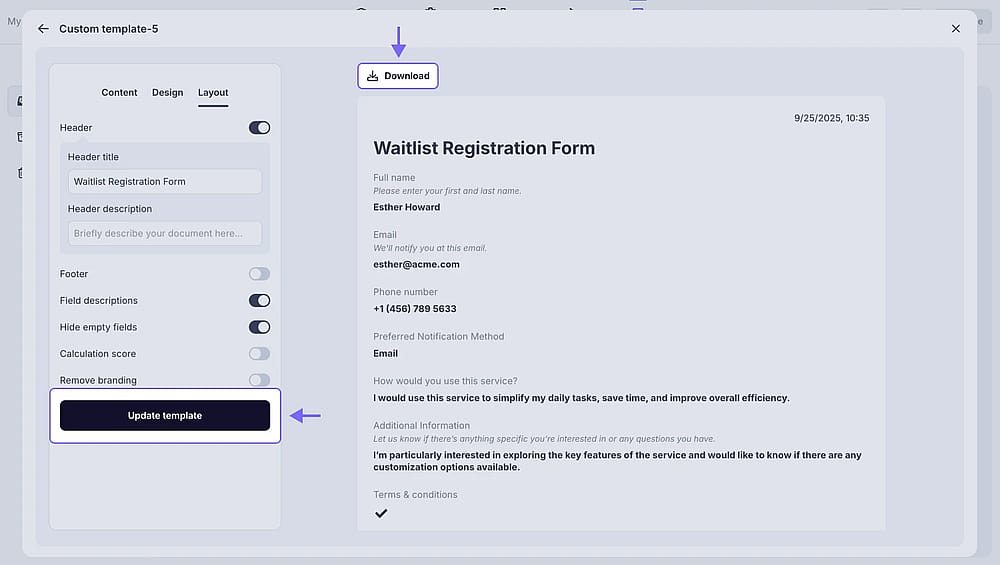
An image showing the “Update template” button to save your changes and the “Download” button to immediately download the PDF version of the response with the current template
That’s it! Now, you can easily customize the PDF for your form responses. What’s more, you can reuse your templates for different responses or in your notifications & integrations.
You can always change the name of your templates by pressing the three-dot menu on the template needed and clicking Rename.
How to use PDF templates for email notifications
forms.app lets you set up a PDF template for your email notifications, whether it’s for you or your respondents. You can easily do it from the notification settings of your form.
Setting up a PDF template for the “Notify me” option
Check the steps below to set a PDF template for the emails that will be received by the form owner:
1. Open your form settings, access the Notifications tab, and go to the Notify Me section:
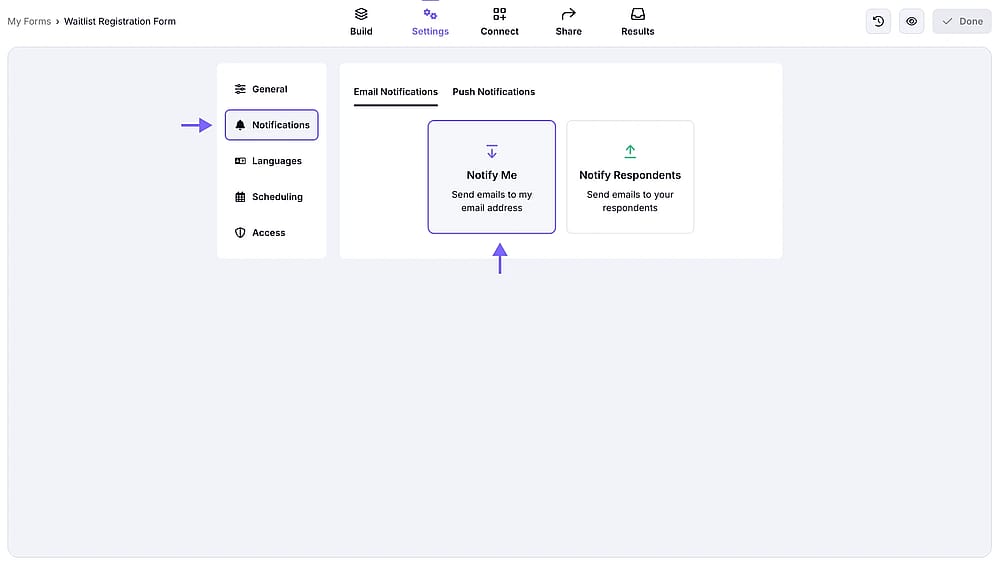
An image showing how you can access the “Notify Me” section from your form settings
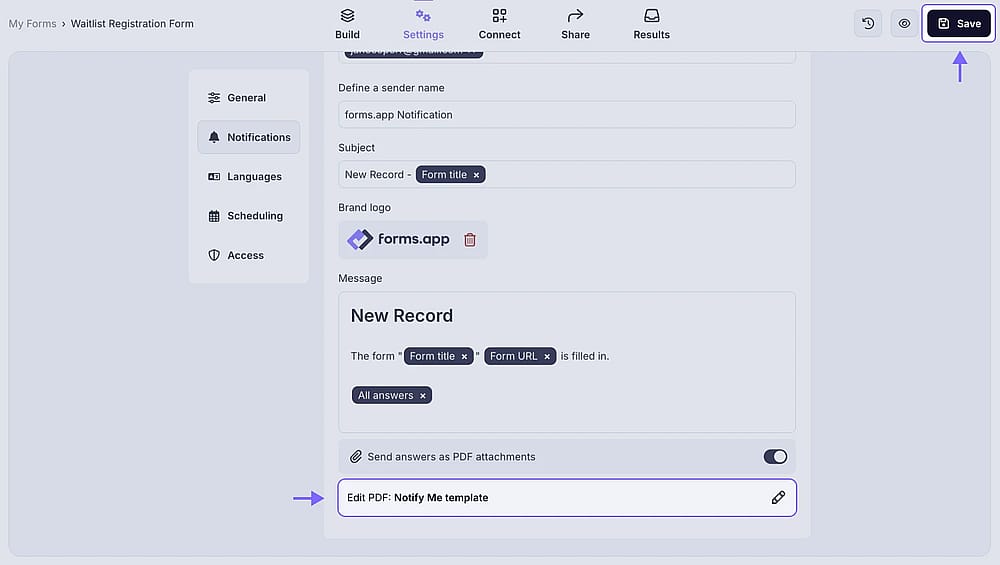
2. After enabling the Email notification toggle, go to the end of the page and open the Send answers as PDF attachments option. Next, click the Pencil icon on the Edit PDF setting:
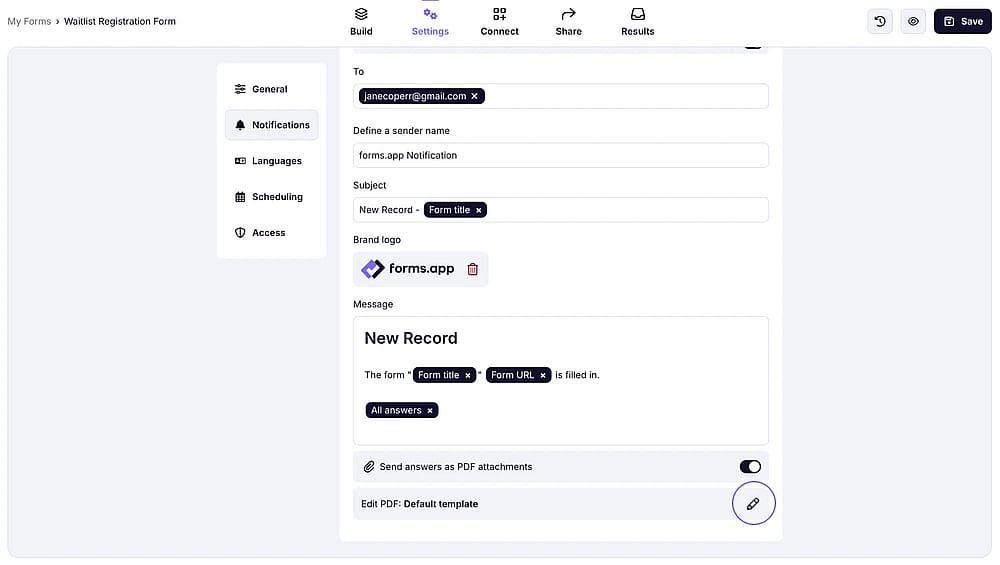
An image showing the “Pencil icon” on the “Edit PDF” setting, which you need to click to adjust the template for email notifications
3. Once the editing panel is opened, you can create a new template or select from the ones you created earlier, or continue with the default template:
An image showing the PDF options you have on the left menu for your future “Notify Me” PDF template
4. Next, after you select a template, remember to press the Save button, and you will start receiving the PDF attachments with your email notifications with the current template:
An image showing the newly added PDF template and the “Save” button, which you need to press to save changes and start getting updated email notifications
Setting up a PDF template for the “Notify Respondents” notifications
The same way you enabled a custom template for the notifications sent to your email address, you can also set up the needed PDF template for the email notifications your respondents will receive by simply accessing the Notifications tab and going to the Notify Respondents section.
How to set a custom PDF for the Print button on the Ending page
You can also set a preferred PDF template for the Print button, which appears on your form's Ending page. If enabled, respondents can view and download their submission by pressing this button after completing the form. Check the steps below to learn how to do it:
1. Open your form and make sure you are in the Build section:
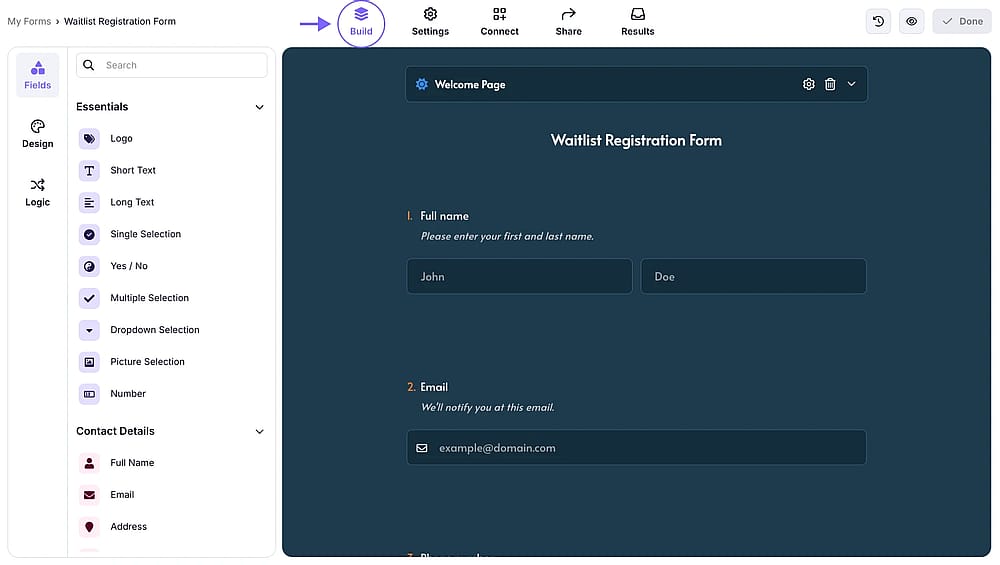
An image showing how to access the “Build” section once you open your form
2. Scroll down to access the Ending page field and press the Gear icon on it to view the field settings:
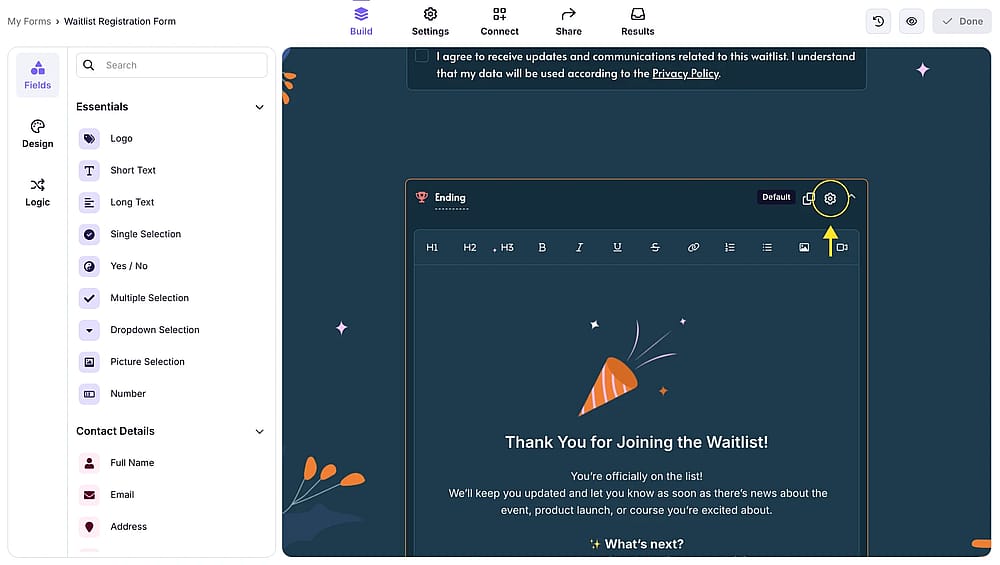
An image showing how to open the “Ending page” settings menu by pressing the “Gear” icon on the field
3. Enable the Print button option, and once opened, click the Pencil icon on the Edit PDF setting:
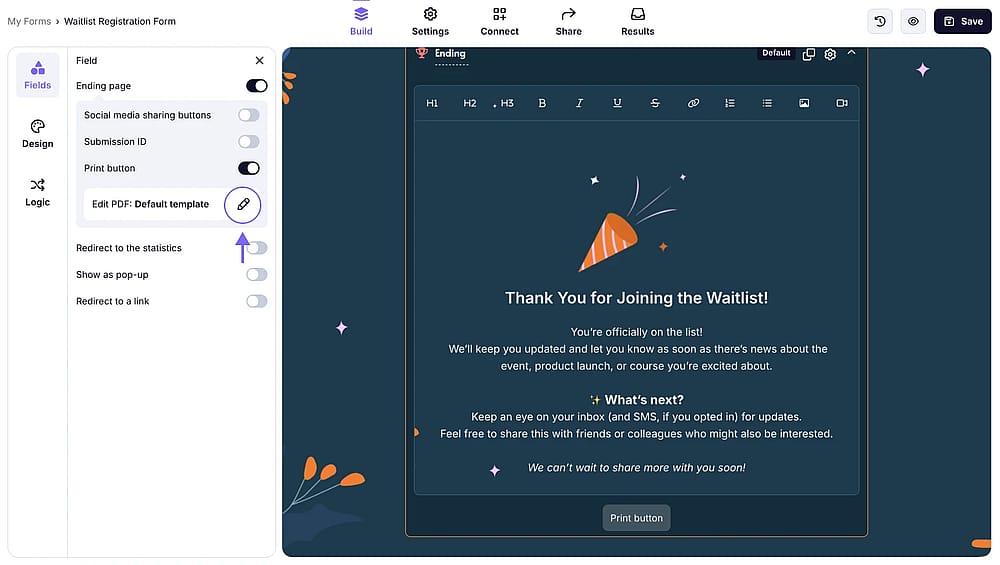
An image showing the “Pencil icon” on the “Edit PDF” setting, which you need to click to adjust the template for the Print button option
That's it! Once the Edit PDF panel appears, you can edit your current templates, select a default one, or create a new one. Then simply press Save, and your preferred template will be set for the Ending page for your respondents.
How to set up PDF templates for Google Drive integration
The next place where you can add and set a PDF template for your form is the Google Drive integration, as it also sends the PDF files of the responses to your Drive space. Follow the steps below to learn how:
1. Start by connecting your form with the Google Drive by going to the Connect section and finding the Google Drive option:
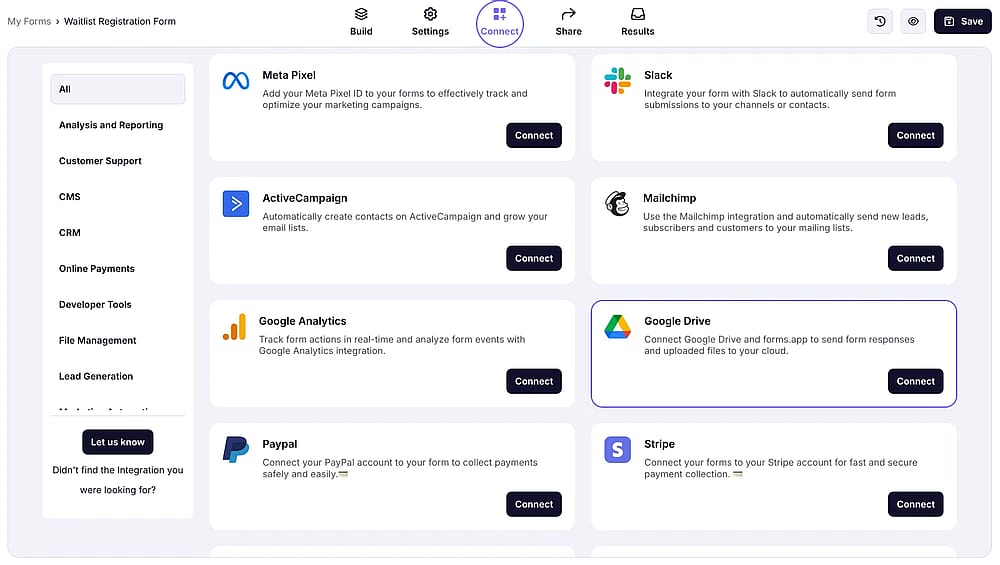
An image showing how to access the “Connect” section and find the Google Drive integration from the options appeared
2. After you press the Connect button and provide the necessary permissions, the connection page will appear. To start adjusting the PDF template, click the Pencil icon on the Edit PDF setting:
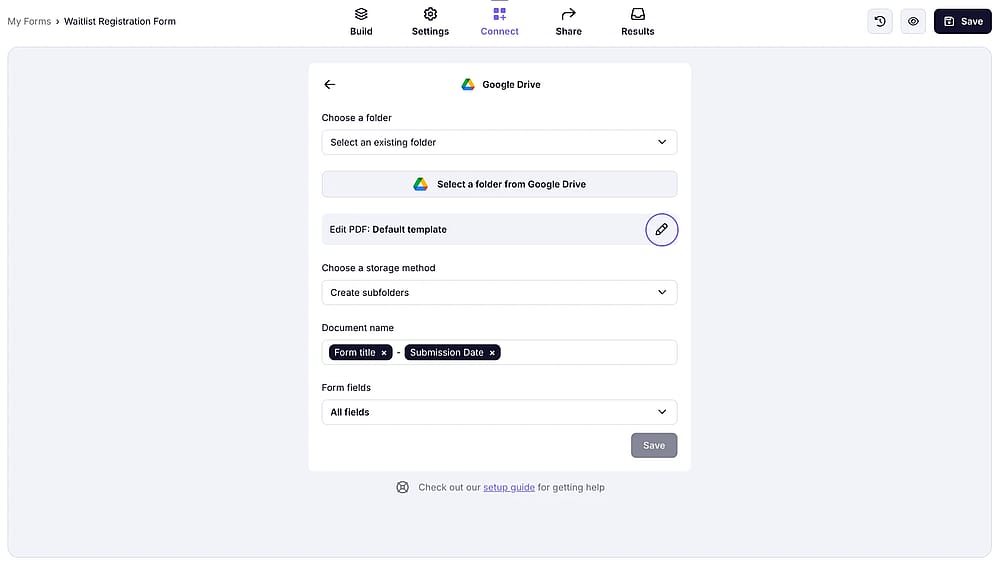
An image showing the “Pencil icon” on the “Edit PDF” setting, which you need to click to adjust the template for the Google Drive integration PDF files
Complete the integration setup and then press Save. From now on, your form’s PDF responses will automatically come to your Drive space with the template you set up.
No, you cannot change the default template. However, you can create a custom template for the purpose needed.
As long as the Hide empty fields switch in the Layout section is turned on (since the deleted questions won’t receive any new responses), these fields will no longer appear in future PDFs.
You can create as many templates as you like without any limits.
You can change the field title specifically for the PDF response by going to the Content section in the Edit PDF tab and clicking the Pencil icon on the field you want to edit.
For example, you can ask a name question conversationally, like “Can we have your name?” and show it on your PDFs as “Full name”. This gives you more control over your exported documents.
You can only customize the elements and fields you’ve created; you cannot edit or change the answers provided by your respondents.
Currently, the way to receive all responses as PDF files at once is through the Google Drive integration, which allows you to receive all responses and uploaded files directly in your Drive space.
If you delete a field from your form after setting up a template, this question will appear in red in the Content section when you open the PDF editor.
The answers to the deleted field will still appear in the PDFs of your older responses, but won’t appear in the new responses, as long as you enable the Hide empty fields setting in the Layout section (so unanswered questions won’t appear) or click the Eye icon on the field in the Content area to hide it manually.
Once you add a new question to your form, the new question will appear on your default PDF; however, it will not be shown in your custom PDF templates by default. You always have the option to edit your template and show your new questions.
On the PDF editor, choose a template to customize. Then click the Eye icons next to fields to hide or show them.
Yes, team members can see and use the templates created for a form.
Yes, when you duplicate your forms, the templates carry over. However, the templates won’t appear in the imported forms via “Import a form” option.