Collecting valuable data is the main reason for everyone who creates forms using form-building platforms, and Google Forms is a great tool for it. One of the most important details to pay attention to when it comes to collecting information is the quality of the information that you are collecting. So, how do you increase the quality of the information that you collect with one simple change in your Google Forms settings?
In this article, we will examine what the response validation function is in Google Forms, how to add a response validation in Google Forms, and a better way to use the response validation feature with the help of forms.app. We will also take a look at frequently asked questions about the response validation feature in Google Forms.
What is a response validation?

Response validation is a feature that allows you to set specific rules for each question in a form.
Knowing how to use response validation basically allows you to understand how to limit Google Forms responses, which ones to choose, and which ones to eliminate without the need to go through all of the responses.
Participants must follow the rules you have set for each question for the answers to be accepted. If the participant does not follow the rules, they will be met with a customizable error text that alerts them to change their answer to an accepted response.
How to add a response validation in Google Forms
While often overlooked, adding the response validation feature and understanding how to limit responses in Google Forms is simple. As it is quite easy to understand, we recommend using it as long as the form's theme and the questions call for it. This way, you can collect the most accurate information possible.
1. Open up your Google form
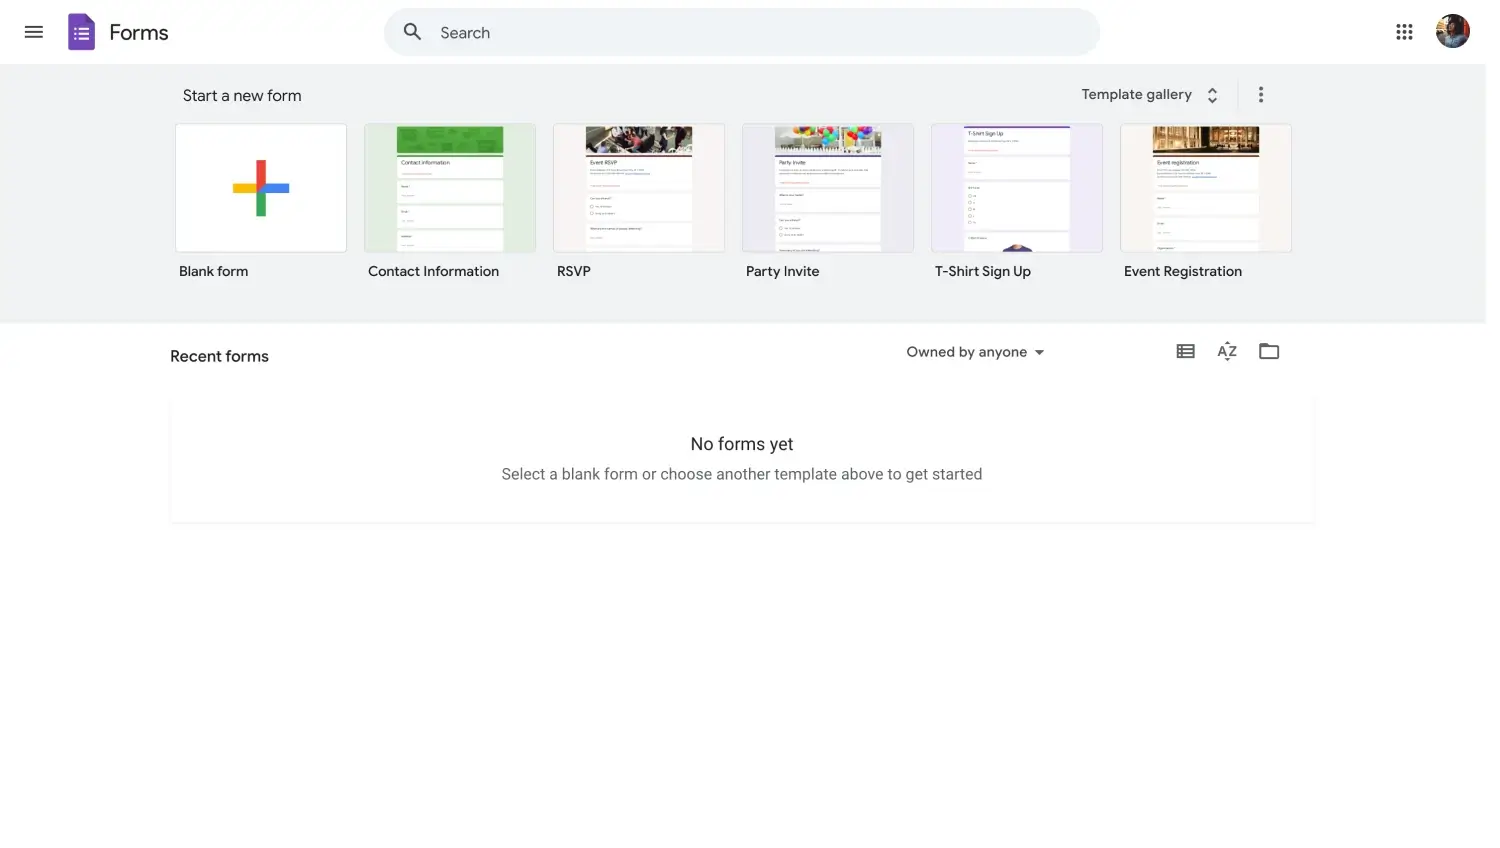
Open Google Forms to start
The first step in adding the response validation feature is opening your Google Form or creating a new one if you do not have one. Once you open your form or create a new one and customize your form, all you have to do is locate the questions to which you would like to add the response validation.
2. Add a new question or edit an existing one
Make sure to add new questions if you do not have any in your form. If you already have questions that you would like to customize, simply click on the question and set the question type to either short answer, paragraph, or checkbox.
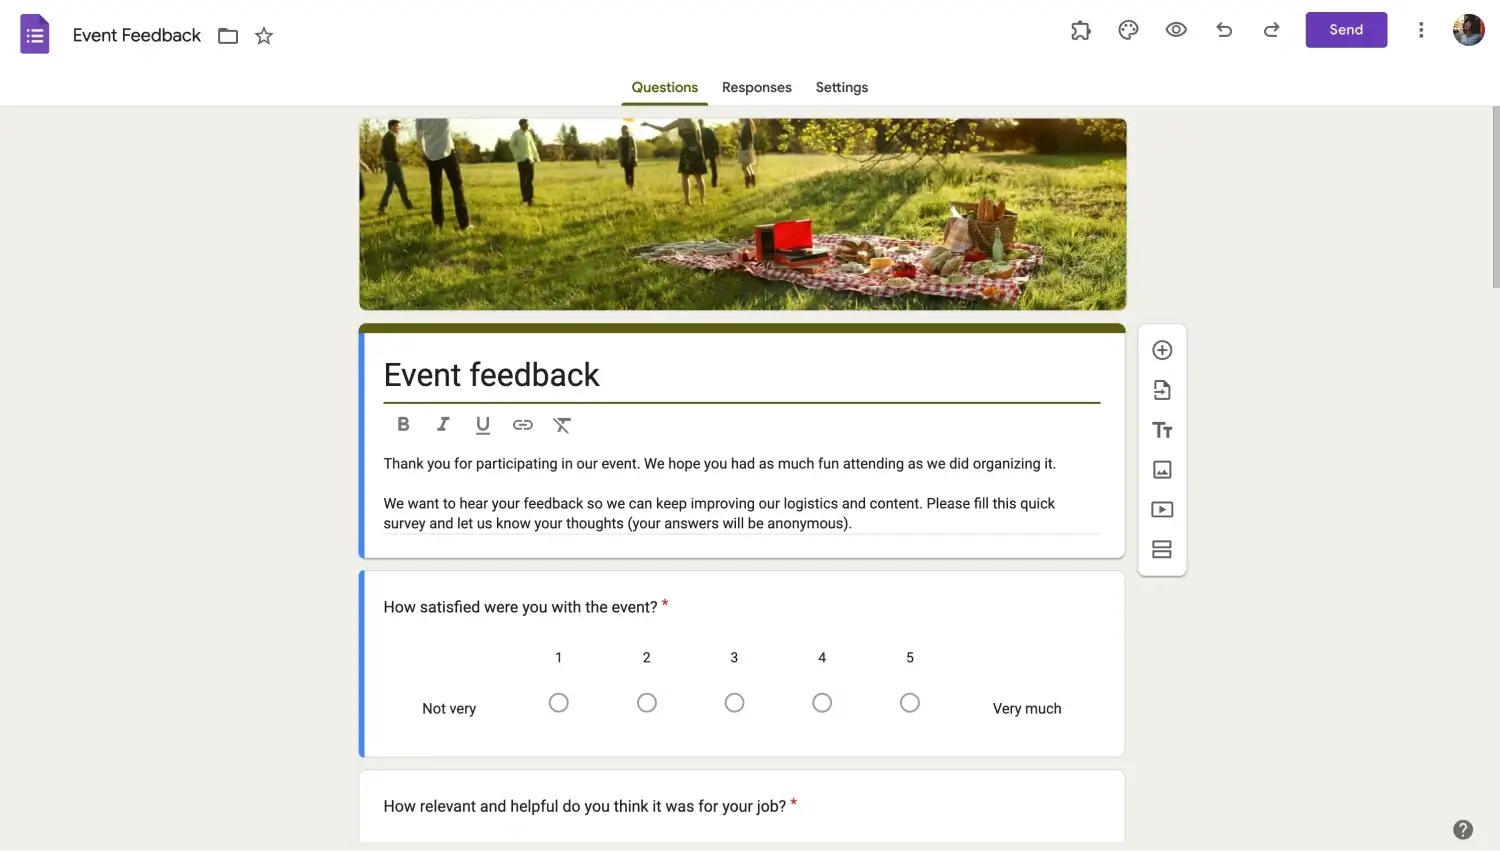
Add your own questions

💡Google Forms only allows you to use response validation in short answer, paragraph, or checkbox questions.
3. Enable response validation
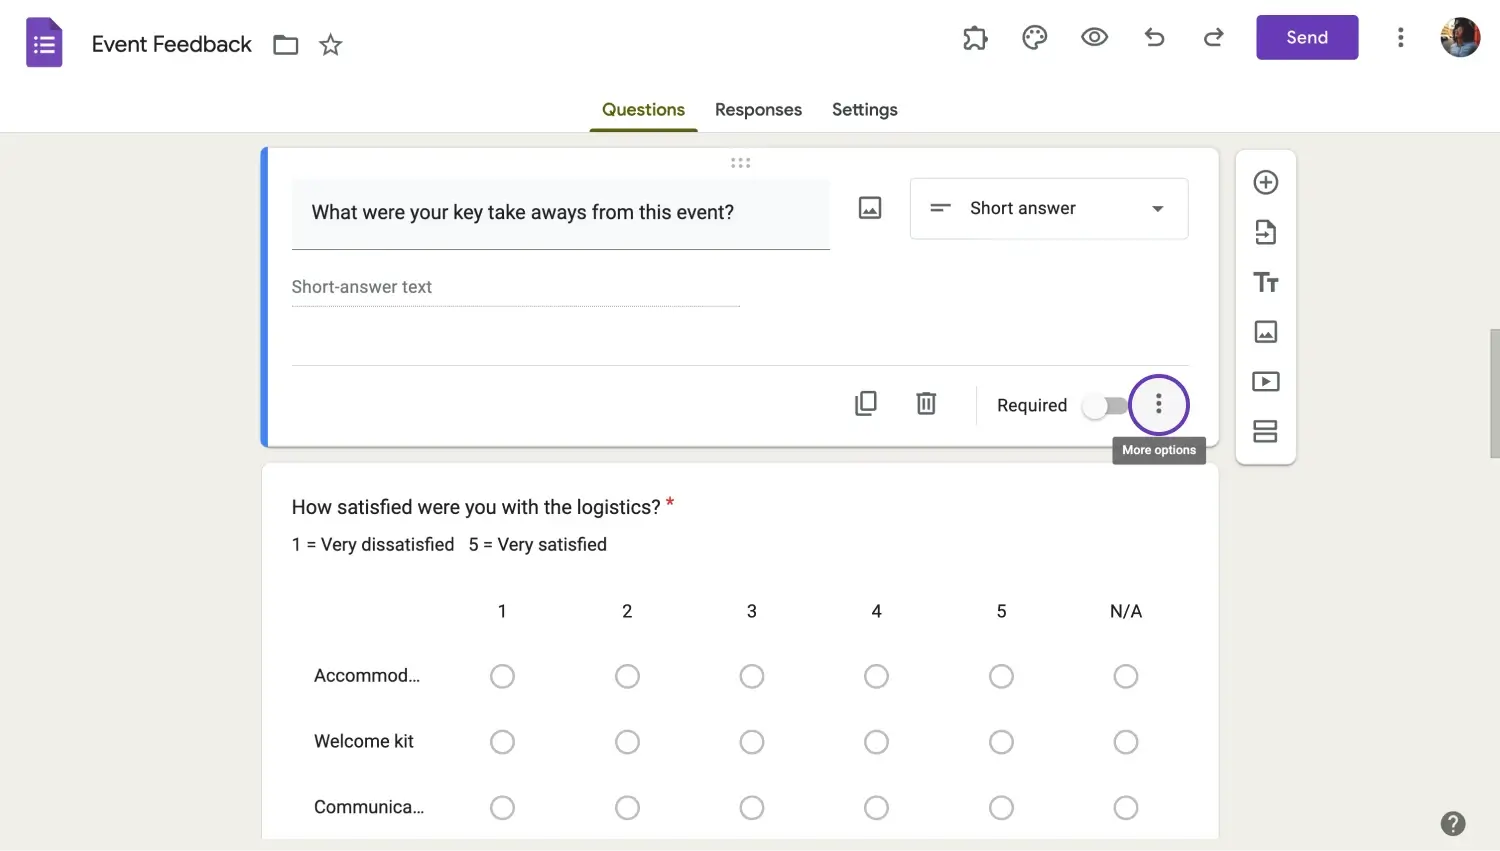
Click “More options”
After you edit the question type to one of the three options, you can now add the response validation feature. To add the response validation feature, simply click on the question, toggle the “Required” setting from the lower right side, and click on the three vertical dots next to it. From the dropdown menu, click on the “Response validation” setting.
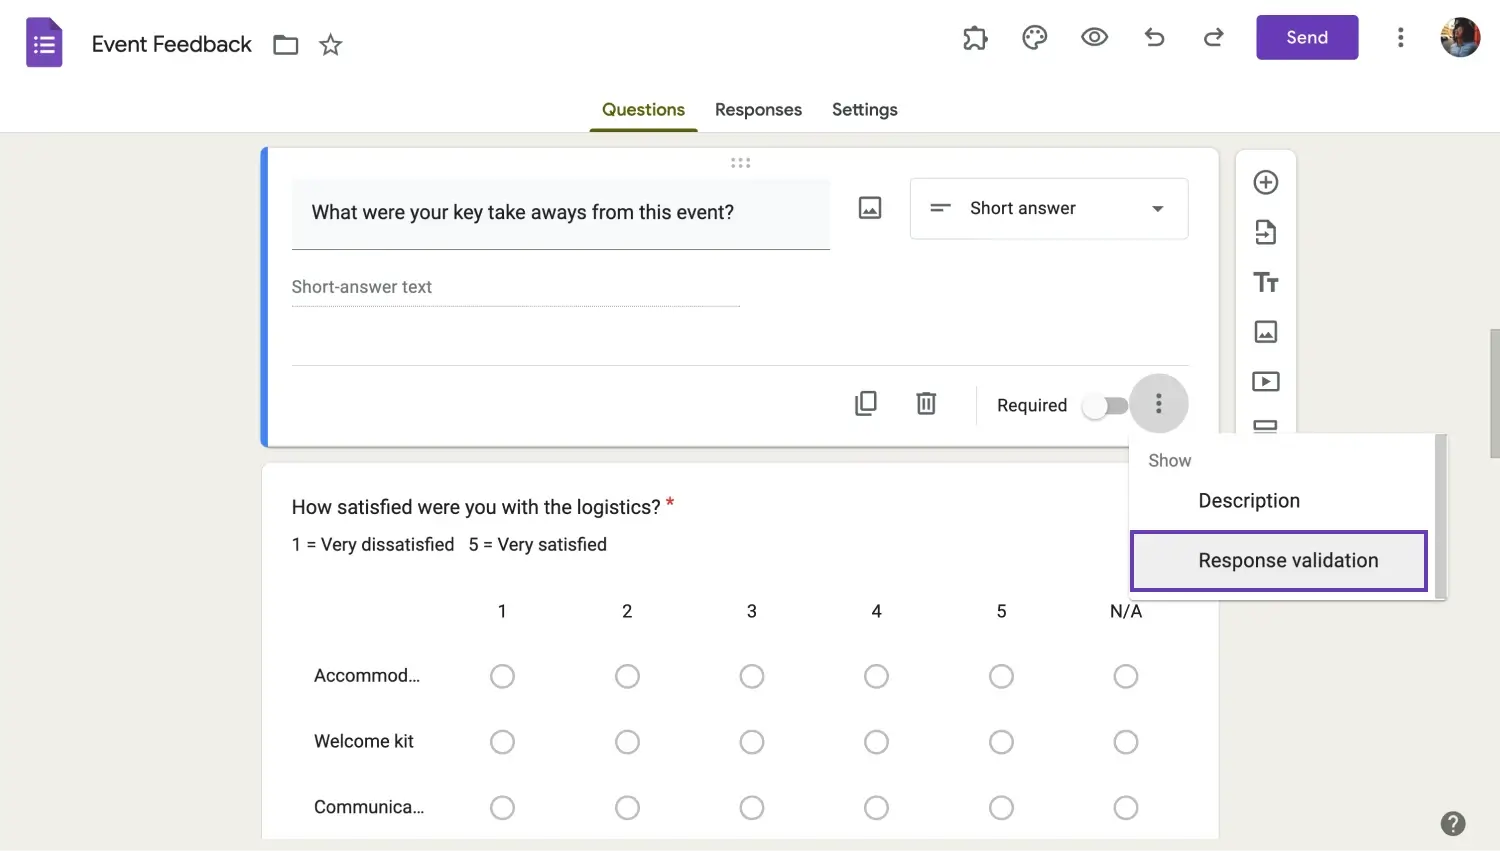
Click “Response validation”
4. Choose the rule you want for different question types
Selecting “Response validation” will open up a setting menu within the question. From there, you can customize the rules of the question. One thing to keep in mind is that each one of the question types has different rule types that you can select.
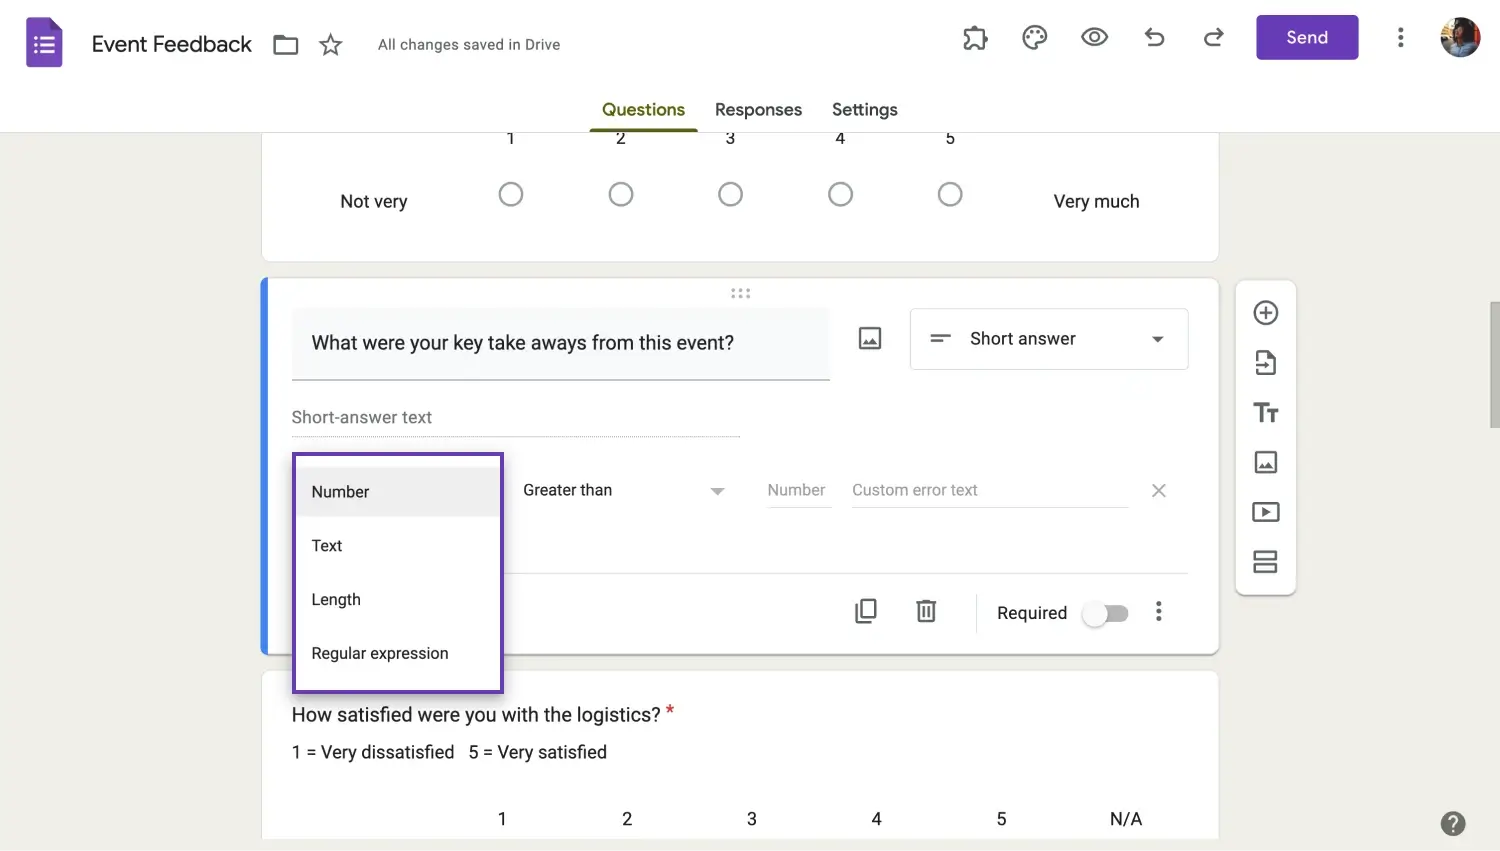
Change the settings
The settings for the paragraph question allow you to change the length and the character number. The short answer question lets you customize the specific answer type, such as a number answer or a text answer, and allows you to change further settings based on your choice. Lastly, the settings for the checkbox question allow you to limit the number of responses or set a maximum number of selections within the question.
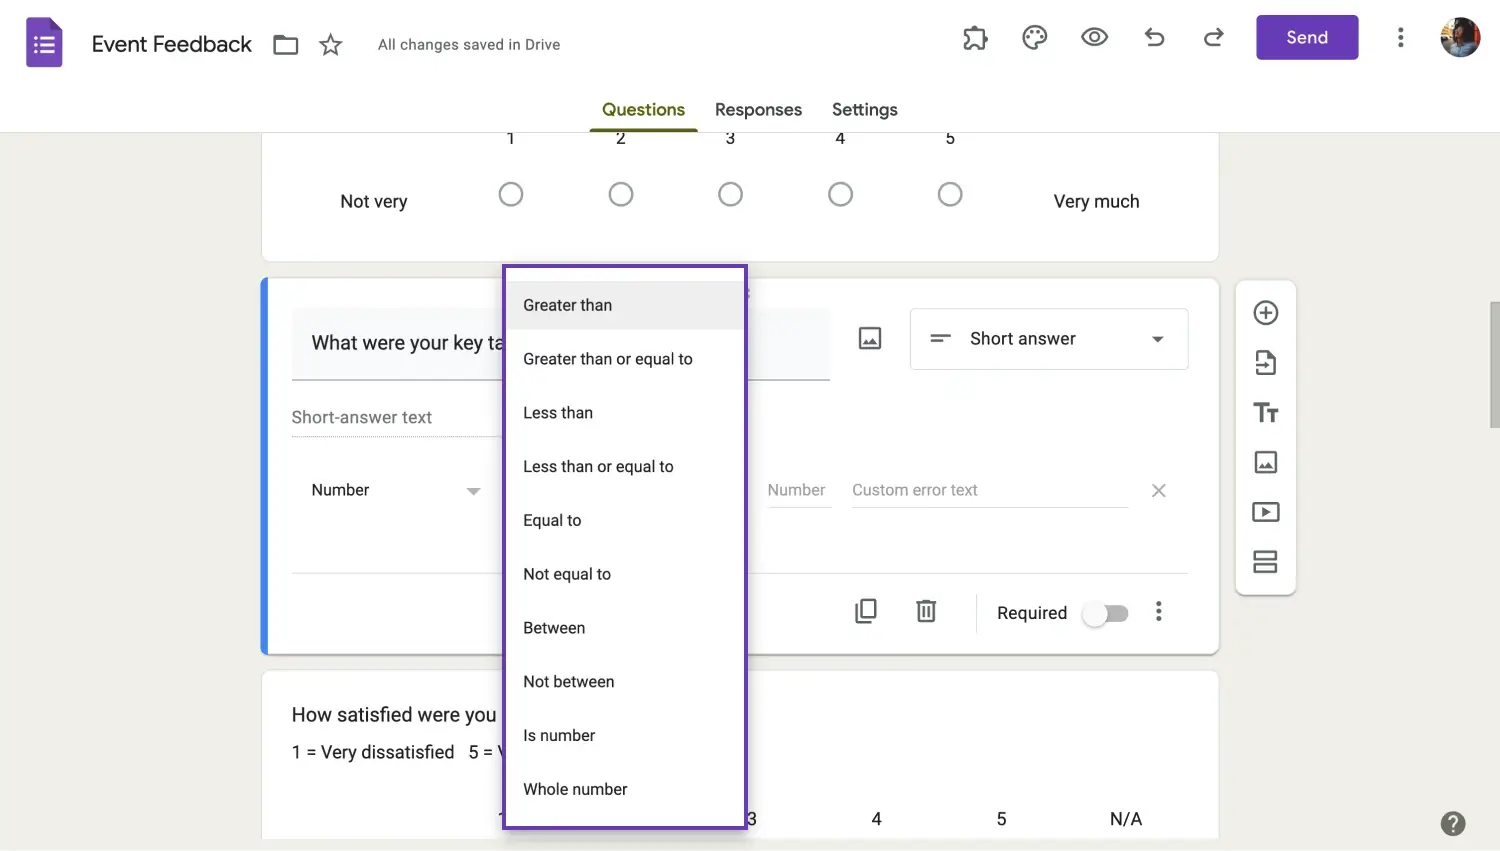
Customize the settings

💡Text answer questions also allow you to regulate the contents of the answer if you select the “Regular expressions” setting.
5. Enter an error message and test your form
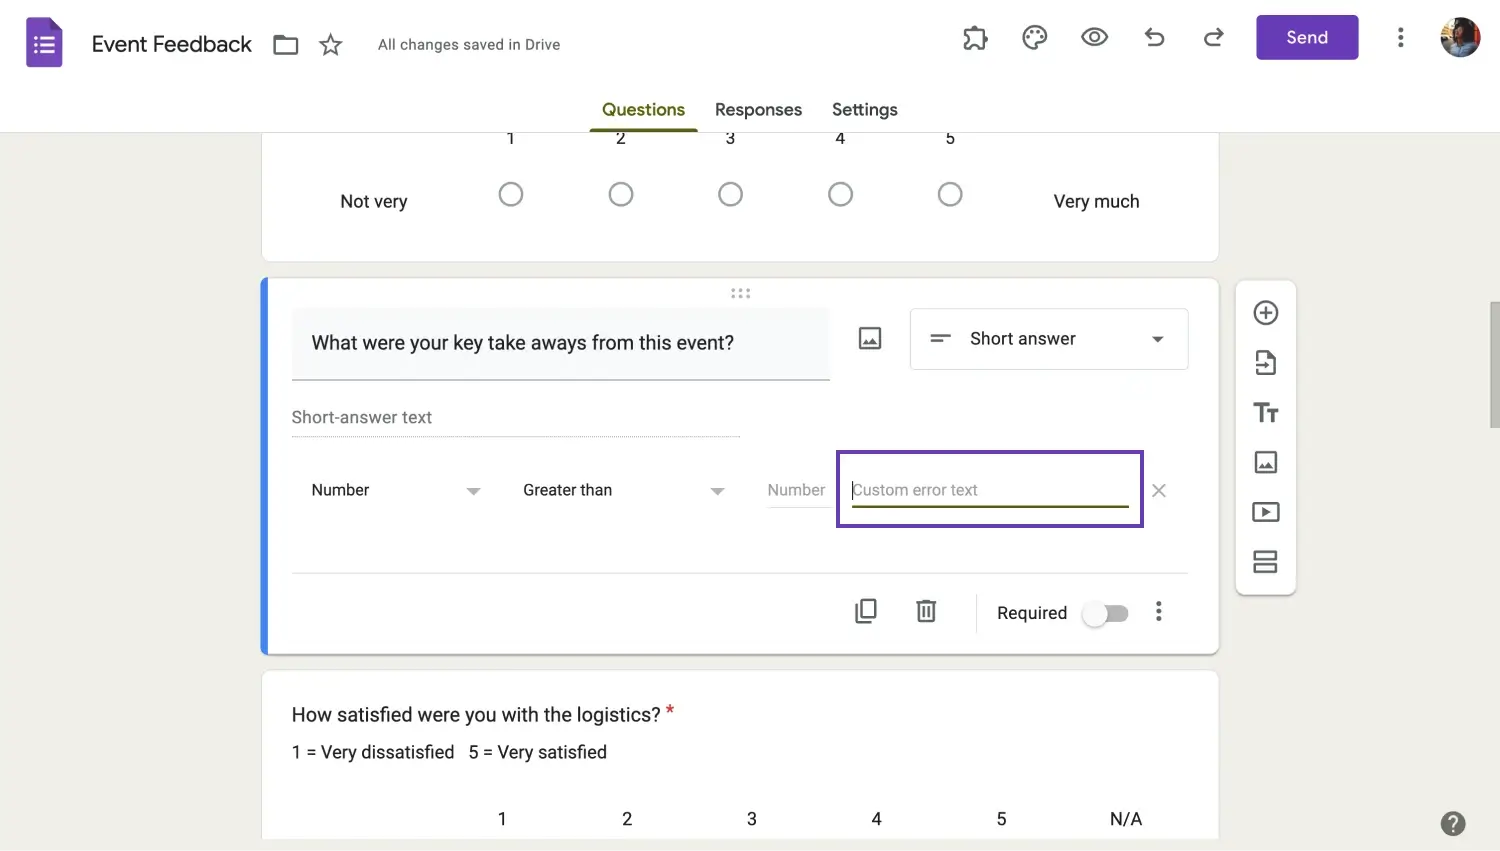
Type an error text
After you go through the setting options and select the ones that work for you, the last step is to enter a custom error text. The error text appears when the participant does not meet the criteria for the specific answer and reminds them to change their answer to a suitable one. Depending on the theme of the form, you can have fun with your custom error text.
How to add a response validation in forms.app
Adding response validation to forms.app is a similar process to Google Forms. However, forms.app offers you a more detailed selection of settings when it comes to customizing your response validation. Furthermore, forms.app also offers advanced features with the “logic” section.
1. Open forms.app and create your form
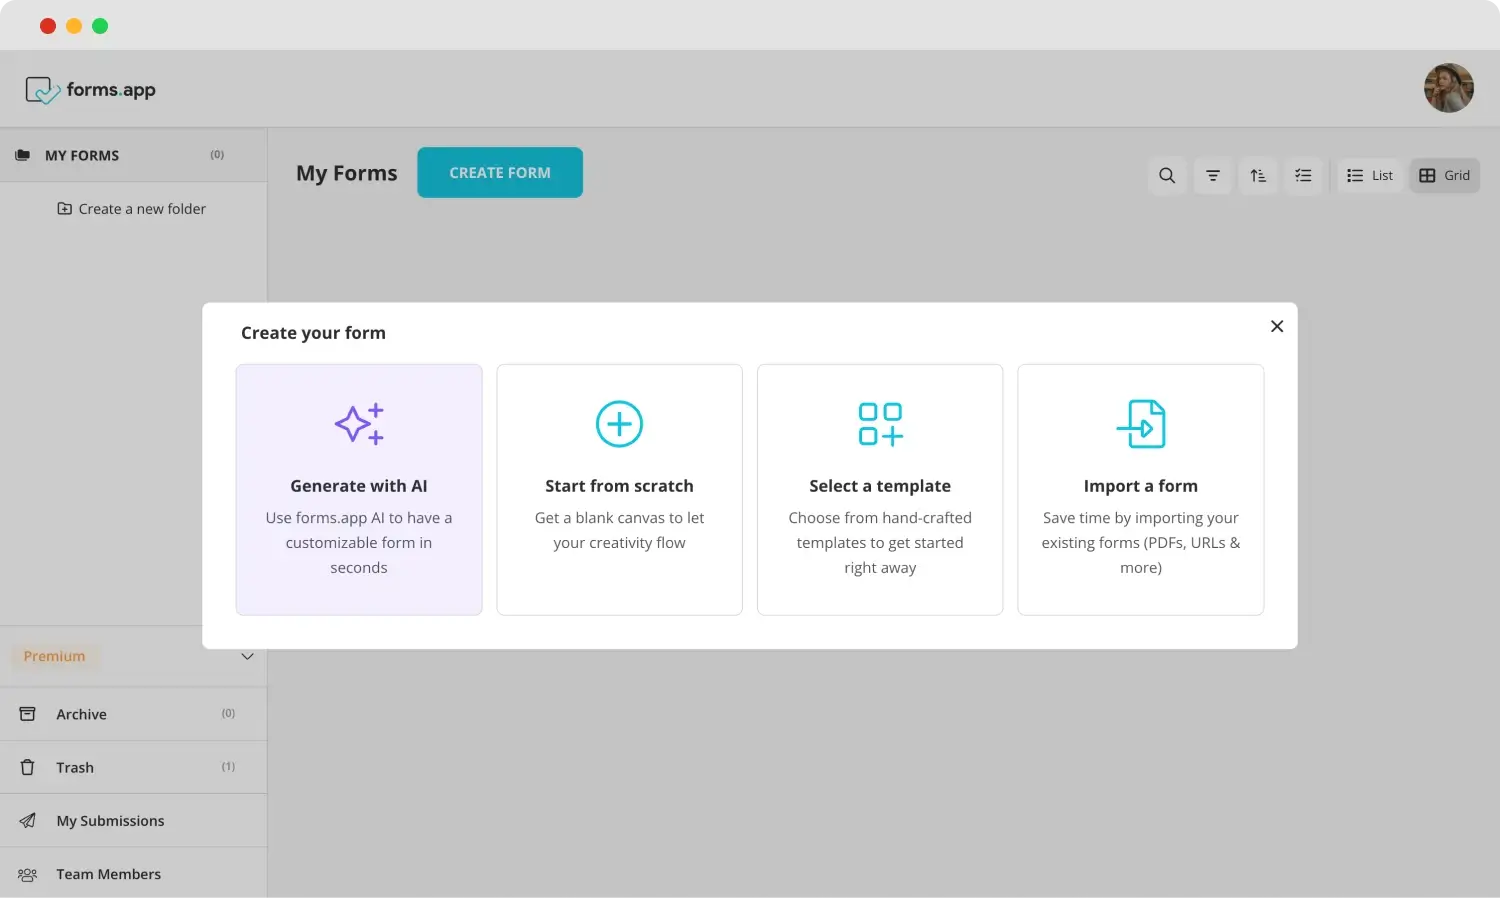
Choose a beginning option
The first step in using the response validation feature in forms.app is to open our page and create your form. While creating your form, you can utilize the blank form, choose from our wide selection of templates, or use forms.app AI for a fast and personalized experience.
2. Add your questions
After you choose the base for your form, the second step in using the response validation feature is to add your questions. One advantage of using forms.app for response validation is forms.app does not put a limit on the question types when using the feature. This means that you can connect the response validation feature to any question you like.
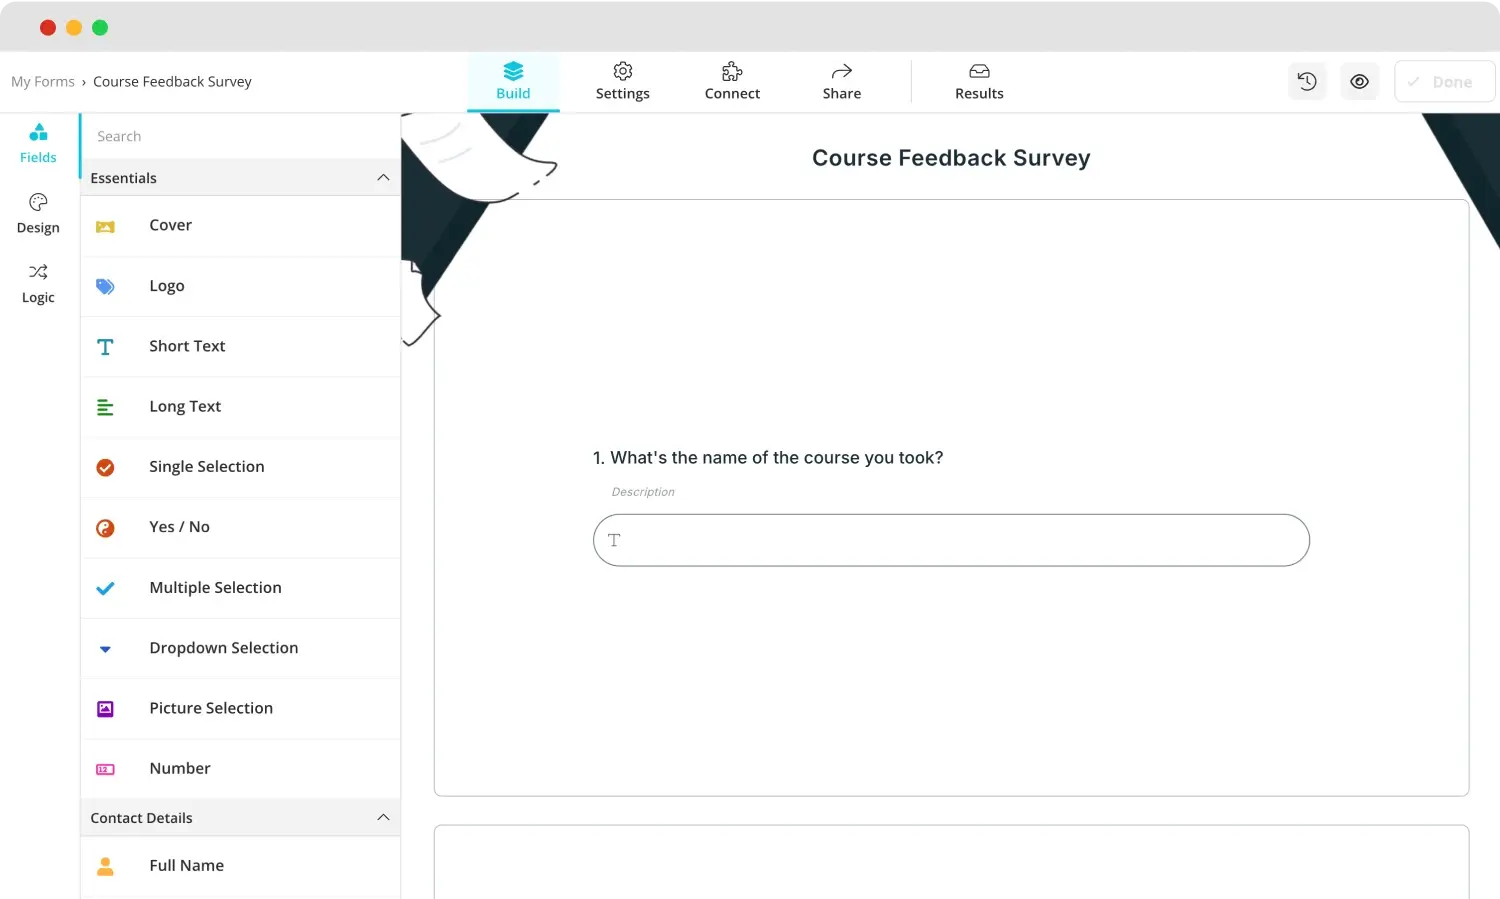
Add your own questions

💡To prevent participants from skipping vital questions, toggle the “Required” setting at the top.
3. Detailed question settings
To access response validation, click on the question that you want and click on the gear icon at the top right side of the question. This will open up the “Field Settings” tab. The “Field Settings” tab allows you to change the settings of the field and set up response validation conditions.
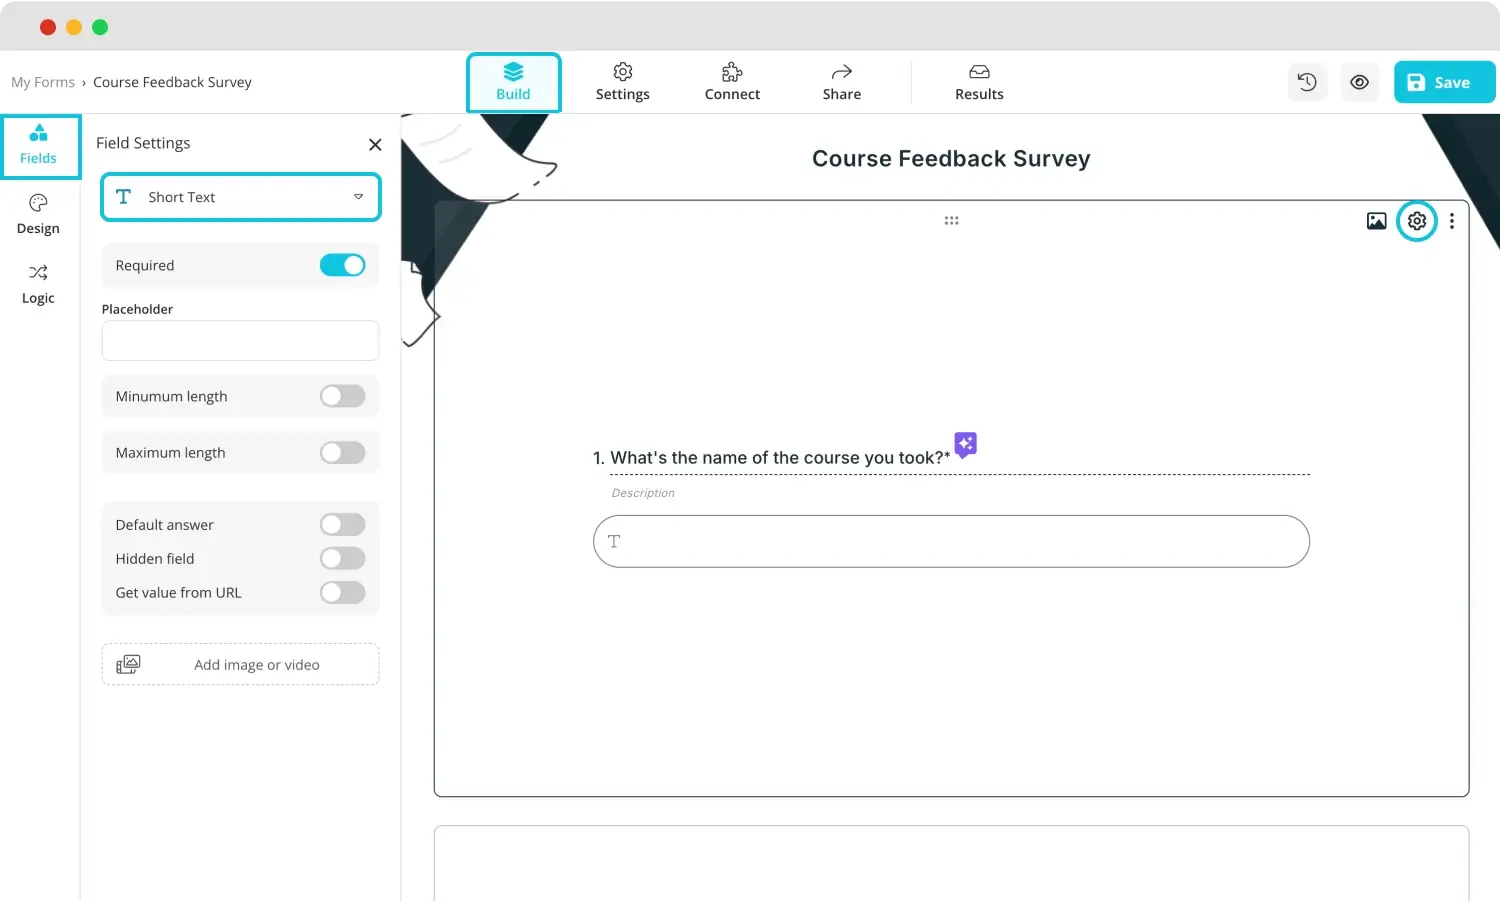
Toggle “Required”

💡By adding a masked text field to your form, you can allow people to enter answers in a specific pattern or use advanced validation methods such as regex validation.
Bonus: The “Logic” section
One particular advanced feature in forms.app that may come in handy if you would like to take your response validation questions to the next level is the “Logic” section. This section allows you to set conditional logic to any question that you like and lets you create a certain pathway for participants who select particular answer options.
Frequently asked questions about the response validation in Google Forms
Since we have learned how to add response validation to both Google Forms and forms.app, it is now time to get to the details of the process with useful tips for Google Forms. Here are the answers to the frequently asked questions about response validation, and the process on how to add it in Google Forms.
Pour créer un formulaire Google avec validation de réponse, il vous suffit de créer votre formulaire, d'ajouter une question et de changer le type de question en réponse courte, paragraphe ou case à cocher. Ensuite, vous devez cliquer sur la question et activer le paramètre "Obligatoire".
Ensuite, vous devez cliquer sur les trois points verticaux et sélectionner "Validation de réponse". Après avoir suivi ces étapes, vous pouvez personnaliser les paramètres selon vos besoins. N'oubliez pas de vérifier tous les paramètres dans les trois types de questions pour voir lesquels conviennent le mieux.
Créer une réponse conditionnelle est un peu différent de la validation de réponse. Après avoir créé votre formulaire et ajouté vos questions, vous devez changer le type de question autre que les trois mentionnés ci-dessus, et après avoir activé le paramètre "Requis" et cliqué sur les trois points verticaux, vous devez sélectionner "Aller à la section en fonction de la réponse".
Pour créer une section, il suffit de cliquer sur la question elle-même et de cliquer sur "Ajouter une section", qui se trouve sur le côté droit de la question sous la forme de deux rectangles verticaux. À partir de là, vous pouvez ajouter vos sections en fonction des réponses, et les participants seront guidés vers une section en fonction de leurs réponses.
Oui, vous pouvez effectuer une validation de données dans Google Forms. Pour ce faire, il vous suffit de suivre les étapes de validation de réponse, car la validation de réponse est une forme de validation de données dans Google Forms. Pour analyser plus en détail les données que vous avez collectées, vous pouvez lier votre formulaire à Google Sheets en vous connectant avec votre compte Google et en allant dans l'onglet "Réponses".
La validation de réponse vous permet de définir des règles spécifiques pour une question et de vérifier si un participant vous a donné la réponse dont vous avez besoin dans ce formulaire. Bien que cela puisse sembler piéger le participant pour obtenir une réponse souhaitée, dans des contextes spécifiques où les données sont précieuses, cette fonctionnalité est nécessaire.
Final words
In summary, using the response validation feature is quite important for collecting correct information from your forms. Learning how to use this feature is a game changer, especially in forms where the quality of the information is more important than the quantity. It also allows you to automatically eliminate responses that are not fit for the theme of the form.
In this article, we have looked at what the feature of response validation is, how to use the response validation feature in Google Forms, a better way to use response validation and collect higher quality information with the help of forms.app, and touched upon several frequently asked questions about response validation. Try to use this feature as much as possible and increase the quality of the information you collect.
Yakup is a content writer at forms.app. He is also a skilled translator. His hobbies include reading, learning about different languages, and different branches of sports. Yakup's expertise lies in translation, NoCode tools, and Google Forms.


 6 minutes de lecture
