How to create intake forms in Microsoft Forms (Tips & more)
You all know the famous saying: Knowledge is power. Probably the best area that this saying can be applied to is business. Especially in businesses where you are in direct contact with the client, having as much knowledge as possible can be the deciding point on whether you will succeed or not. That is why using the right tools, such as intake forms, is important.
In this article, you will learn what an intake form is, why it is beneficial to create an intake form, and which questions to ask in an intake form. Afterward, you will learn how to create an intake form on Microsoft Forms and a better way to create intake forms with the help of advanced features of forms.app.
What is an intake form?
An intake form is designed to collect information about individuals, clients, students, or potential customers by organizations, schools, businesses, or even hospitals.
Various types of intake forms are used daily by many establishments, but all of them serve one core purpose: collecting vital information.
5 reasons to create an intake form
An intake form is a must-have for every aspiring business. Think of the client intake process that an intake form creates as a modern alternative to giving your business card to someone. Not only do you learn information about your potential clients, but you are also automatically sending information about your business to them. Other alternatives for intake forms include:
⏳ Time-saving: Creating an intake form is arguably the quickest way to collect information about a potential customer. With the right intake form template, you can create one in minutes.
🤝 Increase the quality of clients: Intake forms allow you to sort out potential clients and only choose the highest-quality ones. This, in turn, increases the quality of your business and your reputation.
⬆️ Increased customer satisfaction: Making your customers fill out an intake form allows you to get a detailed description of their issues or what services they require. This ensures better service and increases customer satisfaction.
🎯 Better workflow output: Having intake forms allows you to increase your workflow output by automating several processes, ensuring higher performance outputs from your project managers.
🔑 Accessibility: Intake forms are easy to build and understand. Therefore, creating a high-quality intake form is an accessible and convenient process.
What to ask in an intake form
Whether you are creating intake forms in Google Forms or in Microsoft Forms, having well-thought-out questions is a must. Furthermore, it is also important to remember that you must create a form aligned with your overall business goals. Here are several important points that you must ask about within your form:

What to include in an intake form
1. General contact information: The most vital questions you should include in your intake form are general contact information questions. These questions must include the client’s e-mail address, full legal name, date of birth, and phone number.
2. Details about which services they would like: You could include a list of your services or products so people can choose which ones they would like to receive.
3. Their overall goals for the service/product/project: If you are a service-based business, asking about the respondent’s overall goals for the service or the project may allow you to create a roadmap based on those goals.
4. How they have found out about your business: This question can greatly benefit your advertisement numbers. Asking your clients how they have found out about your business/organization allows you to spend more time on advertisement channels that do not perform as well as you would like.
5. Health and safety information/Legal information: Businesses that provide services or products that can greatly affect a client's livelihood must include a health and safety or legal information area within the intake form.
How to create an intake form in Microsoft Forms (step-by-step)
Now that you have understood the value of an intake form and what you should include within it, it is time to learn about how to create one using Microsoft Forms. Learning how to create forms on Microsoft Forms is a relatively easy process, thanks to the professional layout that Microsoft Forms offers.
1. Start from scratch or use a template
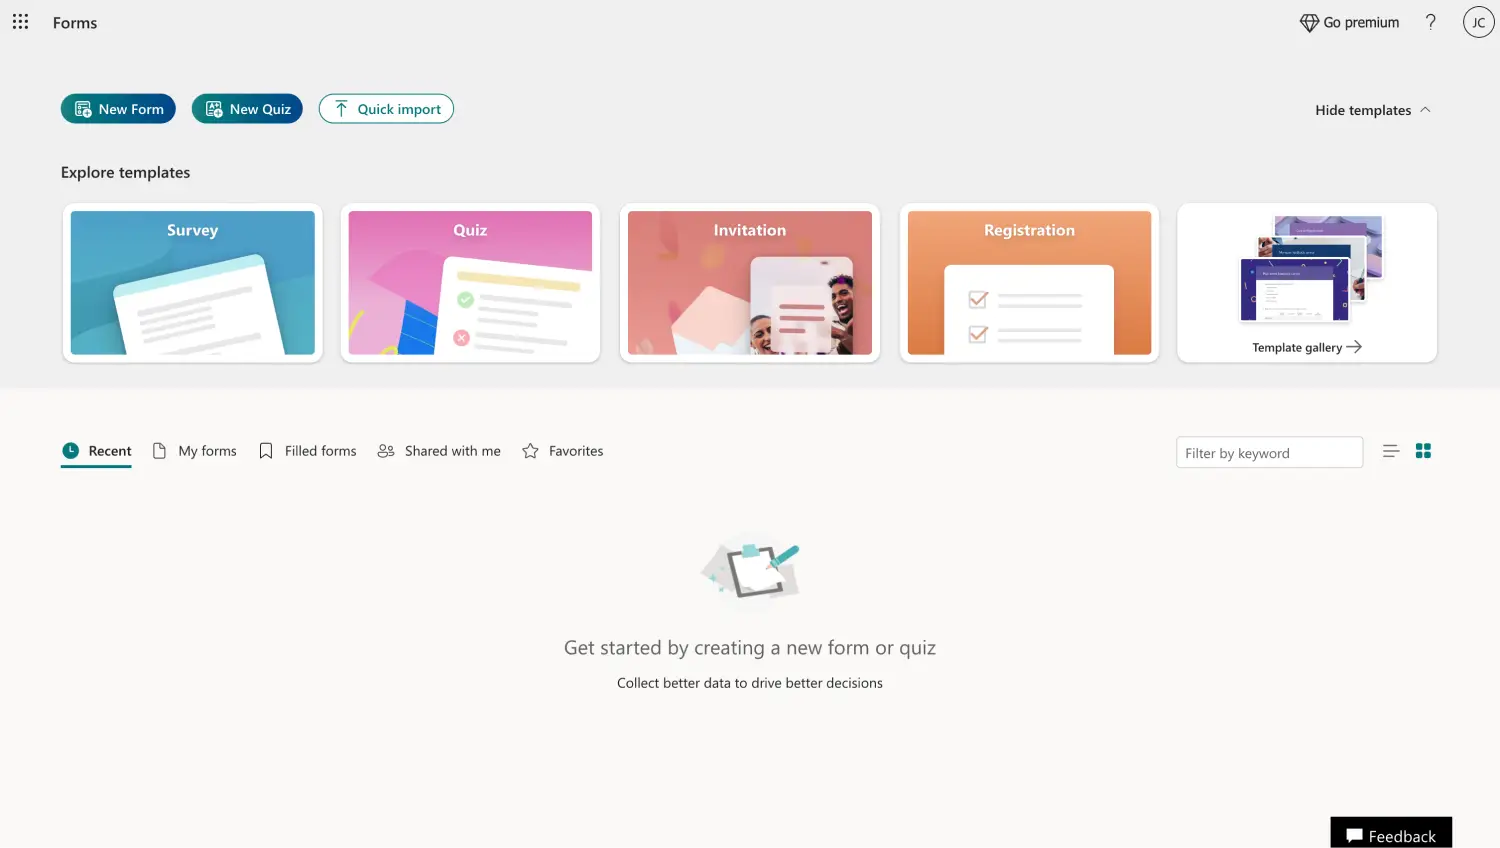
Choose a template or Start from scratch
The first step in creating your intake form with Microsoft Forms is choosing a base. You can choose to start from scratch with a blank form or use one of Microsoft Forms templates and edit the questions within to suit your business needs. Simply click on New Form to start from scratch with a blank form, or choose between template options by clicking on Template gallery.
💡Unfortunately, the Microsoft Forms app does not offer a specific template for intake forms.
2. Add & edit your questions and answers
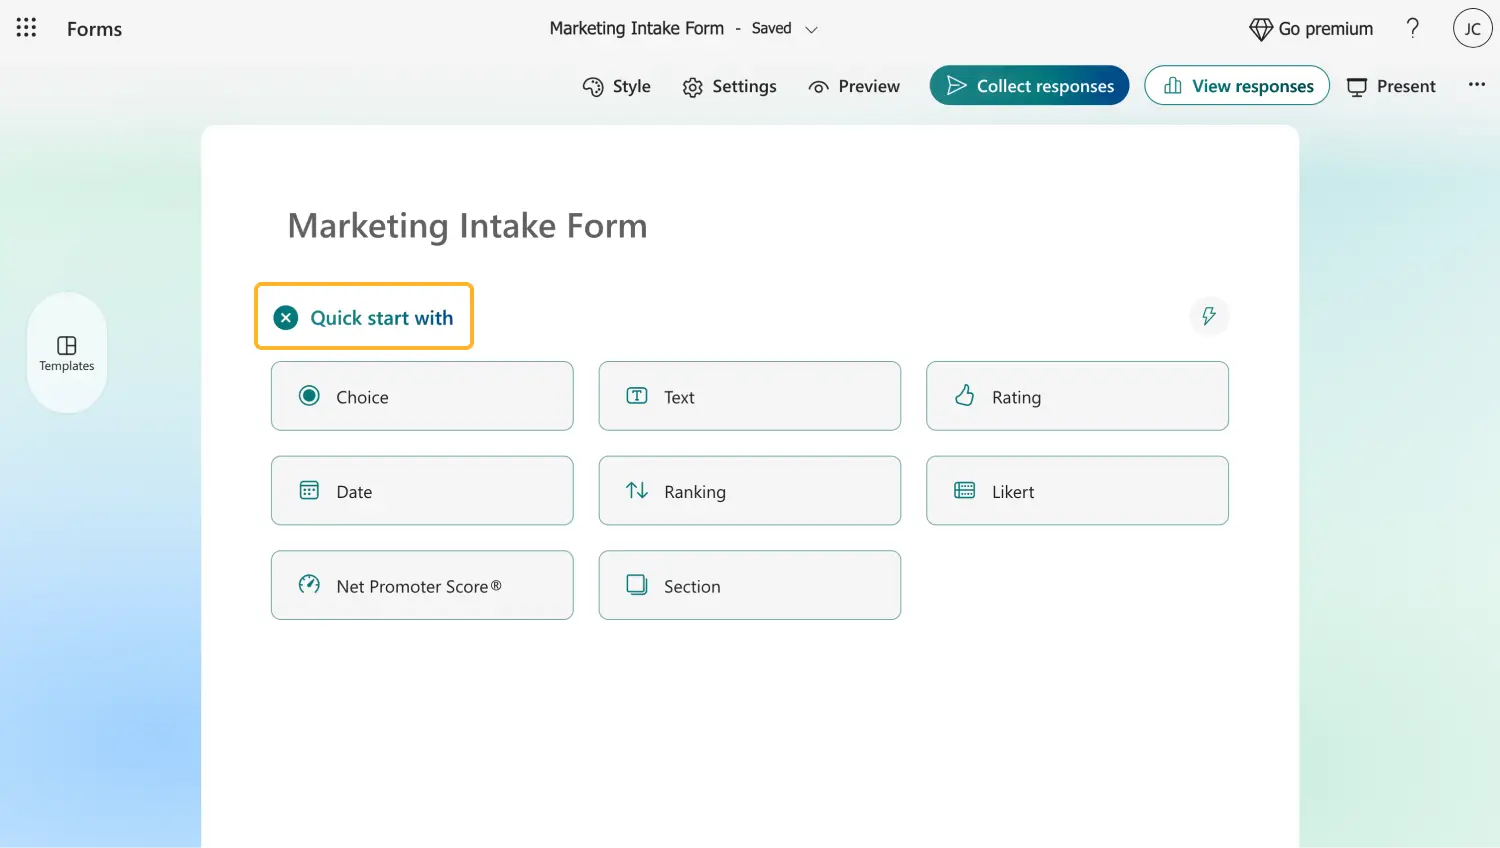
Add your questions
After choosing which base you would like to go with, you can add your questions and answer options. If you are using a template and do not wish to add any additional questions, you can edit the existing ones by clicking on any question you want to change.
To add a new question, click on one of the question options and click on Add new question to add another. There are many Microsoft Forms examples on questions that you can add with just a click after clicking Add new question.
3. Customize the visuals

Customize the settings
Once you have finished working on the form's interior, you can customize its visuals. To start the customization process, simply click on the palette icon at the top right corner of the page. The Style menu allows you to choose between different themes or even add background music, which is a feature that you are not able to find on most online form builders.
4. Change the settings and preview your form
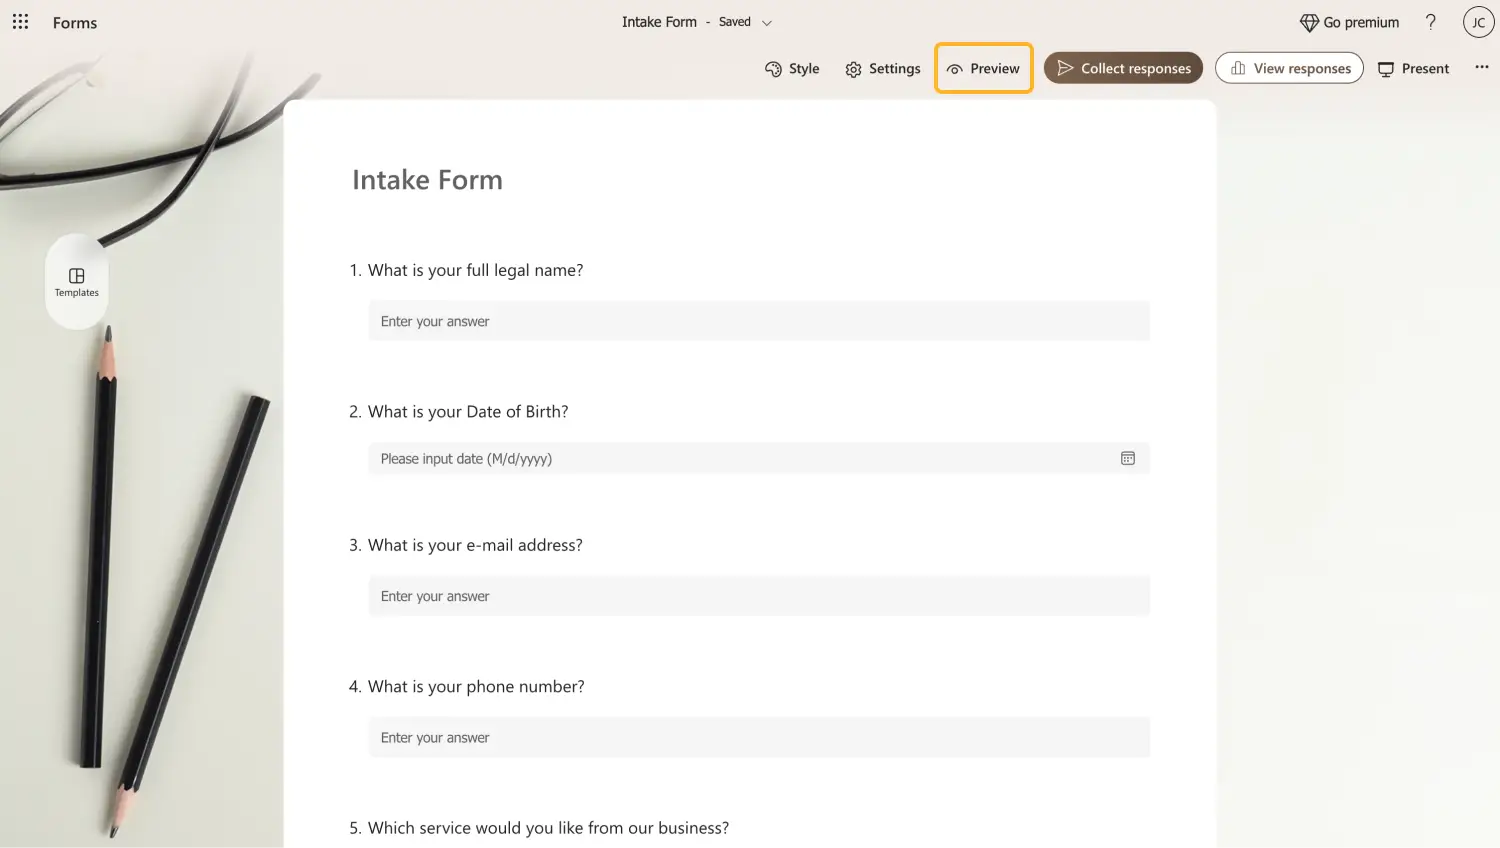
Customize the settings & preview
Before you start sharing your form with potential customers, we recommend visiting two of the often overlooked but important places: The settings menu and the Preview menu. The settings menu allows you to customize settings such as how to accept responses or the question order, and the Preview menu allows you to see how your form would look on a computer or a mobile device.
💡 You can go back and make the necessary changes after previewing your form.
5. Collect responses and view analytics
Check the responses to analyze
Once you have completed the details, you can share your form with the world and accept potential clients. To share your form, simply head to the Collect responses section to share your form. This section also allows you to change small settings in the sharing process and make customizations.
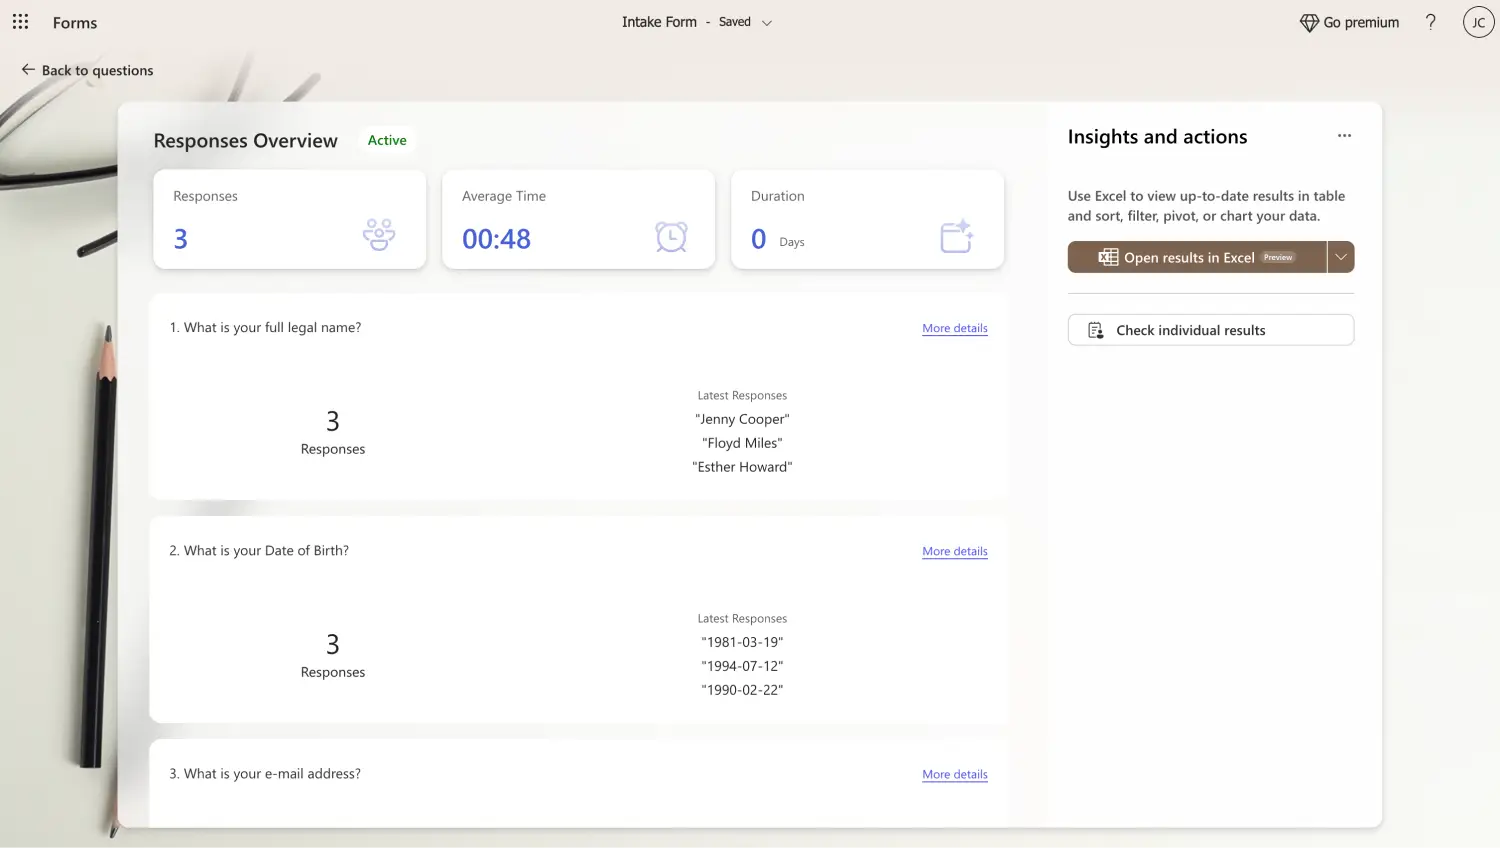
After you share your form and collect information from potential customers, you can visit the Responses section to view details about the participation process. The Responses section lets you see various aspects of your form and details about the question responses.
Try forms.app with advanced features
If you would like to create surveys and forms online and separate yourself from the competition, we recommend looking at forms.app’s advanced features. With the help of an accessible dashboard that gives you as many options as possible, you can take your intake form experience to another level for yourself and your clients.
1. Choose a template, start from scratch, or use forms.app AI
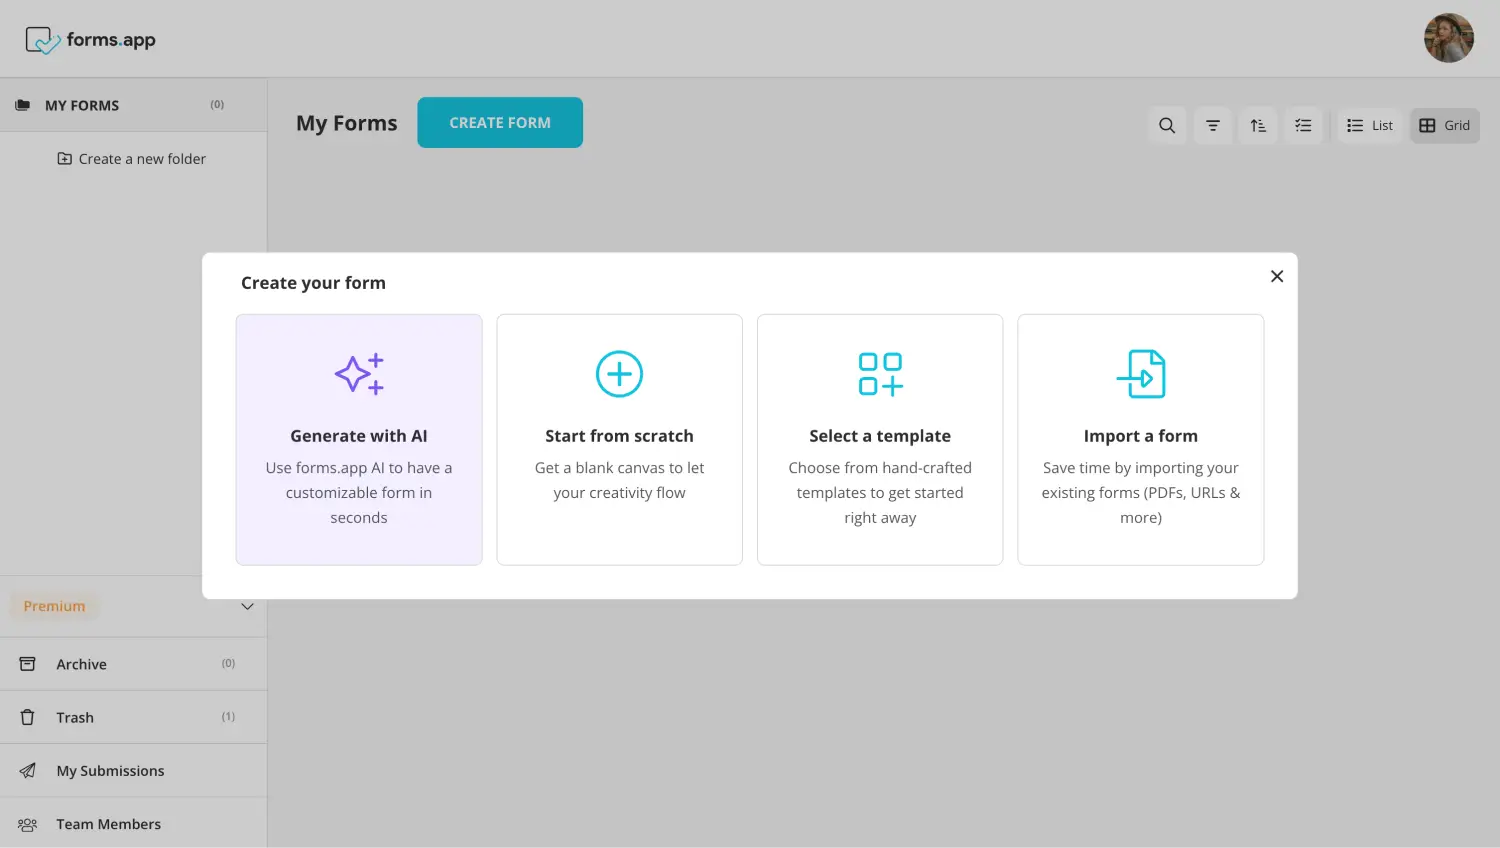
Choose a beginning option
To start your process of creating intake forms with forms.app, you can either start from scratch with a blank form, choose between our numerous template options, or use our revolutionary forms.app AI. All of these options are created to give you the best experience possible and with forms.app AI, you can have a customizable and personal intake form in a matter of seconds.
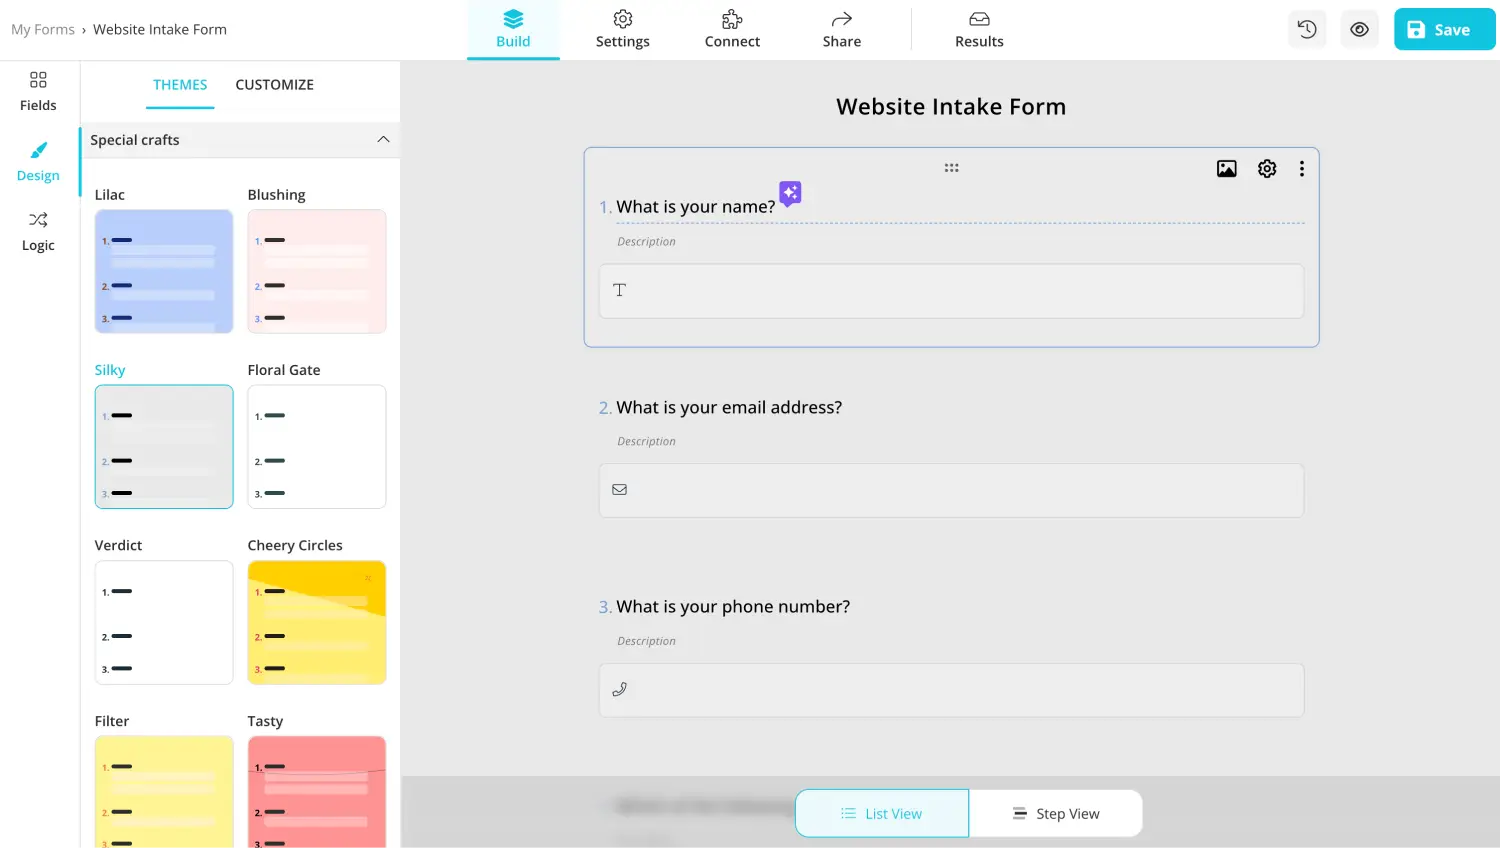
2. Edit the questions or add your own
Add or edit the questions
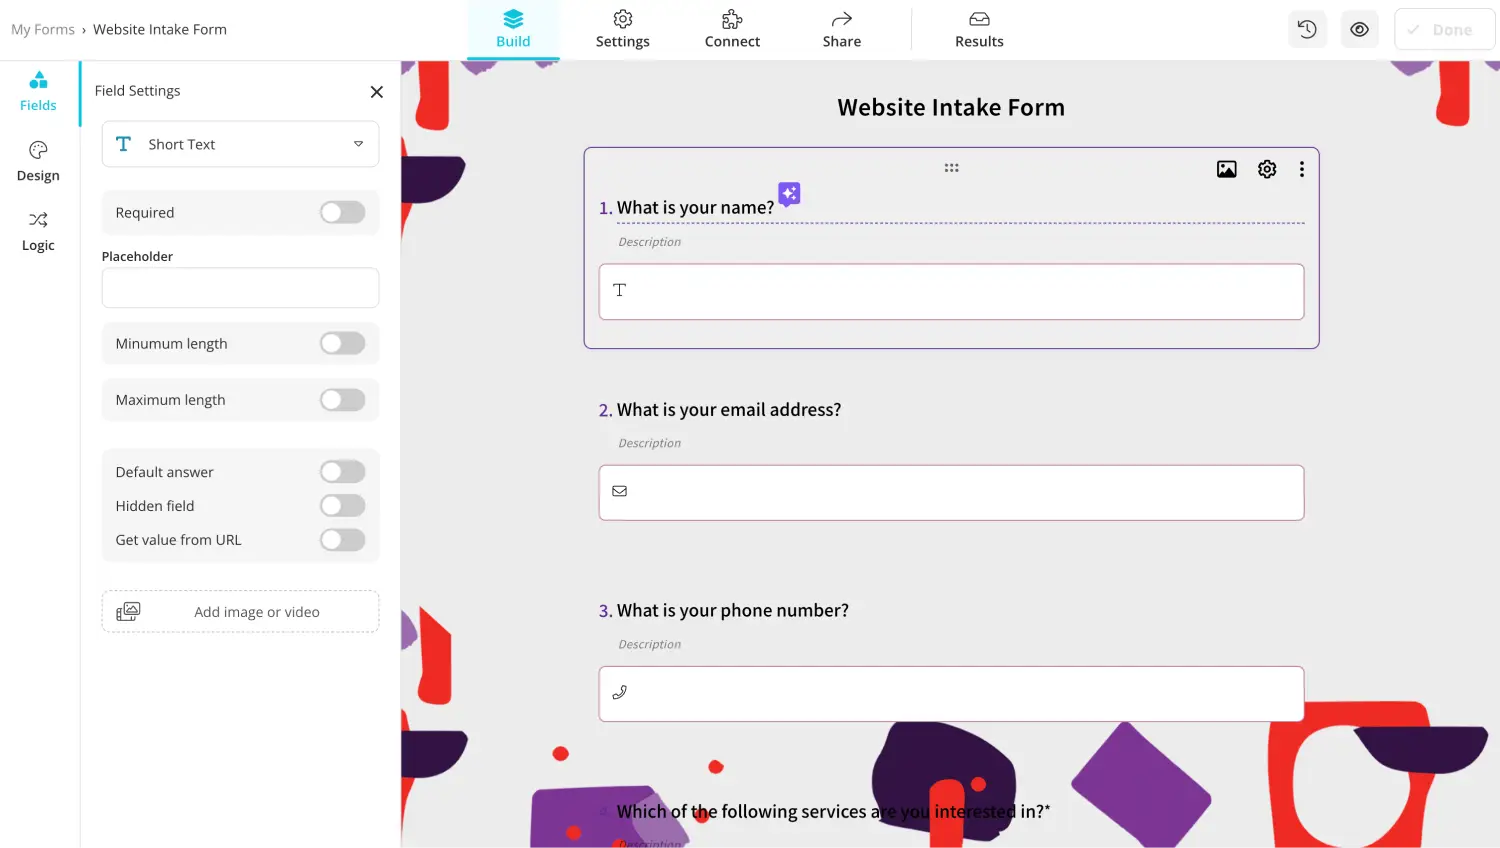
After you choose which base you would like to start with, you can start adding your questions and answer options or edit the questions that you already have if you are using forms.app AI or a template. Simply go to the Fields tab within the Build section to add your questions, and edit or delete a question by clicking on any question you would like and making the necessary changes.
💡 You can also use Rewrite with AI to edit questions. Click the colorful icon next to your question title to rephrase or rewrite your question using AI.
3. Use dedicated fields
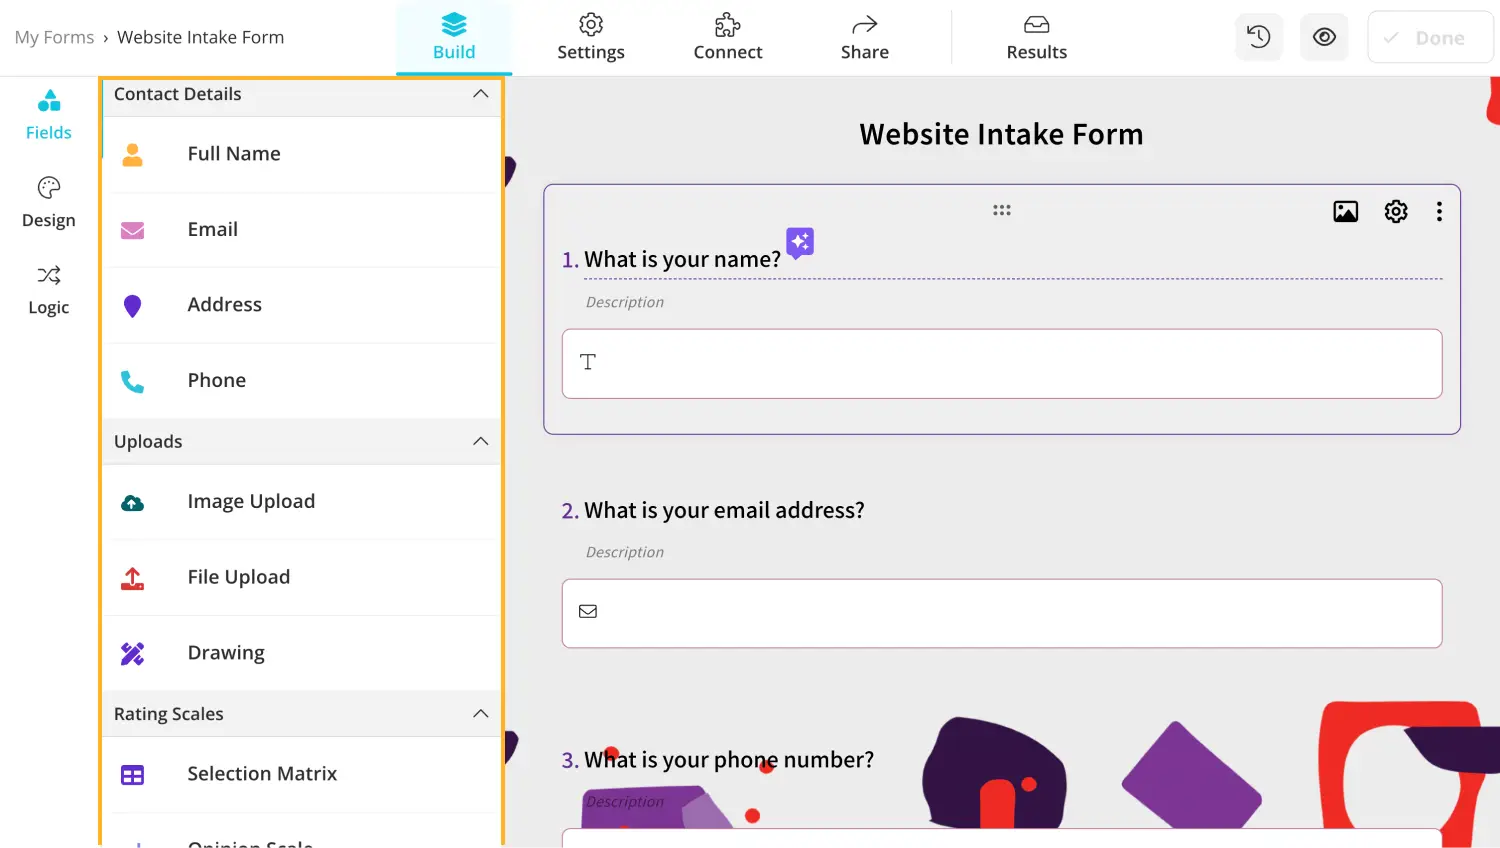
Add or edit the questions
The dedicated fields, such as the Full Name, Terms & Conditions, and Address sections, allow you to add the necessary questions for specific scenarios quickly. Simply head to the Fields tab within the Build section to see these dedicated fields.
💡 forms.app also allows you to add your business’s logo to the form. Head to the Fields tab and choose the Logo field.
4. Customize the form design
Style your form
After you have given enough time and finished answering your intake form’s questions, you can start customizing the form's visuals. In order to edit your form’s visuals, go to the Design tab within the Build section and make any visual changes to the theme.
forms.app also offers advanced features when it comes to the visual customization aspect. You can make further customizations, such as font colors, main form colors, background images, border radiuses, and many other settings, from the Customize section within the Design tab.
5. Connect & Share
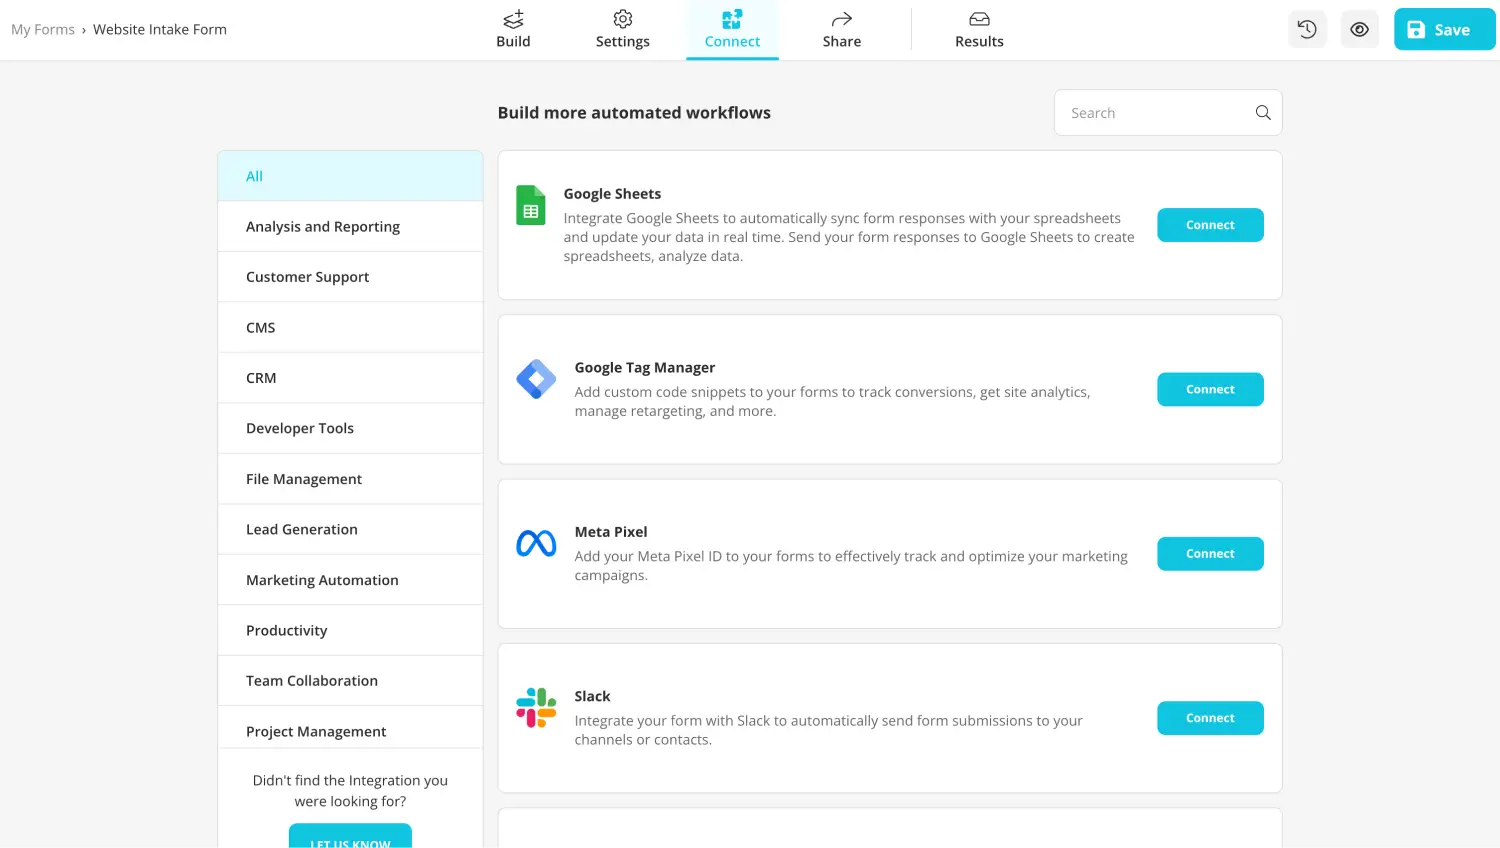
Use integrations
Before sharing your form, you can go to the Connect section to link it to any third-party apps your business uses, such as Google Sheets or Microsoft 365. Another advanced feature of forms.app, the Connect section allows you to connect your form to multiple workflows at once and update them automatically.
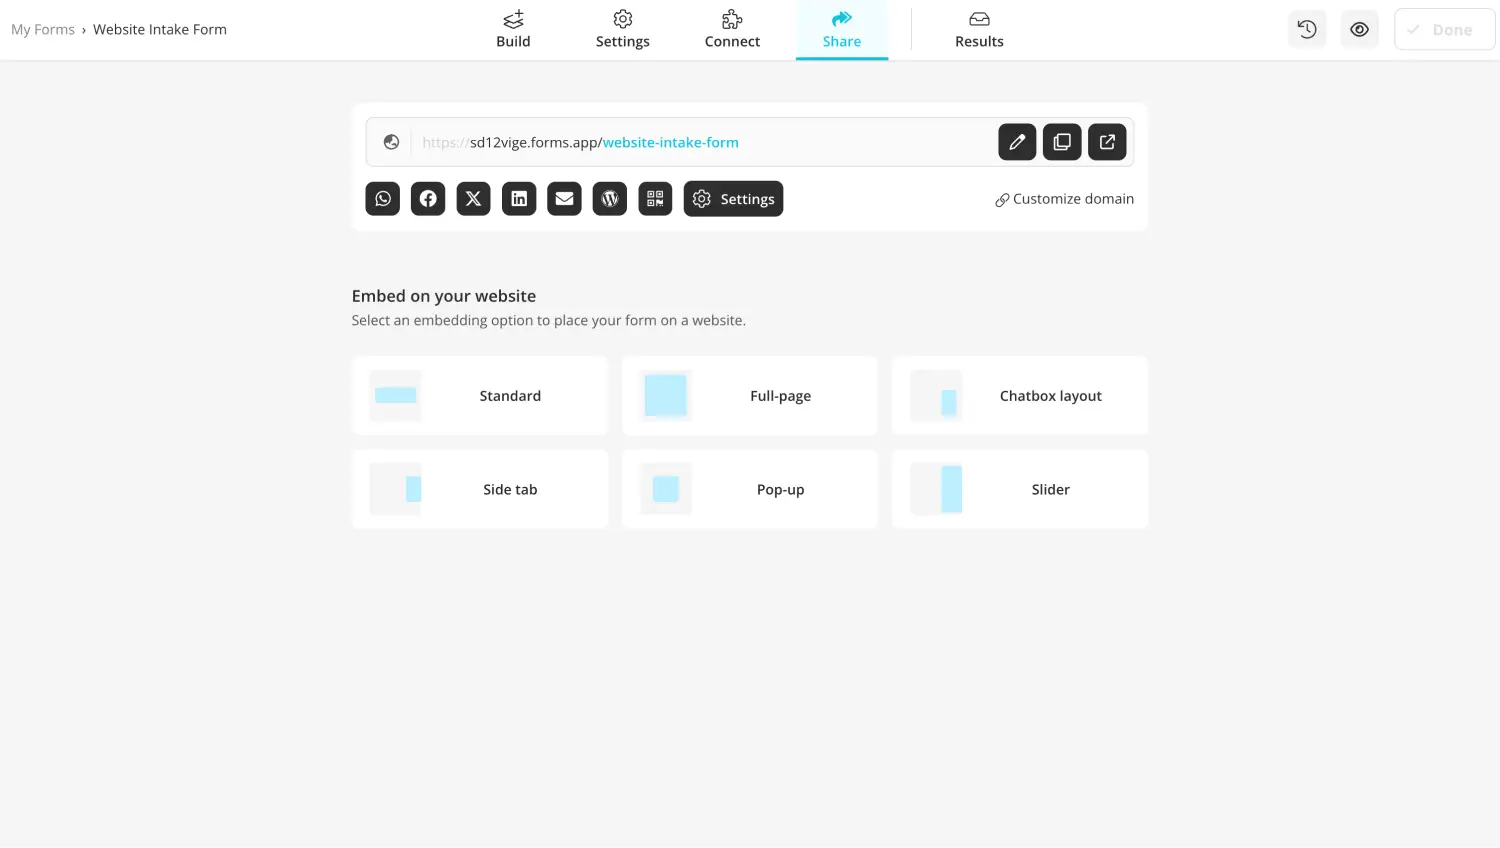
Share your intake form
Once everything is done, you can head to the Share section to share your form. However, the Share section is not just for sharing your form. You can also customize the domain of your form, use the shortcuts for sharing your form quickly on social media platforms, or customize the embedding of your form to your website.
6. Analyze your results
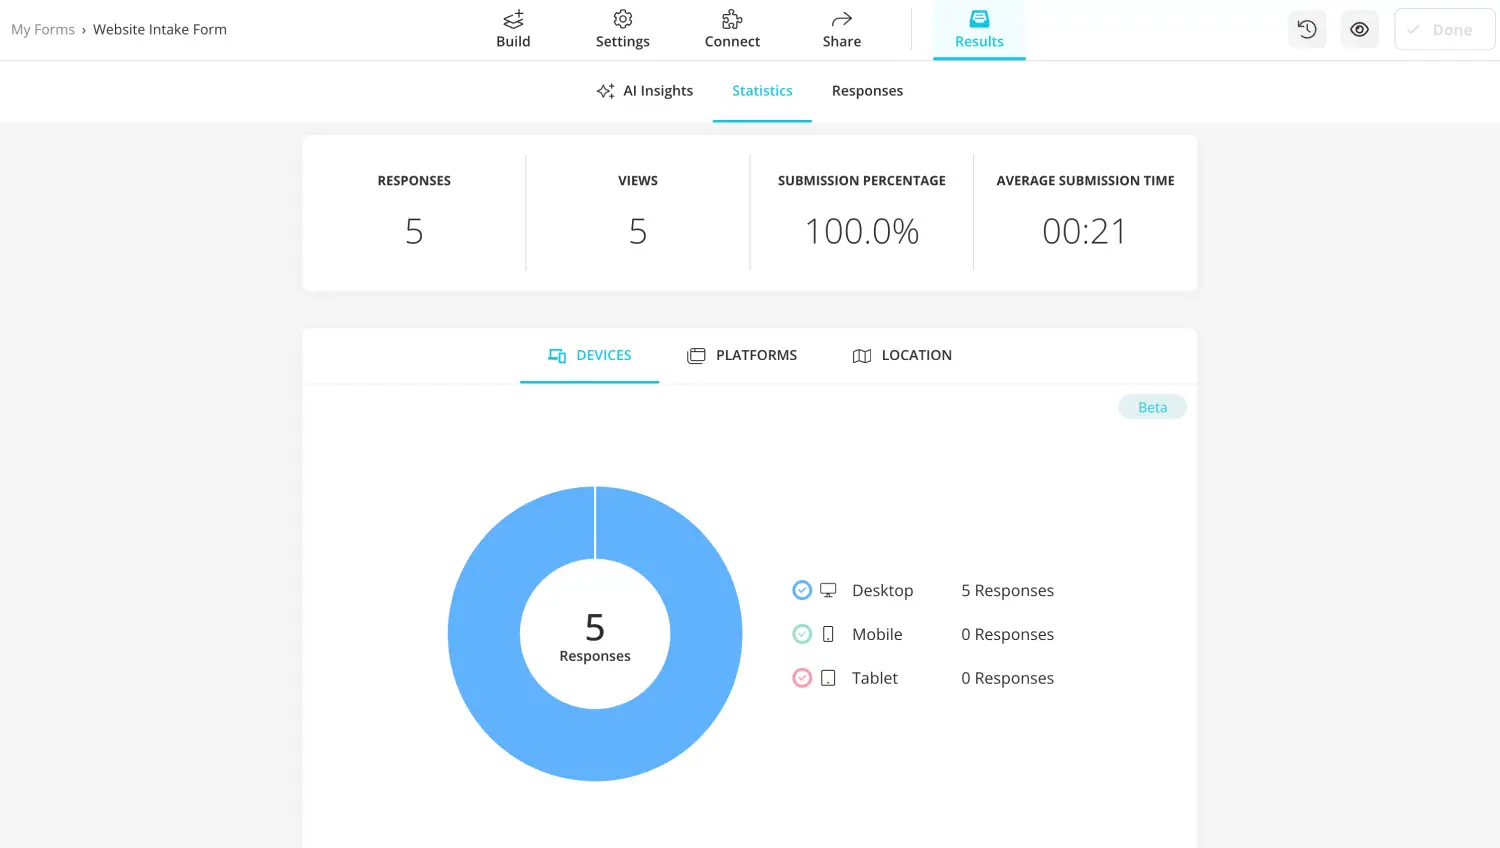
Check responses to analyze
Once you start collecting information from your potential customers, you can head to the Results section to look at the overall data on your form responses. The Responses and Statistics tabs within the Results section allow you to view different aspects of the information that you have collected.
Key points to take away
Intake forms are a great way to collect the necessary information to ensure your business’s success and growth. A great first step for potential customers, a good intake form can also advertise your business while connecting with your target audience. Furthermore, it is crucial to know which questions and fields to include in your intake form.
In this article, we have examined the meaning of an intake form, why it is important to create one, and which questions or fields to include. We have also shown you a step-by-step process for creating intake forms in Microsoft Forms and a better way to create intake forms with the advanced features of forms.app.
It is now up to you to create a good intake form and start collecting the information that your business needs!
Yakup is a content writer at forms.app. He is also a skilled translator. His hobbies include reading, learning about different languages, and different branches of sports. Yakup's expertise lies in translation, NoCode tools, and Google Forms.