- Solutions
- Modèles
- Intégrations
- Tarification
- Entreprise
- Ressources

 6 minutes de lecture
Grading quizzes and exams is a crucial task. Unfortunately, grading papers becomes a heavier burden as the number of students in the classroom increases. That is why many teachers dread the idea of reading and grading papers and let their assistants do all the grading most of the time. However, what if there was a quick and easy tool to grade your papers?
In this article, you will learn how to effectively use Google Forms to grade quizzes, a better version of creating and grading quizzes and online exams with the help of the advanced features of forms.app, and frequently asked questions about how to grade responses in Google Forms.
How to grade Google Forms
Google Forms is one of the best tools for creating and grading online quizzes or exams. There are numerous areas of customization, and while it may get a little hectic from time to time, if you follow the steps and create a few short trial quizzes, you will be able to understand the process easily.
1. Create your form and make it a quiz
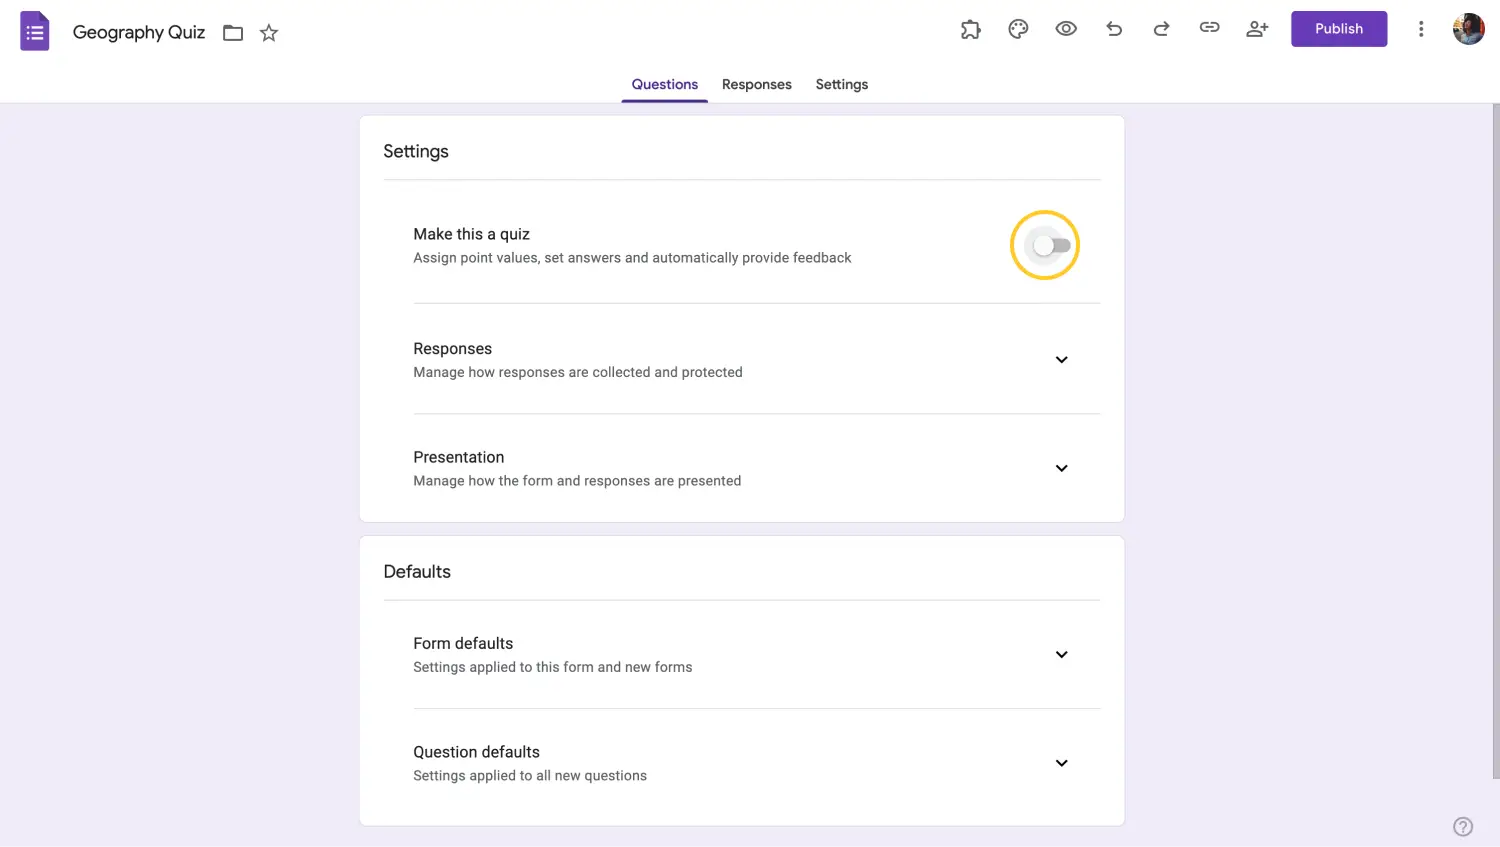
Create your quiz
The first step of grading is to create quizzes in Google Forms. To create a quiz in Google Forms, simply start as you would create a normal form and click on the Settings tab. Within the Settings tab, toggle the setting that says Make this a quiz. This will give you additional settings that you will have to examine.
2. Choose how to release grades
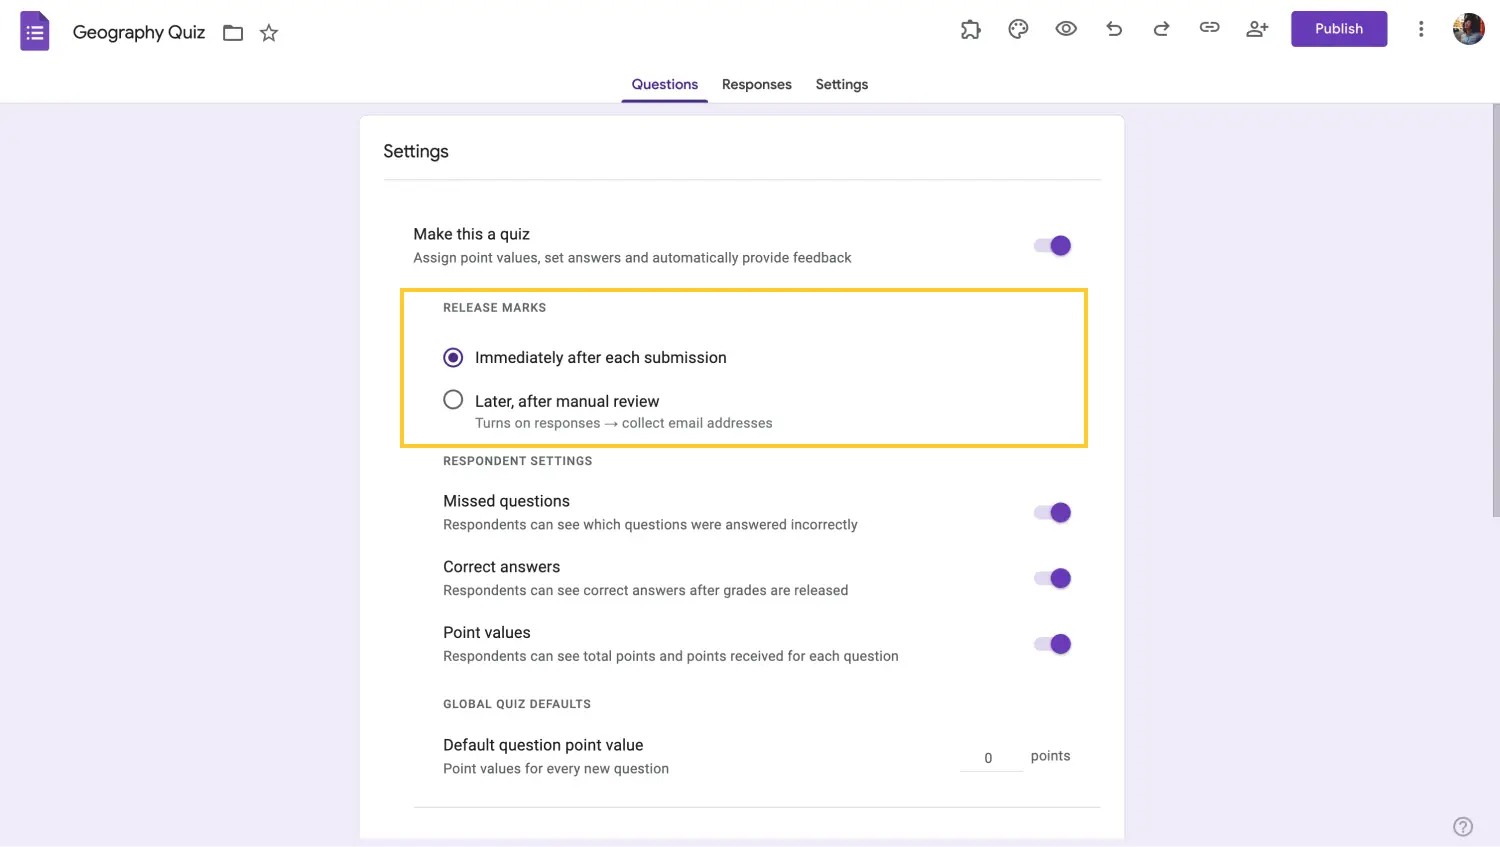
Choose the best quiz option for you
Once you see the additional settings after you toggle Make this a quiz setting, you will see two options for how to release your grades. You can let the students see their grades immediately after they complete the quiz, which is the easier version. If you would like to individually grade each question yourself, toggle the Later after manual review setting.

💡The manual review setting also turns on the Collect email addresses setting so that you can send the grades to students after your review.
3. Add your questions and create an answer key
After you toggle on the necessary settings, simply add your Google quiz questions and answer options and customize your form to finish the creation process of your quiz. Try to add different question types, such as short-answer or multiple-choice questions. After completing your questions and visuals, you must create an answer key so your quiz can be properly graded.
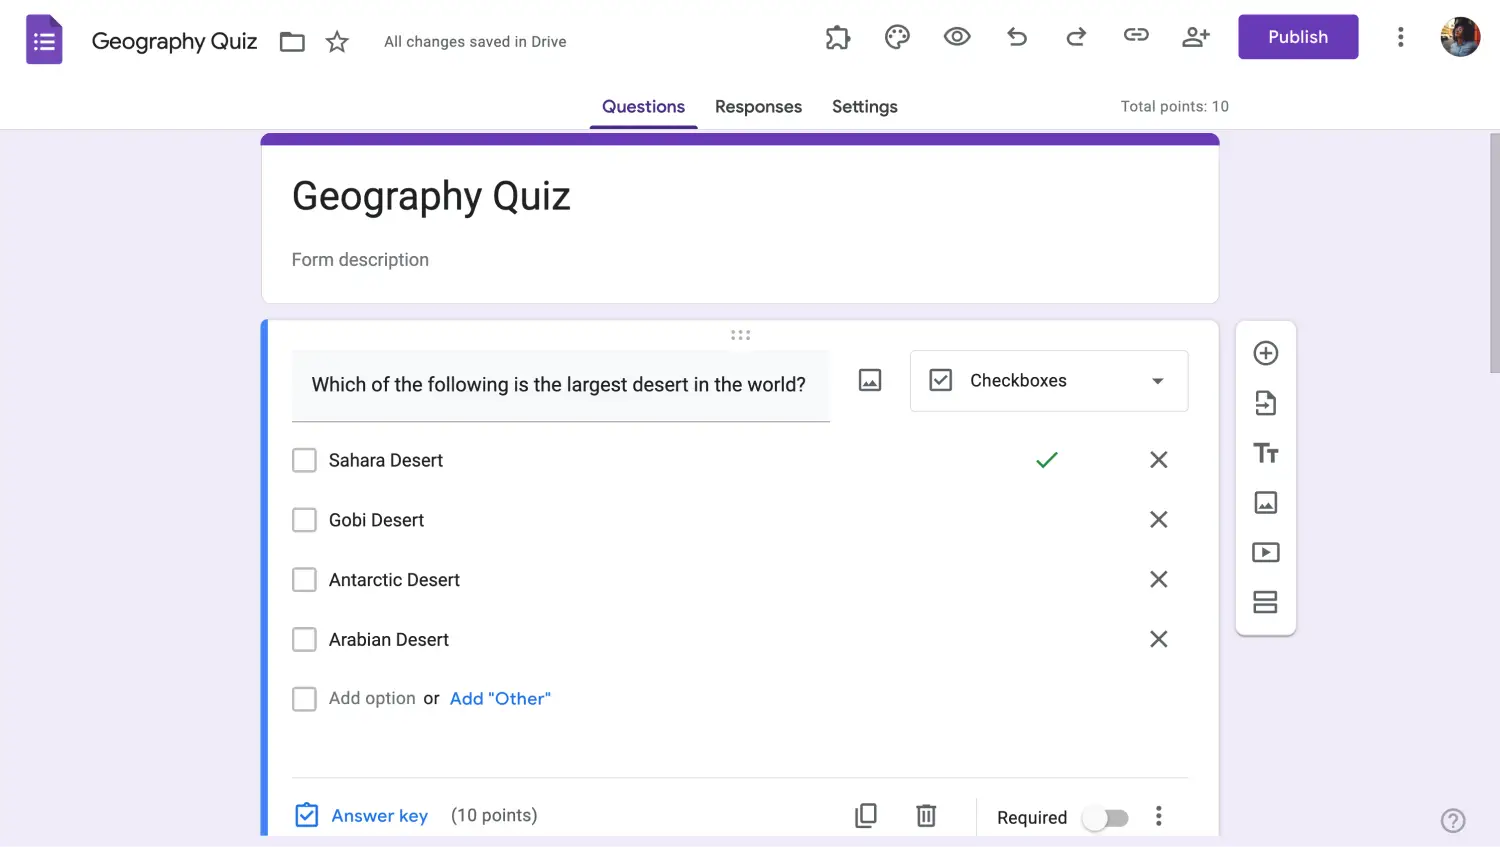
Grade the quiz
To create an answer key, simply click on the questions themselves and click on the Answer key setting at the lower left side of the question. You can choose which answer or answers are correct and assign point values for them with this setting.
💡You can also add answer feedback for correct and incorrect answers through the Answer key setting.
4. Share your quiz and collect responses
After you assign all the points, complete the answer key, and add feedback to the questions that you want, it is time to share your quiz with your students. Once you share your quiz and start collecting responses, you can head to the Responses tab.
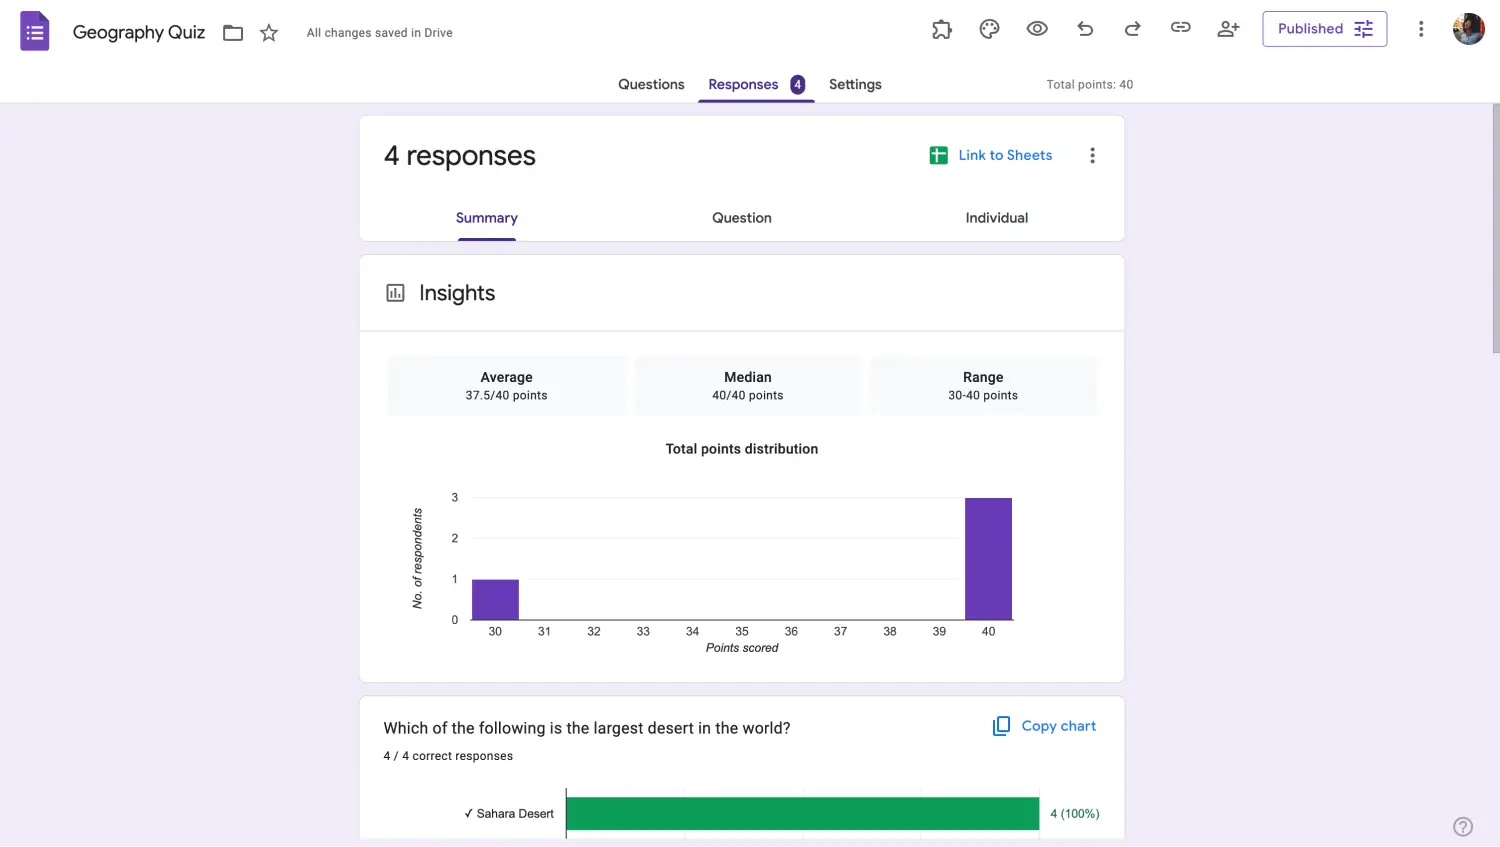
Check the results
The Summary tab shows the total number of responses, the average score, and more. Furthermore, the Questions tab shows how your students are doing on each individual question, which is a great tool for identifying which questions they are struggling with. Lastly, the Individual tab shows the responses of each individual student.
5. Grade your students and give feedback
Once you collect all the responses, it is time to grade them and give the necessary feedback to your students. If you have toggled the Immediately after each submission setting, you will not need this step. However, if you have toggled the Later after manual review setting, this step is for you.
You can grade the responses by either going to the Questions tab or the Individual tab. Each tab allows you to give points for correct answers and add feedback for your students. Simply scroll down and click on Add individual feedback to give your feedback. Once you are done, you can send your students their grades and feedback by clicking on Send.
Get more advanced options for free: forms.app
If you would like to create the best online quiz or exam experience for your students, increase their interest in your class, and engage them in learning, try using forms.app. With the help of several advanced features within forms.app, creating online quizzes and grading your student’s responses are the easiest it has ever been. Do not worry. There are no difficult-to-understand settings or confusing features.
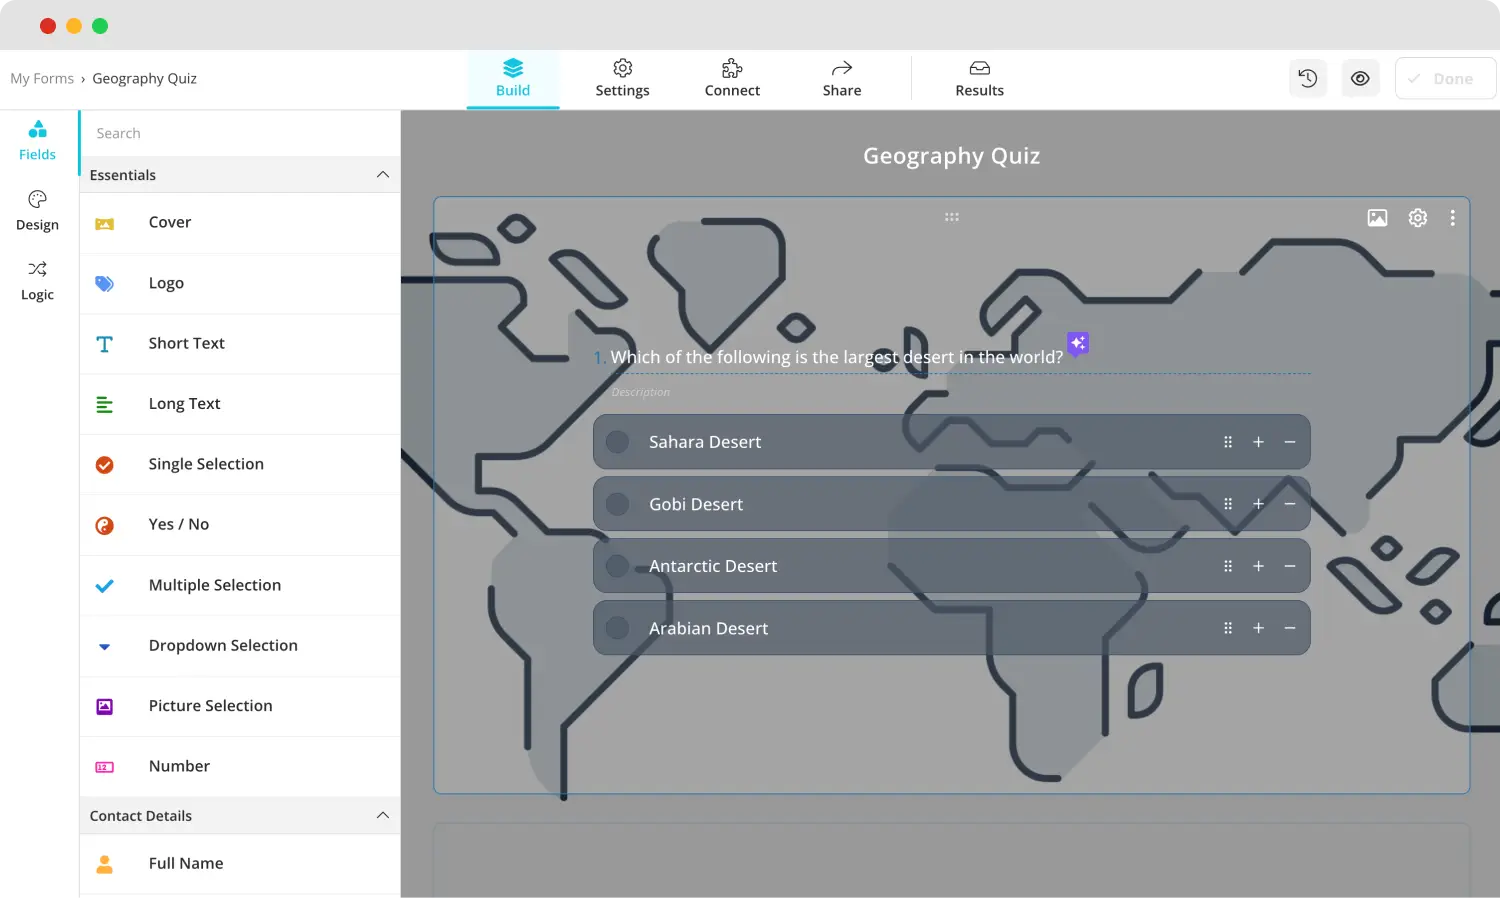
1. Create your form, add questions & customize
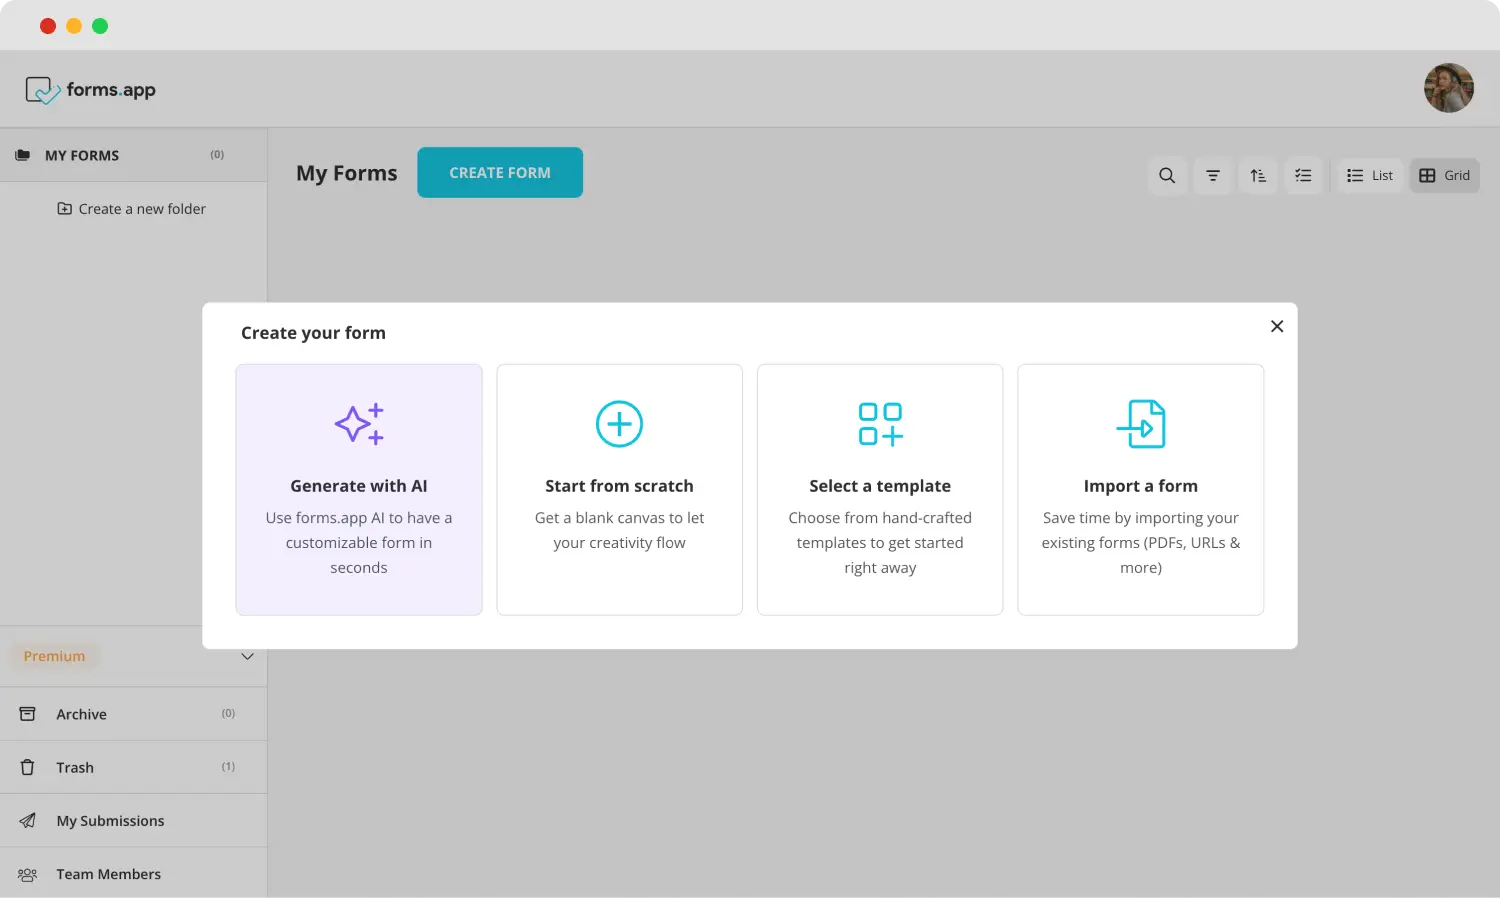
Choose a beginning option
To start creating your quiz, simply select a blank form, choose between our numerous quiz templates, or use forms.app AI. Afterward, add your questions from the Fields tab within the Build section, and customize the visuals of your quiz by heading to the Design tab.
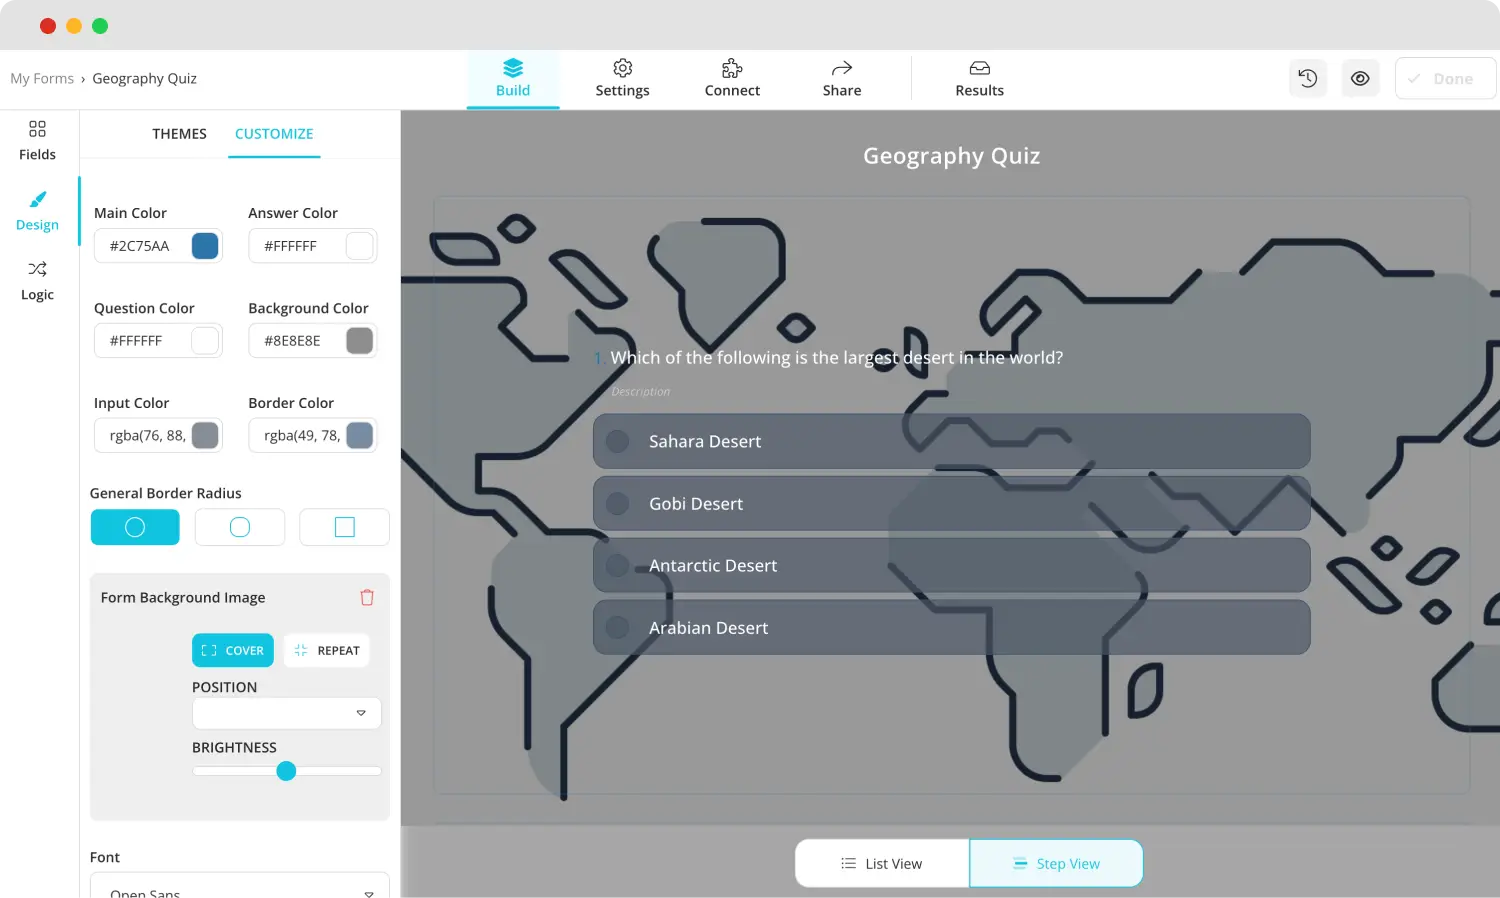
Style your quiz
2. Use dedicated fields
Use dedicated fields
Once you add the general questions, we recommend experimenting with different dedicated question options within the Fields tab. These questions, such as a dropdown question that opens up a drop-down menu or a picture selection question, may add diversity to your quiz and keep your students engaged with the topic.
3. Use the calculator feature
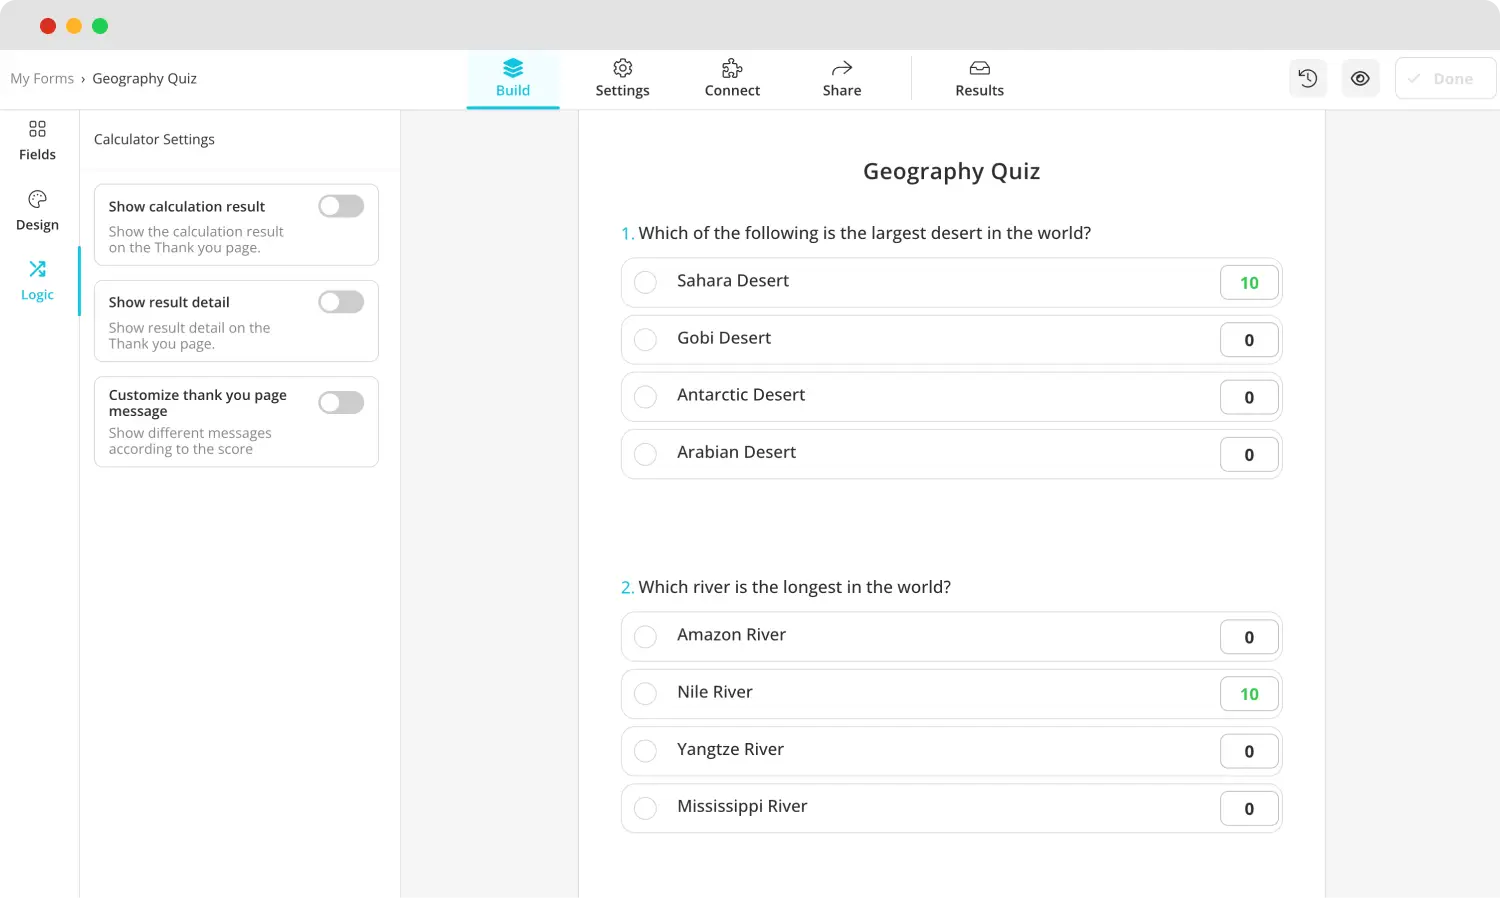
Use the calculator feature
After completing the creation process, you must head to the Logic tab to make your form into a quiz. Within the Logic tab, head to the Calculator feature. The Calculator feature allows you to assign points to each answer option in every question. Therefore, you can choose to have more than one correct answer for a question.
4. Share your form
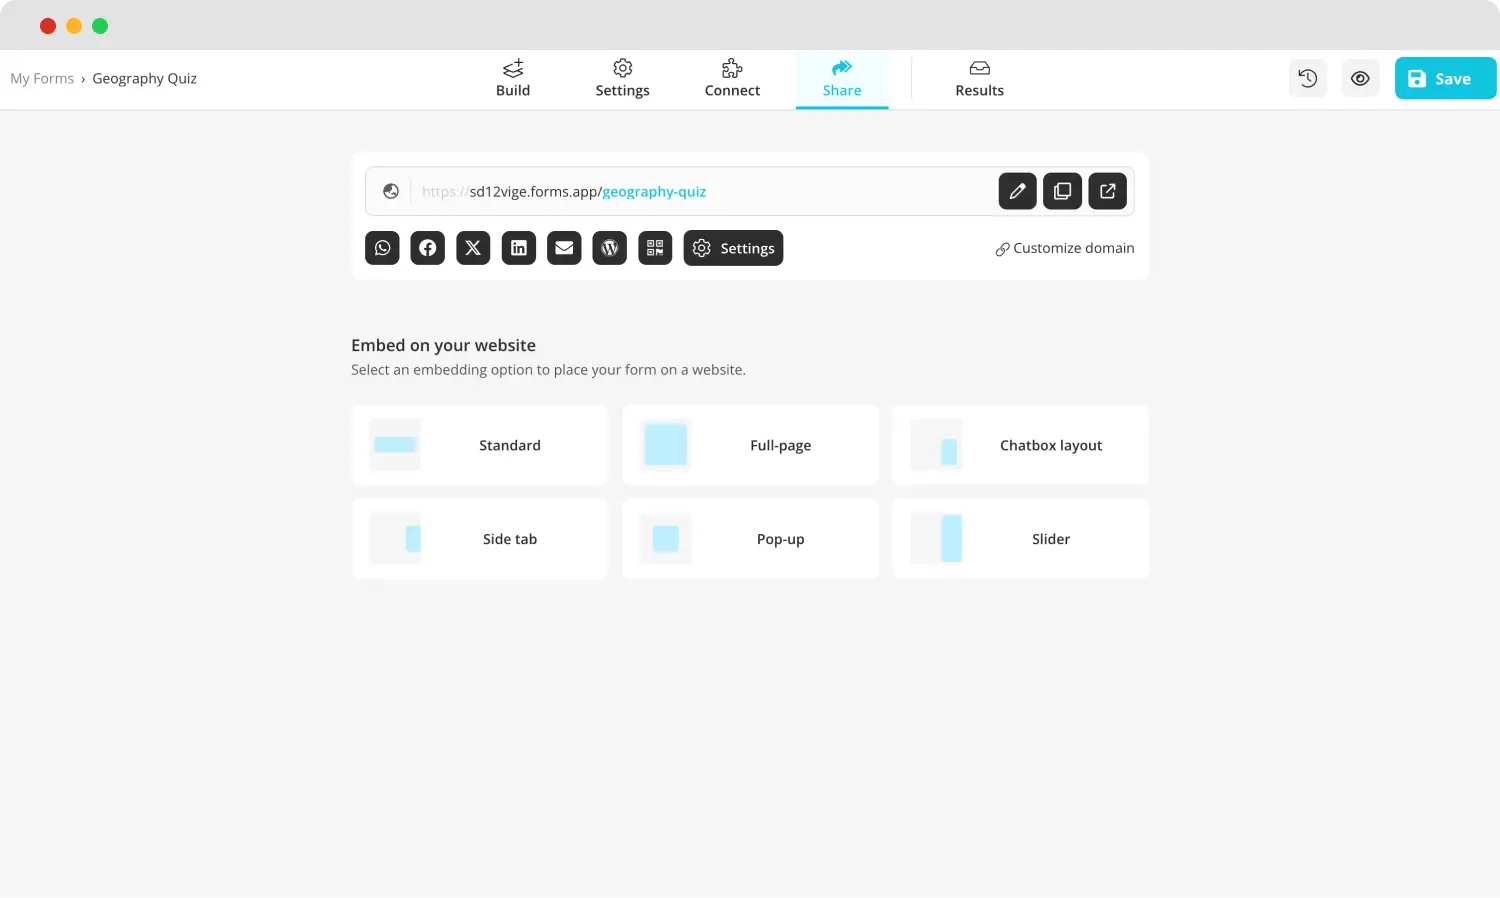
Share your form
Once finished, simply share your form by heading to the Share section and collecting responses. However, the Share tab is not just for sharing your quiz. You can also use the social media shortcuts to share your quiz on social media platforms, such as your class’ WhatsApp group, or change the sharing settings.
5. Connect, & collect responses
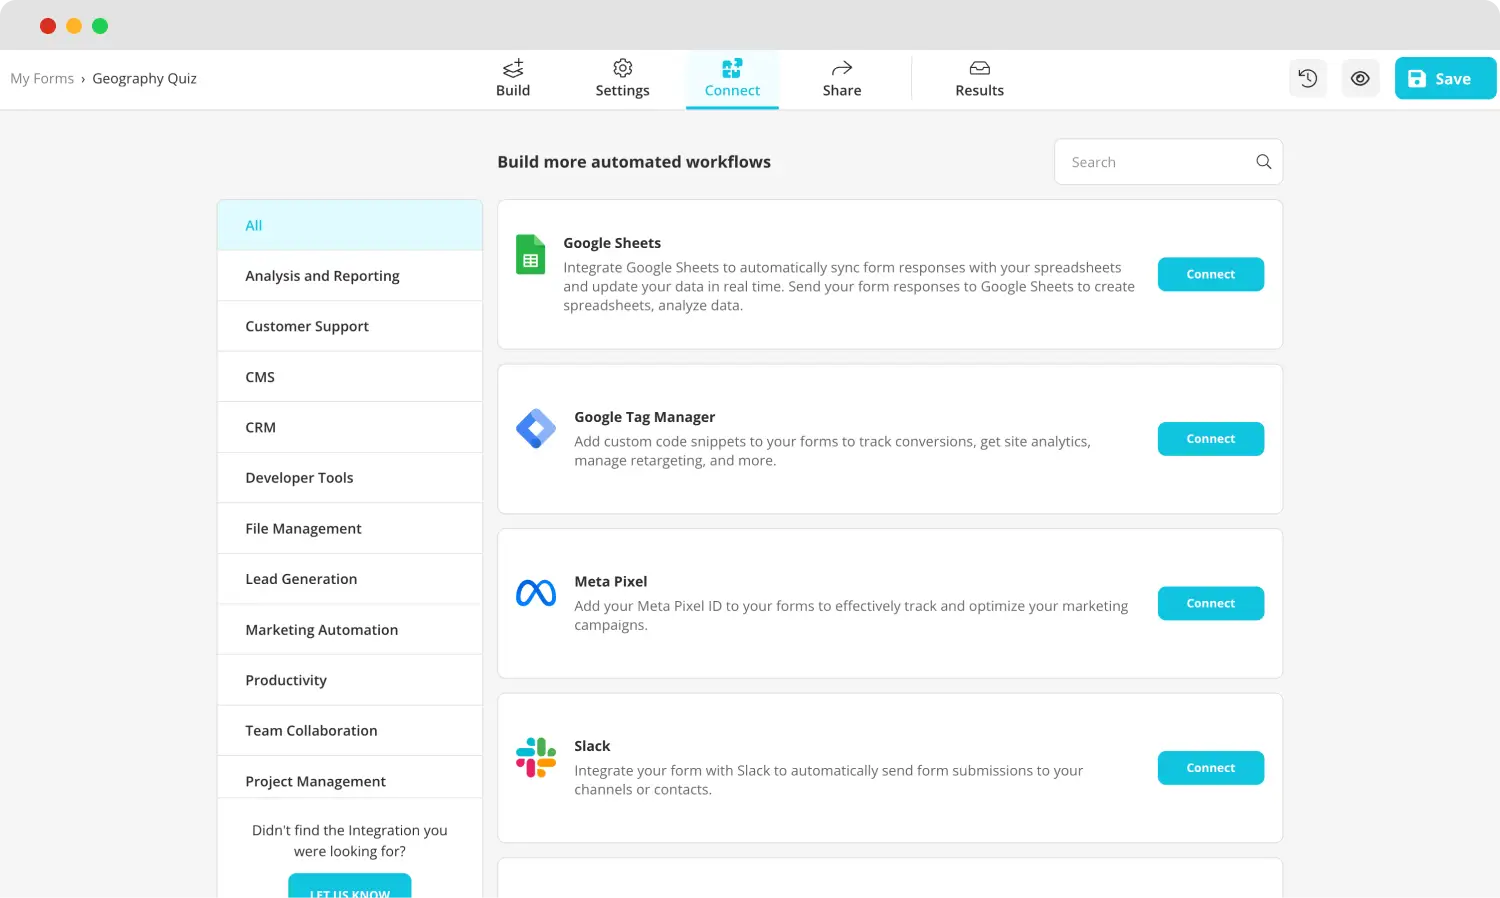
Use various integrations
After you have started collecting responses, we recommend visiting the Connect section to connect your quiz data to a workflow for better management and storage. Additionally, you can head to the Results section to look at the statistics of your quiz and analyze your student’s performance. The Results tab lets you see many details, such as the number of responses, the average submission time, and more.
Frequently asked questions about grading Google Forms
Since you understand how to grade your quizzes using both Google Forms and forms.app, it is time to get into the details of some frequently asked questions about grading Google Forms. These questions may allow you to understand any details or important points you missed.
Le tableau de notation apparaît après avoir commencé à collecter des réponses. L'onglet Réponses affiche les tableaux individuels pour chaque question. Différents types de tableaux sont disponibles pour différentes questions, ce qui facilite la présentation des analyses à vos étudiants ou à d'autres enseignants.
Heureusement, Google Forms peut faire du scoring. En transformant votre formulaire en un quiz et en attribuant à chaque question une valeur de point en suivant les étapes que nous avons fournies ci-dessus, vous pouvez permettre à Google Forms de gérer le processus de scoring sur vos quiz.
Oui, vous pouvez faire des évaluations dans Google Forms. Tout ce que vous avez à faire est de changer le type de question une fois que vous avez ajouté vos questions. Une fois que vous avez ajouté votre question, cliquez simplement sur la question et cliquez sur Choix multiple. Ensuite, changez le type de question en Grille de choix multiple et changez votre question en une question de notation.
La façon de noter les réponses longues sur Google Forms est la même que pour toute autre question. Si la question a une réponse définitive, vous pouvez attribuer un nombre de points fixe. Sinon, suivez simplement les étapes ci-dessus pour attribuer manuellement des valeurs de points aux questions.
Pour apprendre comment activer l'importation de notes dans Google Forms, il suffit d'aller sur Google Classroom, de cliquer sur votre classe, de se rendre dans Travail de classe, puis de cliquer sur l'assignation de quiz et d'aller sur Voir l'assignation. Une fois sur la page Travail des élèves, cliquez sur Importer les notes, puis sur Importer. Assurez-vous d'activer l'option d'importation de notes dans Google Classroom.
Key points to take away
In summary, using a tool such as Google Forms to create and grade your students’ exams and quizzes is crucial if you want to decrease your workload as a teacher. Furthermore, it allows you to experiment with different question types to keep your students engaged with your class.
In this article, we have looked at how you can use Google Forms to grade quizzes and exams, a better and more accessible way to both create and grade quizzes with the advanced features of forms.app, and several frequently asked questions. Use these steps to create a great online quiz experience for your students and decrease your workload!
Yakup is a content writer at forms.app. He is also a skilled translator. His hobbies include reading, learning about different languages, and different branches of sports. Yakup's expertise lies in translation, NoCode tools, and Google Forms.
Articles Connexes