Google Sheets offers a wide range of functionalities to streamline tasks and improve productivity. Among these features, the ability to wrap text is particularly useful. This function allows users to keep all the content visible in a cell without extending its width. It effectively manages data, preventing text overflow and keeping the sheet neat.
In this guide, we will explore how to use the wrap text feature in Google Sheets and provide a detailed walkthrough. We will cover essential steps like selecting cells, applying the wrap text option, and using keyboard shortcuts to speed up the process. By the end of this article, you will have a clear understanding of the wrap text functionality in Google Sheets.
How to wrap text in Google Sheets
Wrapping text in Google Sheets helps you see all your data in each cell without changing column widths. This guide shows how to use wrap text in Google Sheets. It makes your sheets look neat and organized. You will learn to keep text inside cells, making work easier. Here are the steps for wrapping text in Google Sheets:
1. Step

Google Sheets dashboard
The first step is for text wrapping: sign in to your Google account. Then, open Google Sheets from Google Drive. You can start a new sheet or open an existing one.
2. Step
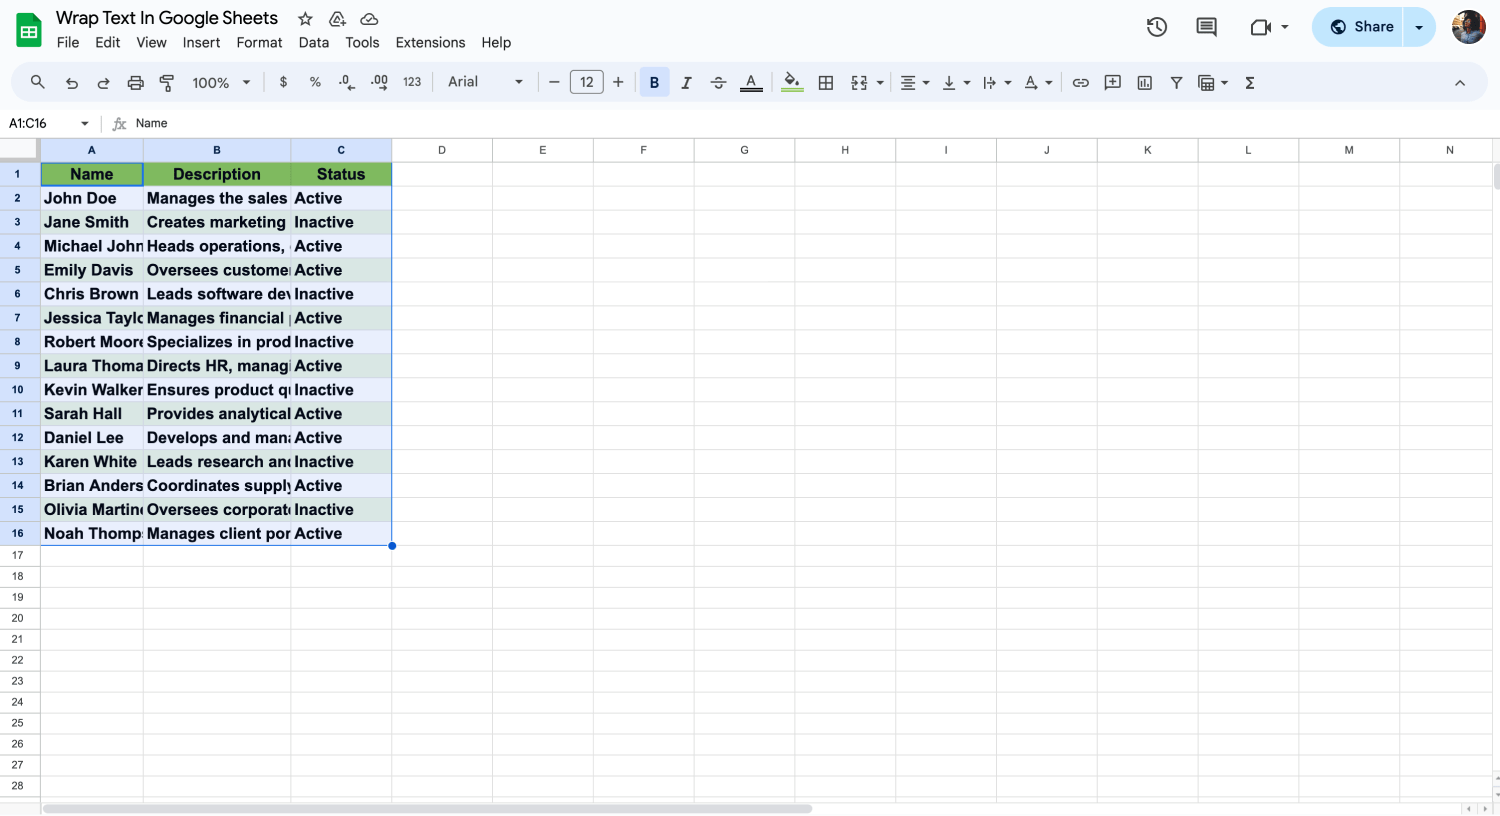
Choose your data
After opening your sheet, pick the cell or cells where you want to wrap the text. Look for the text wrapping icon in the toolbar. It’s in the format menu. This icon helps you manage how text fits in a cell.
3. Step
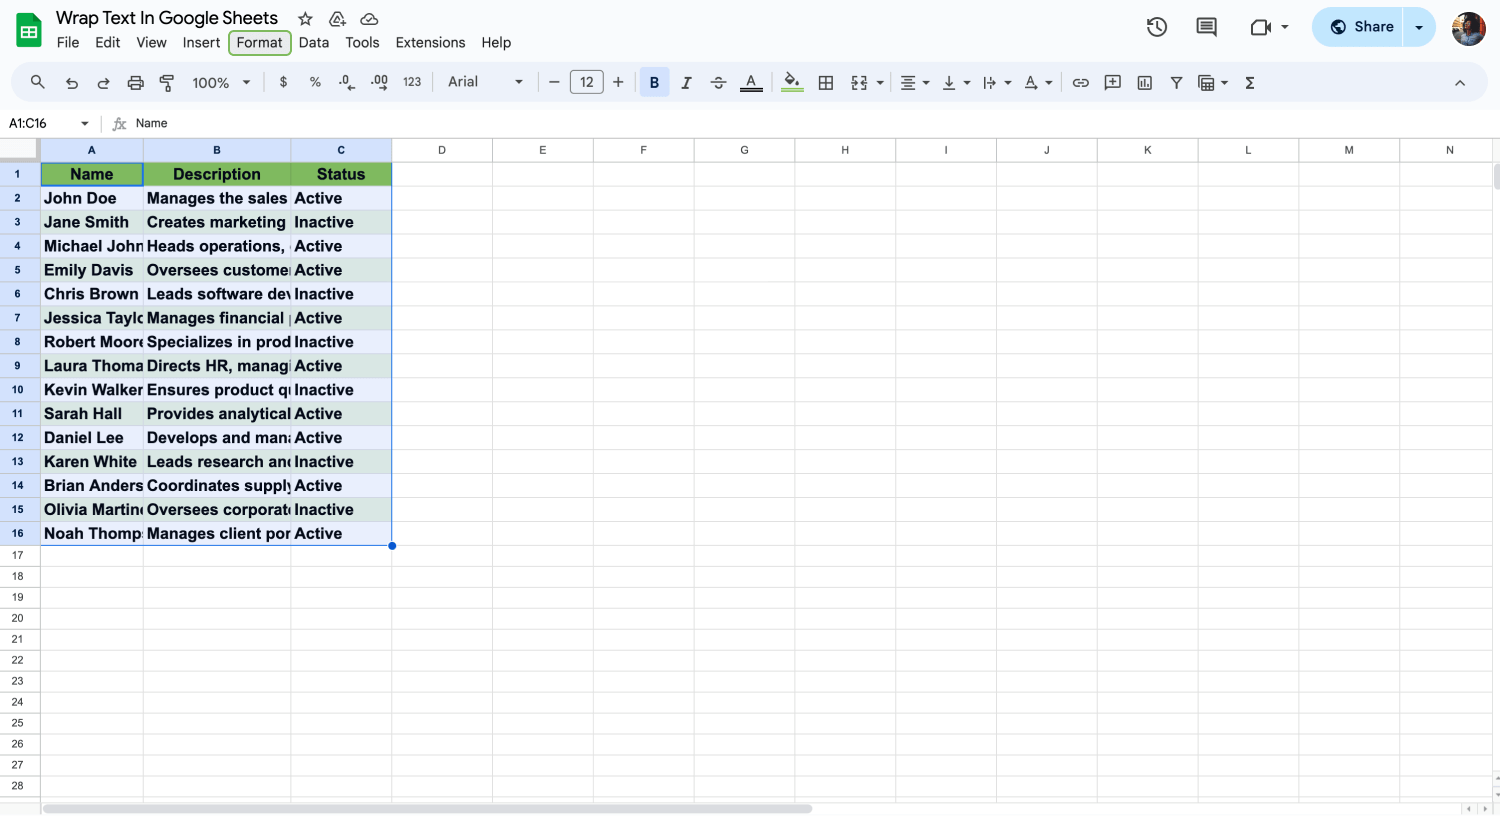
Click “Format”
Go to the 'Format' menu at the top. Here, you will see text-wrapping options. Click on it. This menu lets you control text in cells. It’s where you can wrap the text.
4. Step
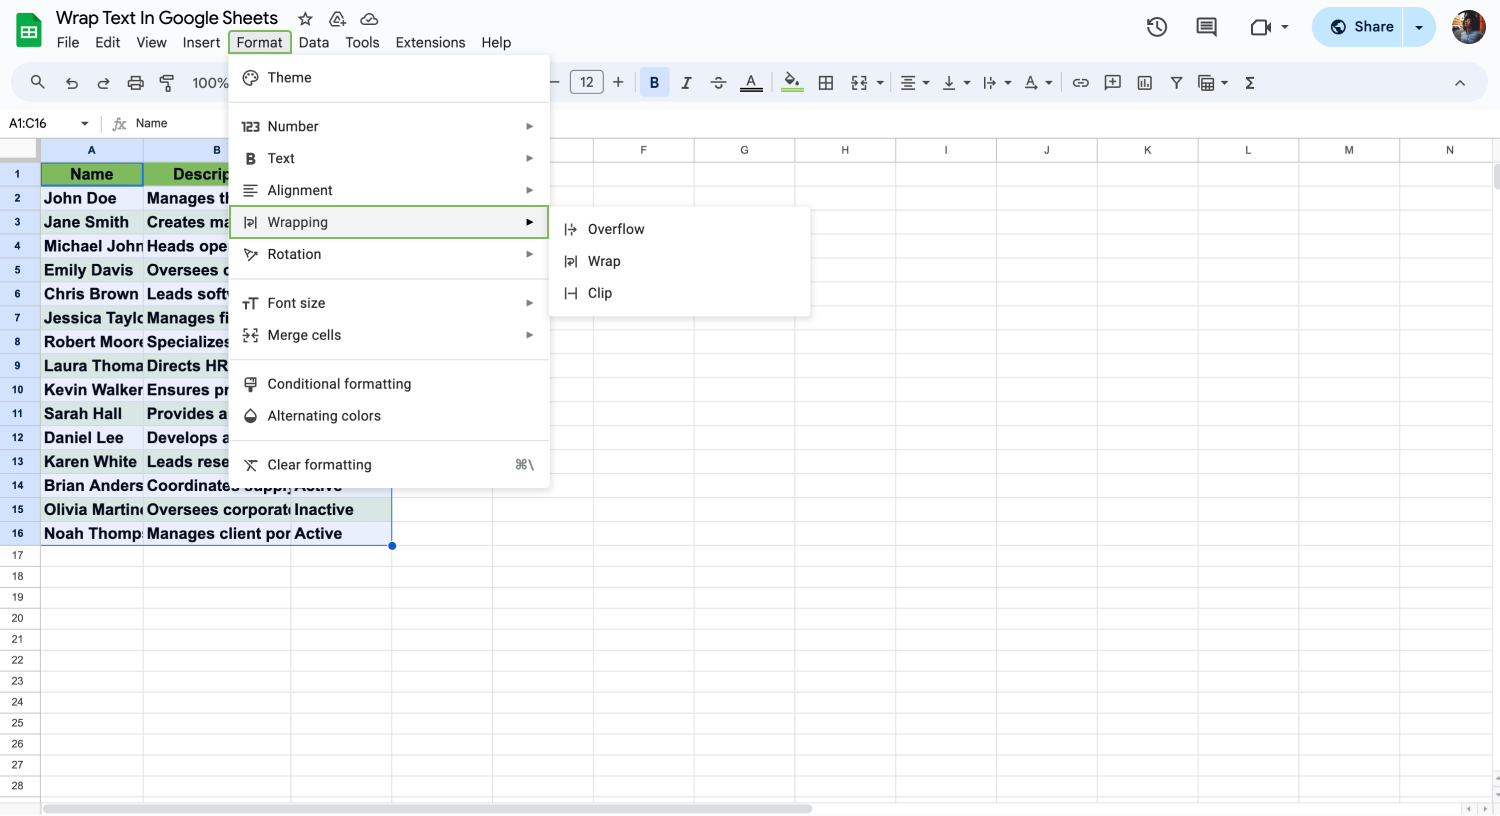
Choose “Wrapping”
In the text wrapping options, select 'wrap'. This makes the text stay inside the cell. It will not overflow. This way, text breaks into lines to fit the cell size.
- Wrap Text: Automatically moves text to a new line within the same cell if it exceeds the cell's width.
- Overflow: Allows text to spill over into adjacent cells if those cells are empty.
- Clip: Cuts off the text that exceeds the cell's width, showing only the part that fits.
5. Step
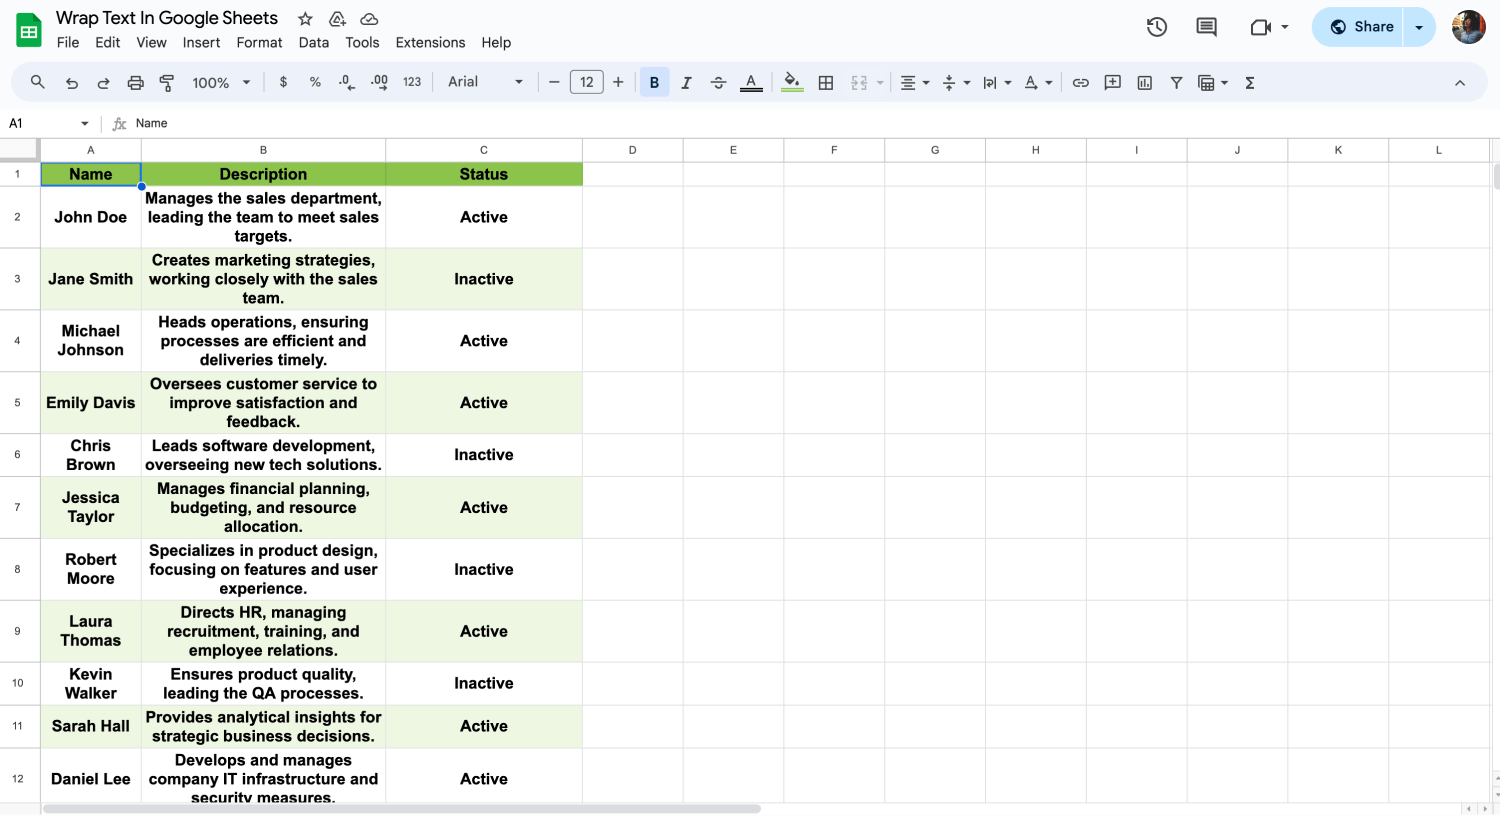
Wrap your text
Once you select 'wrap' from the text wrapping options, check your cell. The text should now fit neatly inside the cell, making your sheet easier to read and more organized.

💡After wrapping your text in Google Sheets, you can align them from the button on the "Format" menu for a cleaner look. You can also play around with columns and line sizes.
Frequently asked questions about wrapping text
Many users have questions about how to use wrapping in Google Sheets effectively. This includes fitting text within cells, adjusting line breaks, and finding shortcuts for quicker formatting. In this section, we'll explore these common inquiries to improve your understanding and use of the Google Sheets app.
Para envolver o texto numa folha de cálculo, clique na célula ou seleccione várias células onde pretende que o texto seja envolvido. Em seguida, aceda ao menu "Formatar", escolha "Quebra de texto" e seleccione "Quebrar". Isto faz com que o texto caiba dentro das células seleccionadas, dividindo-se em novas linhas conforme necessário.
Para que todas as células se adaptem ao texto nas de Cálculo do Google Sheets, seleccione as células ou a folha inteira que pretende formatar. Em seguida, utilize o menu "Formatar", escolha "Quebra de texto" e seleccione "Quebrar". Isto ajusta a altura da célula para apresentar todo o conteúdo do texto dentro dos limites da célula.
No Google Docs, seleccione o texto que pretende envolver e, em seguida, aceda a "Formatar" na barra de menus, escolha "Alinhar e recuar" e, em seguida, "Opções de recuo". Aqui, pode ajustar as definições de quebra de texto para controlar a forma como o texto é colocado à volta de elementos como imagens ou tabelas.
Sim, utilizar o atalho de como envolver texto no Google Sheets torna-o rápido e fácil. Basta selecionar as células que pretende formatar e premir Alt + O, seguido de W. Este atalho envolve o texto nas células seleccionadas de forma eficiente.
A quebra no Google Sheets divide o texto em várias linhas dentro da célula, enquanto o estouro permite que o texto se estenda pelas células vazias seguintes. Se a célula adjacente não estiver vazia, o texto será cortado no limite da célula.
A quebra de texto não afecta diretamente a largura da célula; apenas altera a forma como o texto se ajusta às dimensões da célula existente. Para ajustar a largura, é necessário redimensionar a coluna manualmente.
Para abrir o texto, seleccione as células com texto embrulhado, aceda ao menu "Formatar", escolha "Quebra de texto" e, em seguida, seleccione "Transbordar". Isto fará com que o texto continue numa única linha e transborde para as células adjacentes se estiverem vazias.
A quebra de texto garante que todo o conteúdo de uma célula fica visível e bem organizado quando é impresso. Sem a quebra de linha, o texto mais longo que transborda pode não aparecer totalmente no documento impresso.
No Excel, para envolver o texto, seleccione as células que pretende, vá ao separador "Página inicial" e clique em "Envolver texto" na secção "Alinhamento". Isto faz com que o texto caiba dentro de cada célula.
Key points to take away
Learning to wrap text in Google Sheets enhances your data management skills, ensuring that your spreadsheets are clean and organized. This feature is crucial for presenting information clearly, allowing viewers to understand data without the need to continually adjust column sizes.
Google Sheets is a powerful tool for anyone looking to improve their data productivity. By mastering features like text wrapping, you can fully take advantage of Google Sheets's offerings. Stay updated with our guides to discover more tips and tricks for managing and analyzing your data efficiently.
Behçet is a content writer at forms.app. He is a music producer and enjoys blending electronic and acoustic tunes. Behçet has expertise in Google Sheets, survey questions, and online forms.


 3 min ler