Whether you are taking employee attendance or student attendance, regulating attendance has always been a problem. While the majority still use written signs on paper or call each student by their name in the class to take attendance, this method is outdated. That is why it is important to learn how to create a system with an online attendance form and how to create attendance in Google Forms.
In this article, we will look at why you should keep track of attendance as an educator, how to use Google Forms to create a solid attendance system, and a more advanced option to take your form-creating skills to the next level.
Why keep track of attendance
While most of the students think that attendance is not necessary, the initial investment will almost immediately pay off with the advantages that it brings. Some of the advantages of keeping track of attendance include, but not limited to:
🎯Teaching the students the value of being on time and responsibility
🎯Allows you to keep track of the student's performance and engagement with the class
🎯Aids classroom management by helping teachers get familiar with students, their names, and their faces
🎯Allows for a better performance analysis when it comes to taking employee attendance
How to use Google Forms for the attendance system
Creating a Google Form for the attendance system is one of the easiest and most effective ways that you can use. You only need to follow a few simple steps within the form builder itself, and you can also make the necessary customization to make your attendance system a bit more advanced.
1. Open the Google Forms dashboard
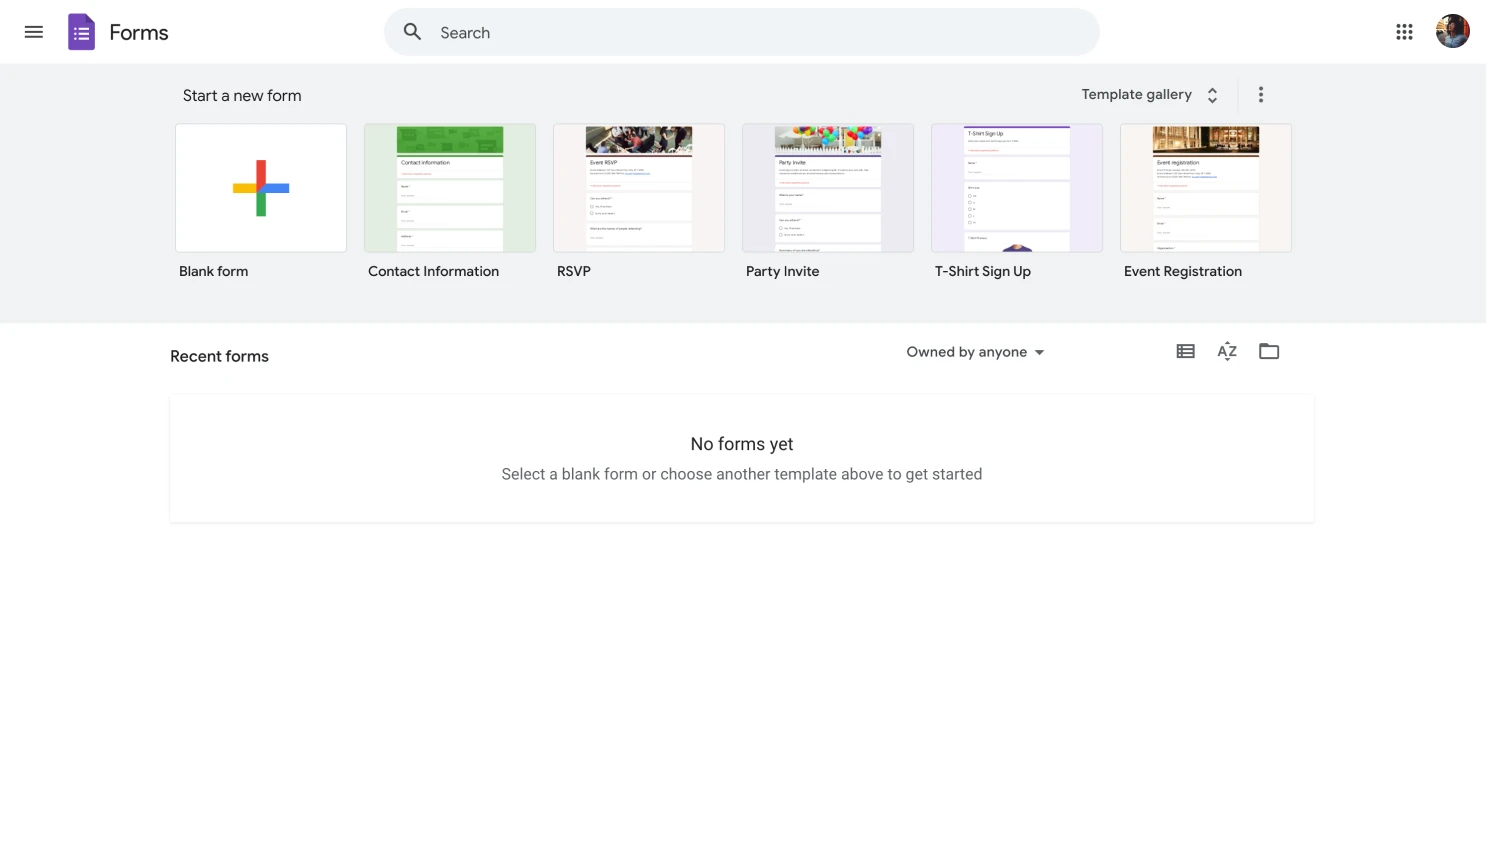
Open the dashboard of Google Forms
The first step in creating your ideal attendance system is to create a form. Creating online forms using Google Forms is relatively easy, as there are many templates that you can use and customize to your liking. You can also start with a blank form and have control over every detail.
2. Add the necessary questions
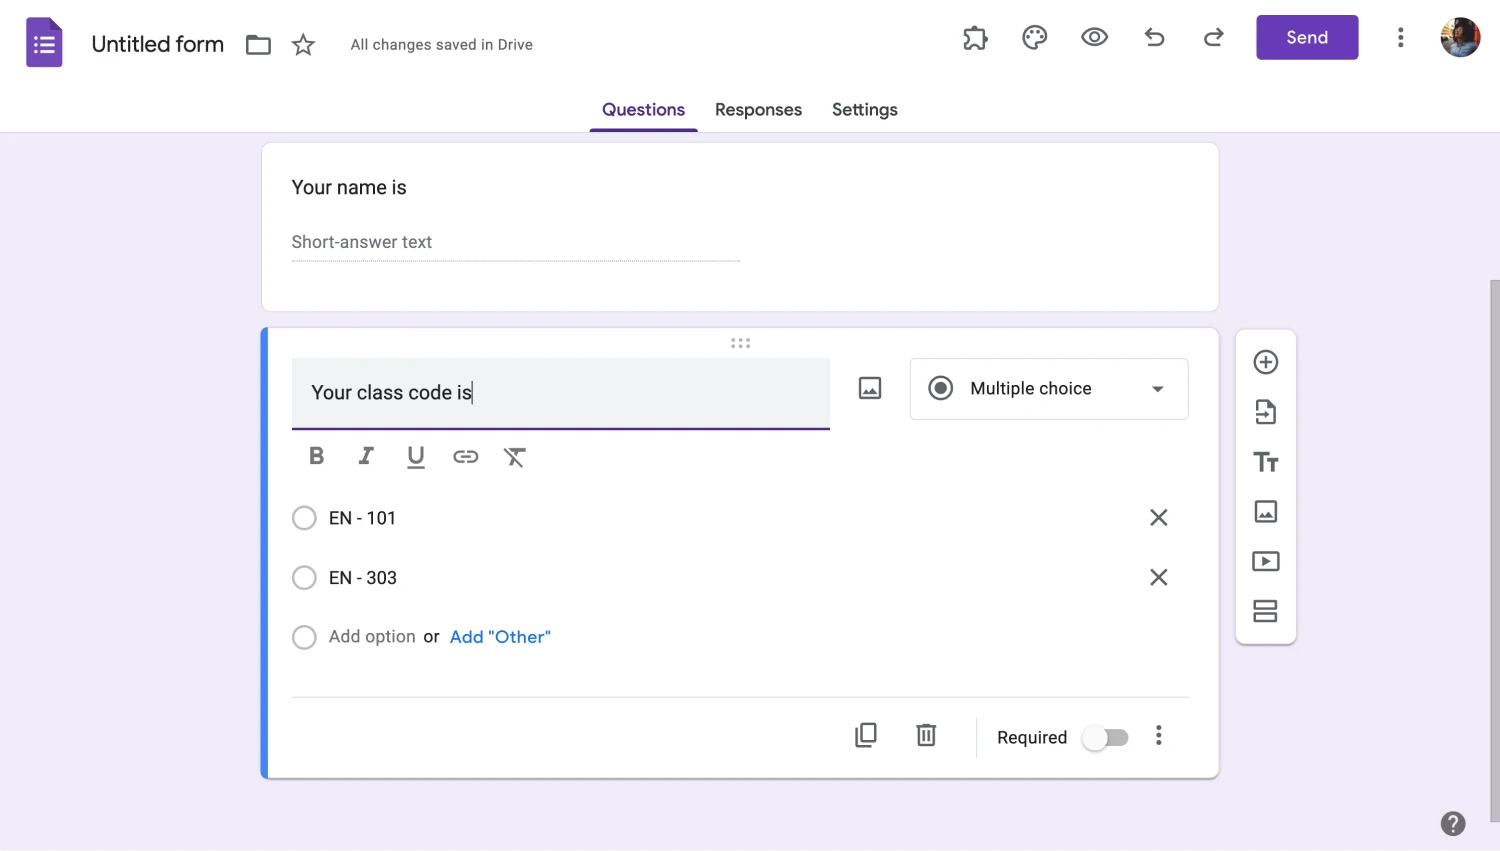
Choose a template or start from scratch
The second step is adding the necessary questions and form fields. Whether you are creating an attendance system for work or for class, collecting necessary information such as the participant’s name, school number, and the date and time of the class that they have attended is crucial for a good attendance form.
3. Assign the question types
After you have added the necessary questions, we recommend taking a look at different question types that you can use. For example, you can use short answer questions for the name of the participant and date and time questions for the attendance information.
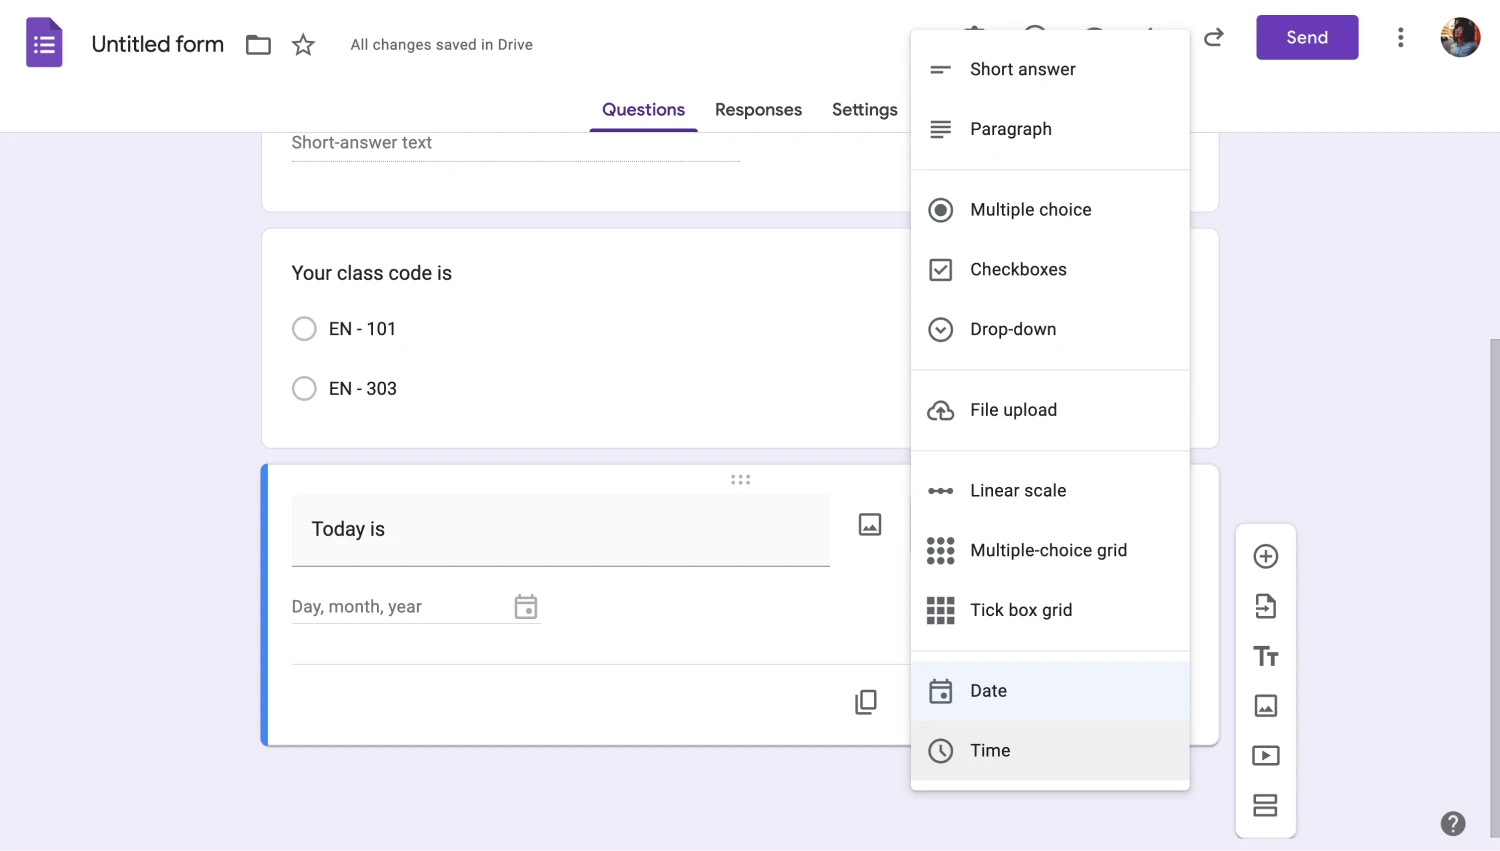
Add the essential fields
Changing the question type of a particular question is easy. Simply click on the question you would like to change, click on “Multiple choice,” and select the question type you want. We recommend experimenting with different question types to see what works best for your form.
4. Preview and customize the settings
The last step of the creation process is previewing the form and customizing the settings. You can preview your form by clicking on the eye icon next to the palette icon to look for any mistakes that need correction or improvements that you may need to make.
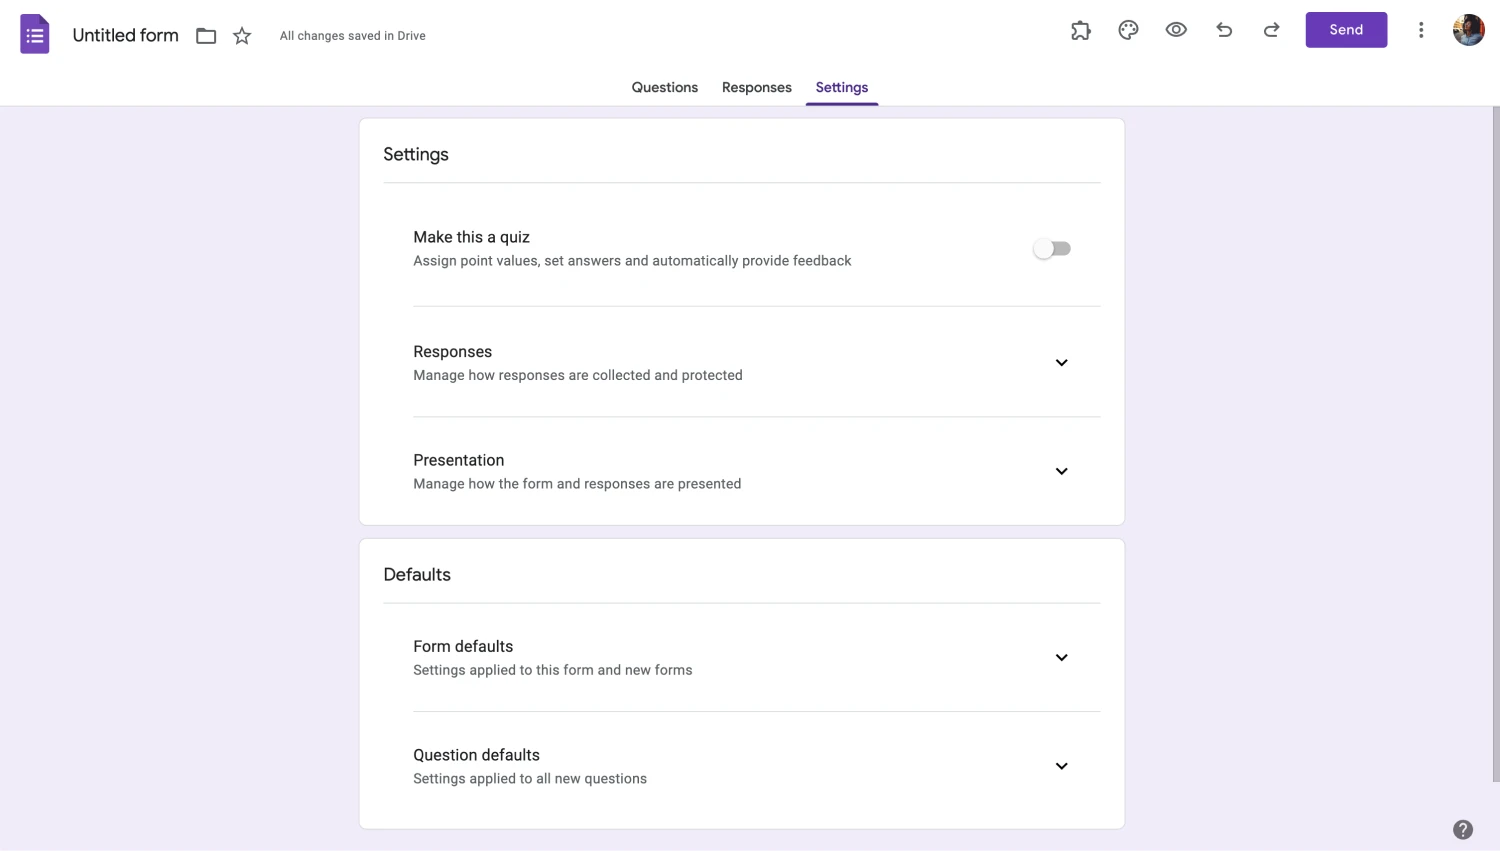
Customize the settings
The “Settings” tab is also as important as the form itself. The “Settings” tab allows you to change essential settings, such as how to collect and protect your responses, how to present your form, and the default settings of your form.
💡You can also toggle the “Require a response for each row” setting within the questions themselves for questions that definitely require an answer.
5. Link your form, share, and add collaborators
While this step may not seem important when creating other types of forms, linking your attendance form and sharing it is one of the most important steps. To link your form, head to the “Responses” section and click on “Link to Sheets.” This action will link your form's responses to a Google Sheets file and help you keep a record of attendance.
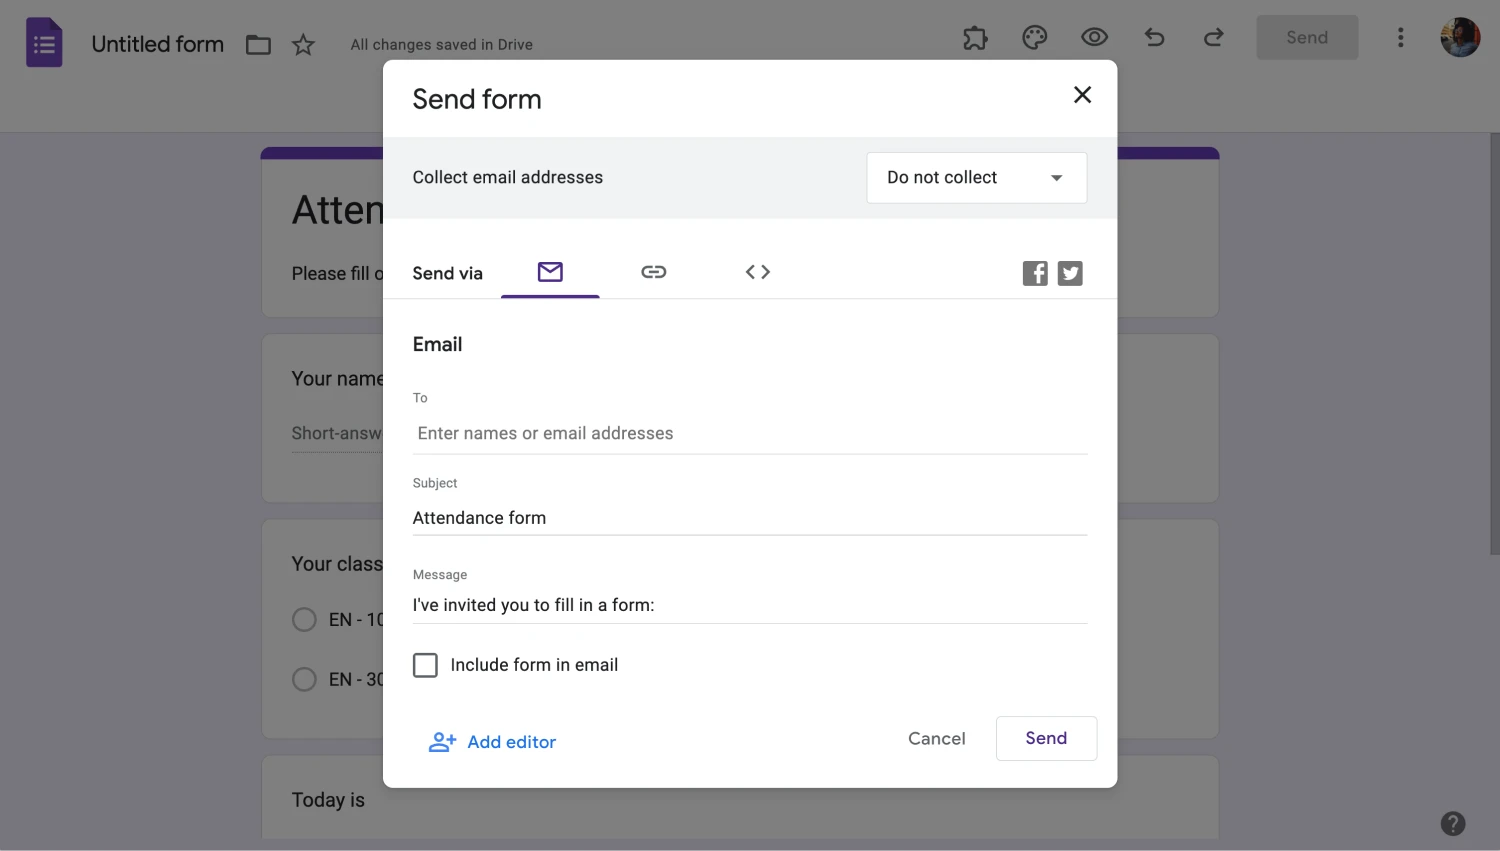
Link your form
To share your form, simply click “Send.” This will open a menu where you can choose how to share the attendance form, as a link or with an email address. One more important feature that you should check out is the “Add collaborators” feature, which you can access by clicking on the three vertical dots at the top right corner.
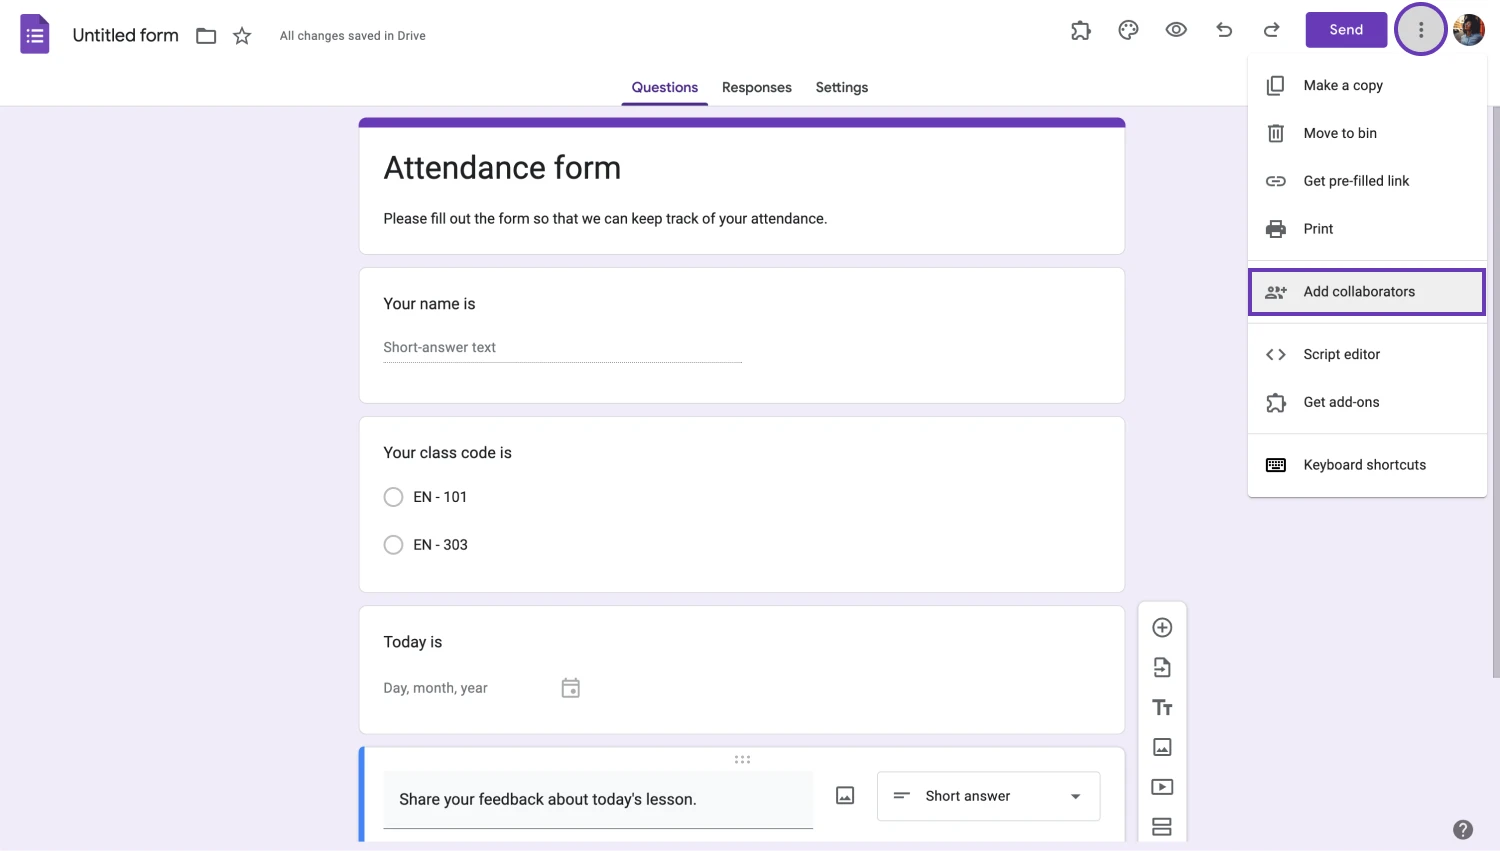
Add collaborators to share
💡The “Add collaborators” feature is especially useful if the class is given by two or more teachers or if you would like to share the information within the form with your superiors.
Try more advanced options: forms.app
If you would like to take the next step when creating your attendance form, forms.app is the way to go. With endless customization options and dedicated fields, you can create the best attendance system possible. Follow these simple steps and try the advanced features to create a customized experience for yourself.
1. Choose a template, start from scratch, or use forms.app AI
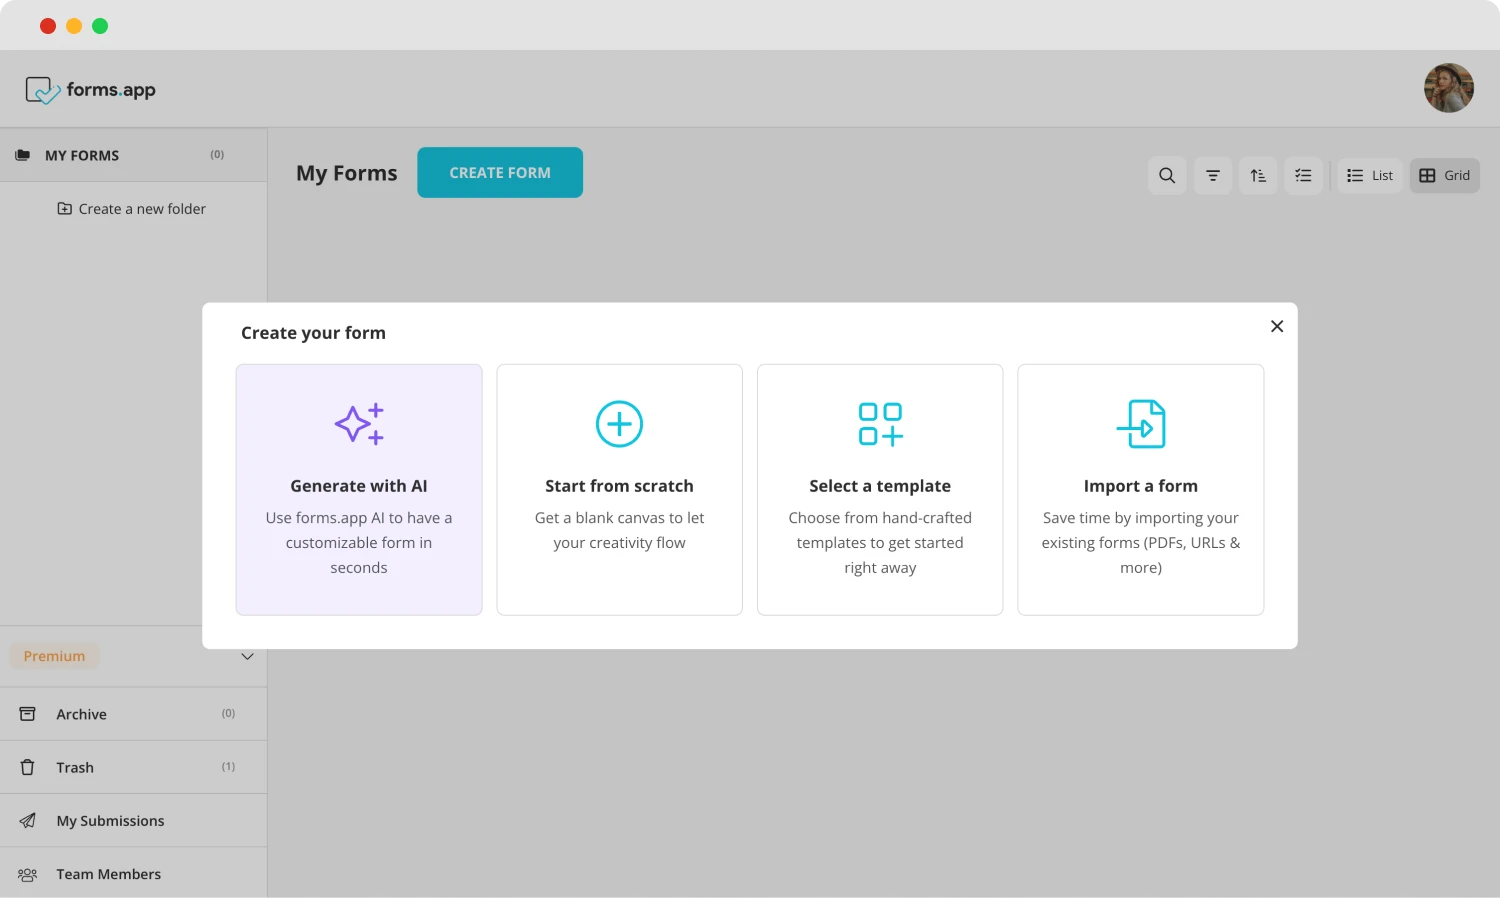
Choose a beginning option
You can choose to start your creation process by selecting one of our attendance templates, starting from scratch with a blank form, or using forms.app AI. Our AI helps you to create a personalized experience with just a sentence and also allows you to customize.
2. Edit the questions or add your own
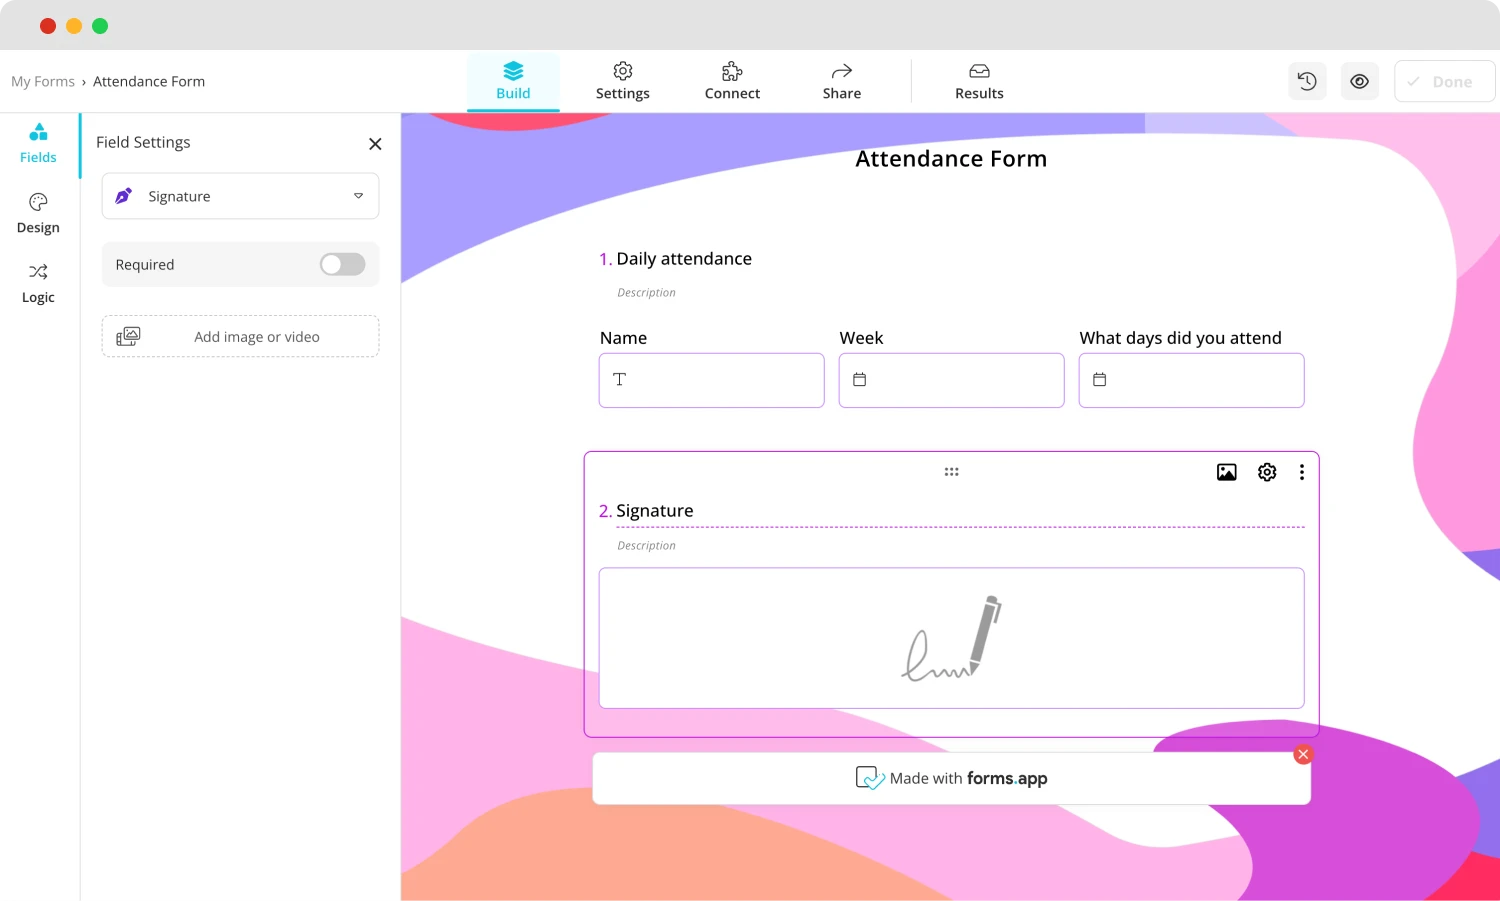
Add your questions
Once you choose your base, you can start editing the questions or adding your own. To edit the questions, simply click on the question that you want and change anything from the question’s title, description, or answers. Do not forget to add the questions that are necessary for an attendance form.
💡You can also use rewrite with forms.app AI to edit questions. Click the purple icon next to any question title to rephrase or rewrite your question using forms.app AI.
3. Use various fields
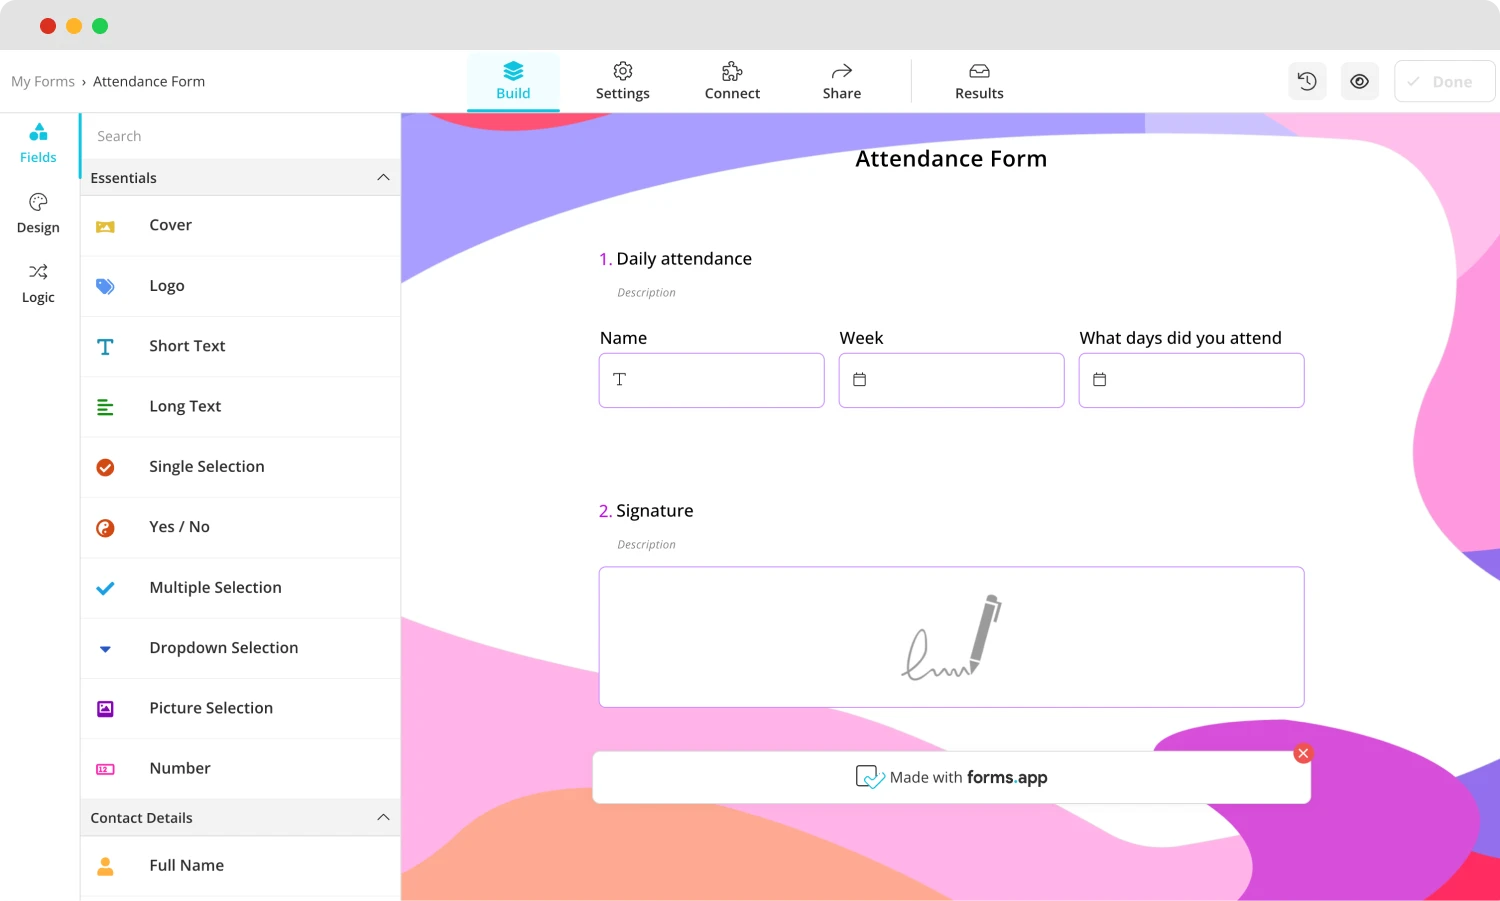
Add the essential fields to your attendance form
One distinct advantage of using forms.app to create your attendance form is the dedicated fields. Our dedicated fields for specific occasions, such as the date field, the time field, or a signature field to allow the participants to sign in their attendance, can be found in the “Fields” section within the “Build” tab.
4. Customize the form design
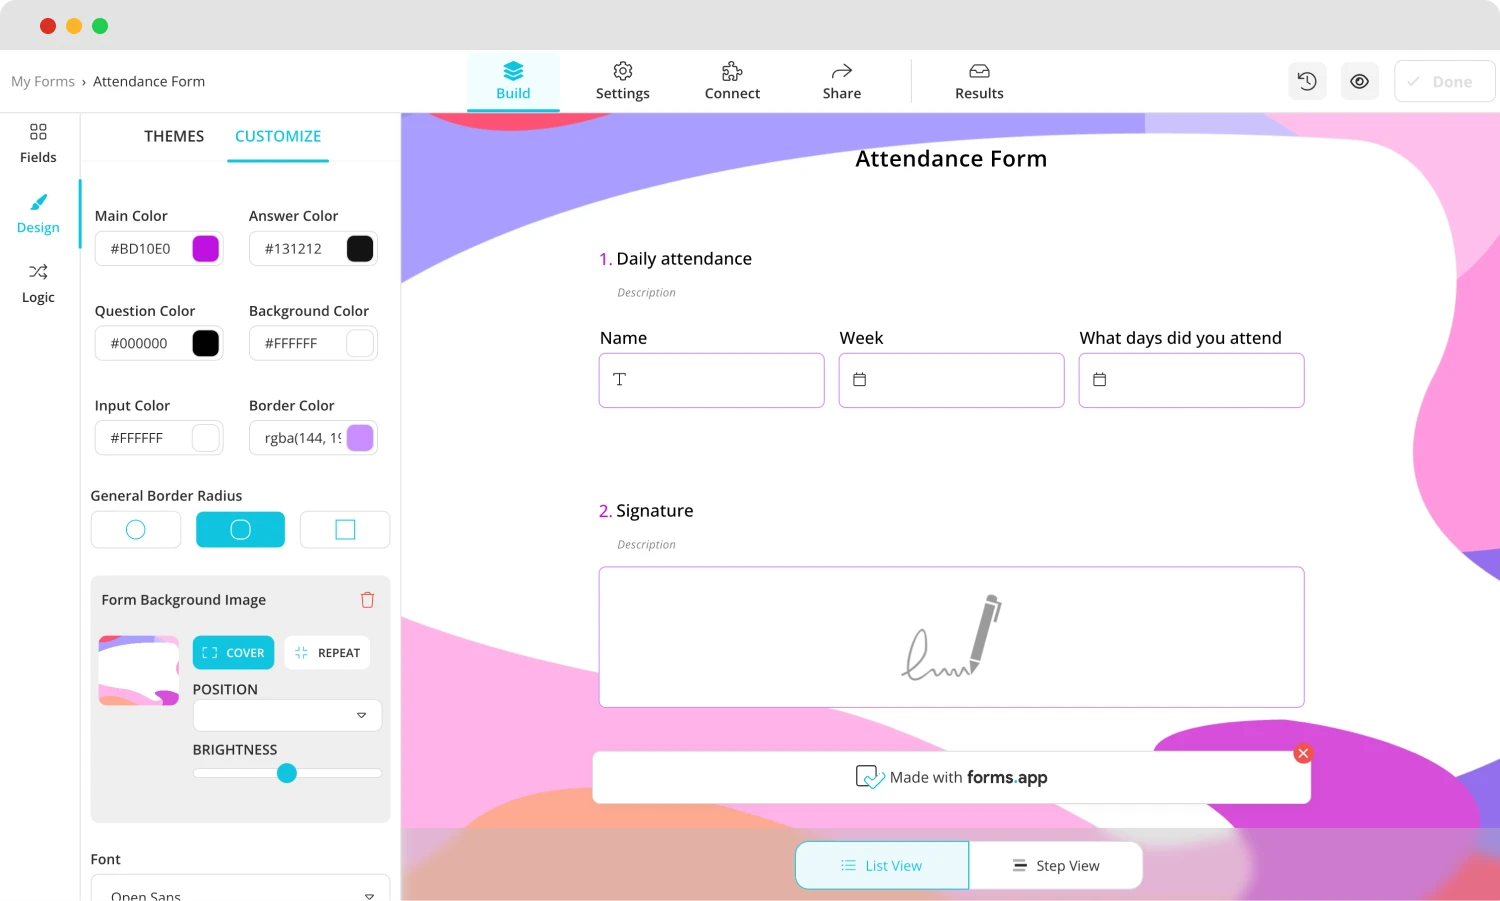
Customizing the design of your form
Once you are done with the questions part of the creation process, you can dive into the endless visual customization options of forms.app. From the font colors to border radiuses, you can find all of the options for customizing your form’s theme in the “Design” tab within the “Build” section.
💡The design tab also allows you to have animated themes for your form. Go to the end of the design tab to choose an animated theme.
5. Preview, connect & share
After you complete the process, you can preview your form by clicking the eye icon at the top right side of the page to see if there are any improvements you can make or mistakes you may need to correct.
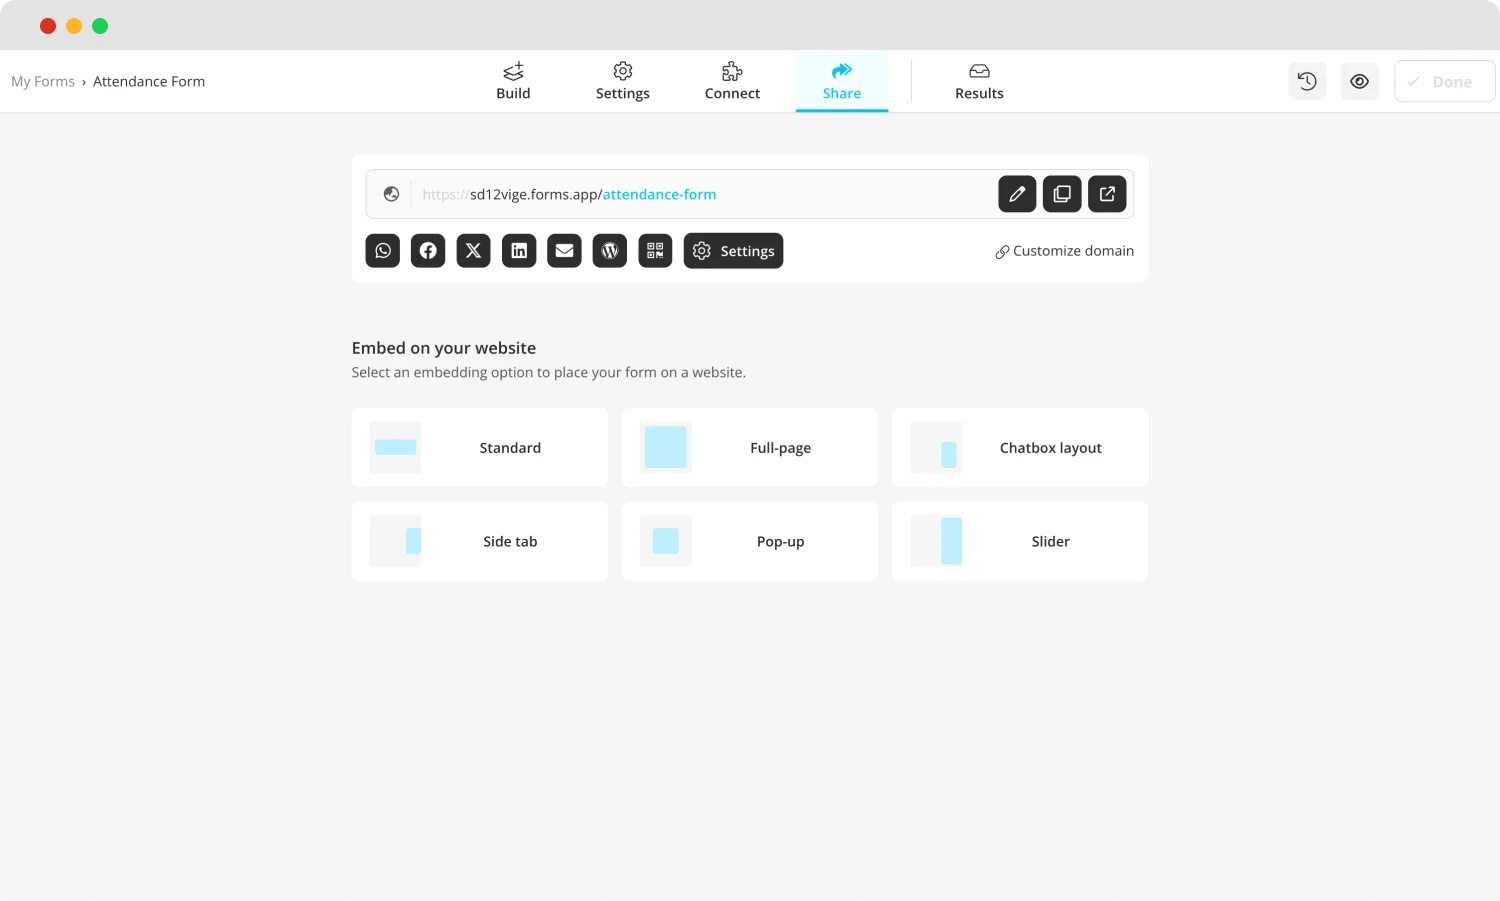
Share the form
Another great feature of forms.app is the connect feature. From the “Connect” section, you can choose to link your form’s responses to any database you want, such as Google Drive, Microsoft Excel, or Notion. That means you are not just limited to Google Sheets. In the end, you can share your form by heading to the “Share” section.
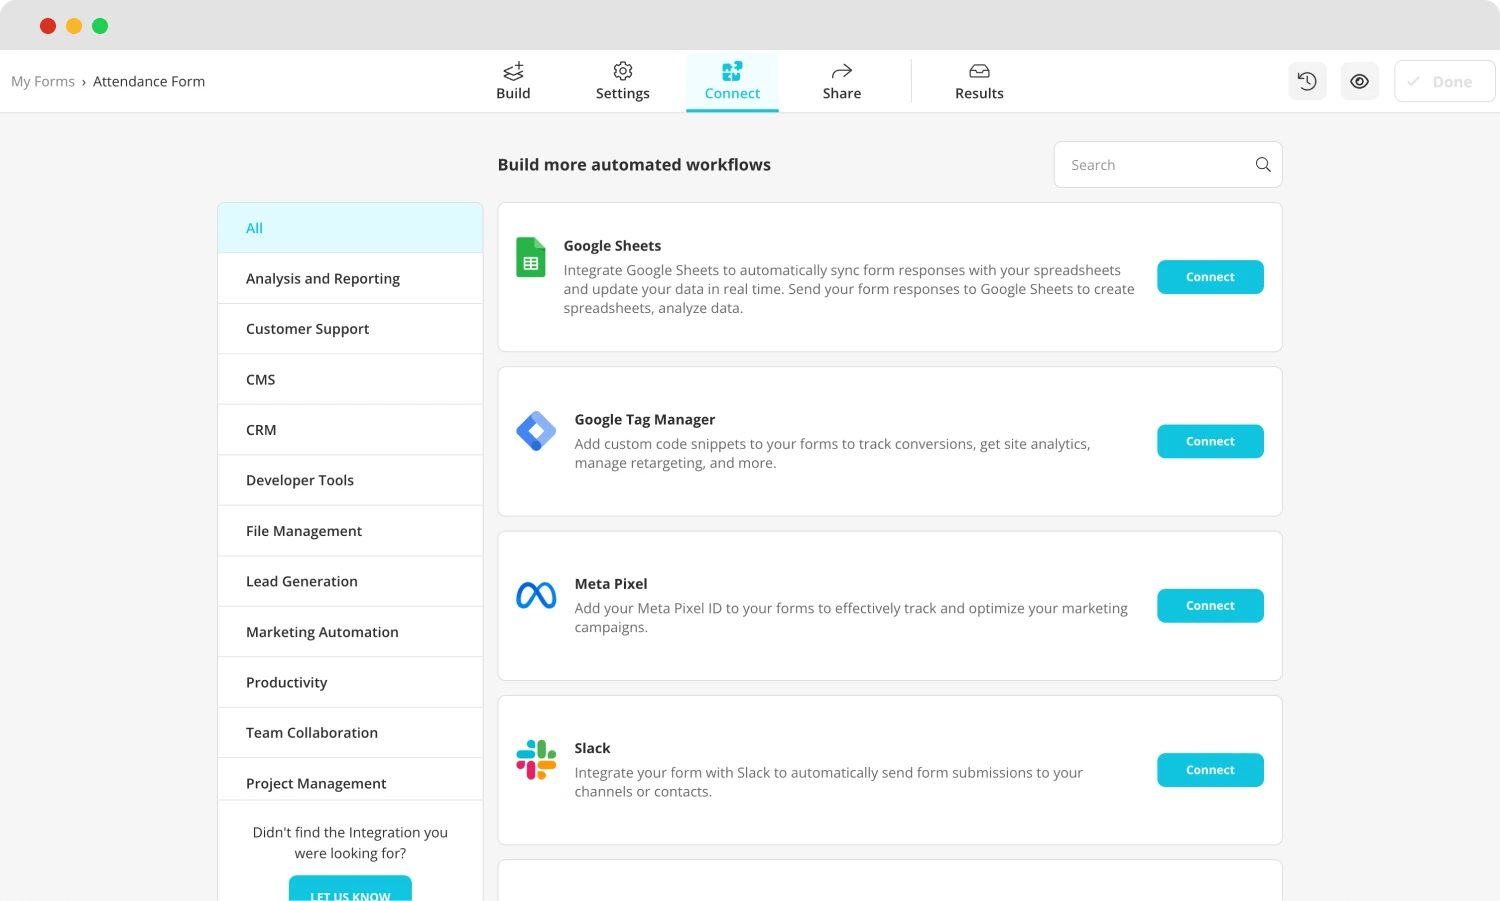
Check the integrations
6. Analyze your responses
One of the biggest advantages of using forms.app is being able to analyze your form responses within the same platform. By heading to the “Results” section, you can see the results and responses and how many people have filled out your attendance. This feature is extremely important if you would like to analyze the attendance records of your employers or students.
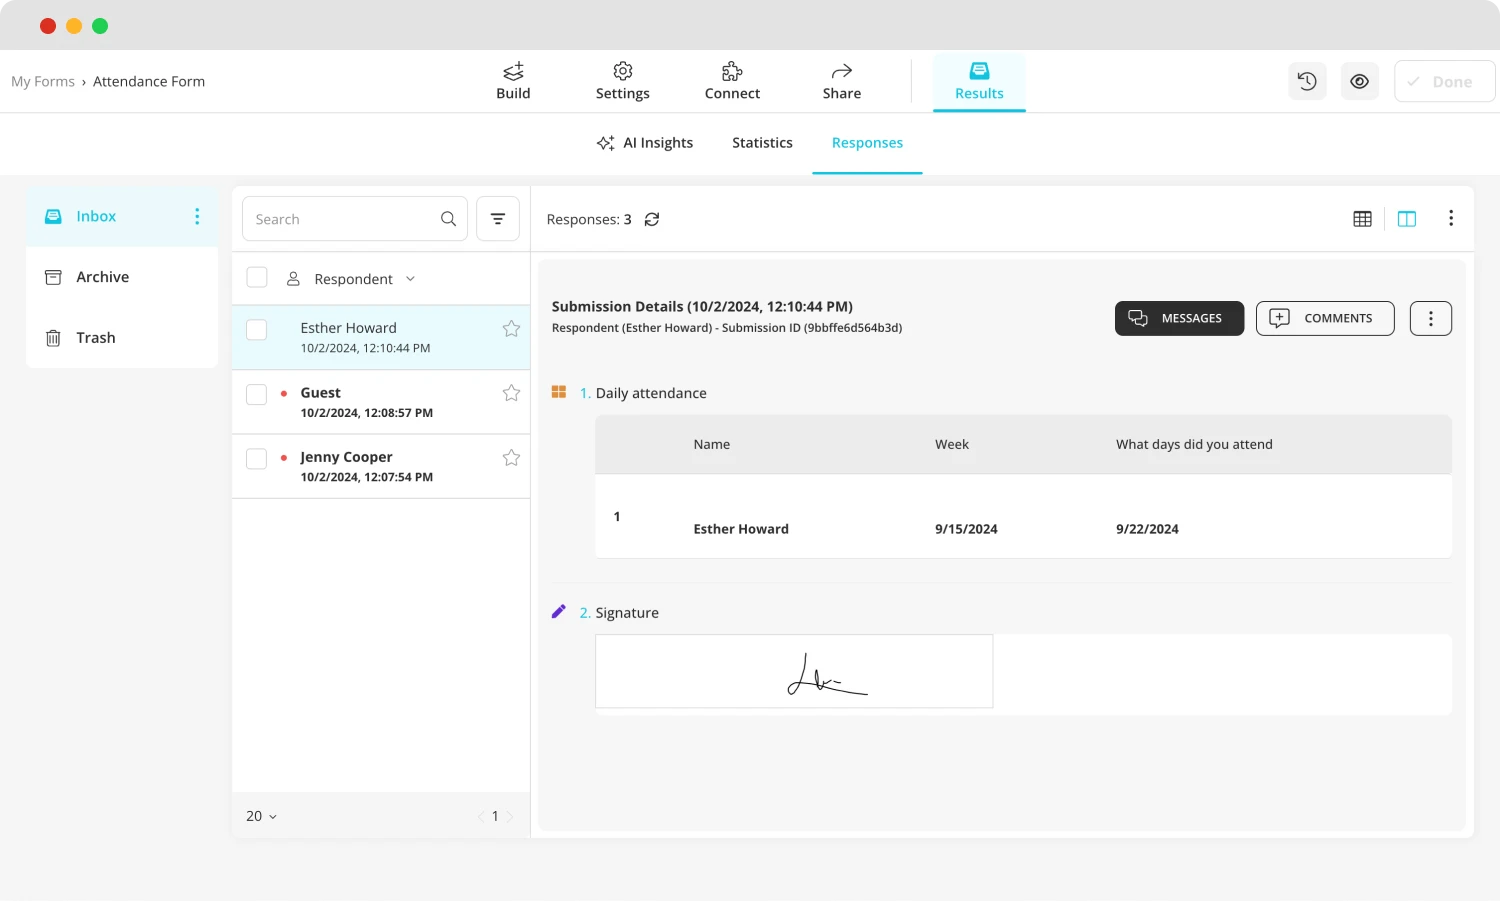
Check the responses
Furthermore, you can also see the statistics and analytics of your form by going to the “Statistics” tab to see the number of responses, submission percentage, views, and much more. You can also see which devices or platforms people have used to fill out your form.
Wrapping it up
In summary, creating an online attendance form can be like a breath of fresh air to an outdated practice. An online attendance form will allow you to have better security, save time, and better attendance tracking. Additionally, it makes the part of reporting the attendance record to your superiors easier.
In this article, we have touched upon why keeping track of attendance is important and why having an online attendance form is the way to go. We have also looked at how to use Google Forms to create an attendance system and a better way to create attendance forms, and forms in general, with the help of forms.app. Try out both platforms and revolutionize the attendance system with the help of online forms.
Yakup is a content writer at forms.app. He is also a skilled translator. His hobbies include reading, learning about different languages, and different branches of sports. Yakup's expertise lies in translation, NoCode tools, and Google Forms.
