
Many Google Sheets functions are available to make using Excel (or Google Sheets) easier and more efficient. In this article, we will discuss one of the important functions: the SUM function. The SUM function in Excel (or Google Sheets) lies in its fundamental role in performing basic arithmetic operations and facilitating data analysis, such as basic calculation or data analysis.
In this article, you will learn about the SUM function, how to use it, and its differences from the SUMIF function. At the end, you will find a section with commonly asked questions.
What is the SUM function in Google Sheets?
The SUM function in Google Sheets is employed to calculate the total of a sequence of numbers or individual values. It is widely utilized for performing fundamental arithmetic computations within spreadsheet data, such as adding up a set of numbers or specific values.
When to use the SUM function?
The SUM function in Google Sheets is extremely useful in a variety of scenarios where you need to perform arithmetic operations on a series of numbers. Here are some common situations when you might use the SUM function:
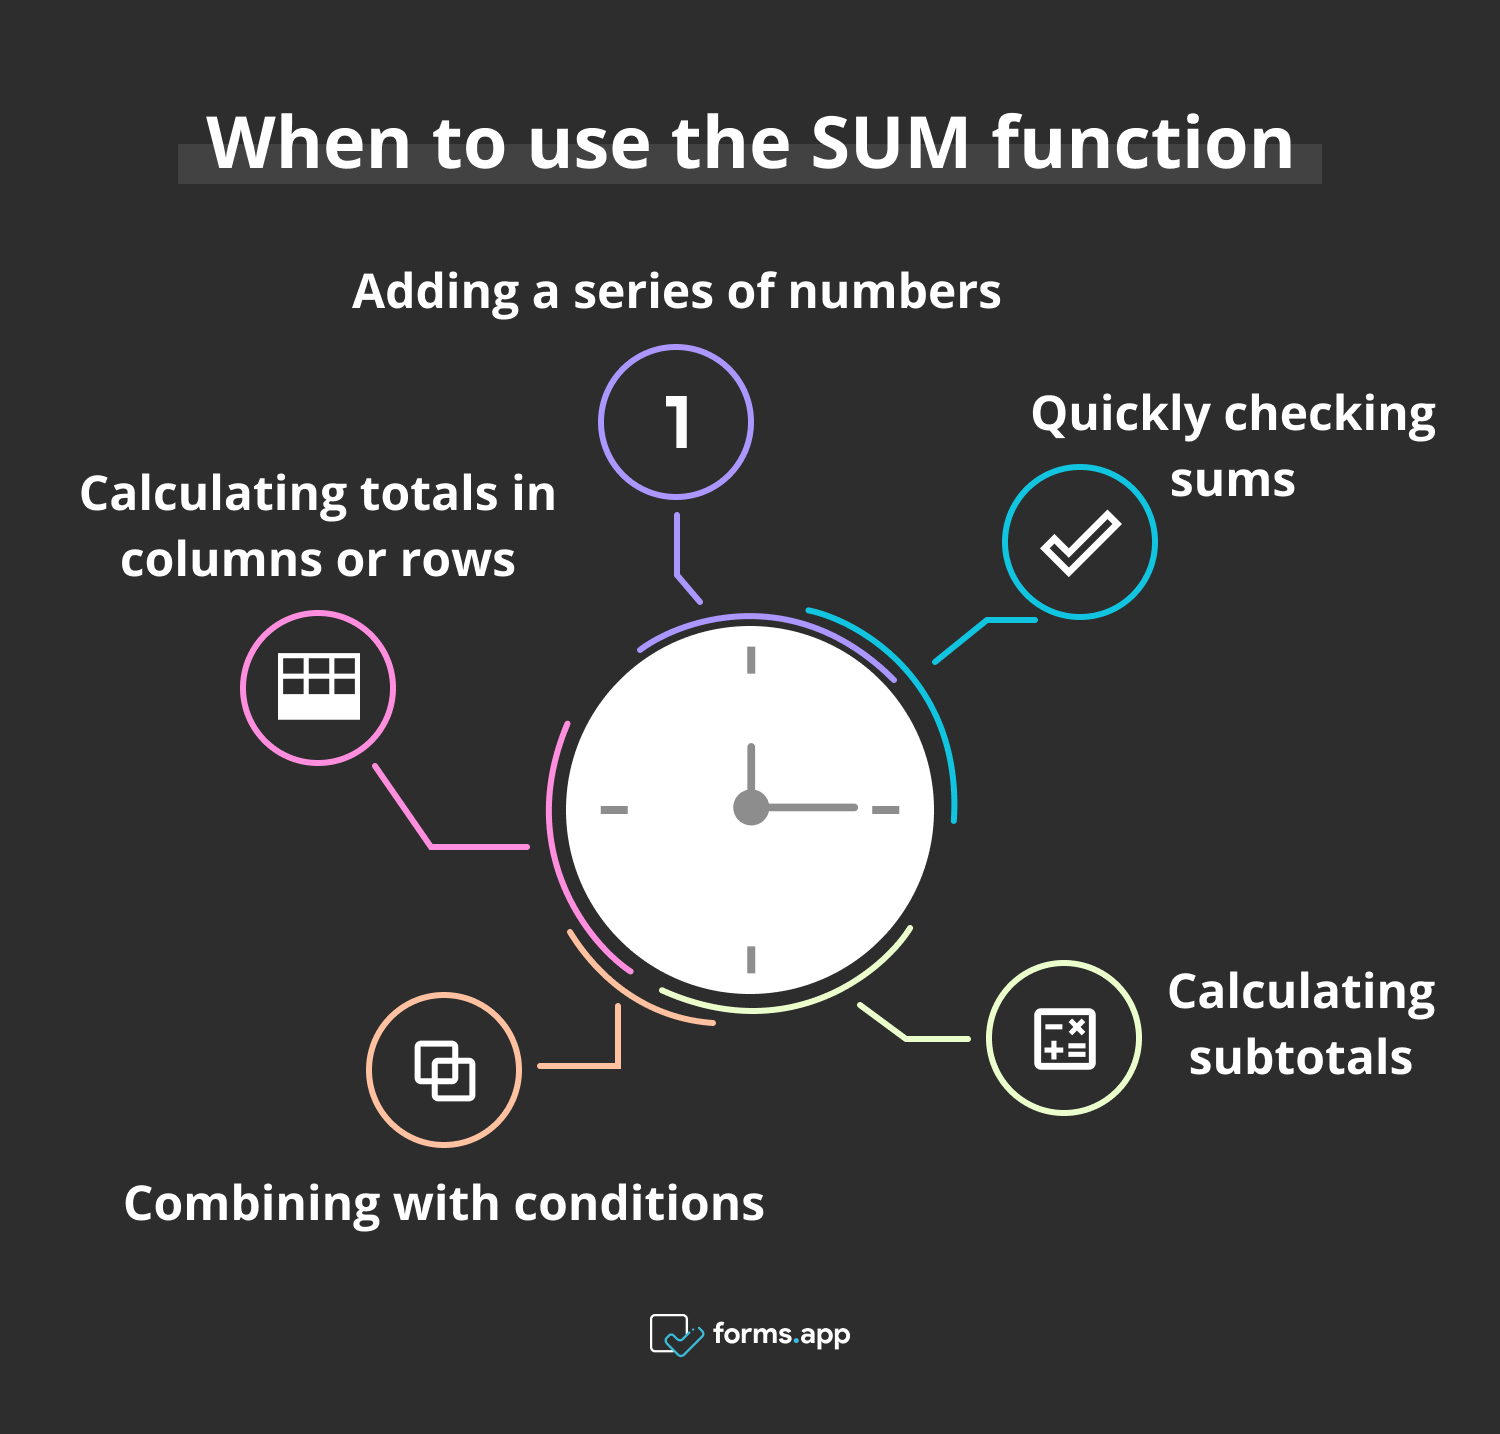
Right times to use the SUM function
⏰Adding a series of numbers
⏰Calculating totals in columns or rows
⏰Combining with conditions
⏰Calculating subtotals
⏰Quickly checking sums

💡You can also check the article about the XLOOKUP function.
How to use the SUM Function?
Using the SUM function in Google Sheets is straightforward and allows you to quickly calculate the total of a range of numbers or specific values. If you are wondering how, here are steps to learn how to use the SUM function in detail:
1. Open Google Sheets

Open your Sheet
Go to Google Sheets and open the spreadsheet where you want to use the SUM function.
2. Select a cell
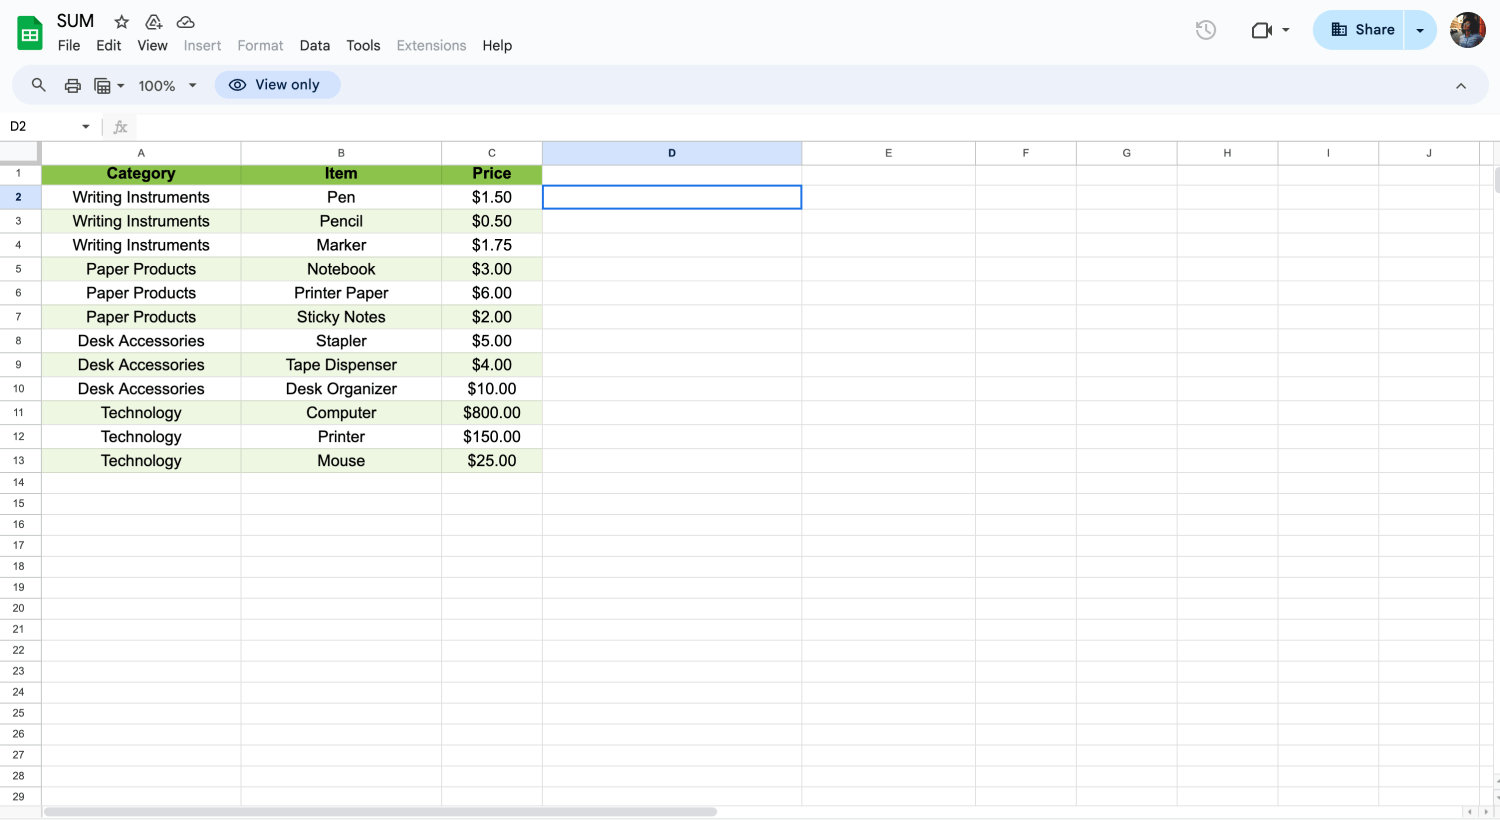
Click a blank cell
Click on the cell where you want the result of the SUM function to appear.
3. Type the function
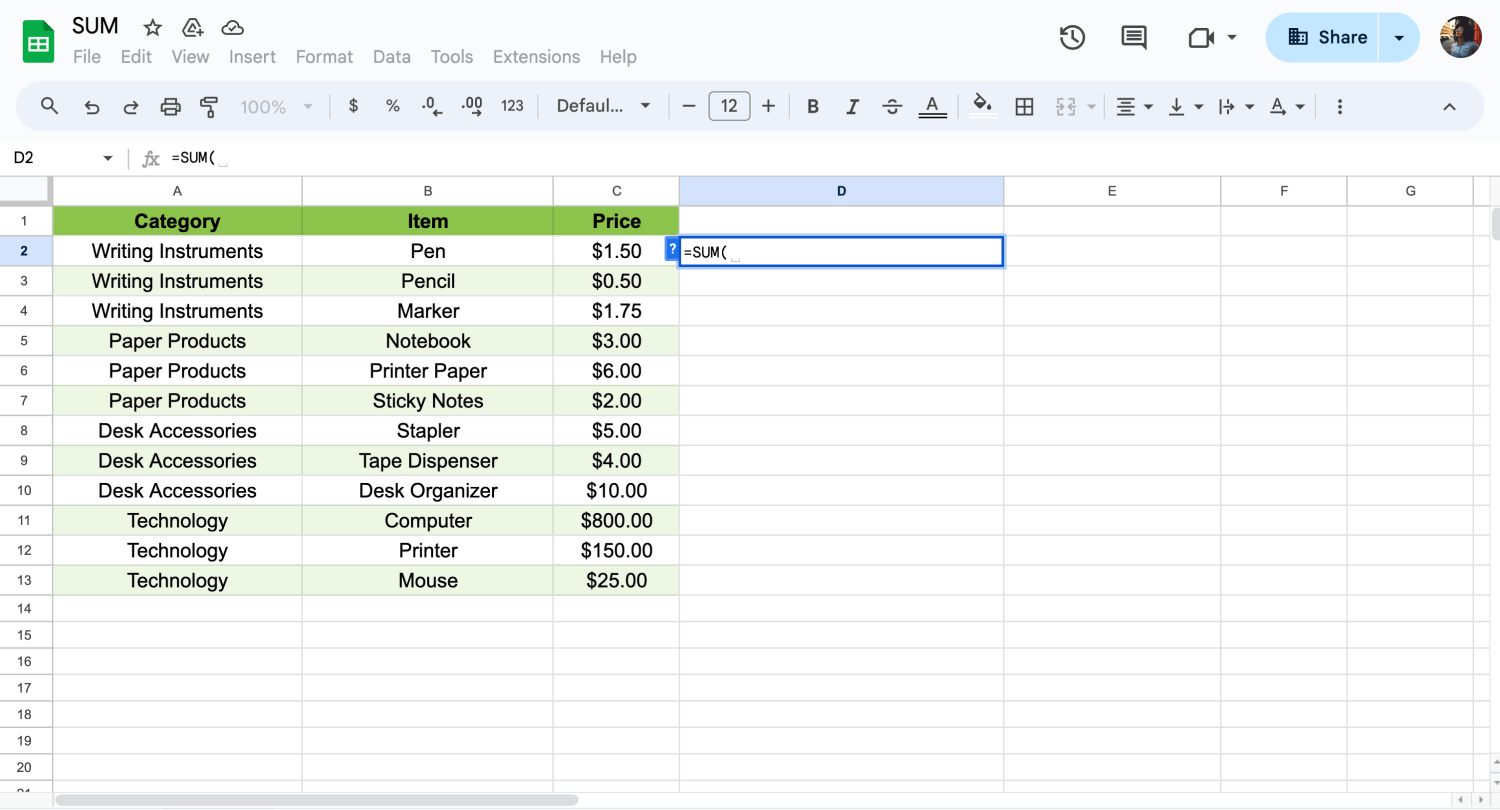
Start typing the function
In the selected cell, start typing =SUM( to begin the SUM function.
4. Specify the range of numbers
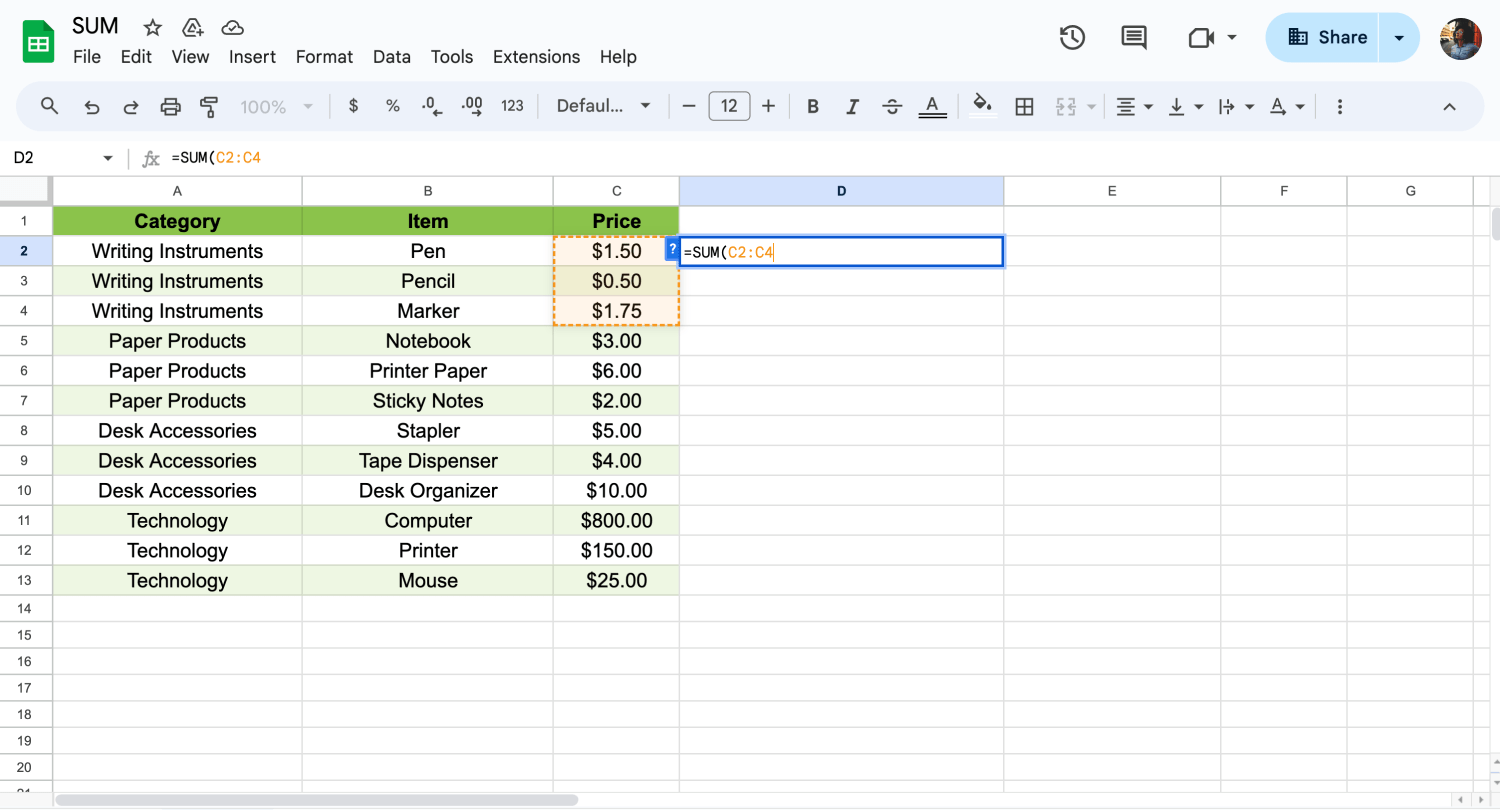
Choose the correct cells
- Individual Cells: You can directly reference individual cells by typing their cell references separated by commas. For example: =SUM(A1, B1, C1)
- Range of Cells: Specify a range of cells by typing the starting cell reference followed by a colon (:) and then the ending cell reference. For example: =SUM(C2:C4)
5. Close the function
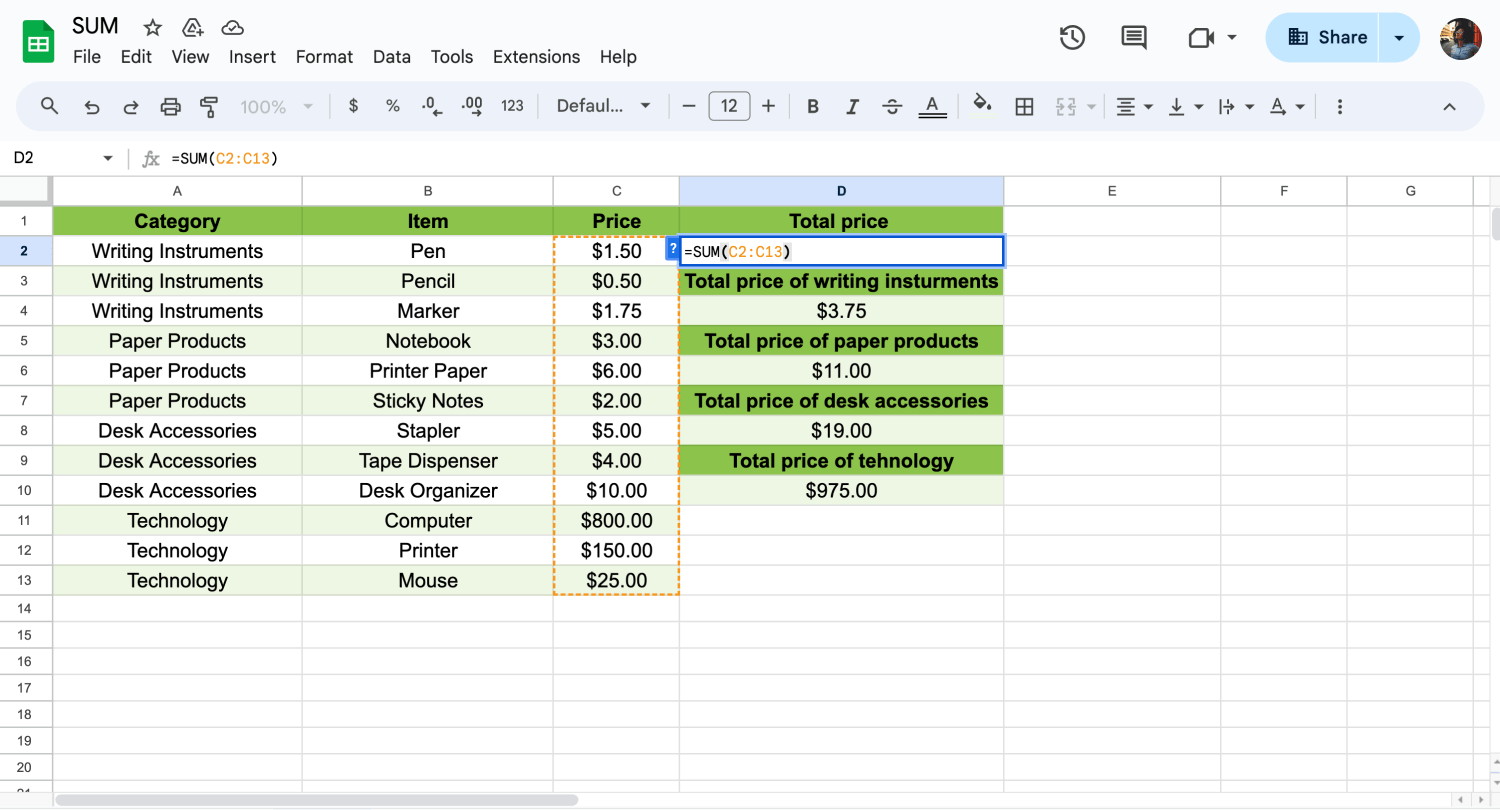
Close the cell
After specifying the range of numbers, close the function with a closing parenthesis ). The complete function will look like =SUM(A1:A10).
6. Press Enter
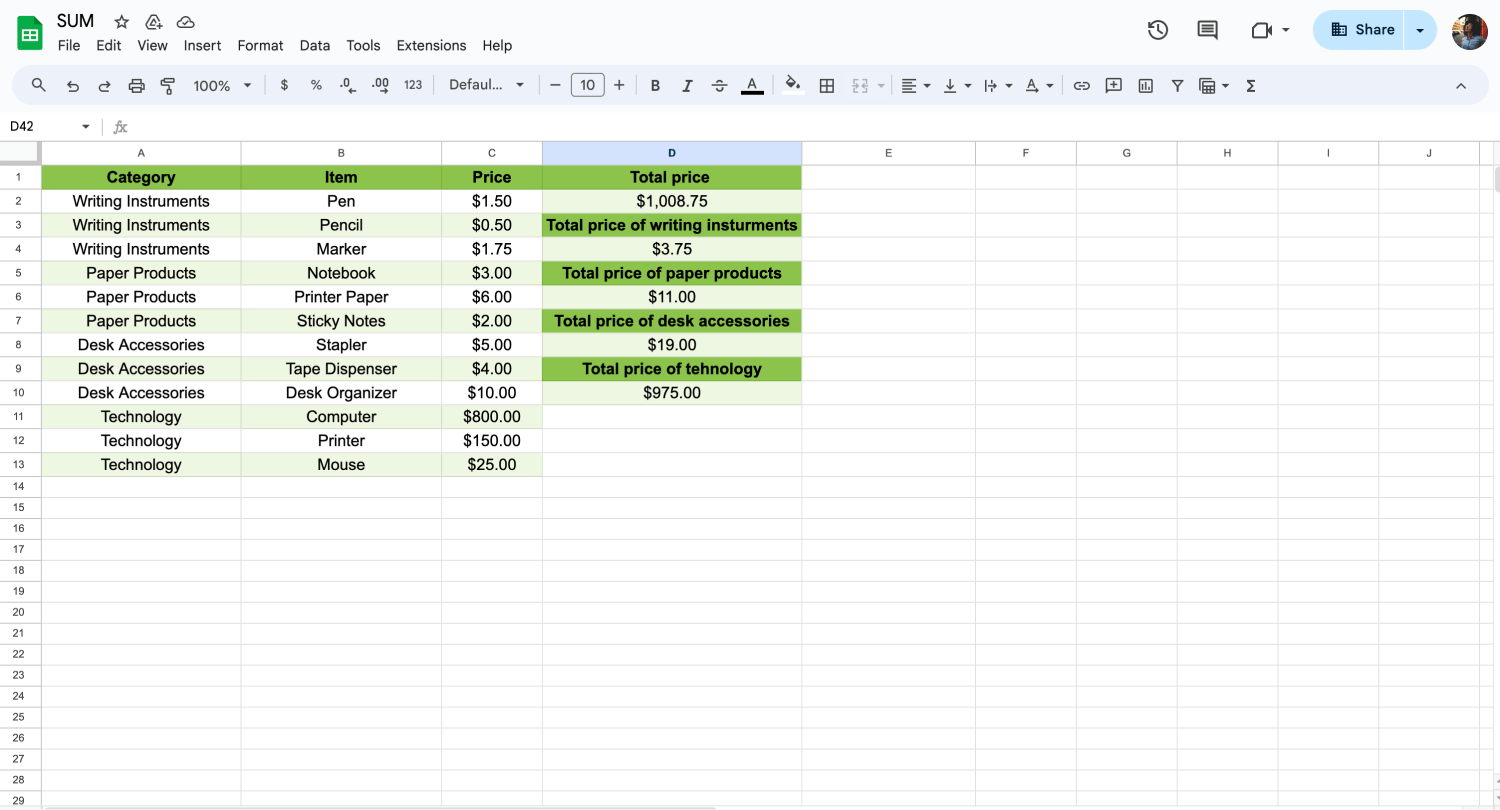
Press Enter
Once you've entered the function correctly, press Enter. The selected cell will display the total sum of the specified range of numbers.

💡If you want to learn how to use PERCENTILE function, check out our article.
What’s the difference between the SUM function and the SUMIF function?
Use the SUM function for the basic addition of numbers or values, and use the SUMIF function when you need to selectively sum numbers based on specific conditions or criteria within a given range of cells. The choice between these functions depends on the nature of your data and the desired outcome of the calculation.
Here are the key differences between SUM and SUMIF function:
Usage
- SUM: Used for straightforward addition of numbers or values.
- SUMIF: Used when you want to add numbers selectively based on specific conditions.
Conditions
- SUM: Does not involve conditions; it simply adds up specified numbers or values.
- SUMIF: Involves a condition (criterion) to determine which numbers to include in the sum.
Argument structure
- SUM: Accepts individual numbers, cell references, or ranges as arguments.
- SUMIF: Requires a range to evaluate, a criterion (condition), and optionally a sum_range (range to sum based on the condition

💡Do you know what the UNIQUE function is? Check our article!
Can I sum up data without using the function?
Yes, you can sum up data in Google Sheets without explicitly using the SUM() function in a formula bar. Here are the steps:
1. Select the cell where you want the sum to appear.
2. Click and drag to select the range of cells you want to sum.
3. Look at the bottom right corner of the selection. A small pop-up will appear with the sum of the selected cells. You can click on this pop-up to confirm the sum.
This method allows you to quickly see the sum of a range of cells without needing to type a formula explicitly in the formula bar. It is convenient for simple calculations and provides a visual way to verify the sum of your data.
However, keep in mind that for more complex operations or if you need to use the sum in a formula, using the SUM() function in the formula bar is usually the most flexible approach.
Frequently asked questions about the SUM function
En las Hojas de cálculo de Google, puedes utilizar la función Autosuma para sumar rápidamente una columna o una fila de números. La función Autosuma de las Hojas de cálculo de Google es similar a la función Autosuma de Excel y te permite insertar automáticamente una función SUMA para un rango de celdas seleccionado. A continuación te explicamos cómo utilizar la función Autosuma en las Hojas de cálculo de Google:
Seleccionar la celda: Haz clic en la celda en la que deseas que se muestre el total.
Inicia la Autosuma: Pulsa Alt + = en el teclado o haz clic en el icono Σ (sigma) de la barra de herramientas.
Confirme el Rango: Asegúrese de que el rango seleccionado mostrado por Autosuma cubre los números que desea sumar.
Aplique la fórmula de suma: Pulse Intro para finalizar y calcular la suma utilizando el rango seleccionado.
Para utilizar la función SUMIF en Excel, siga estos pasos:
Abra Excel: Inicie Microsoft Excel en su ordenador.
Seleccione la Celda para el Resultado: Haz clic en la celda donde quieres que aparezca el resultado de la suma.
Introduce la Fórmula: Escriba =SUMIF( en la barra de fórmulas.
Especifique el Rango: Introduce el rango de celdas donde quieres aplicar la condición. Por ejemplo, si sus datos están en las celdas A1:A10, introduzca A1:A10.
Introduzca los Criterios: Introduzca el criterio en base al cual quiere sumar los valores. Puede ser un número, texto, expresión lógica o referencia de celda. Por ejemplo, si desea sumar valores superiores a 50, puede introducir «>50».
Especifique el Rango de Suma (si es diferente del rango del paso 4): Si el rango a partir del cual desea sumar valores es diferente del rango utilizado en los criterios, introduzca el rango de suma. Por ejemplo, si los valores a sumar se encuentran en las celdas B1:B10, introduzca B1:B10.
Cierre los paréntesis y pulse Intro: Completa la fórmula cerrando los paréntesis y pulsa Intro. Excel calculará la suma basándose en los criterios especificados.
La función SUMIF es una valiosa herramienta disponible en Excel (y en aplicaciones de hojas de cálculo similares como Google Sheets) que permite calcular la suma de valores dentro de un rango especificado basándose en condiciones o criterios concretos. Esta función es especialmente útil para realizar cálculos en un subconjunto de datos que satisface criterios particulares dentro de un conjunto de datos más amplio.
Para sumar sólo números positivos en Excel, puede utilizar la función SUMIF junto con un criterio que filtre los valores negativos o cero. Aquí tienes una guía paso a paso de cómo hacerlo:
1. Identifique su rango de datos: Determina el rango de celdas que contiene los números que quieres sumar. Supongamos que tus números están en las celdas A1:A10.
2. Introduce la fórmula SUMIF:
- Haz clic en la celda donde quieres que aparezca el resultado.
- Introduce la siguiente fórmula
=SUMIF(A1:A10, «>0»)
- Esta fórmula sumará todos los números positivos del rango A1:A10.
3. Comprensión de la fórmula:
- A1:A10: Es el rango de celdas que contiene los números que quieres evaluar.
- «>0»: Este es el criterio que especifica que quieres sumar sólo números mayores que cero (es decir, números positivos).
4. Pulsa Intro: Después de introducir la fórmula, pulsa Intro. Excel calculará y mostrará la suma de todos los números positivos del rango especificado.
Key points to take away
There are many Google Sheets formulas to make your work more effective, like the SUM function. The SUM function in Google Sheets computes the sum of a series of numbers or individual values. It is commonly used for basic arithmetic calculations within spreadsheet data, such as totaling a list of numbers or specific values.
This article covered the SUM function, its usage, and how it differs from the SUMIF function. You also learned how to automatically add numbers in Google Sheets, subtract in Google Sheets, and sum rows in Google Sheets. Now that you know how to use the formula, you can boost your power in Google Sheets!
Behçet is a content writer at forms.app. He is a music producer and enjoys blending electronic and acoustic tunes. Behçet has expertise in Google Sheets, survey questions, and online forms.


 4 minuti di lettura