The Google Sheets filter function streamlines data analysis. It lets users highlight necessary data within extensive source data. By applying this feature, finding relevant information becomes a breeze. The Google Sheets filter simplifies data organization, making analysis more accessible.
Exploring this guide reveals the potential of the Google Sheets filter function. Users will learn to apply filters effectively, ensuring data-driven decisions. Beyond basic filtering, the guide introduces advanced techniques for even more tailored data management. This knowledge is crucial for anyone looking to enhance their data management skills in Google Sheets.
What is the FILTER function?
The FILTER function in Google Sheets lets you display only the rows of data that meet certain criteria.
It filters out the rows that don't match. This makes it easier to focus on the information that matters most. This feature is a go-to for anyone looking to streamline their data analysis process.
Applying the FILTER function simplifies working with large datasets. You learn to extract specific information. For example, it can be sales data within a particular range or customer feedback that meets certain conditions. With practice, using multiple criteria for more complex filtering becomes second nature.
Benefits of the FILTER function
The FILTER function in Google Sheets drastically eases data management. By accurately filtering data, you make sifting through large datasets a breeze. This method speeds up your analysis and ensures you base your decisions on key information.
Having this function means you can easily turn complex data into useful insights, greatly improving your data management skills. Here are some friendly pointers on its benefits:
- You can quickly sort data in either ascending or descending order to spot trends at a glance.
- You can easily dive deep into your data analysis thanks to the ability to apply multiple criteria.
- You can achieve a crystal-clear presentation of your data by integrating it with dynamic arrays.
- You can save precious time as it shows you exactly what you need, streamlining your prep work.
- You can effortlessly blend it with the sort and unique functions for more sophisticated data tasks.
- You can enhance teamwork by easily sharing targeted data insights promoting improved collaborative efforts.
How to use the FILTER function in Google Sheets (step-by-step)
Let's create an example Google Sheets document to demonstrate how to use the FILTER function effectively. Imagine we have a dataset of sales records for a bookstore. The data includes columns for Book Title, Author, Genre, Sales, and Publication year. In this example, we will filter to show only books in the "Science" genre with sales over 400.
Step 1
You need to open your Google account and find your Google Sheets document with the dataset.
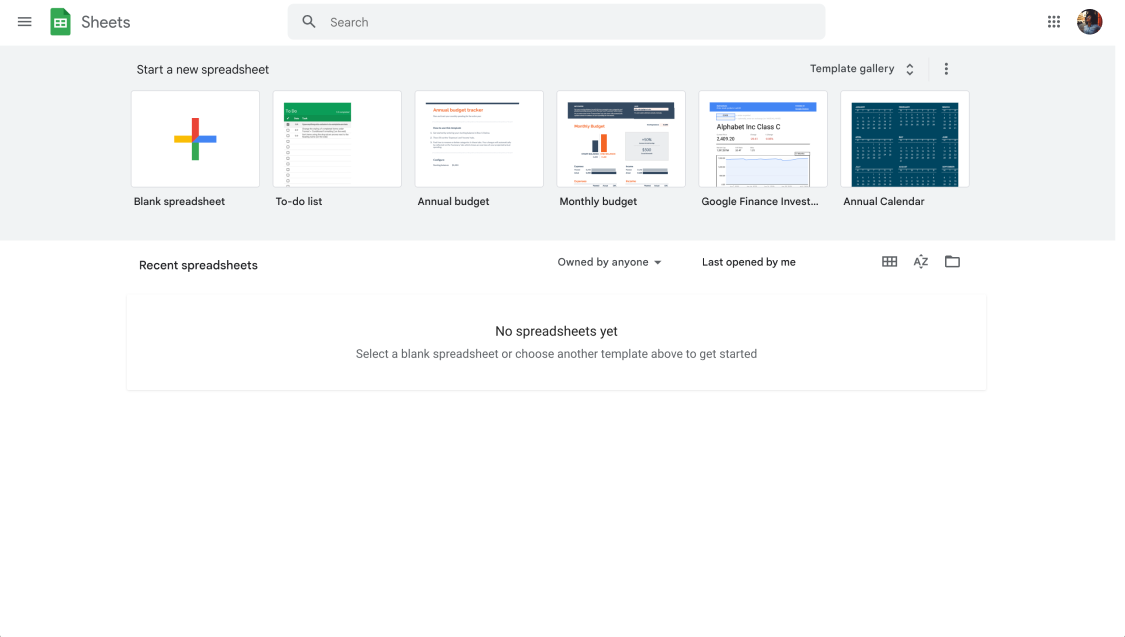
Open your sheet
Step 2
Select an empty cell where you want to start the FILTER function. For this example, let's choose cell A11 to write our function.
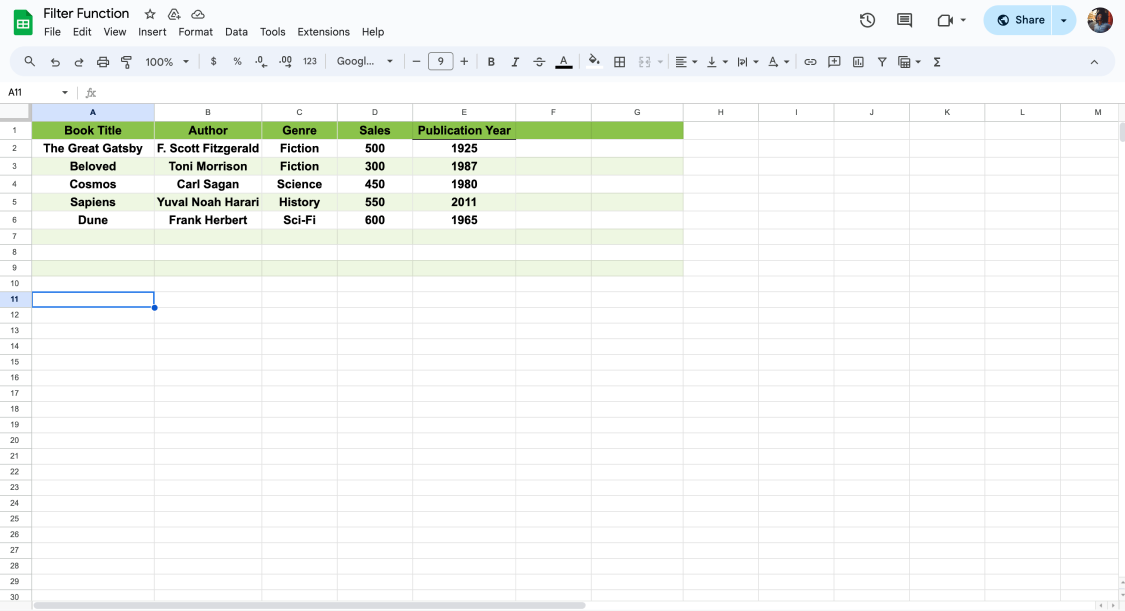
Click a cell to start
Step 3
Understand the FILTER function's structure for our objective: =FILTER(range, condition1, condition2). We'll need to define our range and conditions based on the objective.
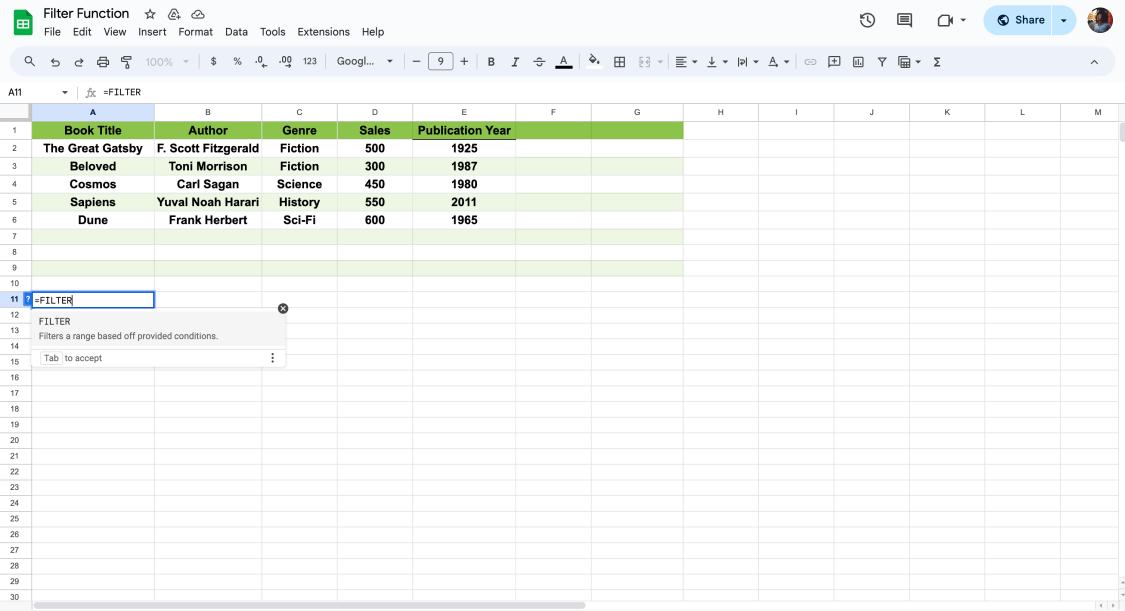
Start typing the filter
Step 4
Enter the FILTER formula in cell based on our dataset and objective: =FILTER(A2:E6, C2:C6="Science", D2:D6>400)
- A2:E6: the range of cells containing our dataset.
- C2:C6= "Science”: the first condition that the genre must be "Science."
- D2:D6>400: the second condition is that sales must be over 400.
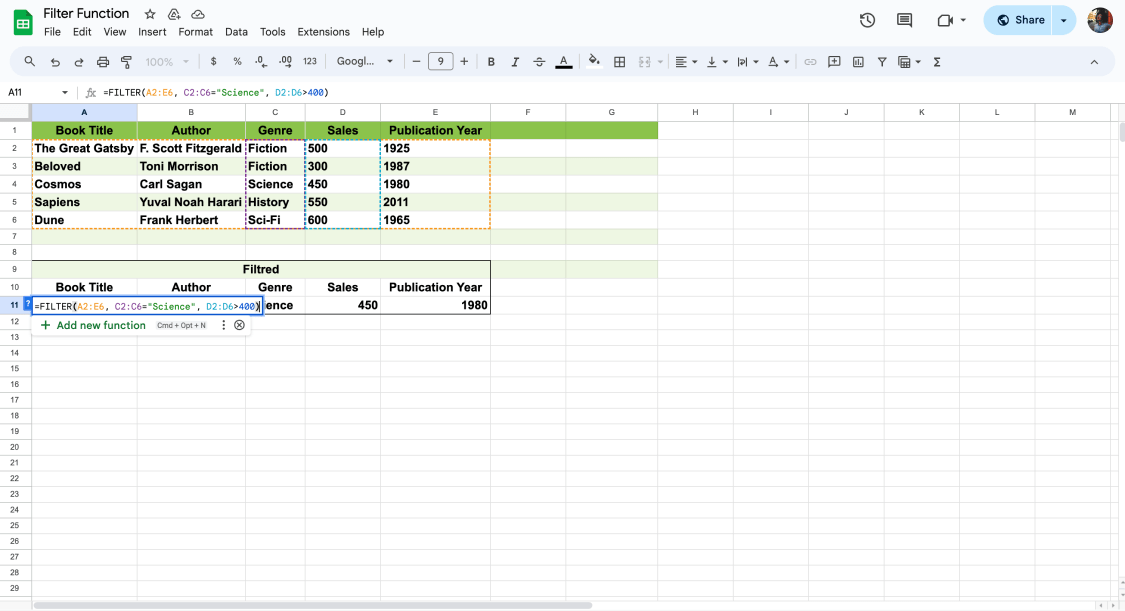
Apply the formula
Then press Enter. Google Sheets will now filter and display only the rows that meet both conditions directly below the cell where you entered the formula.
By following these steps, you can effectively use the FILTER function to analyze and work with specific subsets of your data based on defined criteria.
Frequently asked questions about the FILTER function
The FILTER function in Google Sheets often leads to queries. Users dive into its capabilities, from basics to advanced. It's key for enhancing data management and analysis. Here, we address some common questions to maximize your use of this tool.
To use advanced filters in Google Sheets, set up a range with your criteria and reference it in the FILTER function. This lets you tackle complex filtering needs beyond basic single-condition filters.
For a FILTER formula with multiple conditions, use * for AND logic (all conditions must be true) and + for OR logic (any condition can be true). This way, you can precisely target the data you need.
To restrict filters in Google Sheets, use the sheet's protection features. You can lock entire sheets or specific ranges to control who can apply or modify filters, keeping your data secure.
Using the UNIQUE function with FILTER helps you eliminate duplicate results. Apply the FILTER to your data first, then wrap the UNIQUE function around it to ensure only distinct values are shown.
1. Identify Your Data Range: Decide which spreadsheet range contains the data you want to filter and remove duplicates from.
2. Specify Filter Criteria: Determine the criteria you will use to filter your data. This could be conditions like a specific value in a column.
3. Apply FILTER Function: Use the FILTER function to narrow your data based on the specified criteria.
4. Wrap with UNIQUE Function: Enclose the FILTER function with the UNIQUE function to eliminate duplicates from the filtered results.To get unique entries: =UNIQUE(FILTER(data_range, condition))
5. Review Your Results: The formula will return a list of unique entries from your specified range that meet the filter criteria.
To filter multiple entries, you can use the FILTER function with conditions that match various entries you're interested in. This approach is ideal for segmenting your data based on several criteria.
Yes, the FILTER function can work alongside the SORT function to organize filtered data. First, filter your data to meet specific criteria, then use the SORT function on the filtered range to order it as needed.
Combining FILTER with conditional formatting allows you to highlight filtered results visually. Apply FILTER to identify the data range, then use conditional formatting rules to style these cells based on your filtering criteria.
You can effectively use the filter function in Excel to manage and analyze complex datasets, similar to how you might do so in Google Sheets. This process simplifies data exploration, enabling you to focus on the information that matters most. Here are the steps for the Excel filter function:
- Open your Excel workbook containing the dataset you wish to filter.
- Select the data range to which you want to apply the filter. Ensure that all relevant columns for filtering are included.
- Navigate to the Data tab on the Excel ribbon at the top of the screen.
- Click on the Filter button within the Sort & Filter group. Excel will add drop-down arrows to the header row of your selected data range.
- Click on the drop-down arrow next to the column header where you want to set your criteria. A menu with filtering options will appear.
- Choose your filtering criteria. Excel offers several ways to filter, including by specific text, numbers, dates, or even by color. For more complex filters, you can use the Text Filters or Number Filters submenus to specify detailed conditions.
- If you need to apply multiple criteria across different columns, repeat the filtering process for each column as necessary. Excel allows you to stack filters to refine your dataset progressively.
- To clear a filter from a single column, click the drop-down arrow again and select Clear Filter From [Column Name]. To remove all filters from your dataset, go back to the Data tab and click the Filter button again, which will toggle off the filter mode.
For advanced filtering, such as extracting unique values or using formulas as criteria, explore options like the Advanced Filter dialog box or combining the UNIQUE and FILTER functions in Excel for Microsoft 365 and Excel 2019 users.
For data from external sources, use IMPORTRANGE to bring the data into your sheet, then apply the FILTER function. This method ensures you can filter and analyze data that was not originally in your Google Sheets document.
The FILTER function naturally produces dynamic arrays, automatically expanding to accommodate the number of matching entries. This means filtered results adjust in size based on the criteria met without needing manual range adjustments.
After filtering your dataset with the FILTER function, you can apply the PERCENTILE function to the filtered data to calculate specific percentile values. This is useful for statistical analysis, such as identifying the median or quartiles within the subset of data that meets your filtering criteria.
💡If you want to learn more about Google Sheets formulas, feel free to visit our guide.
Conclusion
Exploring the FILTER function improves data analysis in Google Sheets. It focuses on relevant data segments, boosts efficiency, and offers a smart approach to data sorting. It goes beyond old methods by allowing custom data filtering.
This guide introduces the FILTER function's flexibility. Using these FILTER tips makes Google Sheets more user-friendly. It enhances data analysis. The function lets users handle large datasets easily, apply detailed criteria, and work with other functions. This changes how we manage data.
Behçet is a content writer at forms.app. He is a music producer and enjoys blending electronic and acoustic tunes. Behçet has expertise in Google Sheets, survey questions, and online forms.
