forms.app is a great way to collect data from your audience. It allows its users access to 300+ effective and online custom forms and surveys. And, anyone with a device that is connected to the internet can create their form. But what if you want to change the way how your forms look or behave? In this article, we'll show you how to customize your forms on forms.app, so they look and work the way you want them to.
What are custom forms, and why do you need them?
Custom forms are forms that allow you to make changes according to your goals. There are many existing forms and customization features in forms.app. It is a great form builder that helps your design your forms online.
Custom forms help you stand out amongst other companies and forms with your uniqueness. Using one of the ready-to-go templates is a great source, but you can also create your own form from scratch. Nonetheless, form customization is something you do not need to worry about with forms.app.
There are numerous ways for one to customize their web forms. Here are the features of forms.app that works best for customizations:
- You can attract so much attention with your custom form designs. You can choose one of the themes and animation backgrounds or choose your company’s colors to have a professional design.
- Add form fields that help your goal in creating that form. For example, add a field to ask about their occupation or age if you need to know your target audience.
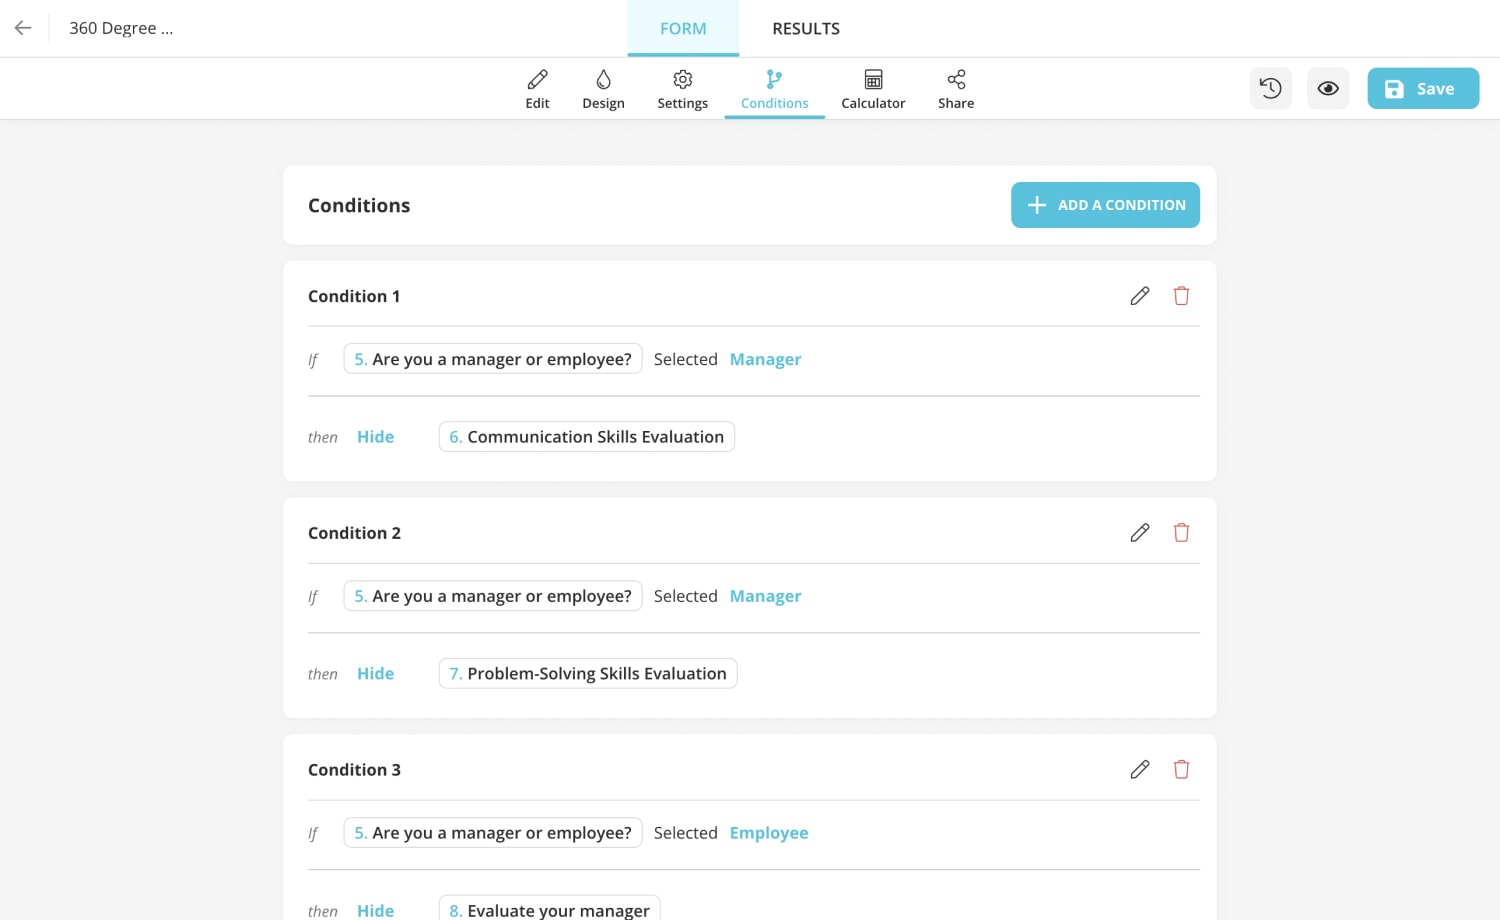
- Use the conditions feature to go into specific details on the subjects you need to know the most. You can easily set conditions on some questions to pre-determine which question to show after that, according to the client’s answers.
- Add a welcome page and/or thank-you page to make your clients feel appreciated.
- Another feature that is quite helpful is calculations. You can use it to assign points to questions in your survey or quiz to have a result in the end. In addition to this, you can also assign points to questions to show a custom message.
If you have any more questions on your mind about how to make custom forms, you can visit the blog of forms.app today!
How to create custom forms from scratch
forms.app is a great source when it comes to making beautiful forms. And it offers its users many customization features. Moreover, it is very effortless to create your form with forms.app’s easy website. Now, let us see the steps for creating custom forms.
1. Go to forms.app and click on ‘Use template’ or go to ‘MyForms’ to start from scratch.
2. Click plus button to add a field. Decide on using what kind of questions for your forms. You can also make the fields ‘required’ if necessary.
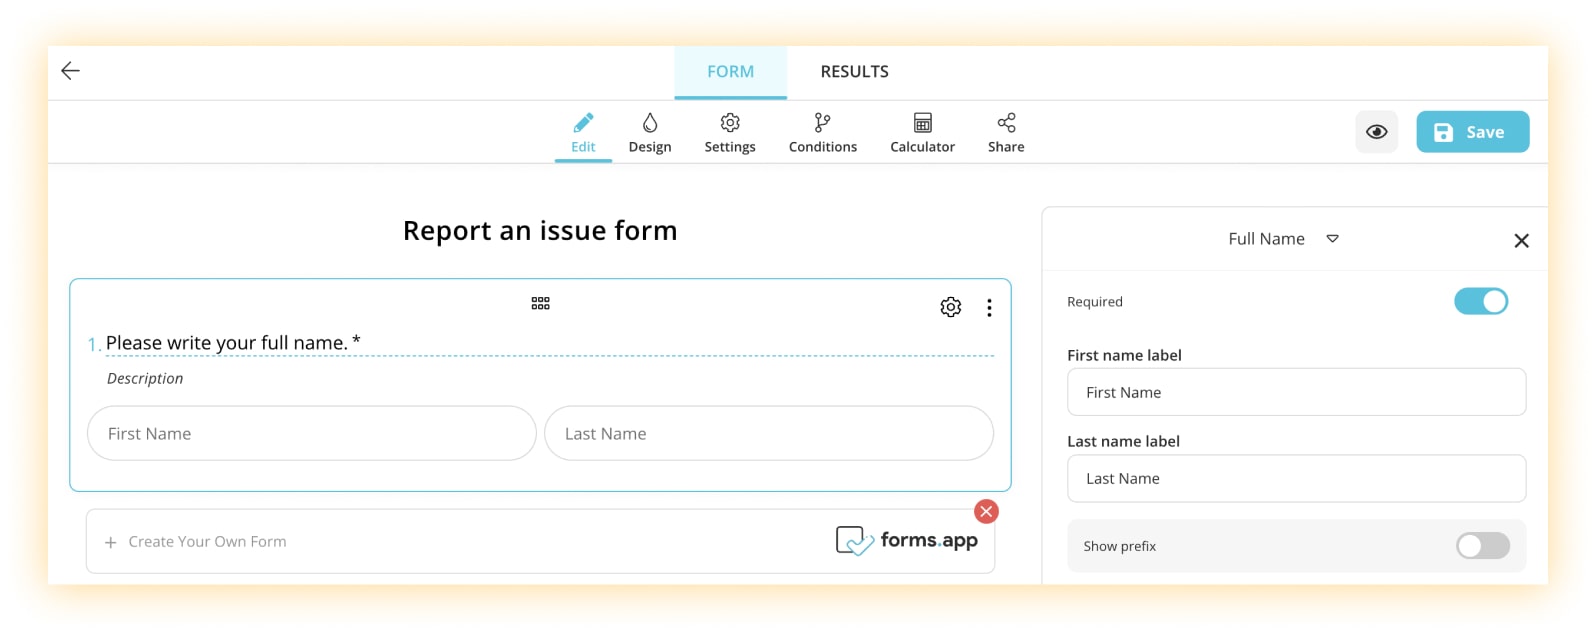
3. Add descriptions to form fields if there is any need.
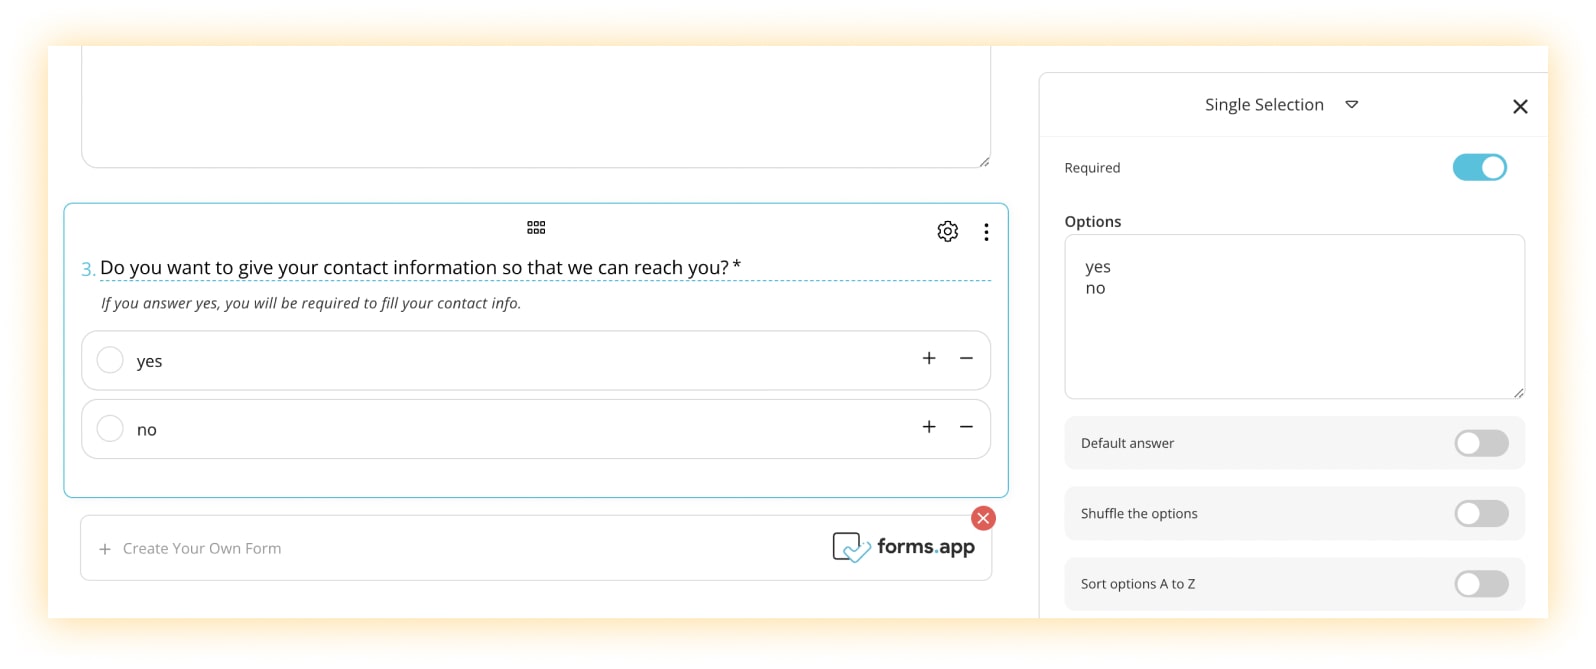
4. Set a condition to go into specific details and not to take up space with unnecessary questions. As it can be seen below, it is extremely effortless to set conditions on one or multiple questions at once.
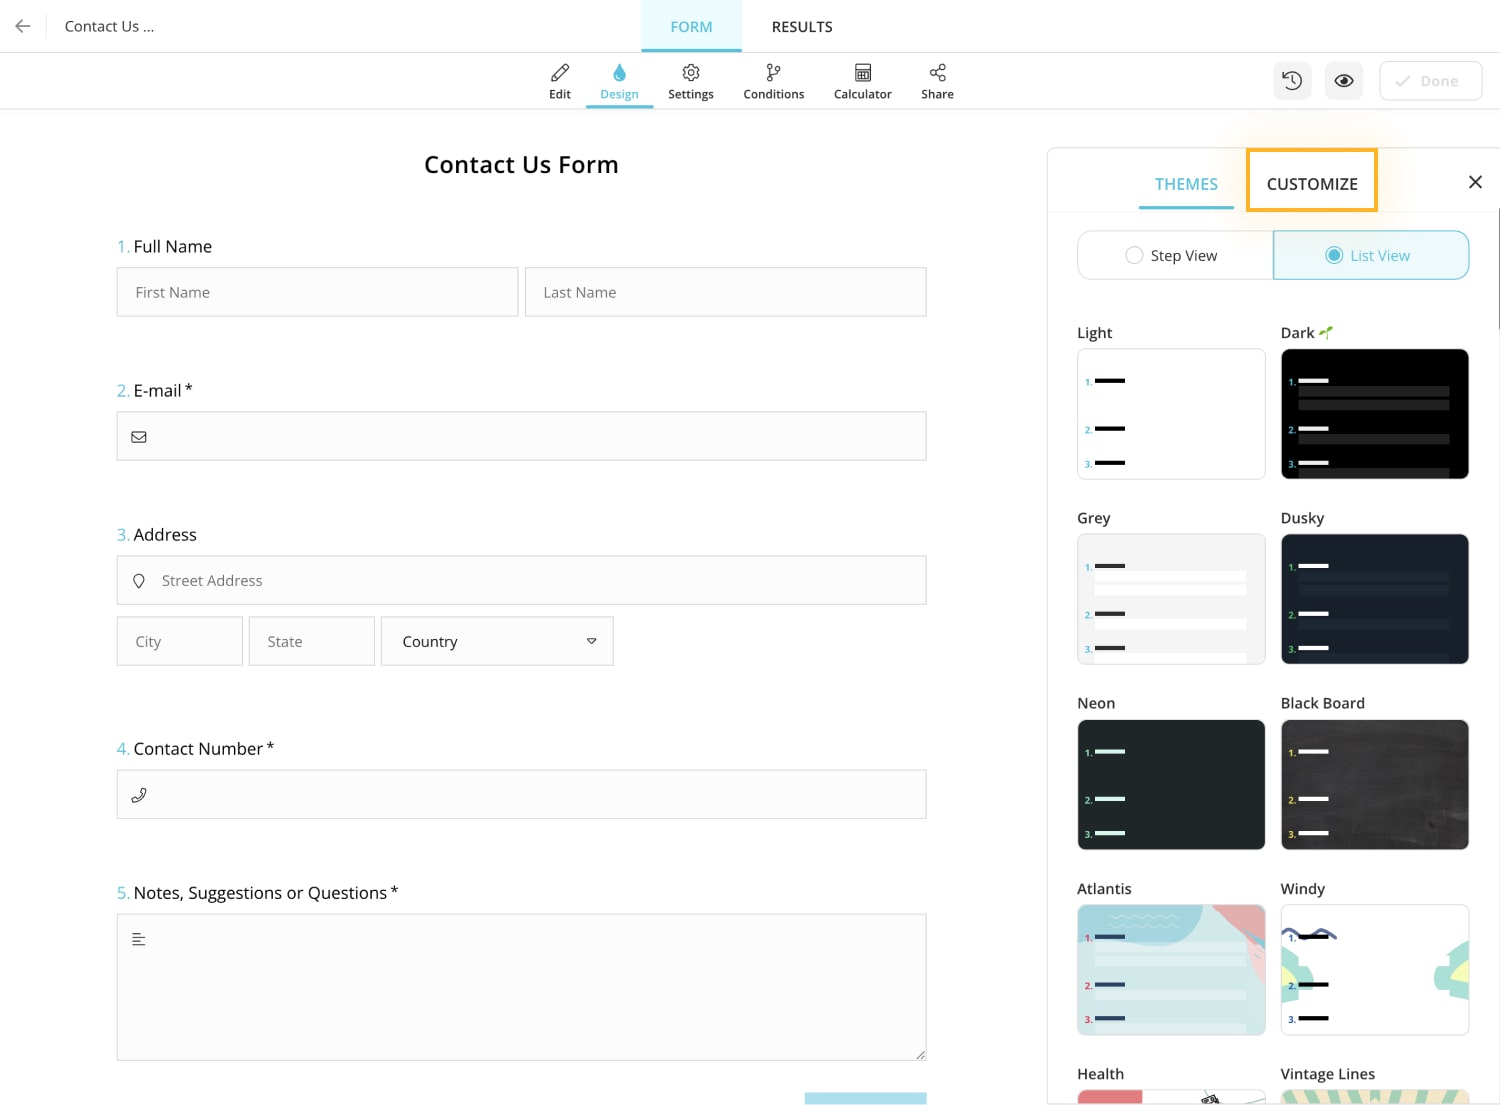
5. Customize the colors, fonts, and theme of the form easily in the ‘design’ tab. You can also choose one of the existing images for the background.
6. When you are done with creating your form, open the form by clicking the 👁 (open the form) icon to see it completed.
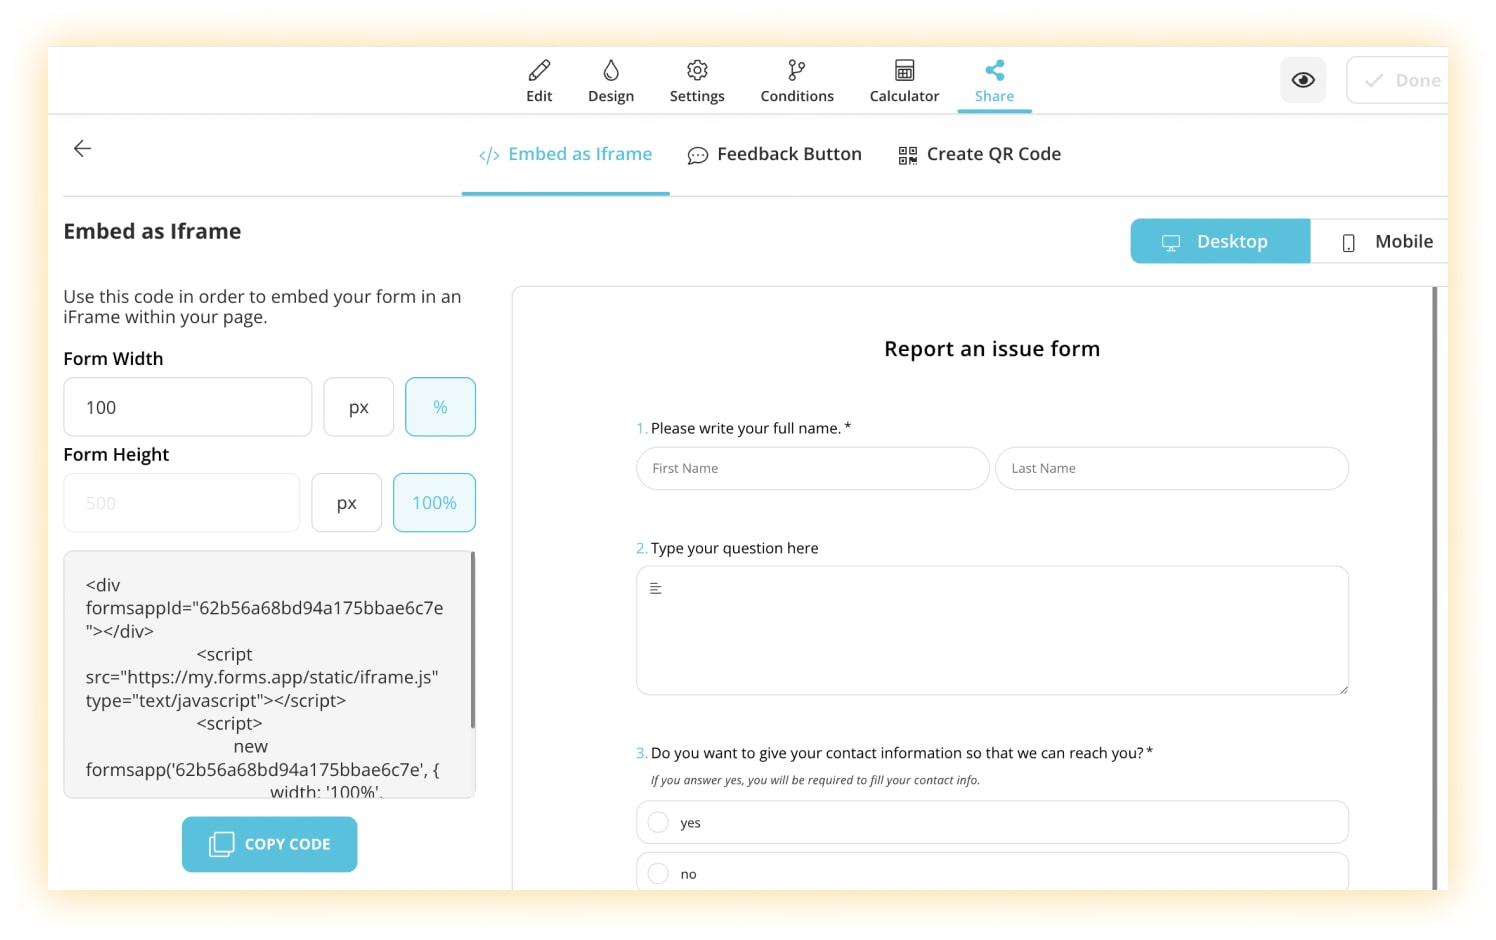
7. Afterward, as the last step, embed your form to your website or share the unique link.
Tips for designing custom forms that look great and are easy to use
Making a web form is easy; making that form as effective as possible is equally effortless thanks to forms.app. Smart features of forms.app helps anyone who wishes to create their own form. And any person with a device can create a form with maximum results by having these tips in mind:
- Choose the right template: There are many ready-to-go templates for numerous occasions. If you decide on your goal in creating the form, you can easily choose the correct template.
- Keep it simple: Complex things may tend to scare people away. That’s why your farm should be a simple looking as possible.
- Do not ask too many questions: People do not like to look at long and boring texts, and they surely would not want to answer many questions in their free time. Therefore, you should only ask what is essential to know.
- Make the necessary fields required: You can make some questions required and make sure that the most important questions will be answered every time.
- Set conditions on questions: Instead of asking 10 questions to everyone, you can set conditions on certain questions. Then, only the people who are going to answer that question will see it.
- Have an eye-catching design: Everybody likes nice things and if you make your form pleasing to the eye you will maximize the responses.
- Keep your notifications on: By going to settings you can keep your notifications on to never miss out on new submissions.
You can create your forms on any device, including your mobile phone. And, you can check out the tips to create exquisite forms on mobile and so much more on forms.app!
How to publish your custom form and embed it on your website
As we mentioned in this post, creating and customizing your web form takes only minutes. And it takes only seconds to share with your target audience. You can share your form by copying the unique link of your form on social media or via email. Or you can embed the form on your website for your web visitors to check out. When you embed your form in a visible place on your website with a big button, your website visitors will be excited to fill that form.
We created a ‘report an issue form’ just for you and you can either use it just like that or you can customize it according to your wishes by following the steps we mentioned above. You can easily import the form and share it with your audience.
Defne is a content writer at forms.app. She is also a translator specializing in literary translation. Defne loves reading, writing, and translating professionally and as a hobby. Her expertise lies in survey research, research methodologies, content writing, and translation.
.jpg)
